
1. Introduction
This manual provides essential information for the setup, operation, and maintenance of your DORHEA Pro Micro NRF52840 Development Board. This board is designed for Internet of Things (IoT) and DIY electronics projects, leveraging the powerful nRF52840 System-on-Chip (SoC) for advanced wireless applications. Please read these instructions carefully before using the product.
2. Product Overview
The DORHEA Pro Micro NRF52840 Development Board is a compact and powerful platform for developing Bluetooth 5.0 and 2.4GHz wireless applications. It features the nRF52840 SoC, which includes a 64MHz ARM Cortex-M4F processor, 1MB flash memory, and 256KB RAM.
- High-Performance Low-Power Wireless SoC: Equipped with an ARM Cortex-M4F processor running at 64MHz, suitable for demanding IoT applications.
- Ample Memory and Peripherals: Features 1MB flash and 256KB RAM, along with rich peripherals including ADC, PWM, SPI, I2C, UART, USB, and multiple GPIOs for versatile connectivity with sensors, displays, and other components.
- Integrated Advanced Security: Includes AES encryption and SHA-256 hashing to protect data and communications.
- Efficient Power Management: Designed with a 3.7V Li-ion battery interface and a software-controlled LED power switch for optimized power consumption.
- Ultra-Low Standby Power: Achieves standby power consumption as low as 1mA when LEDs are off, extending battery life for portable projects.
- USB-C Interface: Modern and convenient USB-C port for power and data communication.
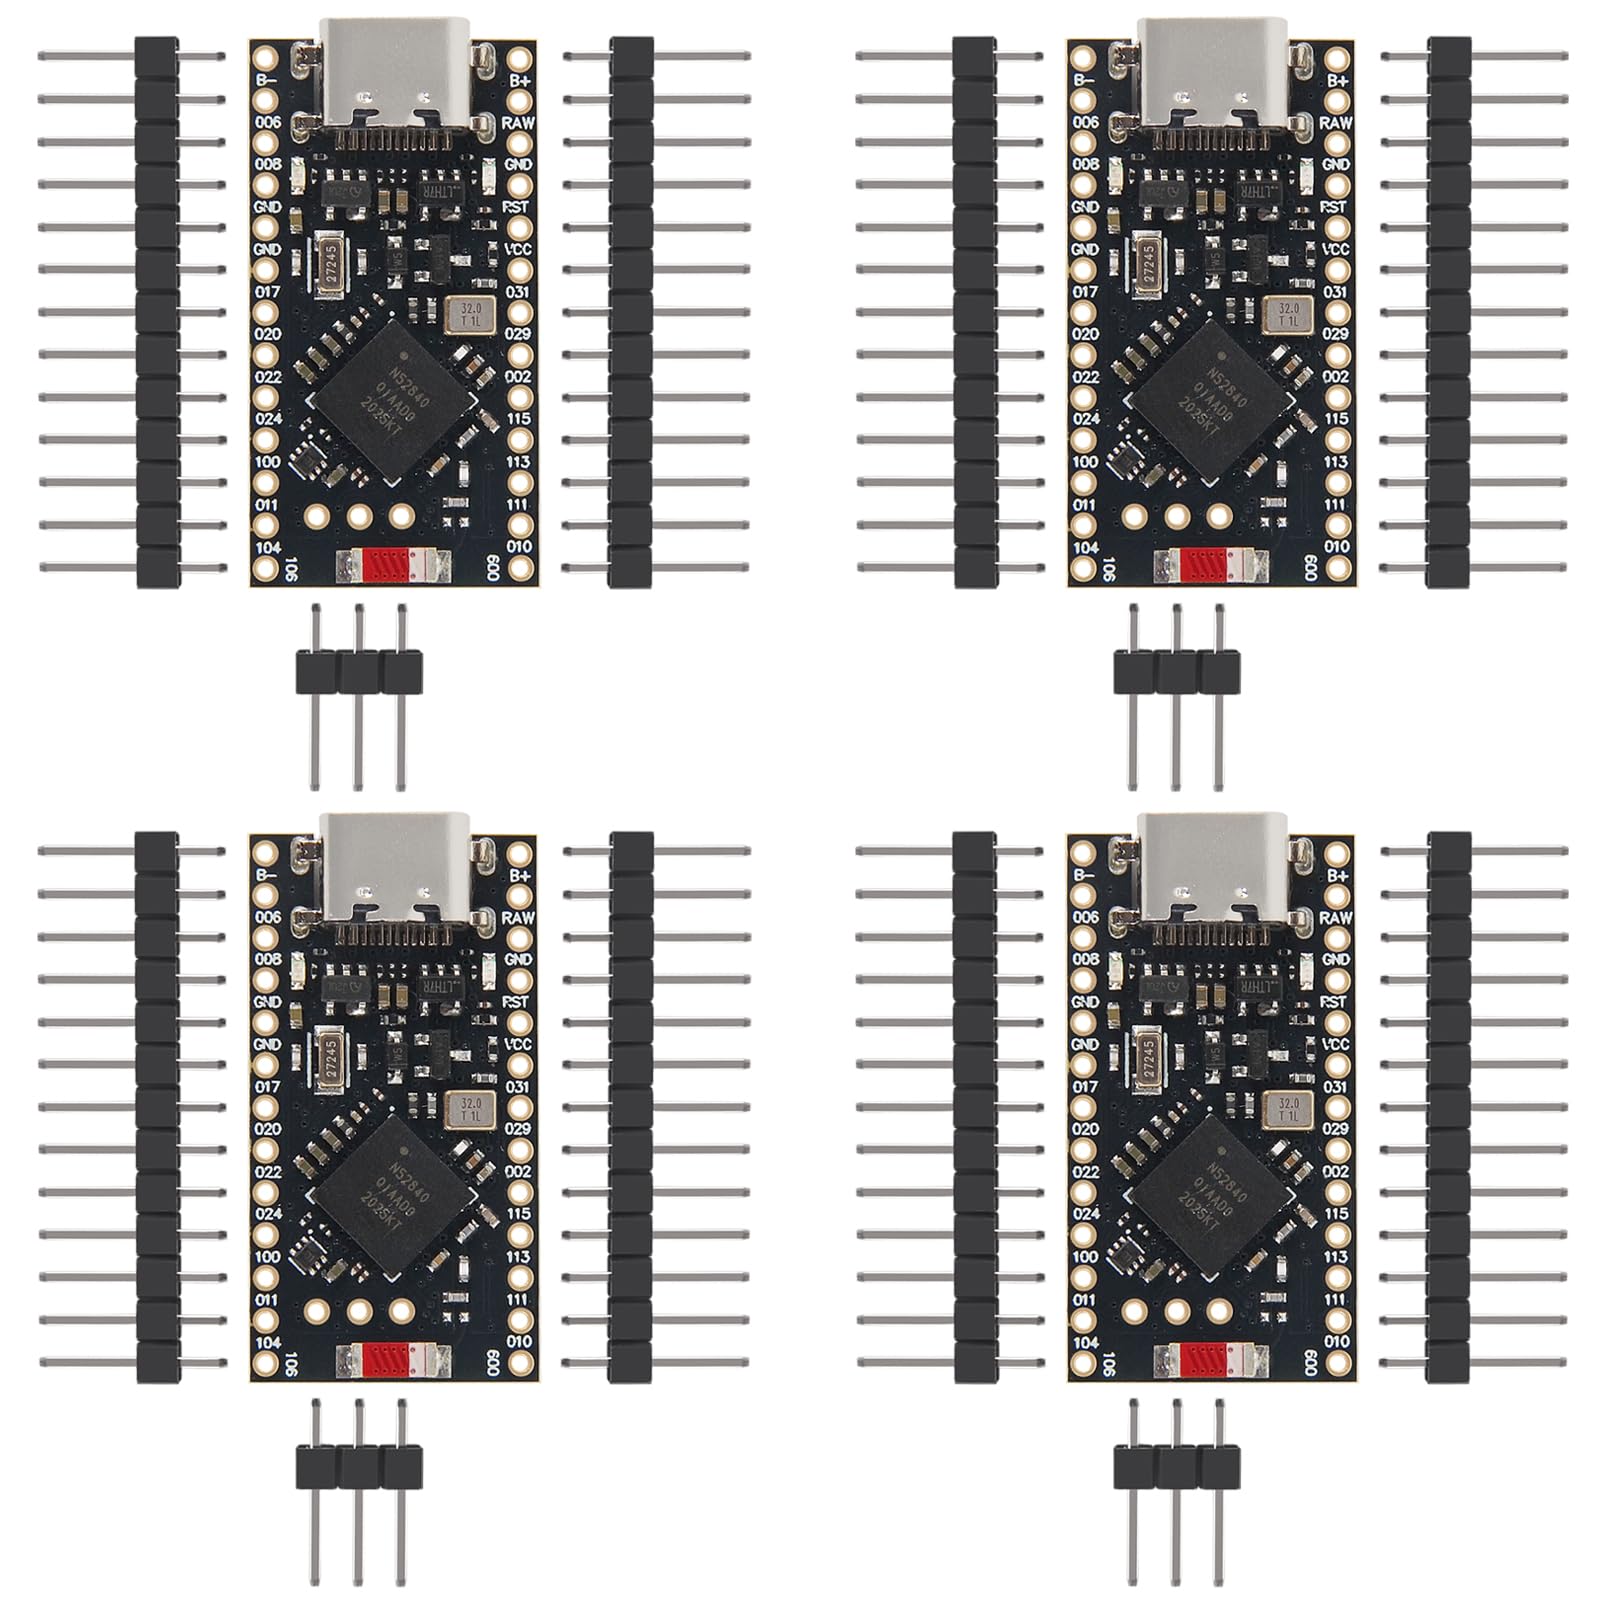
Figure 2.1: Front and back view of the DORHEA Pro Micro NRF52840 Development Board. The front shows the USB-C port, nRF52840 chip, and various components. The back displays pin labels and the "ProMicro NRF52840" branding.
3. Specifications
| Feature | Description |
|---|---|
| Brand | DORHEA |
| Processor | Nordic nRF52840 (ARM Cortex-M4F) |
| CPU Speed | 64 MHz |
| Flash Memory | 1 MB |
| RAM | 256 KB |
| Connectivity | Bluetooth 5.0, 2.4GHz Wireless, USB-C |
| Peripherals | ADC, PWM, SPI, I2C, UART, GPIO |
| Power Input | USB-C, 3.7V Li-ion battery interface |
| Model Number | DAD12695-1 |
| UPC | 687117794147 |

Figure 3.1: Physical dimensions of the development board, showing approximate measurements of 33mm (1.29 inches) in length and 18mm (0.70 inches) in width.
4. Package Contents
The package typically includes the following items:
- DORHEA Pro Micro NRF52840 Development Board (quantity as purchased, e.g., 4 boards)
- Header pins (male, typically included for soldering)

Figure 4.1: The development board shown alongside the included male header pins, which require soldering for external connections.
5. Setup
5.1. Physical Connection
- Soldering Header Pins: The board comes with unattached header pins. You will need to solder these pins onto the board's through-holes to connect to breadboards or other components. Ensure proper soldering techniques to avoid short circuits or poor connections.
- USB-C Connection: Connect the board to your computer using a standard USB-C cable. This provides power and enables data communication for programming and debugging.
- External Power (Optional): For standalone applications, connect a 3.7V Li-ion battery to the designated battery interface (B+ and B- pads). The board includes a charging module for Li-ion batteries when powered via USB-C.
5.2. Software Setup
- Driver Installation: Your operating system may automatically install necessary drivers when the board is connected via USB-C. If not, refer to the nRF52840 documentation or community resources for specific driver installation instructions.
- Development Environment:
- Arduino IDE: Install the Arduino IDE and add support for nRF52 boards (e.g., Adafruit nRF52 Boards). This allows for easy programming using the Arduino framework.
- nRF Connect SDK: For advanced development, Nordic Semiconductor's nRF Connect SDK provides a comprehensive development environment with tools for Zephyr RTOS, Bluetooth Low Energy (BLE), and other wireless protocols.
- ESPHome: For smart home integration, the nRF52840 chip is supported by ESPHome, allowing configuration via YAML code.
- Firmware Upload: Use the chosen development environment to compile and upload your firmware to the board via the USB-C connection.
6. Operating Instructions
6.1. Basic Programming
Once your development environment is set up, you can begin writing and uploading code. The nRF52840 supports various programming paradigms, from simple Arduino sketches to complex RTOS applications.
- GPIO Control: Control the General Purpose Input/Output pins to interface with LEDs, buttons, and other digital components. Refer to the board's pinout diagram for specific pin assignments.
- Serial Communication: Utilize UART for serial communication with other devices or for debugging output to your computer's serial monitor.
- I2C/SPI: Interface with I2C and SPI sensors and modules using the dedicated pins.
6.2. Wireless Communication
The nRF52840 is optimized for wireless applications.
- Bluetooth 5.0: Develop Bluetooth Low Energy (BLE) applications for connecting to smartphones, other BLE devices, or creating mesh networks.
- 2.4GHz Proprietary: Utilize the 2.4GHz radio for custom wireless protocols or high-throughput data transfer.
6.3. Power Management
- Battery Operation: When using a Li-ion battery, the board's low-power features can be leveraged to maximize battery life.
- LED Power Switch: The software-controlled LED power switch allows you to turn off indicator LEDs to further reduce power consumption in battery-powered projects.
7. Maintenance
- Cleaning: Keep the board clean and free from dust and debris. Use a soft, dry brush or compressed air. Avoid liquid cleaners.
- Storage: Store the board in an anti-static bag when not in use to protect it from electrostatic discharge (ESD). Keep it in a dry environment away from extreme temperatures.
- Handling: Always handle the board by its edges to minimize contact with components and prevent ESD damage.
- Inspection: Periodically inspect soldered connections for any signs of cold joints or damage.
8. Troubleshooting
- Board Not Powering On:
- Ensure the USB-C cable is securely connected to both the board and the power source/computer.
- If using a battery, verify it is charged and correctly connected to the B+ and B- pads.
- Check for any visible damage to the board or USB-C port.
- Computer Not Recognizing Board:
- Try a different USB-C cable and port on your computer.
- Ensure necessary drivers are installed (refer to Section 5.2).
- Restart your computer.
- Firmware Upload Errors:
- Verify that the correct board and port are selected in your development environment.
- Check for syntax errors in your code.
- Ensure the bootloader is active (some boards require a reset button press to enter bootloader mode).
- Wireless Connectivity Issues:
- Confirm that your code correctly initializes and configures the Bluetooth or 2.4GHz radio.
- Check for interference from other 2.4GHz devices.
- Ensure antennas (if external) are properly connected.
9. Warranty and Support
For warranty information, please refer to the specific terms and conditions provided by DORHEA at the time of purchase or on their official website.
For technical support, documentation, and community resources, please visit the manufacturer's website or relevant online forums dedicated to nRF52840 development.
- DORHEA Store: Visit the DORHEA Store on Amazon
- Nordic Semiconductor Resources: Search for official nRF52840 documentation and SDKs.