
1. Important Safety Information
Please read all instructions carefully before installation and use. Improper installation or operation can cause damage to the unit, vehicle, or personal injury. Always consult a qualified professional for installation if you are unsure. Do not operate the unit in a way that distracts you from driving. Keep the volume at a level that allows you to hear outside traffic sounds.
Ensure all wiring is correctly connected and insulated to prevent short circuits. Disconnect the vehicle's battery before beginning installation to avoid electrical hazards.
2. Product Overview
The Jingelsye 9-inch Android 13 Car Radio Stereo is designed to upgrade the infotainment system in Honda CRV models from 2007 to 2011. This head unit features an 8-core processor, 4GB RAM, and 64GB ROM, running on Android 13. It includes a high-definition 1280x800 IPS touch screen, offering clear visuals and responsive interaction.
Key functionalities include wireless Apple CarPlay and Android Auto for seamless smartphone integration, 5G WiFi connectivity, GPS navigation with offline map support, Bluetooth 5.0 for hands-free calls and audio streaming, AM/FM/RDS radio, and support for a 1080P AHD backup camera with steering wheel control (SWC) compatibility.

Image: Comparison of the original Honda CRV dashboard radio and the upgraded Jingelsye 9-inch Android 13 Car Radio Stereo.
3. Package Contents
Verify that all items are present in the package:
- Jingelsye 9-inch Android 13 Car Radio Stereo Head Unit
- Vehicle-specific wiring harnesses
- Dash kits for Honda CRV 2007-2011
- 1080P AHD Rear Reversing Camera
- GPS Antenna
- USB Cables
- User Manual (this document)
4. Installation Guide (Setup)
This section provides general installation steps. Specific vehicle wiring may vary. Professional installation is recommended.
- Prepare the Vehicle: Ensure the vehicle is turned off and the negative terminal of the battery is disconnected to prevent electrical shorts.
- Remove Factory Radio: Carefully remove the existing factory radio and dashboard trim. Refer to your vehicle's service manual for specific instructions on trim removal.
- Connect Wiring Harnesses: Connect the provided vehicle-specific wiring harnesses to the car's existing wiring. Ensure all connections are secure. Connect the GPS antenna and any other external antennas.
- Install Backup Camera (Optional): If installing the included backup camera, route the camera cable from the rear of the vehicle to the head unit. Connect the camera's power to the reverse light circuit and the video signal to the head unit's camera input.
- Connect Head Unit: Connect the main wiring harness, USB cables, and camera input to the back of the Jingelsye head unit.
- Test Functionality: Before fully reassembling the dashboard, reconnect the vehicle battery and power on the unit. Test basic functions such as power, audio, touch screen, radio, and backup camera (if installed).
- Secure Head Unit and Reassemble: Once tested, secure the head unit into the dash using the provided dash kits. Reinstall all removed trim pieces.
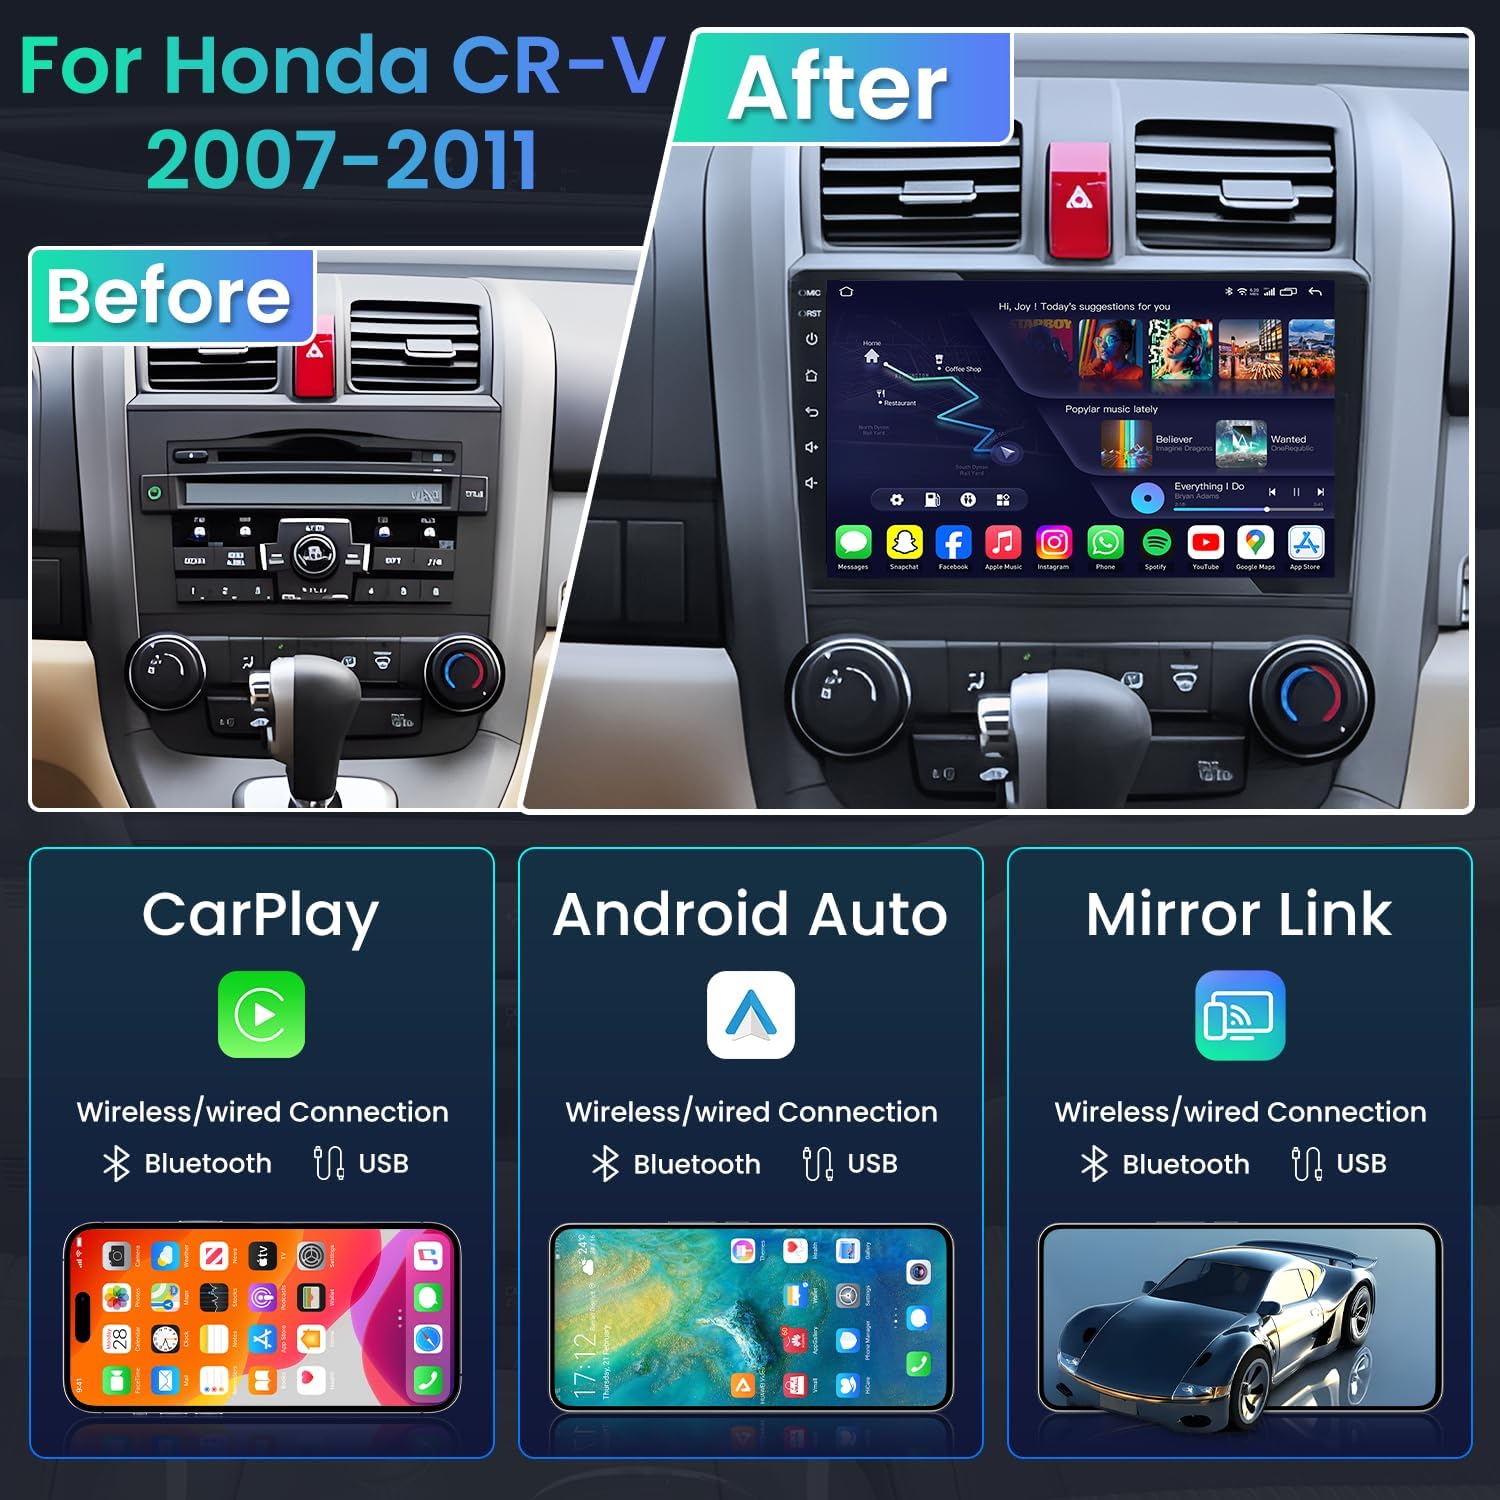
Image: Example of wiring connections for the car radio.
5. Initial Setup and Configuration
After installation, perform the following initial setup steps:
- Power On: Turn on your vehicle's ignition. The head unit should power on automatically.
- Language and Time: Navigate to the system settings to select your preferred language, time zone, and set the correct date and time.
- Wi-Fi Connection: Go to Settings > Network & Internet > Wi-Fi. Select your desired Wi-Fi network and enter the password to connect. This enables online features, app downloads, and real-time traffic updates.
- GPS Setup: The unit comes with a built-in GPS. For offline navigation, you can download maps via the 'Download Maps' menu in the navigation application. Ensure the GPS antenna has a clear view of the sky for optimal signal reception.
- Bluetooth Pairing: Access the Bluetooth menu. Enable Bluetooth on your smartphone and search for available devices. Select the head unit's name (e.g., "CarBT") and pair.
- Steering Wheel Control (SWC) Calibration: If your vehicle has steering wheel controls, you may need to calibrate them. Go to Settings > SWC Learning and follow the on-screen instructions to map the buttons.

Image: GPS Navigation and 5G WiFi connection interface.
6. Operating Instructions
6.1. Touch Screen Operation
The 9-inch IPS capacitive touch screen offers a responsive and clear interface. Use light touches for navigation. The IPS technology ensures consistent color and brightness from various viewing angles, even in direct sunlight.

Image: Features of the 1280x800 IPS touch screen, highlighting resolution and viewing angles.
6.2. Wireless CarPlay & Android Auto
Connect your iPhone or Android smartphone wirelessly or via USB to access CarPlay or Android Auto. This allows you to use navigation, make calls, send messages, and listen to music directly from your phone's interface displayed on the head unit. Activate Siri or Google Assistant for voice control.
- Wireless Connection: Ensure Bluetooth and Wi-Fi are enabled on your phone and the head unit. Follow the on-screen prompts to pair and connect.
- Wired Connection: Connect your phone to one of the head unit's USB ports using a compatible USB cable.
- Mirror Link: The unit also supports Mirror Link, allowing you to mirror your smartphone's screen directly onto the head unit display.

Image: Connectivity options for CarPlay, Android Auto, and Mirror Link.
6.3. GPS Navigation
The integrated GPS system provides accurate navigation. You can use online navigation apps (requires 5G WiFi connection) or download free maps for offline use. The system supports real-time traffic updates when connected to the internet.
- Online Navigation: Use pre-installed apps like Google Maps or Waze.
- Offline Navigation: Download maps for specific regions via the 'Download Maps' option in the navigation settings.
6.4. Bluetooth Functions
Bluetooth 5.0 ensures stable connections for hands-free calling and audio streaming. Once paired, your phone will automatically connect when in range.
- Hands-Free Calling: Make and receive calls directly from the head unit. Your phone's contact list can be synced.
- Audio Streaming: Play music from your phone through the car's speakers.

Image: Bluetooth call interface and steering wheel control integration.
6.5. Radio (AM/FM/RDS)
Access the Radio application to tune into AM and FM stations. The RDS (Radio Data System) feature displays station information, song titles, and traffic announcements where available.
- Auto Scan: Use the auto-scan function to find and save available stations.
- Presets: Save your favorite stations for quick access.

Image: Radio interface and built-in EQ DSP settings.
6.6. Multimedia Playback
The unit supports various multimedia formats. You can play audio and video files from connected USB devices or stream content via installed apps when connected to Wi-Fi.
6.7. Backup Camera
When the vehicle is shifted into reverse, the display automatically switches to the backup camera view. The included 1080P AHD camera provides a clear, wide-angle (170-degree) view with night vision capabilities and IP69 waterproof design. Dynamic parking guidelines assist with maneuvering.

Image: Dynamic parking guidelines displayed on the screen from the rearview camera.
6.8. Steering Wheel Controls (SWC)
After proper calibration, your vehicle's existing steering wheel controls can be used to manage volume, change tracks/stations, and answer/end calls, enhancing driving safety and convenience.
6.9. Split Screen Functionality
The split-screen feature allows you to run two applications simultaneously on the display, such as navigation on one side and music playback on the other. This reduces the need for frequent app switching.

Image: Example of split-screen functionality, displaying two apps simultaneously.
7. Maintenance
- Screen Cleaning: Use a soft, lint-free cloth slightly dampened with water or a screen cleaner specifically designed for electronics. Avoid harsh chemicals or abrasive materials.
- Software Updates: Periodically check for available software updates through the system settings (requires Wi-Fi connection). Keeping the software updated ensures optimal performance and access to new features.
- General Care: Avoid exposing the unit to extreme temperatures, direct sunlight for prolonged periods, or excessive moisture.
8. Troubleshooting
If you encounter issues, refer to the following common problems and solutions:
| Problem | Possible Cause | Solution |
|---|---|---|
| Unit does not power on | Incorrect wiring, blown fuse, loose connection | Check power connections, vehicle fuses, and ensure the ignition is on. |
| No sound | Volume too low, incorrect audio settings, speaker wiring issue | Increase volume, check audio output settings, verify speaker connections. |
| GPS signal weak or inaccurate | GPS antenna obstruction, poor placement | Ensure GPS antenna has a clear view of the sky, reposition if necessary. |
| Bluetooth not connecting | Bluetooth off, device not in pairing mode, interference | Ensure Bluetooth is enabled on both devices, put phone in pairing mode, restart both devices. |
| CarPlay/Android Auto not starting | Incorrect connection, phone settings, app issues | Verify USB cable (if wired), check phone's CarPlay/Android Auto settings, ensure apps are updated. |
| Backup camera not displaying | Camera wiring, power supply, reverse signal | Check camera power and video connections, ensure reverse gear signal is connected. |
If the problem persists after attempting these solutions, please contact Jingelsye technical support.
9. Specifications
| Feature | Specification |
|---|---|
| Brand | Jingelsye |
| Model | B0GS1TS8K4 |
| Operating System | Android 13 |
| Processor | 8 Core |
| Memory (RAM) | 4GB |
| Storage (ROM) | 64GB |
| Screen Size | 9 inches |
| Display Type | IPS Touch Screen |
| Resolution | 1280 x 800 HD |
| Connectivity | Bluetooth 5.0, 5G Wi-Fi |
| Special Features | Wireless CarPlay, Android Auto, GPS Navigation, AM/FM/RDS Radio, Steering Wheel Control (SWC) Support, 1080P AHD Backup Camera Support |
| Compatible Vehicle | Honda CRV 2007-2011 |
10. Warranty and Support
For warranty information, please refer to the documentation provided at the time of purchase or contact your retailer. Jingelsye provides technical support for its products.
For technical assistance, troubleshooting, or any questions regarding your Jingelsye car radio stereo, please visit the official Jingelsye store on Amazon or contact their customer service directly. You can find the store here: Jingelsye Store