
Introduction
This manual provides detailed instructions for the installation, operation, and maintenance of your SakerPlus 360° 4-Channel Dash Cam System. This system is designed to provide comprehensive video surveillance for your vehicle, recording from four distinct channels: front, rear, left, and right. It features 1080P Full HD recording, advanced night vision, G-sensor emergency lock, and continuous loop recording.
Please read this manual thoroughly before using the product to ensure proper functionality and to maximize its lifespan.
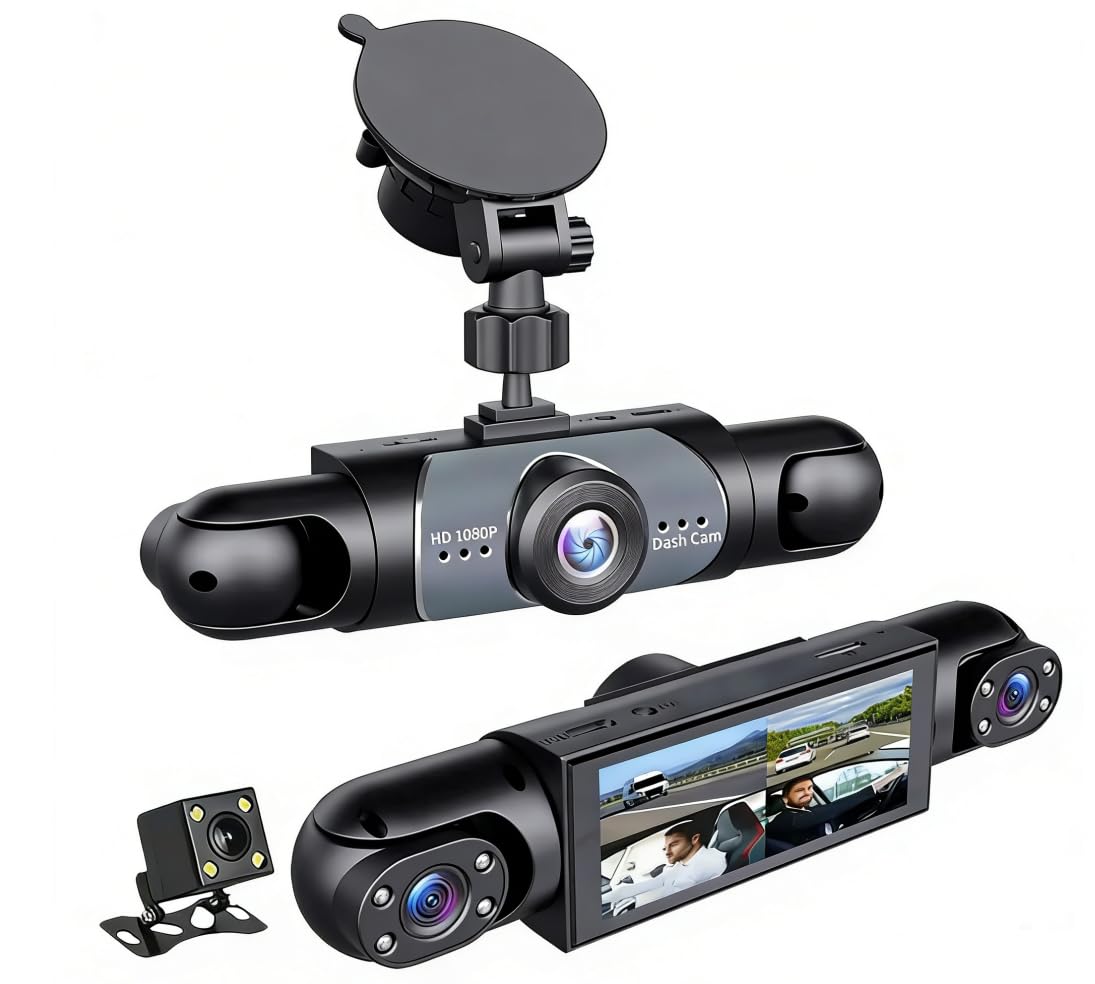
Image: The SakerPlus 360° 4-Channel Dash Cam System, illustrating its multi-camera setup for comprehensive vehicle coverage.
Package Contents
Before installation, please verify that all components are present:
- SakerPlus Dash Cam Main Unit
- Pre-installed 128GB SD Card
- Power Cable for Direct Vehicle Connection
- Mounting Accessories (Dashboard Mount)
- User Manual (this document)
Setup and Installation
- Mounting the Main Unit:
Attach the main dash cam unit to your vehicle's dashboard using the provided dashboard mount. Ensure the mounting location provides a clear view of the road ahead and does not obstruct your driving visibility. Secure the mount firmly.
- Connecting Power:
The SakerPlus dash cam requires a direct vehicle power connection for stable and uninterrupted recording. Connect the provided power cable to the dash cam and route it to your vehicle's power source. This system is designed for hardwiring to the vehicle's electrical system, not for wireless battery operation. Professional installation is recommended for optimal power connection and cable management.
- Positioning Cameras:
The system includes four cameras for front, rear, left, and right views. Position each camera to cover its designated area effectively. The side cameras are adjustable to help reduce blind spots. Ensure all camera lenses are clean and free from obstructions.
- SD Card:
A 128GB SD card is pre-installed. Ensure it is properly seated in the designated slot. The dash cam will automatically begin recording to this card once powered on.
Operating Instructions
- Powering On/Off:
The dash cam will automatically power on and begin recording when your vehicle's ignition is turned on, provided it is correctly connected to the vehicle's power supply. It will power off automatically when the ignition is turned off.
- Recording Modes:
- Loop Recording: The system continuously records video in short segments. When the SD card is full, the oldest unprotected files are automatically overwritten to ensure continuous recording.
- G-Sensor Emergency Lock: In the event of a sudden impact or collision, the built-in G-sensor will detect the event and automatically lock the current video segment, preventing it from being overwritten by loop recording. These files are stored in a protected folder.
- Night Vision:
The dash cam features advanced night vision technology for clear road details in low-light conditions. Built-in infrared lights enable sharp interior recording even in dark environments.
- Wi-Fi Connectivity:
The dash cam supports Wi-Fi connectivity. Refer to the on-screen menu or a separate application guide for instructions on connecting your smartphone or other devices to access recordings or adjust settings wirelessly.
- Viewing Footage:
Footage can be viewed directly on the dash cam's screen (if available), by connecting the dash cam to a computer, or by removing the SD card and inserting it into a compatible card reader.
Maintenance
- SD Card Formatting: It is recommended to format the SD card periodically (e.g., once a month) to maintain optimal performance and prevent data corruption. Refer to the dash cam's menu settings for the formatting option. Formatting will erase all data on the card, so back up any important recordings first.
- Cleaning: Use a soft, dry cloth to clean the camera lenses and the main unit's screen. Avoid using abrasive cleaners or solvents that could damage the surfaces.
- Temperature: Avoid exposing the dash cam to extreme temperatures for extended periods, as this can affect its performance and lifespan.
Troubleshooting
- Dash Cam Does Not Power On:
Ensure the power cable is securely connected to both the dash cam and the vehicle's power source. Verify that the vehicle's ignition is on. If professionally installed, check the fuse for the power connection.
- "Not Wireless" Clarification:
This SakerPlus dash cam system is designed for continuous, stable recording and requires a direct, wired connection to your vehicle's power supply. It is not a battery-operated wireless device. The term 'wireless' in some contexts may refer to its Wi-Fi connectivity for data transfer, not its power source.
- Recording Issues (e.g., footage missing, errors):
Check if the SD card is properly inserted. Format the SD card through the dash cam's settings menu. If issues persist, try using a different high-quality SD card (Class 10 or higher).
- Poor Video Quality:
Ensure all camera lenses are clean and free from dirt or smudges. Check that the protective film (if any) has been removed from the lenses. Verify that the video resolution settings are set to 1080P.
- G-Sensor Not Triggering/Too Sensitive:
Adjust the G-sensor sensitivity setting in the dash cam's menu. A higher sensitivity will trigger recordings more easily, while a lower setting will require a stronger impact.
Specifications
| Feature | Detail |
|---|---|
| Brand | SakerPlus |
| Model Number | B0GR565VHD |
| Video Capture Resolution | 1080p Full HD |
| Real Angle of View | 360 Degrees (via 4 channels) |
| Connectivity Technology | Wi-Fi |
| Special Features | 360 Degree View, Night Vision, G-Sensor, Loop Recording |
| Mounting Type | Dashboard Mount |
| Included Components | SakerPlus Dash Cam, 128GB SD Card |
| Compatible Devices | Car, Truck, Taxi, Fleet Vehicle |
| Power Source | Direct Vehicle Power Connection |
| Frame Rate | 30 fps |
Warranty Information
Based on the provided product information, there is no explicit warranty description for this SakerPlus dash cam system. Please refer to your point of purchase or contact the seller directly for any warranty-related inquiries.
Customer Support
For further assistance, technical support, or inquiries not covered in this manual, please contact the manufacturer or your retailer. Keep your purchase receipt and product model number (B0GR565VHD) ready when contacting support.