1. Introduction and Overview
Thank you for choosing the VINGLI Fluted TV Stand. This manual provides essential information for the safe assembly, operation, and maintenance of your new entertainment center. Please read these instructions carefully before beginning assembly and retain them for future reference.
This 58-inch TV stand, crafted from walnut wood, features a modern mid-century design with unique fluted panels. It is designed to accommodate televisions up to 70 inches and offers ample storage with open shelves and hidden compartments, including a 3-position adjustable shelf for flexible organization. Integrated cable management helps maintain a tidy setup.
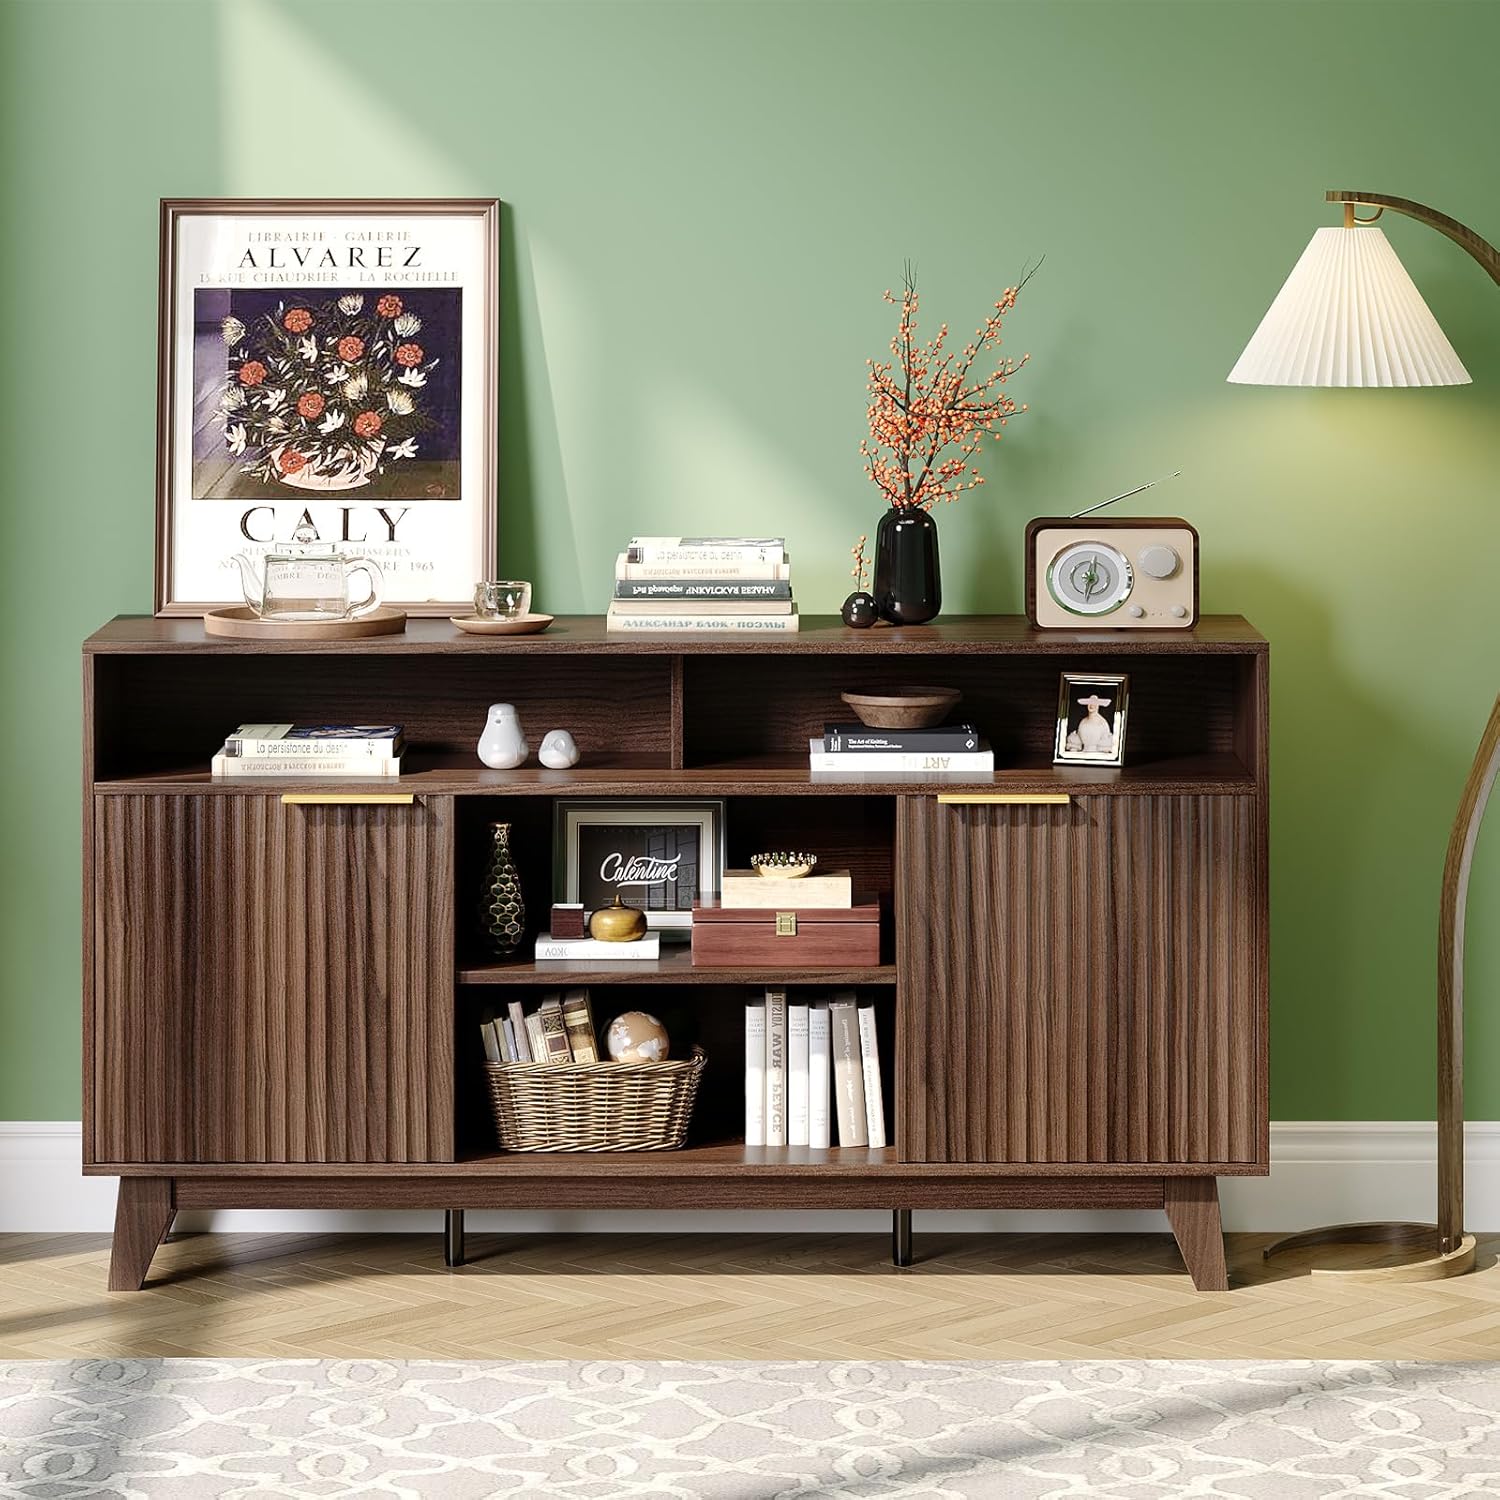
Image 1.1: The VINGLI Fluted TV Stand in a living room, showcasing its design and storage capabilities.
2. Safety Information
- Weight Capacity: Do not exceed the maximum weight capacity of 300 lbs for the entire unit. The top surface is designed for TVs up to 70 inches. Ensure the TV's weight does not exceed the stand's capacity.
- Anti-Tip Precautions: To prevent serious injury, this product should be securely attached to the wall using the provided anti-tip hardware (if included). If not included, purchase and install appropriate anti-tip restraints. Never allow children to climb or hang on the TV stand.
- Placement: Place the TV stand on a flat, level, and stable surface. Uneven surfaces can compromise stability.
- Assembly: Follow all assembly instructions carefully. Incorrect assembly can lead to instability and potential injury. Two people are recommended for assembly due to the product's size and weight.
- Maintenance: Regularly check all fasteners to ensure they remain tight. Loose fasteners can affect the stability of the unit.
- Ventilation: Ensure adequate ventilation for electronic devices placed within the stand's compartments to prevent overheating.
3. Package Contents
Before assembly, verify that all parts and hardware are present. If any items are missing or damaged, please contact customer support.
- Top Panel
- Bottom Panel
- Side Panels (Left & Right)
- Back Panels
- Fixed Shelves
- Adjustable Shelves
- Cabinet Doors with Fluted Panels
- Solid Wood Legs
- Hardware Pack (screws, dowels, cam locks, hinges, handles, non-slip pads, anti-tip kit)
- Assembly Tools (e.g., Allen wrench, screwdriver)

Image 3.1: Diagram illustrating the various storage components: spacious desktop, fixed shelves, adjustable shelves, and storage cabinets.
4. Assembly Instructions
Assembly is required for this product. Please follow the step-by-step instructions provided in the included assembly manual. The following general guidelines apply:
- Unpack and Identify: Carefully unpack all components and hardware. Lay them out on a clean, soft surface (e.g., carpet or blanket) to prevent scratches. Identify each part using the provided diagrams.
- Gather Tools: Ensure you have all necessary tools. An Allen wrench and screwdriver are typically included. A power drill with appropriate bits can speed up the process but use with caution to avoid overtightening.
- Follow Steps Sequentially: Assemble the unit by following the numbered steps in the assembly manual. Do not skip steps or deviate from the sequence.
- Secure Fasteners: Hand-tighten all screws and fasteners initially. Once the section is fully assembled, go back and tighten them securely, but do not overtighten.
- Attach Legs: Securely attach the solid wood legs to the bottom panel. Ensure non-slip pads are applied to protect your flooring.
- Install Doors: Attach the cabinet doors using the soft-close hinges. Adjust hinges as needed for proper alignment. Install the smooth metal handles.
- Adjust Shelves: Position the adjustable shelves to your desired height.
- Anti-Tip Kit: Install the anti-tip kit to a wall stud according to the instructions to prevent tipping.
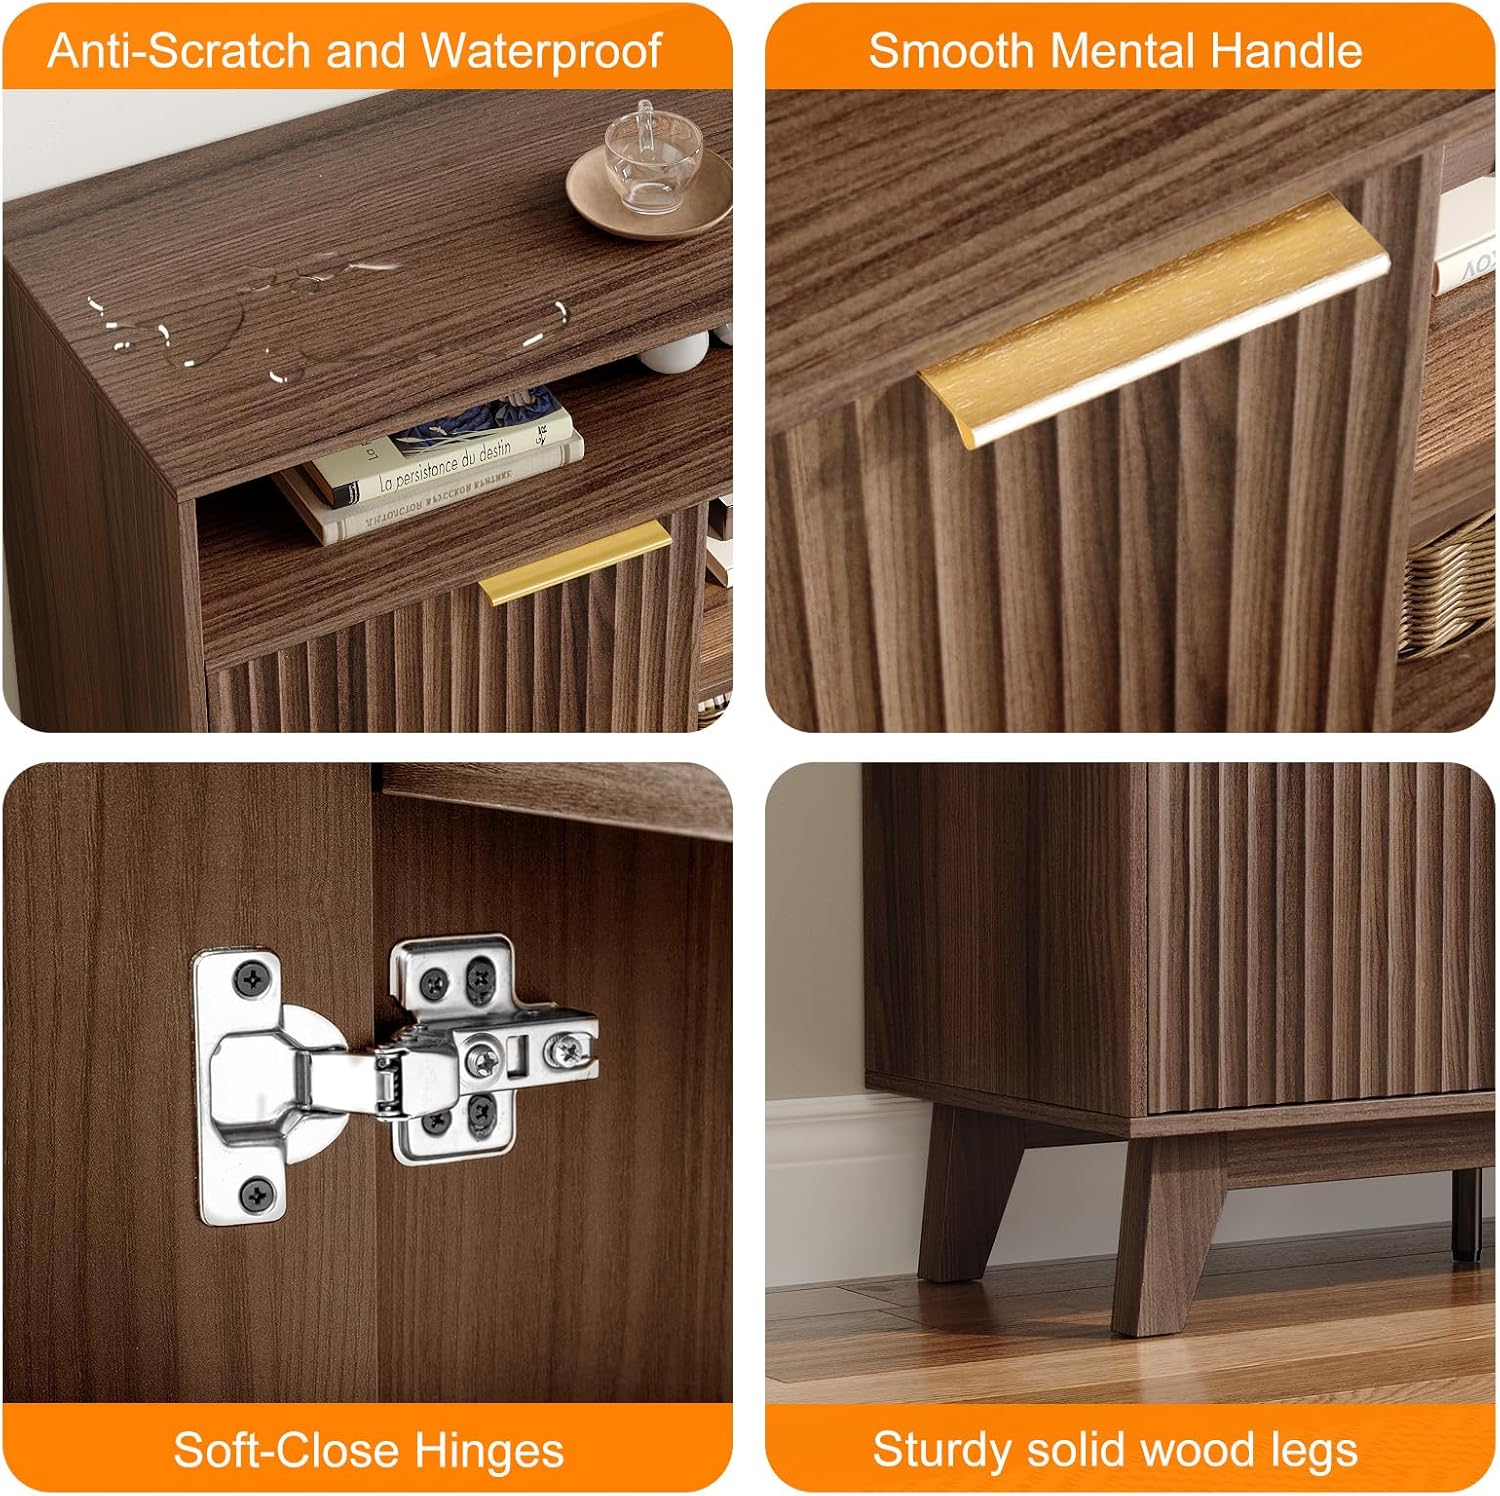
Image 4.1: Detailed view of key features including the anti-scratch surface, metal handle, soft-close hinges, and solid wood legs.
5. Operating Instructions
Once assembled, your VINGLI Fluted TV Stand is ready for use.
- TV Placement: Carefully place your television on the spacious desktop. Ensure it is centered and stable. This stand supports TVs up to 70 inches.
- Adjustable Shelves: The internal shelves offer 3-position adjustability. To change the shelf height, remove the shelf, reposition the shelf pins to the desired holes, and then place the shelf back onto the pins.
- Storage Compartments: Utilize the open shelves for displaying decorative items or frequently accessed media. The hidden compartments behind the fluted doors are ideal for concealing electronics, cables, or other items you wish to keep out of sight.
- Cable Management: Use the integrated cable management cutouts on the back panel to route and organize power cords and AV cables, keeping your setup neat and preventing tangles.

Image 5.1: The TV stand in use, demonstrating the arrangement of a television, decorative items, and media devices within its storage areas.
6. Maintenance
- Cleaning: Wipe the surface with a soft, damp cloth. Avoid using harsh chemicals, abrasive cleaners, or polishes that may damage the walnut wood finish. The surface is designed to be anti-scratch and waterproof, but excessive moisture should still be avoided.
- Fastener Check: Periodically (e.g., every 3-6 months), check all screws and fasteners to ensure they are tight. Re-tighten if necessary to maintain structural integrity.
- Sunlight Exposure: Avoid prolonged exposure to direct sunlight, which can cause fading or discoloration of the wood finish.
- Heat and Moisture: Keep the TV stand away from direct heat sources and areas of high humidity to prevent warping or damage to the wood.
7. Troubleshooting
- Issue: The TV stand feels wobbly or unstable.
Solution:
- Ensure the stand is placed on a completely flat and level surface.
- Check all assembly screws and fasteners. Tighten any that are loose.
- Verify that the solid wood legs are securely attached and evenly seated.
- Confirm the anti-tip kit is properly installed and secured to a wall stud.
- Issue: Cabinet doors are misaligned or do not close smoothly.
Solution:
- Adjust the soft-close hinges. Most hinges have adjustment screws to modify door position (up/down, left/right, in/out). Refer to the hinge manufacturer's instructions if specific adjustments are needed.
- Ensure the cabinet frame was assembled squarely.
- Issue: Missing or damaged parts during unboxing.
Solution:
- Do not proceed with assembly.
- Contact VINGLI customer support immediately with your purchase details and a list of the missing or damaged components.
8. Specifications
| Brand | VINGLI |
| Model Number | VL-G52009258 |
| Material Type | Walnut Wood |
| Color | Walnut |
| Overall Dimensions (W x D x H) | 58 x 15.8 x 32 inches |
| Item Weight | 77.2 Pounds |
| Maximum TV Size Supported | Up to 70 inches |
| Weight Capacity | 300 lbs |
| Assembly Required | Yes |
| Storage Features | 4 Open Shelves, 2 Hidden Compartments, 3-Position Adjustable Shelf, Cable Management |
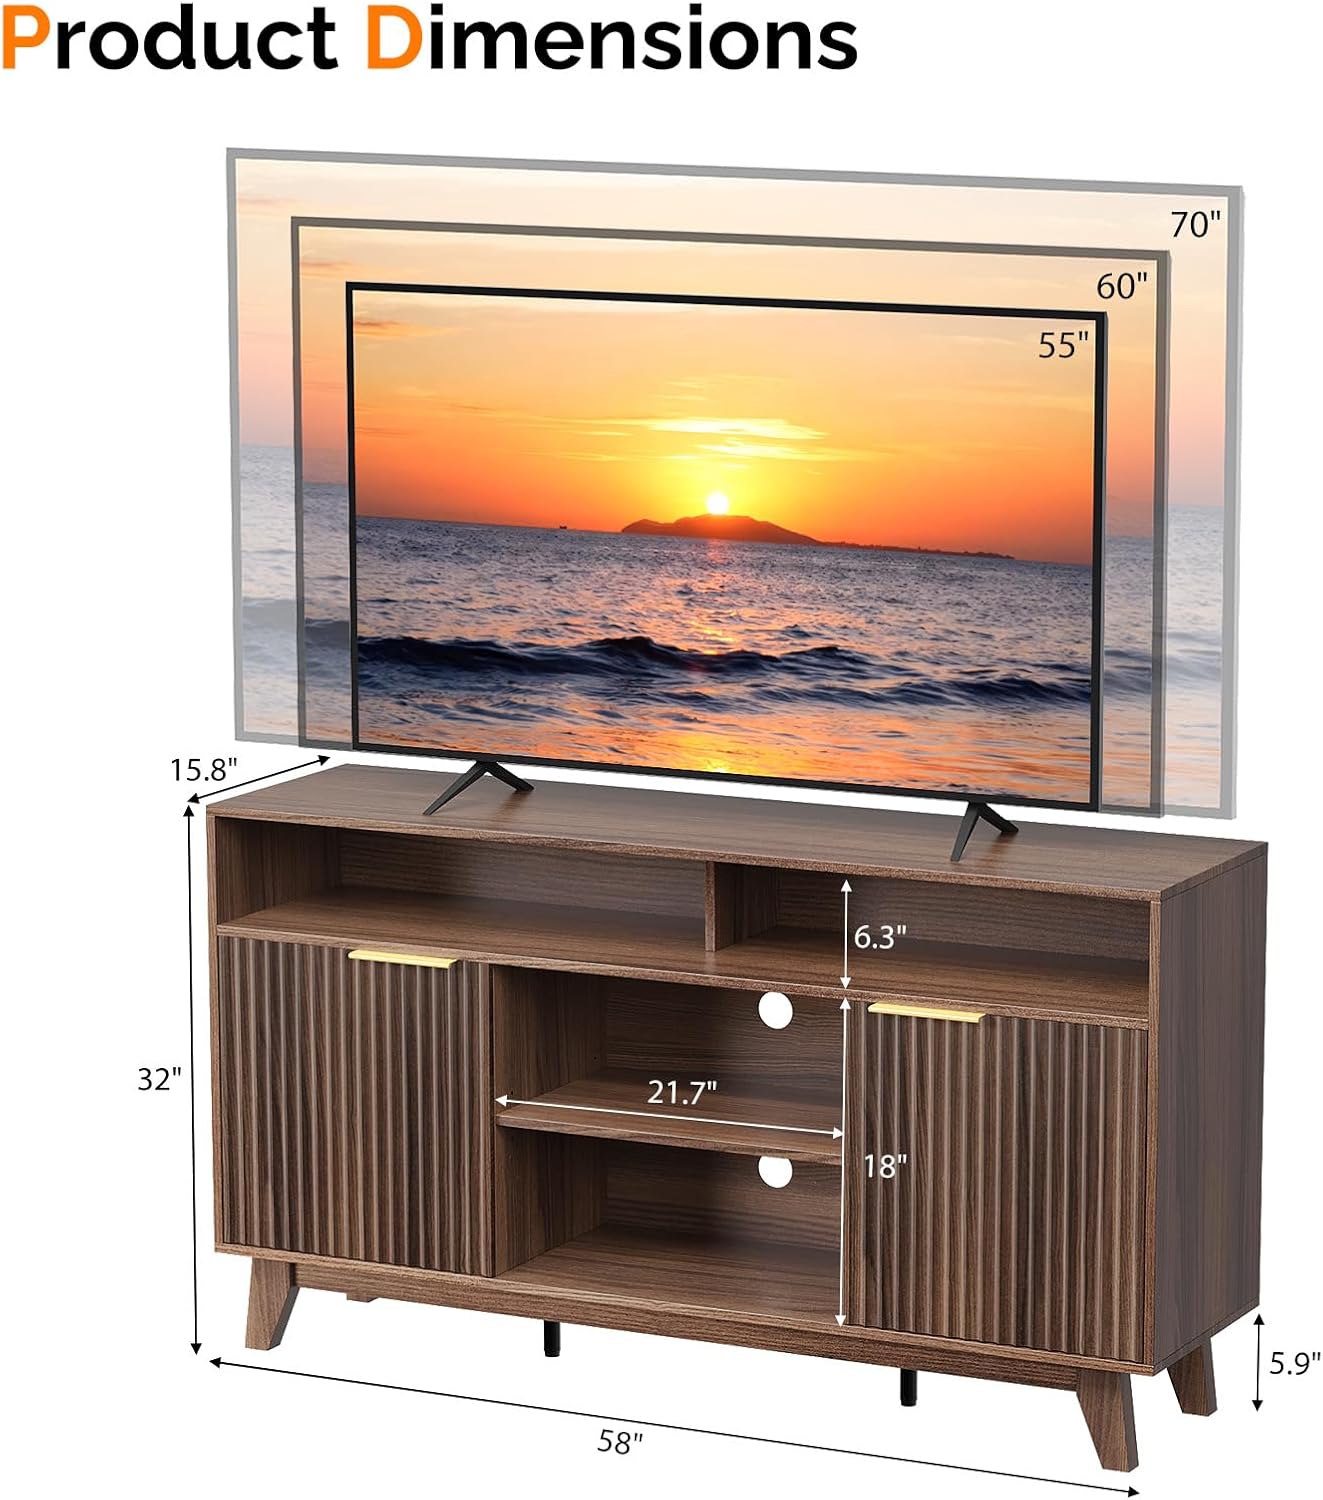
Image 8.1: Product dimensions and TV size compatibility for the VINGLI Fluted TV Stand.
9. Warranty and Customer Support
For warranty information, please refer to the terms and conditions provided at the time of purchase or contact the seller directly. If you have any questions, require assistance with assembly, or need to report missing/damaged parts, please contact VINGLI customer support through the retailer where the product was purchased.
Please have your model number (VL-G52009258) and purchase date available when contacting support.