
Introduction
Thank you for choosing the VEVOR Commercial Ice Maker Machine. This appliance is designed for efficient ice production, suitable for various commercial and home settings. Please read this manual thoroughly before installation, operation, and maintenance to ensure safe and optimal performance.
This ice maker produces up to 100 lbs of ice per day with a storage capacity of 16-30 lbs. It features adjustable ice thickness, a smart control panel, and a self-cleaning function.
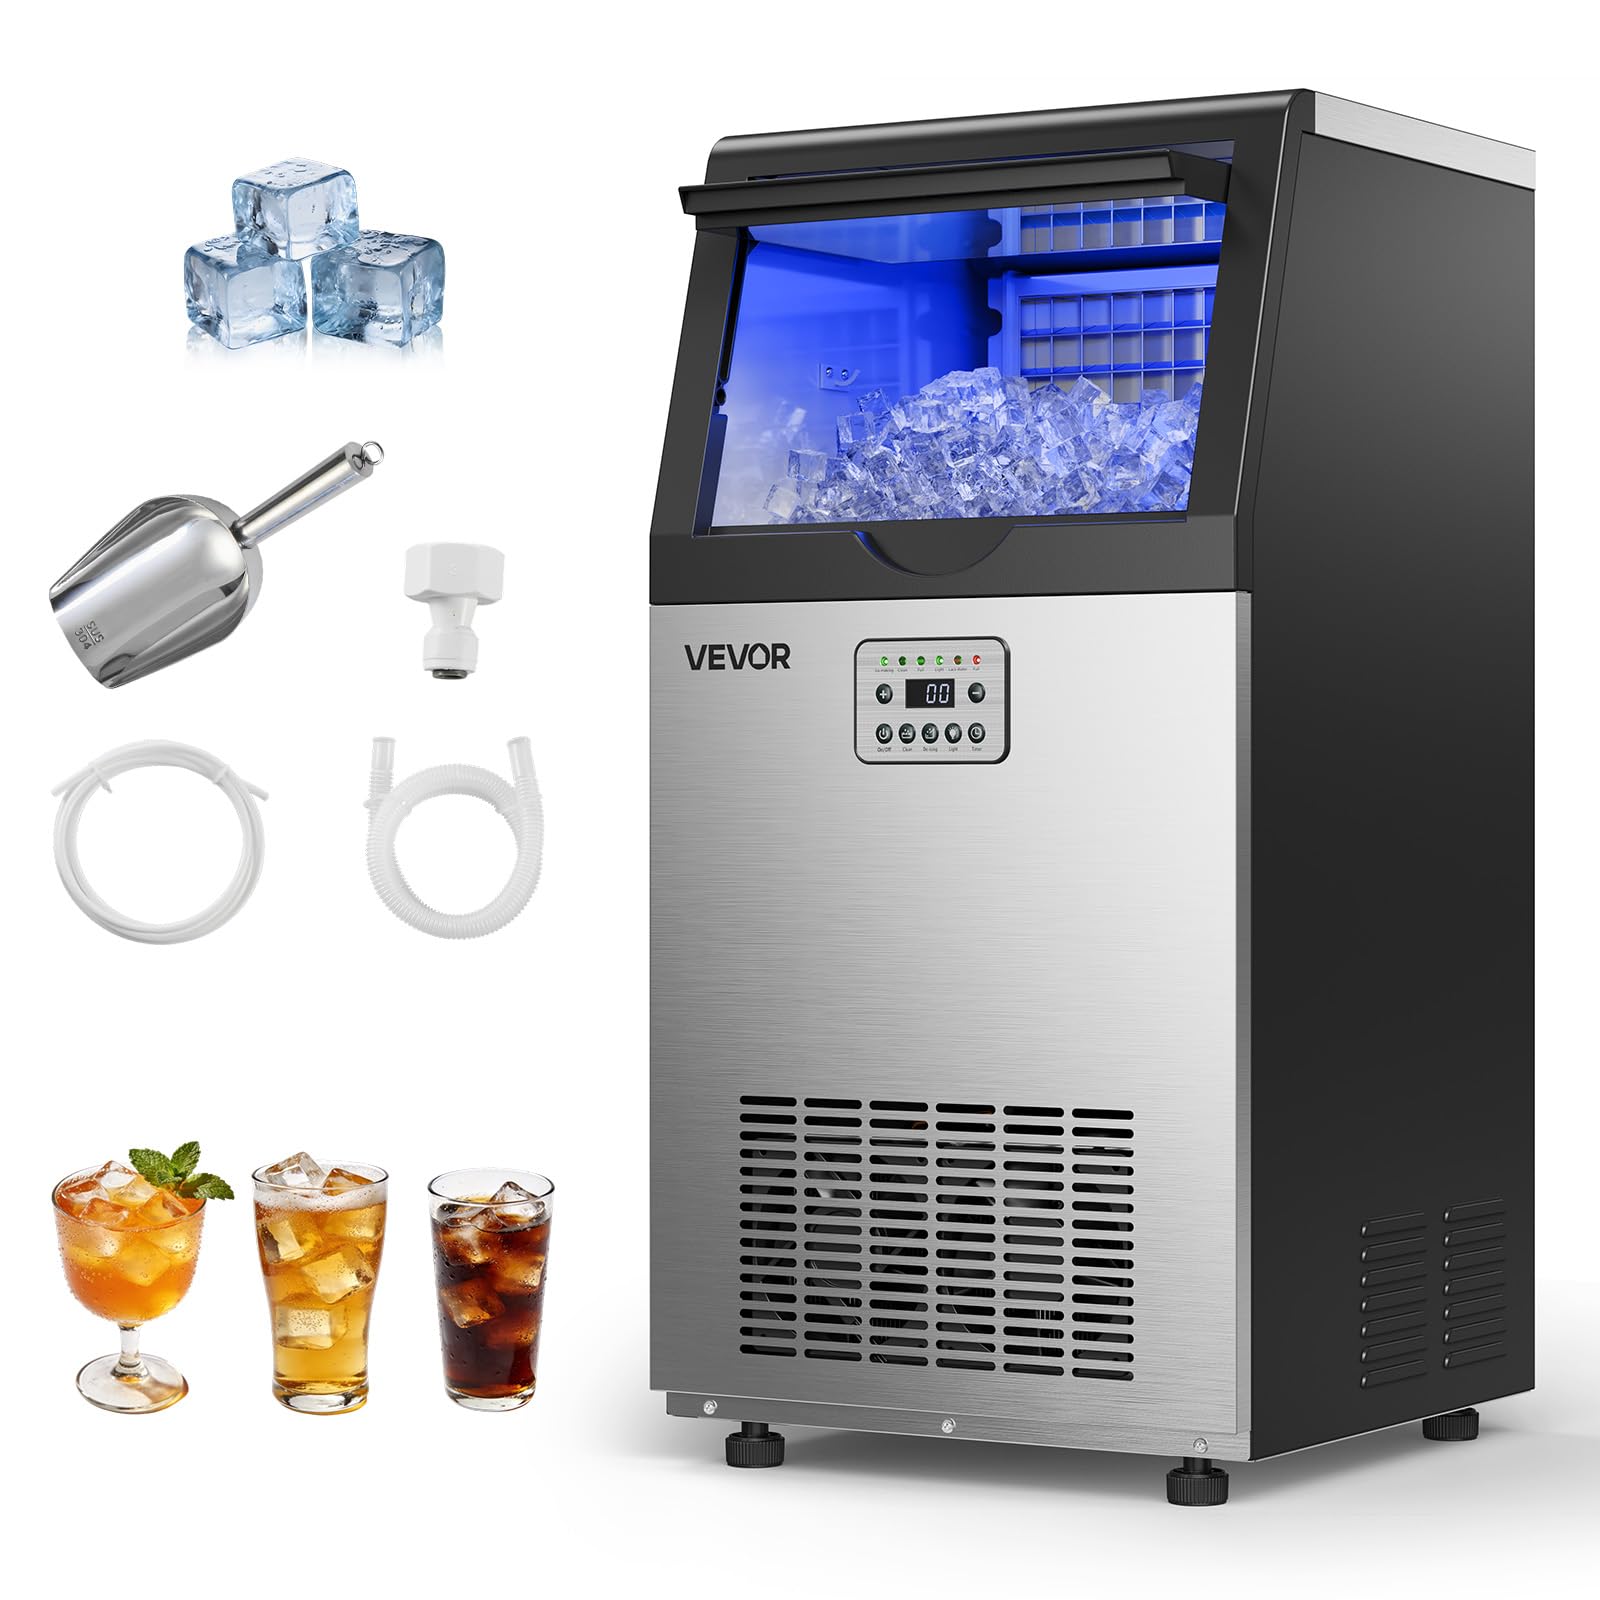
Figure 1: VEVOR Commercial Ice Maker Machine (Model CIM-360T)
Safety Instructions
- Read all instructions before using the appliance.
- Ensure the power supply matches the specifications on the rating label.
- Do not operate the appliance with a damaged cord or plug.
- Keep the appliance away from heat sources and direct sunlight.
- Do not immerse the appliance, cord, or plug in water or other liquids.
- Unplug the appliance before cleaning or performing any maintenance.
- This appliance is not intended for use by persons with reduced physical, sensory, or mental capabilities unless supervised.
- Keep ventilation openings clear of obstructions.
- Use only potable water for ice production.
Product Overview and Components
The VEVOR Commercial Ice Maker Machine (CIM-360T) includes the following components:
- Commercial Ice Maker Machine
- User Manual (this document)
- Stainless Steel Ice Scoop
- Water Inlet Hose
- Drain Hose
- Adapter (0.96 in to 0.75 in)

Figure 2: Product Dimensions and Included Accessories
Setup
- Unpacking and Placement:
- Remove all packaging materials.
- Place the ice maker upright for at least 24 hours before use to allow the refrigerant to settle.
- Position the unit on a flat, stable surface. It can be used freestanding or installed under a counter. Ensure adequate ventilation around the unit.
- Adjust the four screw-in feet to level the unit on uneven floors.
- Water Connection:
- Connect the provided water inlet hose to a potable water supply (faucet).
- Connect the other end of the water inlet hose to the designated inlet on the back of the ice maker.
- Connect the drain hose to the drain outlet on the back of the ice maker.
- Route the drain hose to a floor drain or a suitable drainage system. Ensure the drain hose is lower than the unit's drain outlet for proper gravity drainage.
- Power Connection:
- Plug the power cord into a grounded electrical outlet (110 volts).
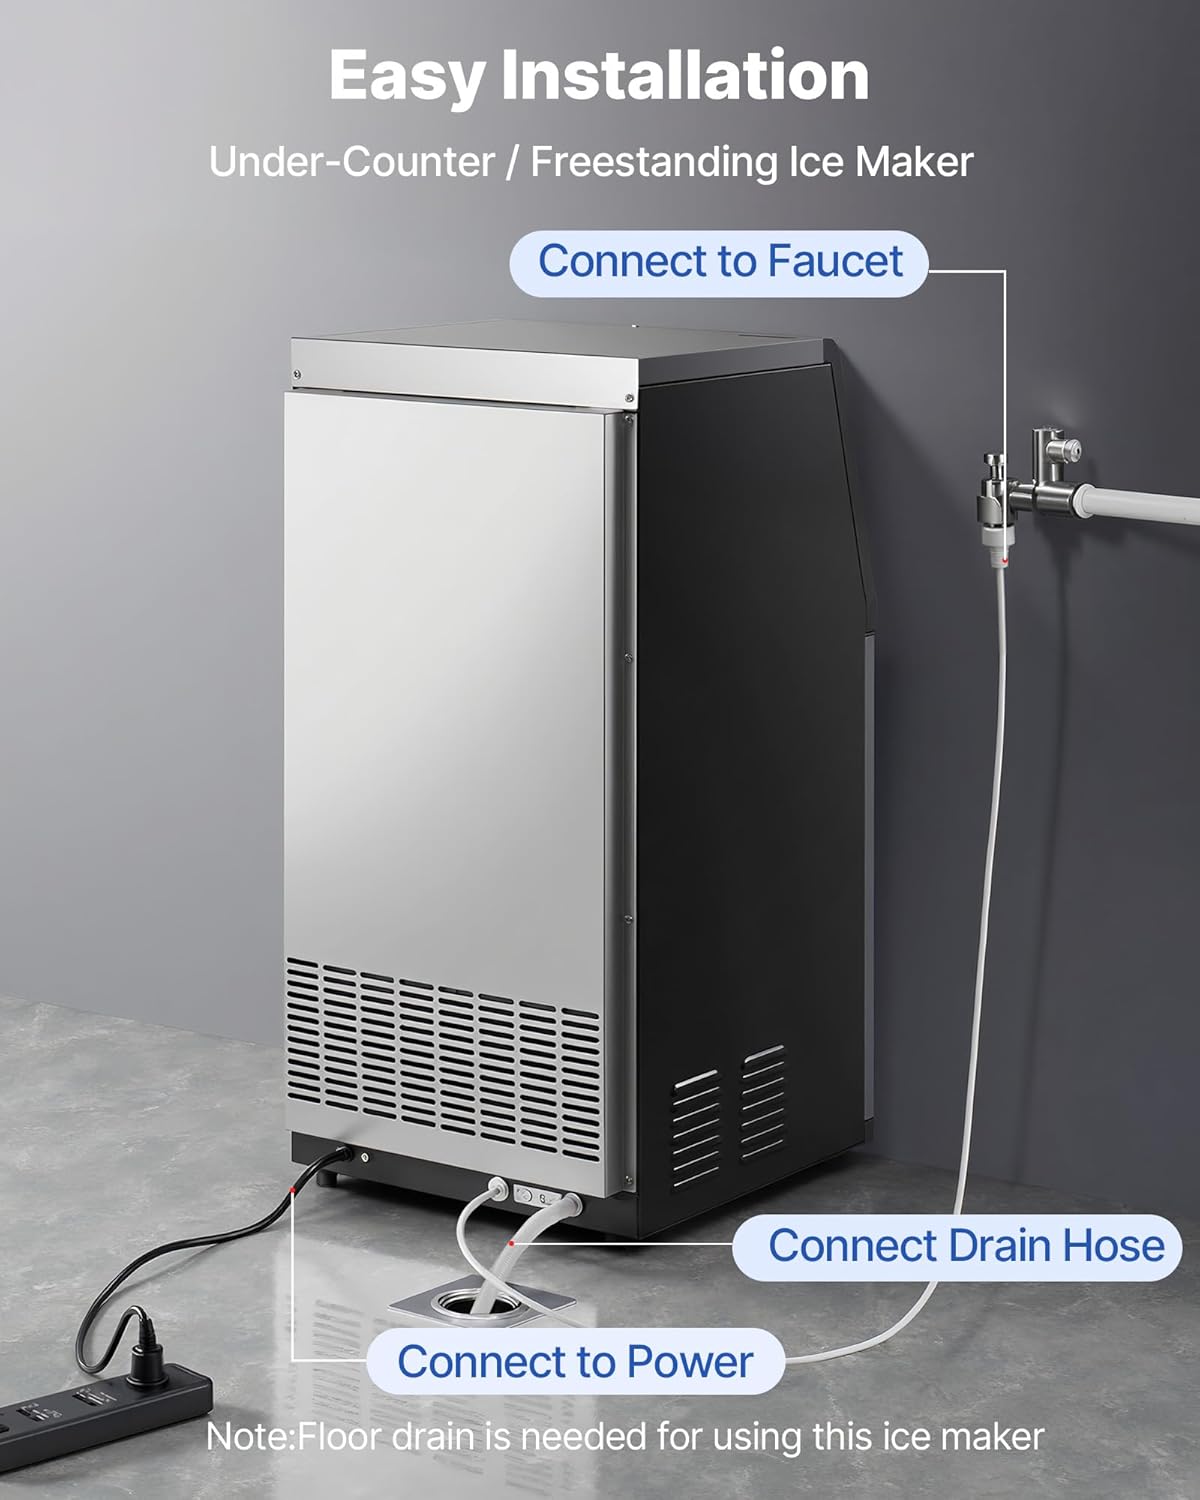
Figure 3: Water and Power Connections

Figure 4: Simple Water Line Installation
Operating Instructions
The ice maker features a smart control panel for easy operation.

Figure 5: Smart Control Panel
- Power On/Off: Press the On/Off button to start or stop the ice making process.
- Ice Making Cycle: Once powered on and water is supplied, the machine will automatically begin the ice making cycle. It produces 36 ice cubes in approximately 8-10 minutes.
- Adjusting Ice Thickness:
- Use the + and - buttons to adjust the freezing time, which controls the ice cube thickness.
- Shorter freezing time (8-10 minutes) results in thinner ice, suitable for smoothies and seafood.
- Medium freezing time (11-15 minutes) for standard drinks.
- Longer freezing time (15-18 minutes) results in thicker ice, ideal for beer, cocktails, and whiskey.
- Setting the Timer:
- Press the Timer button to set a delayed start or stop time for the ice maker (up to 24 hours).
- Use the + and - buttons to adjust the desired time.
- Light Function: Press the Light button to turn the interior blue light on or off.
- De-icing Function: Press the De-icing button to initiate a de-icing cycle if ice buildup occurs.

Figure 6: Customizable Ice Thickness

Figure 7: Adjustable Ice Cube Thickness Chart

Figure 8: 24-Hour Reservation Feature
Maintenance
- Self-Cleaning Function:
- Ensure the machine is in standby mode.
- Press the Clean button on the control panel to initiate the automatic 10-minute cleaning cycle. This helps maintain hygiene and fresh ice.
- Regular Cleaning:
- Unplug the ice maker before any manual cleaning.
- Clean the exterior with a soft cloth and mild detergent.
- Periodically clean the interior ice storage bin and water tray with a diluted solution of water and vinegar or a food-grade sanitizer. Rinse thoroughly with clean water.
- Ensure the drain hose is clear of any blockages.

Figure 9: Automatic Cleaning Feature
Troubleshooting
The smart control panel provides alerts for common issues:
- "Lack Water" Alert: Indicates insufficient water supply. Check the water inlet connection and ensure the water supply is turned on.
- "Full Ice" Alert: The ice storage bin is full. The machine will pause ice production until ice is removed. The indicator light will automatically turn on when ice storage reaches 16 lbs.
- "Error Alert": Indicates a system malfunction. Refer to the specific error code displayed on the LED panel and consult the VEVOR support for assistance if the issue persists after basic checks.

Figure 10: Intelligent Reminder System
If you encounter issues not covered here, please contact VEVOR customer support.
Specifications
| Feature | Specification |
|---|---|
| Brand | VEVOR |
| Model Name | Commercial Ice Maker Machine |
| Model Number | CIM-360T |
| Product Dimensions (D x W x H) | 15.16"D x 15.75"W x 29.88"H (385mm x 400mm x 759mm) |
| Ice Production per Day | 100 lbs (45 kg) |
| Maximum Ice Storage Capacity | 30 lbs (14 kg) |
| Ice Full Indicator Activation | 16 lbs (7.3 kg) |
| Number of Ice Trays | 36 pcs |
| Adjustable Ice Thickness | Thick & Thin Options |
| Operating Temperature | 50 to 100.4 °F / 10 to 38 °C |
| Wattage | 290 watts |
| Voltage | 110 volts |
| Refrigerant | R290a |
| Material Type | Pre-coated sheet + stainless steel + ABS, galvanized sheet |
| Item Weight | 43 lbs (19.5 kg) |
| UPC | 197988191841 |

Official Product Video
Video: VEVOR Commercial Ice Maker Machine, 100 lbs/24h. This video provides an overview of the ice maker's features and operation.
Warranty and Support
For warranty information, technical support, or service inquiries, please contact VEVOR customer service. Refer to your purchase documentation or the official VEVOR website for contact details.
Included components: 1 x Commercial Ice Maker Machine, 1 x User Manual, 1 x Stainless Steel Ice Scoop.


