
Introduction
This manual provides detailed instructions for the setup, operation, maintenance, and troubleshooting of your Diyeeni IP Phone, Model Diyeenit92x456rdz. Please read this manual thoroughly before using the device to ensure proper functionality and to prevent damage.

Image: The Diyeeni IP Phone, a business VoIP phone, displayed on a wooden desk, illustrating its compact design and suitability for office environments.
Setup
1. Unpacking
Carefully remove all components from the packaging and verify that all items are present.
- Diyeeni IP Phone Unit
- Handset
- Handset Coiled Cord
- Ethernet Cable
- Desk Stand
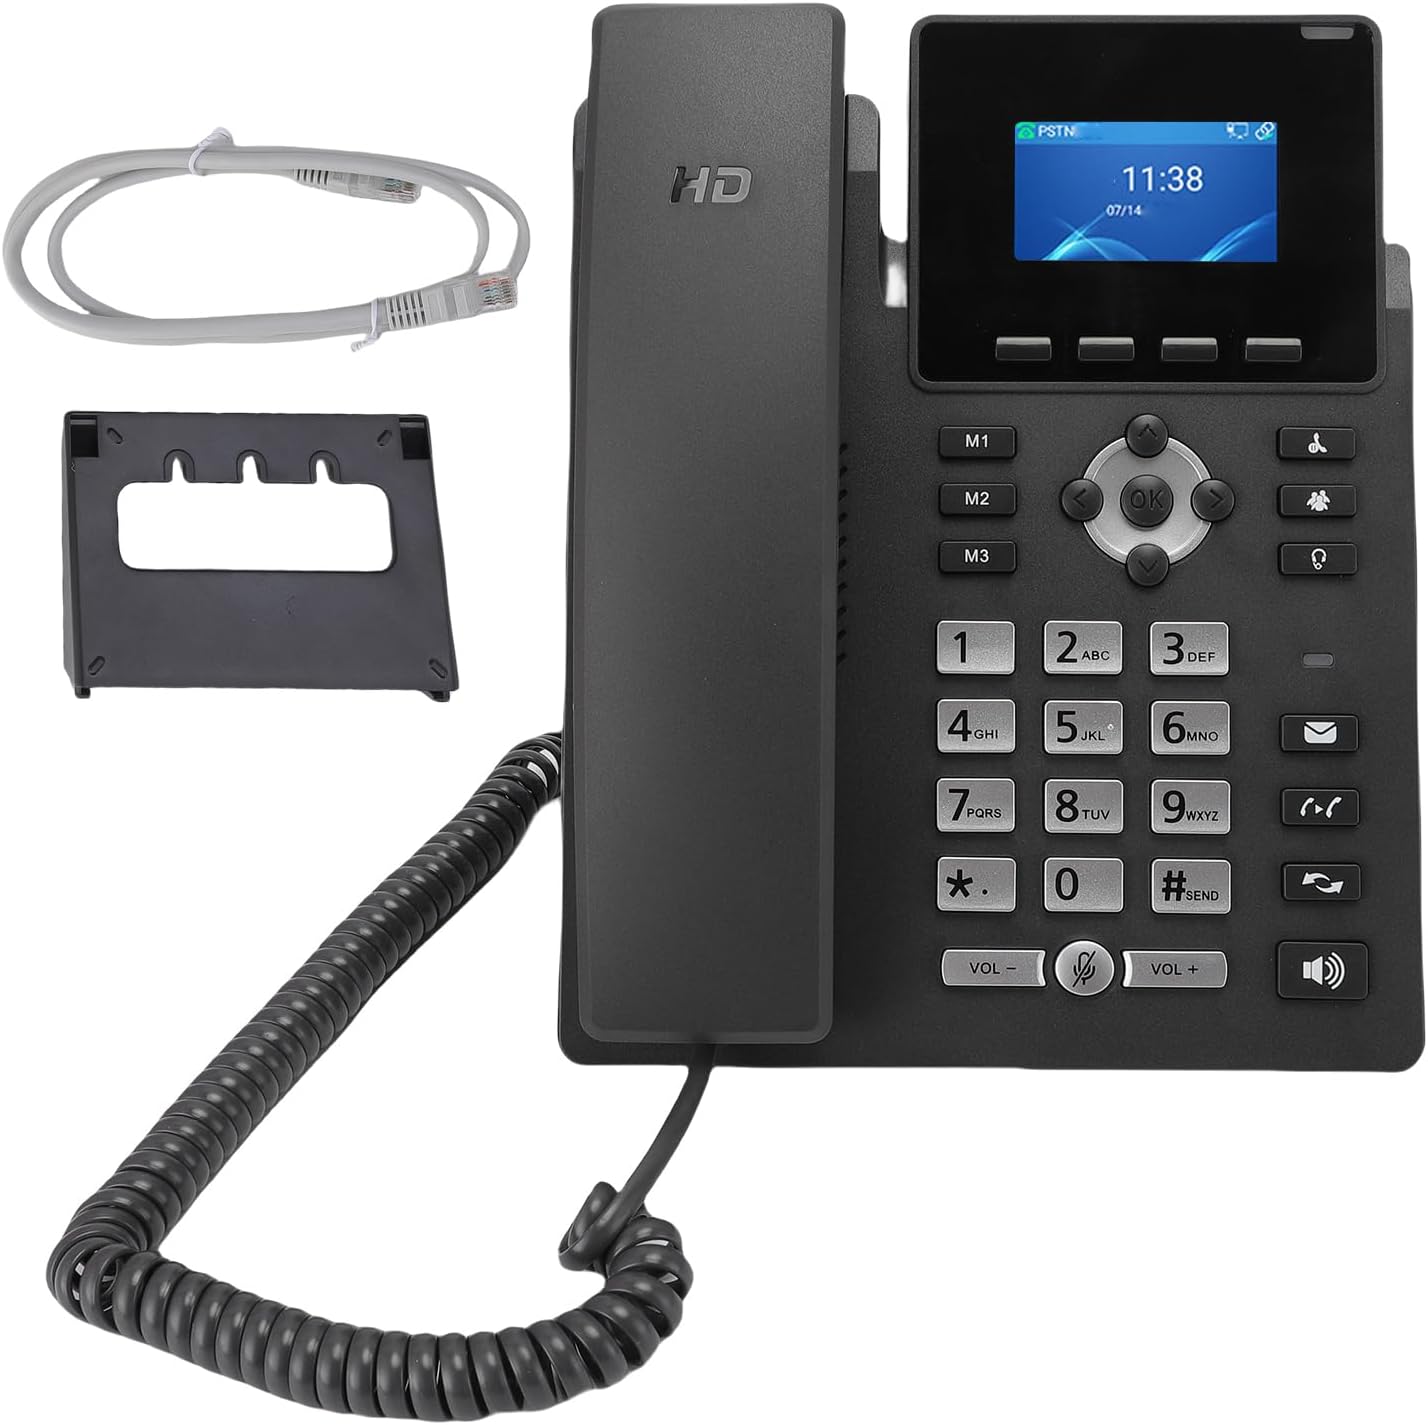
Image: The Diyeeni IP Phone unit, handset, coiled cord, desk stand, and an Ethernet cable, representing the contents typically found in the product box.
2. Physical Connection
Follow these steps to connect the phone to your network and power source.
- Attach the Desk Stand: Securely attach the provided desk stand to the back of the IP phone unit.
- Connect the Handset: Plug one end of the coiled cord into the handset and the other end into the port on the phone marked with a handset icon.
- Connect to Network and Power (PoE): If your network supports Power over Ethernet (PoE), connect one end of the Ethernet cable to the LAN port (often marked with a computer icon) on the back of the phone and the other end to a PoE-enabled network switch or router. The phone will receive both network connectivity and power through this single cable.
- Connect to Network (Non-PoE) and Power Adapter: If PoE is not available, connect one end of the Ethernet cable to the LAN port on the phone and the other end to your network switch or router. Then, connect a 5V DC power adapter (not explicitly listed as included, but required if no PoE) to the DC 5V port on the phone and plug it into a power outlet.
- Connect PC (Optional): If you wish to connect a computer through the phone, use another Ethernet cable to connect the PC port on the phone to your computer.
- Connect Headset (Optional): For hands-free communication, plug a compatible headset into the RJ9 or USB-A port on the phone.

Image: The rear view of the Diyeeni IP Phone, clearly showing the LAN, PC, DC 5V, RJ9, and USB-A ports for various connections.
3. Initial Configuration
After physical connections are made, the phone will power on and begin its boot sequence.
- Power On and Boot: The phone will automatically power on. Wait for the boot process to complete and the main screen to appear on the 2.4-inch LCD display.
- Network Settings: By default, the phone attempts to obtain network settings (IP address, subnet mask, gateway, DNS) via DHCP. If your network requires a static IP address, you may need to configure this through the phone's menu or its web interface.
- SIP Account Registration: To make and receive calls, you must register your SIP account(s) with the phone. Access the phone's menu (usually via a 'Menu' or 'Settings' button) or its web interface (by entering the phone's IP address into a web browser) to enter the SIP server address, username, and password provided by your VoIP service provider. The Diyeeni IP Phone supports 2 SIP lines.
Operating Instructions
1. Basic Call Functions
- Making a Call: Pick up the handset or press the Speaker button. Dial the desired phone number using the keypad and press the Dial or Send button.
- Answering a Call: When the phone rings, pick up the handset or press the Speaker button to answer.
- Ending a Call: Hang up the handset or press the End Call button.
- Hold: During an active call, press the Hold button. The call will be placed on hold. Press the Hold button again to resume the call.
- Transfer: During an active call, press the Transfer button. Dial the number to which you want to transfer the call. Once the second party answers (or if it's an unattended transfer), press the Transfer button again to complete the transfer.

Image: A front view of the Diyeeni IP Phone, showcasing its 2.4-inch LCD display and functional keypad for call management.
2. Advanced Features
- Using 2 Service Lines: The phone supports two independent SIP lines. Use the dedicated line keys (e.g., 'Line 1', 'Line 2' or similar labels on the display) to select which line to use for outgoing calls or to switch between active calls on different lines.
- Noise Cancellation Technology: The integrated noise cancellation feature automatically minimizes background noise during calls, ensuring clearer audio for both parties. This feature is active by default.
- Headset Usage: Once a compatible headset is connected to the USB-A or RJ9 port, you can switch between the handset/speaker and the headset by pressing the dedicated Headset button.

Image: The Diyeeni IP Phone with an overlay emphasizing its support for 2 service lines, ideal for managing multiple calls or accounts.

Image: A close-up of the Diyeeni IP Phone, illustrating its noise cancellation capability for improved call clarity in various environments.

Image: The Diyeeni IP Phone with an overlay indicating its compatibility with various headsets via USB-A and RJ9 ports, offering flexible audio solutions.
Maintenance
1. Cleaning
To maintain the appearance and functionality of your IP phone:
- Disconnect the phone from power before cleaning.
- Use a soft, dry, lint-free cloth to wipe the phone's surface.
- For stubborn marks, lightly dampen the cloth with water or a mild, non-abrasive cleaner. Avoid harsh chemicals or abrasive materials.
- Do not allow liquids to enter any openings.
2. Software Updates
Periodically check the manufacturer's website for firmware updates. Keeping your phone's firmware updated ensures optimal performance, security, and access to new features.
Troubleshooting
If you encounter issues with your Diyeeni IP Phone, refer to the table below for common problems and their solutions.
| Problem | Possible Cause | Solution |
|---|---|---|
| No dial tone | Phone not powered on; Network cable disconnected; SIP account not registered. | Ensure phone is connected to PoE or power adapter. Check Ethernet cable connection. Verify SIP account registration status in phone settings. |
| Cannot make or receive calls | SIP account not registered; Network connectivity issues; Incorrect dial plan. | Confirm SIP account registration. Check network cable and router/switch status. Review dial plan settings with your VoIP provider. |
| Poor call quality (e.g., static, echo) | Network bandwidth issues; Interference; Outdated firmware. | Ensure stable internet connection and sufficient bandwidth. Check for nearby electronic interference. Update phone firmware if available. |
| Display not working | No power; Phone malfunction. | Verify power connection. Try restarting the phone by disconnecting and reconnecting power. If issue persists, contact support. |
Specifications
Key technical specifications for the Diyeeni IP Phone, Model Diyeenit92x456rdz.
| Feature | Description |
|---|---|
| Brand | Diyeeni |
| Model Number | Diyeenit92x456rdz |
| SIP Lines | 2 |
| Display | 2.4-inch Graphical LCD (Backlit) |
| Ports | USB-A, RJ9, Dual Port Gigabit Ethernet (LAN/PC) |
| Power Source | Power over Ethernet (PoE) support, AC/DC (5V DC input) |
| Dimensions (L x W x H) | 10.62 x 9.44 x 2.75 inches |
| Special Features | Noise Cancellation Technology |
Warranty Information
This Diyeeni IP Phone is covered by a manufacturer's warranty for 90 days from the date of purchase. Please retain your proof of purchase for warranty claims. The warranty covers defects in materials and workmanship under normal use.
Customer Support
For technical assistance, troubleshooting beyond this manual, or warranty inquiries, please contact Diyeeni customer support. Refer to the official Diyeeni website for the most current contact information and support resources.