
1. Introduction
This manual provides instructions for the installation, operation, and maintenance of your Wisoqu 303.9MHz Ceiling Fan Remote Control Replacement. This product is designed to replace lost or damaged remote controls for 3-speed ceiling fans, offering independent control over fan speed and light brightness. Please read this manual thoroughly before use to ensure proper functionality and safety.
Important Note: This product is a remote control transmitter only and does not include a receiver or battery. It lacks a reverse function. Ensure the on/off settings match your original remote's receiver.
2. Safety Information
- Always disconnect power to the ceiling fan at the circuit breaker before performing any installation or maintenance.
- Do not expose the remote control to water or excessive moisture.
- Keep batteries out of reach of children. If swallowed, seek immediate medical attention.
- Dispose of used batteries according to local regulations.
- Ensure correct battery polarity when installing.
3. Package Contents
Verify that all items are present in your package:
- 1 x Ceiling Fan Remote Control (Transmitter)
- 1 x Wall Mount Holder
- 1 x User Manual (this document)
- 2 x Screws
- 2 x Expansion Tubes
4. Setup
4.1 Battery Installation
The remote control requires one MV21 A23 battery (not included).
- Locate the battery compartment cover on the back of the remote control.
- Slide the cover open.
- Insert one A23 battery, ensuring the positive (+) and negative (-) terminals align correctly with the markings inside the compartment.
- Slide the battery cover back into place until it clicks securely.

Figure 1: Rear view of the remote control, showing the battery compartment.
4.2 Dip Switch Matching
For the remote to communicate with your ceiling fan's receiver, the dip switches on the remote control must match the dip switches on your fan's receiver unit. This remote operates at 303.9MHz.
- Locate the dip switches inside the battery compartment of the remote control.
- Access the dip switches on your ceiling fan's receiver unit (refer to your fan's manual for location, typically in the canopy or motor housing).
- Carefully match the switch positions (ON/OFF) on the remote control to those on the receiver.
- Once matched, the remote is ready for use.
4.3 Wall Mount Holder Installation
The included wall mount holder allows for convenient storage of your remote control.
- Choose a suitable location on a wall, away from direct sunlight or heat sources.
- Use the wall mount holder as a template to mark the positions for the two screws.
- Drill pilot holes if necessary, and insert the expansion tubes.
- Secure the wall mount holder to the wall using the provided screws.
- Place the remote control into the holder for easy access.

Figure 2: The wall mount holder for convenient remote storage.
5. Operating Instructions
The remote control provides independent control for your ceiling fan's speed and light function.
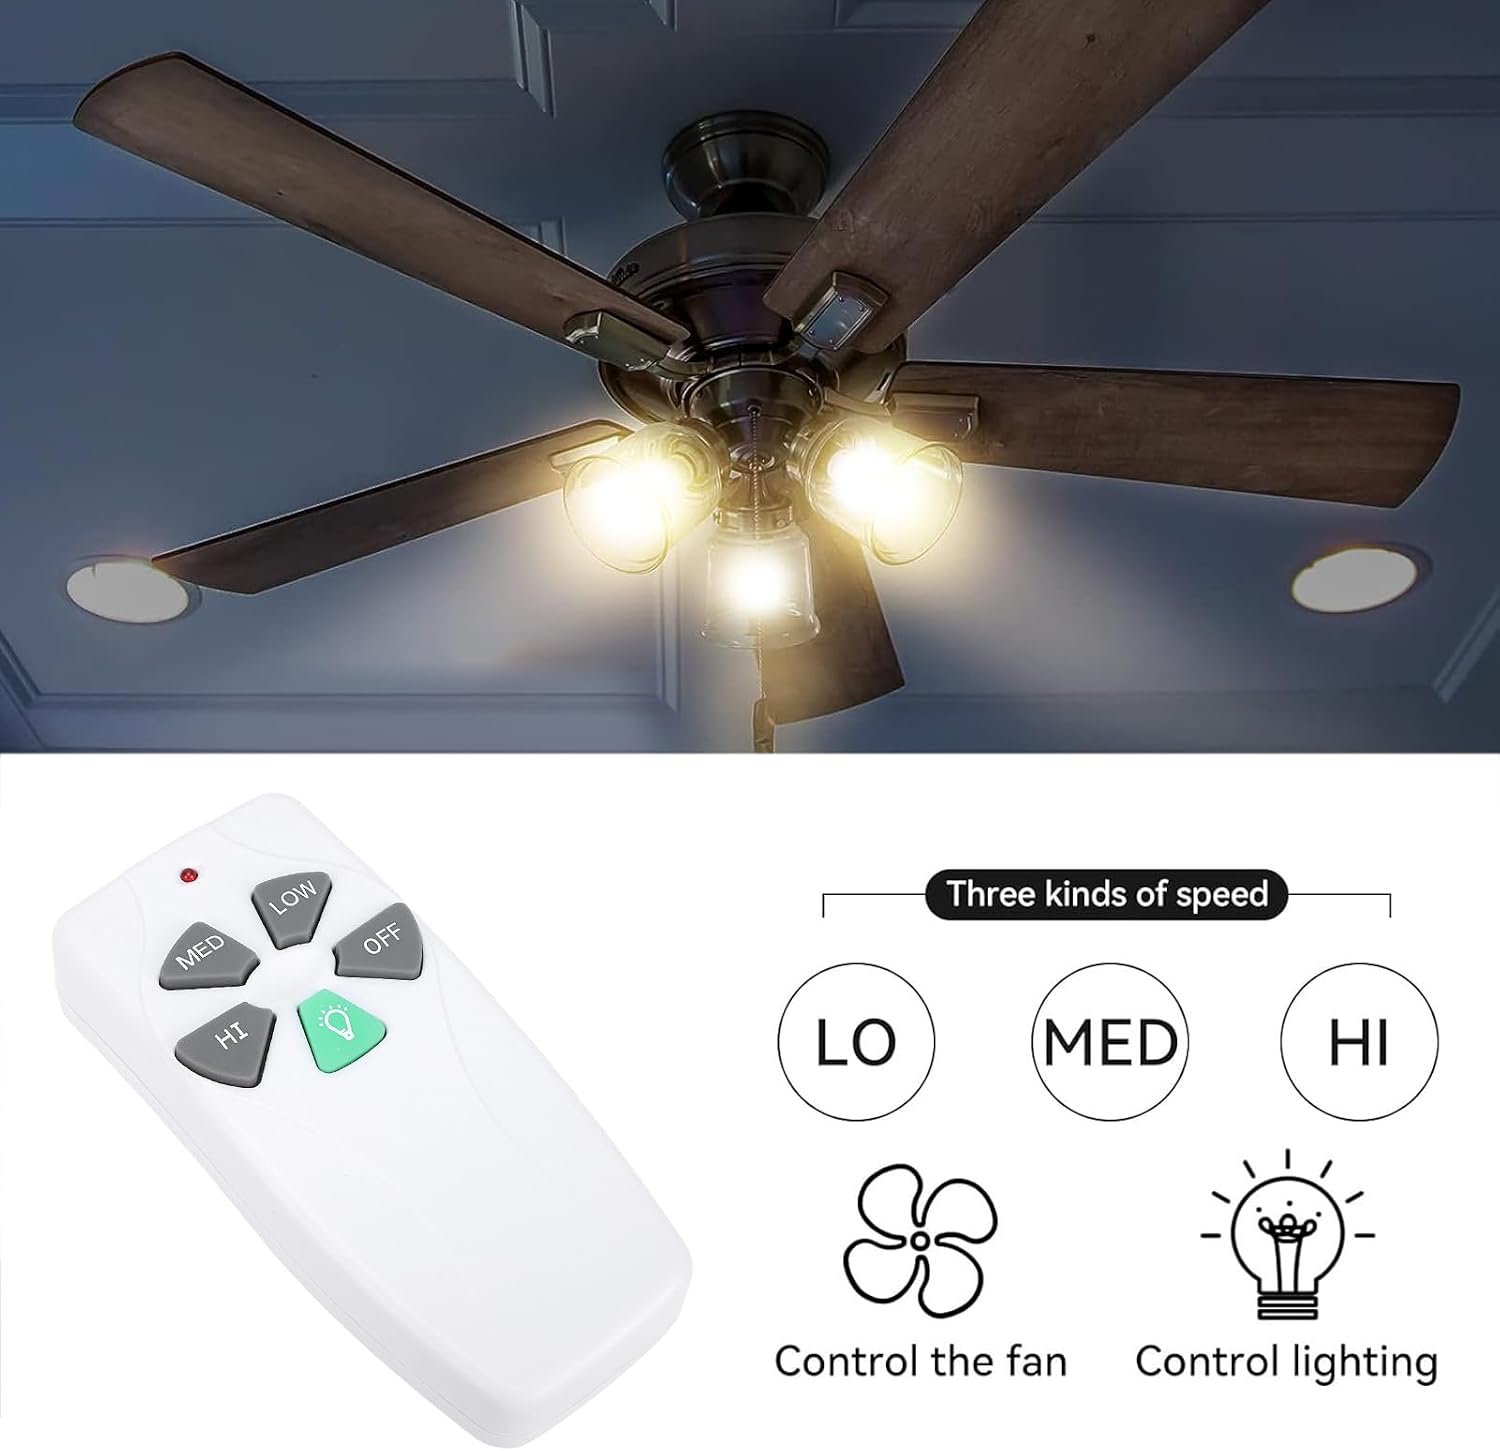
Figure 3: Wisoqu remote control with fan speed and light buttons.
5.1 Fan Speed Control
Use the following buttons to adjust the fan speed:
- HI: Sets the fan to high speed.
- MED: Sets the fan to medium speed.
- LOW: Sets the fan to low speed.
- OFF: Turns the fan off.
5.2 Light Control and Dimmer Function
The green light bulb button controls the ceiling fan's light.
- Press the Light button once to turn the light ON or OFF.
- To dim the light, press and hold the Light button. The light will cycle through its dimming range. Release the button when the desired brightness is reached.
Note on Dimming: The dimming function is compatible with incandescent bulbs and dimmable LED lamps. Most standard LED and CFL lights are non-dimmable; for these, the remote will only control their ON/OFF functionality.
6. Compatibility
This 303.9MHz ceiling fan remote control replacement is designed to be compatible with a wide range of ceiling fan brands and models. It seamlessly replaces models such as 2AZPFAN53T, FAN53TW, 2AAZPFAN53T, FAN-HD, L3HFAN35T1, L3HFAN35T2, UC7030T, CHQ7030T, FAN-11T, FAN-HD5, KUJCE9103, CHQ8BT7030T, L3H2014FANHD, and L3H2010FANHD. It is compatible with brands like , Allen+, and Bay, among others.
Always ensure your fan's receiver operates at 303.9MHz and that the dip switch settings can be matched for proper functionality.
7. Maintenance
7.1 Battery Replacement
When the remote control's range decreases or buttons become unresponsive, it's time to replace the battery. Follow the steps in Section 4.1 for battery installation.
7.2 Cleaning
Wipe the remote control with a soft, dry cloth. Do not use abrasive cleaners or solvents, as these may damage the surface or internal components.
8. Troubleshooting
- Remote not responding:
- Check if the battery is installed correctly and has sufficient charge. Replace if necessary.
- Verify that the dip switches on the remote match those on the fan's receiver.
- Ensure the remote is within range of the fan's receiver.
- Light not dimming:
- Confirm that the light bulbs installed in your ceiling fan are dimmable (incandescent or dimmable LEDs). Non-dimmable LED/CFL bulbs will only turn ON/OFF.
- Fan not changing speed:
- Ensure the fan's receiver is functioning correctly.
- Re-check dip switch settings.
9. Specifications
- Item Type: Ceiling Fan Remote Control
- Material: ABS
- Color: White
- Battery Type: 1 x MV21 A23 Battery (Not Included)
- Frequency: 303.9MHz
- Max Number of Supported Devices: 1
- Maximum Range: 10 Meters (approx. 32.8 feet)
- Model Name: Wisoqup2liwkjmnc
- Model Number: Wisoqup2liwkjmnc
10. Warranty Information
This Wisoqu product comes with a manufacturer warranty for 90 days from the date of purchase. Please retain your proof of purchase for warranty claims. The warranty covers defects in materials and workmanship under normal use. It does not cover damage caused by misuse, accident, unauthorized modification, or improper installation.
11. Customer Support
If you encounter any issues or have questions not covered in this manual, please contact Wisoqu customer support. Refer to the product packaging or the retailer's website for contact information.