
1. Introduction
Thank you for choosing the XIWBSY T07 PRO Google TV Projector. This manual provides essential information for setting up, operating, and maintaining your projector to ensure optimal performance and longevity. Please read it thoroughly before use.
Package Contents
Verify that all items are present in the package:
- XIWBSY Projector & Stand
- Power Cord
- AV & HDMI Cable
- Remote Control
- User Manual
2. Safety Information
To prevent fire, electric shock, or injury, always follow these safety precautions:
- Do not block ventilation openings. Ensure adequate airflow around the projector.
- Do not look directly into the projector lens when the lamp is on, as the bright light can damage your eyes.
- Use only the power cord and adapter supplied with the projector.
- Keep the projector away from water or other liquids.
- Avoid placing the projector on unstable surfaces.
- Unplug the projector during lightning storms or when unused for long periods.
3. Product Overview
The XIWBSY T07 PRO projector features a compact design with integrated Google TV, offering a versatile entertainment experience. It includes various ports for connectivity and intuitive controls.
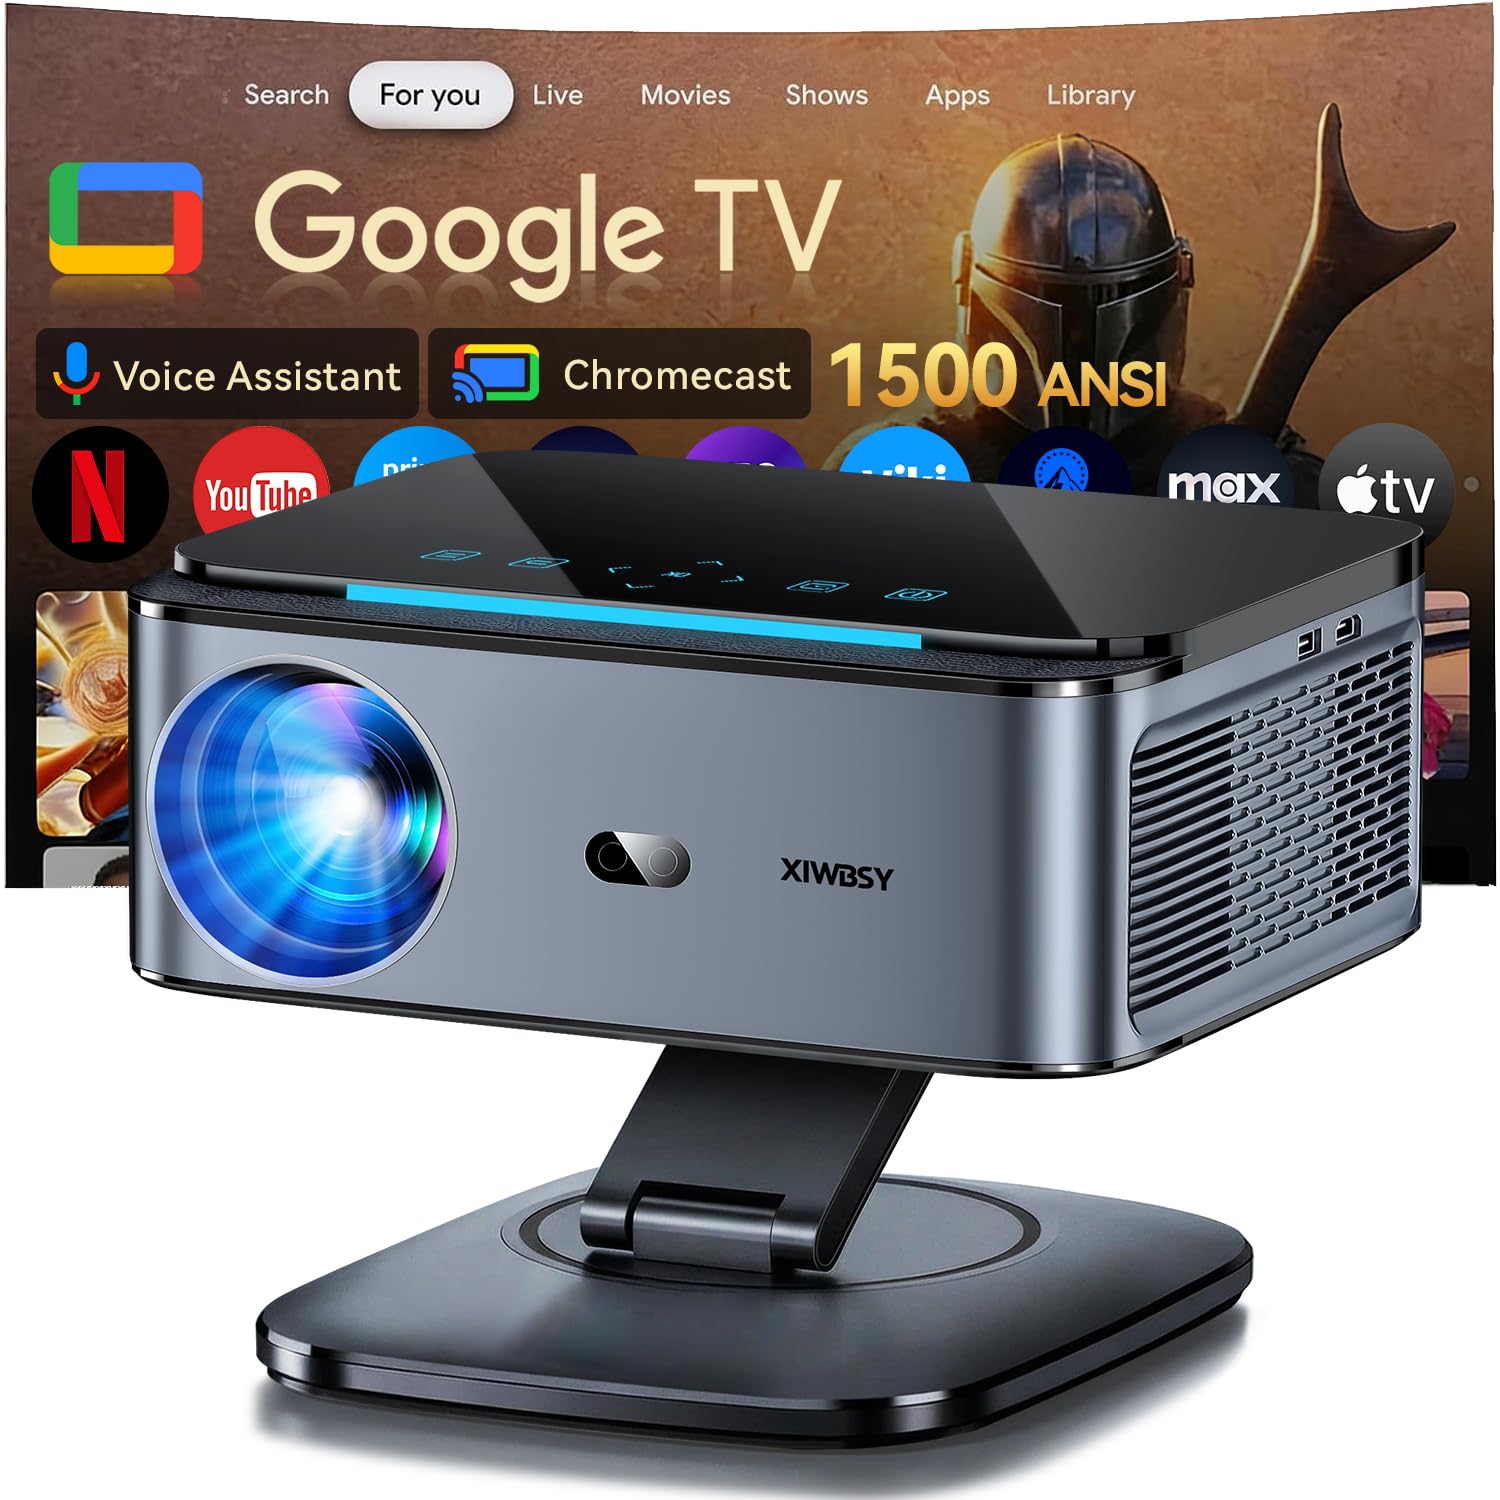
Figure 3.1: Front view of the XIWBSY T07 PRO Projector, showing the lens and brand logo.
Key Components
- Projection Lens: Emits the image onto the screen.
- Touch Panel: Controls on the top of the projector for basic functions.
- Ventilation Grills: Ensures efficient cooling.
- Integrated Stand: Allows for 360° rotation and flexible positioning.
Ports and Connectivity
The projector offers extensive connectivity options:
- HDMI Input (x2): Connects to devices like laptops, gaming consoles, or streaming sticks.
- USB Port (x1): For media playback from USB drives.
- AV Input: For connecting older analog devices.
- 3.5mm Audio Jack: For external audio output.
- Wi-Fi 6: High-speed wireless network connection.
- Bluetooth 5.3: For connecting wireless audio devices.
4. Setup
4.1 Initial Power On
- Connect the power cord to the projector and then to a power outlet.
- Press the power button on the projector or remote control to turn it on.
- Follow the on-screen instructions for initial Google TV setup, including connecting to your Wi-Fi network and logging into your Google account.
4.2 Image Adjustment
The projector features advanced AI-powered visual calibration for easy setup:
- Auto Focus: The projector automatically adjusts the image sharpness within seconds, even after movement.
- Auto Keystone: Corrects distorted images to ensure a perfectly rectangular projection from various angles.
- Auto Screen Fit: Automatically adjusts the image size to fit your projection surface.
- Digital Zoom: Adjust the image size from 100% down to 50% using the remote control.

Figure 4.1: The projector's auto-focus feature ensures a clear image instantly.

Figure 4.2: Auto Keystone correction automatically aligns the projected image.
5. Operating Instructions
5.1 Google TV Interface
The projector comes with an officially licensed Google TV system, providing access to over 10,000 applications including Netflix, YouTube, Prime Video, and Spotify. The intelligent recommendation system tailors content to your viewing preferences.

Figure 5.1: Google TV interface with popular streaming applications.
5.2 Voice Control with Google Assistant
Utilize the integrated Google Assistant for hands-free control. Press the microphone button on the remote control and speak commands such as "Open Netflix," "What's the weather?" or "Increase the volume."

Figure 5.2: Using Google Assistant for voice commands with the remote control.
5.3 Wireless Connectivity (Wi-Fi 6 & Bluetooth 5.3)
- Wi-Fi 6: Enjoy ultra-fast and stable wireless streaming from your iOS, Android, or Windows devices.
- Google Cast: Seamlessly mirror content from your smartphone or tablet to the projector.
- Bluetooth 5.3: Connect external Bluetooth speakers or headphones for enhanced audio.

Figure 5.3: High-speed Wi-Fi 6 for smooth gaming and streaming.

Figure 5.4: Bluetooth 5.3 function for connecting external audio devices.
5.4 Family Group and Content Filtering
Create a family group via your main Google account to share paid apps and subscription services. Each account receives personalized recommendations and an application interface, preventing interference between family members. Child accounts can automatically filter age-inappropriate content.

Figure 5.5: Personalized content for each family member with content filtering.
6. Mounting Options
The XIWBSY T07 PRO projector offers flexible installation methods:
- Tabletop Mounting: Use the integrated 360° rotatable stand for easy placement on any flat surface.
- Tripod Mounting: The projector includes a standard M4 screw hole at the bottom for tripod compatibility.
- Wall Mounting: Securely attach the projector to a wall using a compatible mount (M4 screws).
- Ceiling Mounting: Install the projector on the ceiling for a permanent setup (M4 screws).
- Floor Mounting: Place the projector directly on the floor for low-angle projection.

Figure 6.1: The 360° rotatable stand allows for versatile projection angles.
7. Maintenance
7.1 Cleaning the Lens
Use a soft, lint-free cloth specifically designed for optical lenses to gently wipe the projector lens. Avoid using abrasive cleaners or excessive force, which can scratch the lens.
7.2 Ventilation and Cooling
The projector features an efficient bi-directional dual-fan cooling system to dissipate heat and extend lamp life. Ensure that the ventilation grills are not obstructed to maintain optimal cooling performance. The fan noise is kept below 35 decibels for a quiet viewing experience.
7.3 Lamp Life
The light source has a lifespan of approximately 60,000 hours. Proper ventilation and usage can help maximize its longevity.
8. Troubleshooting
If you encounter issues with your projector, refer to the following common problems and solutions:
| Problem | Possible Cause / Solution |
|---|---|
| No image / Power not turning on | Check if the power cord is securely connected. Ensure the power outlet is functional. |
| Image is blurry | Allow the Auto Focus feature to calibrate. If needed, manually adjust focus via settings. |
| Image is distorted (trapezoid shape) | The Auto Keystone correction should activate automatically. If not, check settings for manual adjustment. |
| Bluetooth device not found | Ensure the Bluetooth device is in pairing mode. Navigate to the projector's settings > Bluetooth to search and connect. |
| Cannot start directly in HDMI mode | After powering on, navigate to the input source menu (usually accessible via the remote) and select the desired HDMI input. Some projectors may not default to HDMI on startup. |
| No sound or low sound | Check the volume level on both the projector and the connected source device. Ensure external speakers are properly connected and powered on if used. |
9. Specifications
| Feature | Detail |
|---|---|
| Brand | XIWBSY |
| Model | T07 PRO |
| Recommended Uses | Business, Home Cinema, Gaming, Education |
| Connectivity Technology | Bluetooth, Chromecast, HDMI, USB, Wi-Fi 6 |
| Display Resolution | 1920 x 1080 (Native 1080p) |
| Maximum Display Resolution | 4096 x 2160 Pixels (4K Supported Input) |
| Display Type | LCD |
| Product Dimensions | 25.5L x 22W x 15H centimeters |
| Form Factor | Portable |
| Mounting Type | Ceiling Mount, Floor Mount, Wall Mount, Table Mount, Tripod Mount |
| Brightness | 1500 ANSI Lumens (38000 Lumens marketing value) |
| Color | Pearl Grey |
| Power Consumption | 105 Watts |
| Control Type | Voice Control, Remote Control |
| Compatible Devices | Game Console, Speaker, Laptop, Smartphone, Tablet |
| Contrast Ratio | 20000:1 |
| Maximum Projection Distance | 7 Meters |
| Light Source Lifespan | 60000 Hours |
| Maximum Image Size | 250 Inches |
| Minimum Projection Distance | 1.4 Meters |
| Minimum Image Size | 40 Inches |
| Video Encoding | H.265 |
| Image Quality Enhancement | HDR10 |
| Weight | 2.64 Kilograms |
10. Warranty and Support
10.1 Product Warranty
The XIWBSY T07 PRO Projector comes with a 1-year warranty from the date of purchase. This warranty covers manufacturing defects and malfunctions under normal use. Please retain your proof of purchase for warranty claims.
10.2 Customer Support
For any questions, technical assistance, or warranty inquiries, please contact our customer service team:
- Email: support01@lthjm.com
- Our support team is available 24 hours a day, 7 days a week.
We are committed to providing high-quality products and reliable after-sales service.
