
1. Introduction and Overview
The ASRock B850M Challenger WiFi White is a Micro-ATX motherboard designed for AMD Socket AM5 processors, supporting Ryzen 9000, 8000, and 7000 Series. It features a robust 8+1+1 phase power design for stable performance. This motherboard integrates advanced connectivity options including WiFi 7 and 2.5G LAN, alongside PCIe 5.0 for graphics and storage, and DDR5 memory support.
Key features include:
- Gamer-Focused AM5 Platform: Supports AMD Socket AM5 Ryzen 9000, 8000, and 7000 Series processors.
- Striking White Aesthetic: Clean white PCB and accents for visually cohesive PC builds.
- Enhanced Power Design: 8+1+1 phase power delivery with Dr.MOS for stable performance.
- High-Capacity DDR5 Memory: Four DIMM slots supporting dual-channel DDR5 up to 8000+(OC) with XMP and EXPO compatibility.
- PCIe 5.0 for Graphics & Storage: One PCIe 5.0 x16 slot and a Blazing M.2 (PCIe Gen5x4) socket.
- Next-Gen Wireless Connectivity: 802.11be WiFi 7 module and Bluetooth 5.4.
- Competitive Gaming Edge: ASRock Lightning Gaming Ports (USB32_56) for reduced input latency.
- Premium Wired Networking & Audio: Realtek 2.5G LAN with Dragon software and Realtek ALC897 audio with Nahimic Audio.
Video: ASRock New B850 Challenger Series Motherboard. This video provides an overview of the key features and design of the ASRock B850 Challenger series motherboards.
2. Setup and Installation
2.1 Motherboard Layout
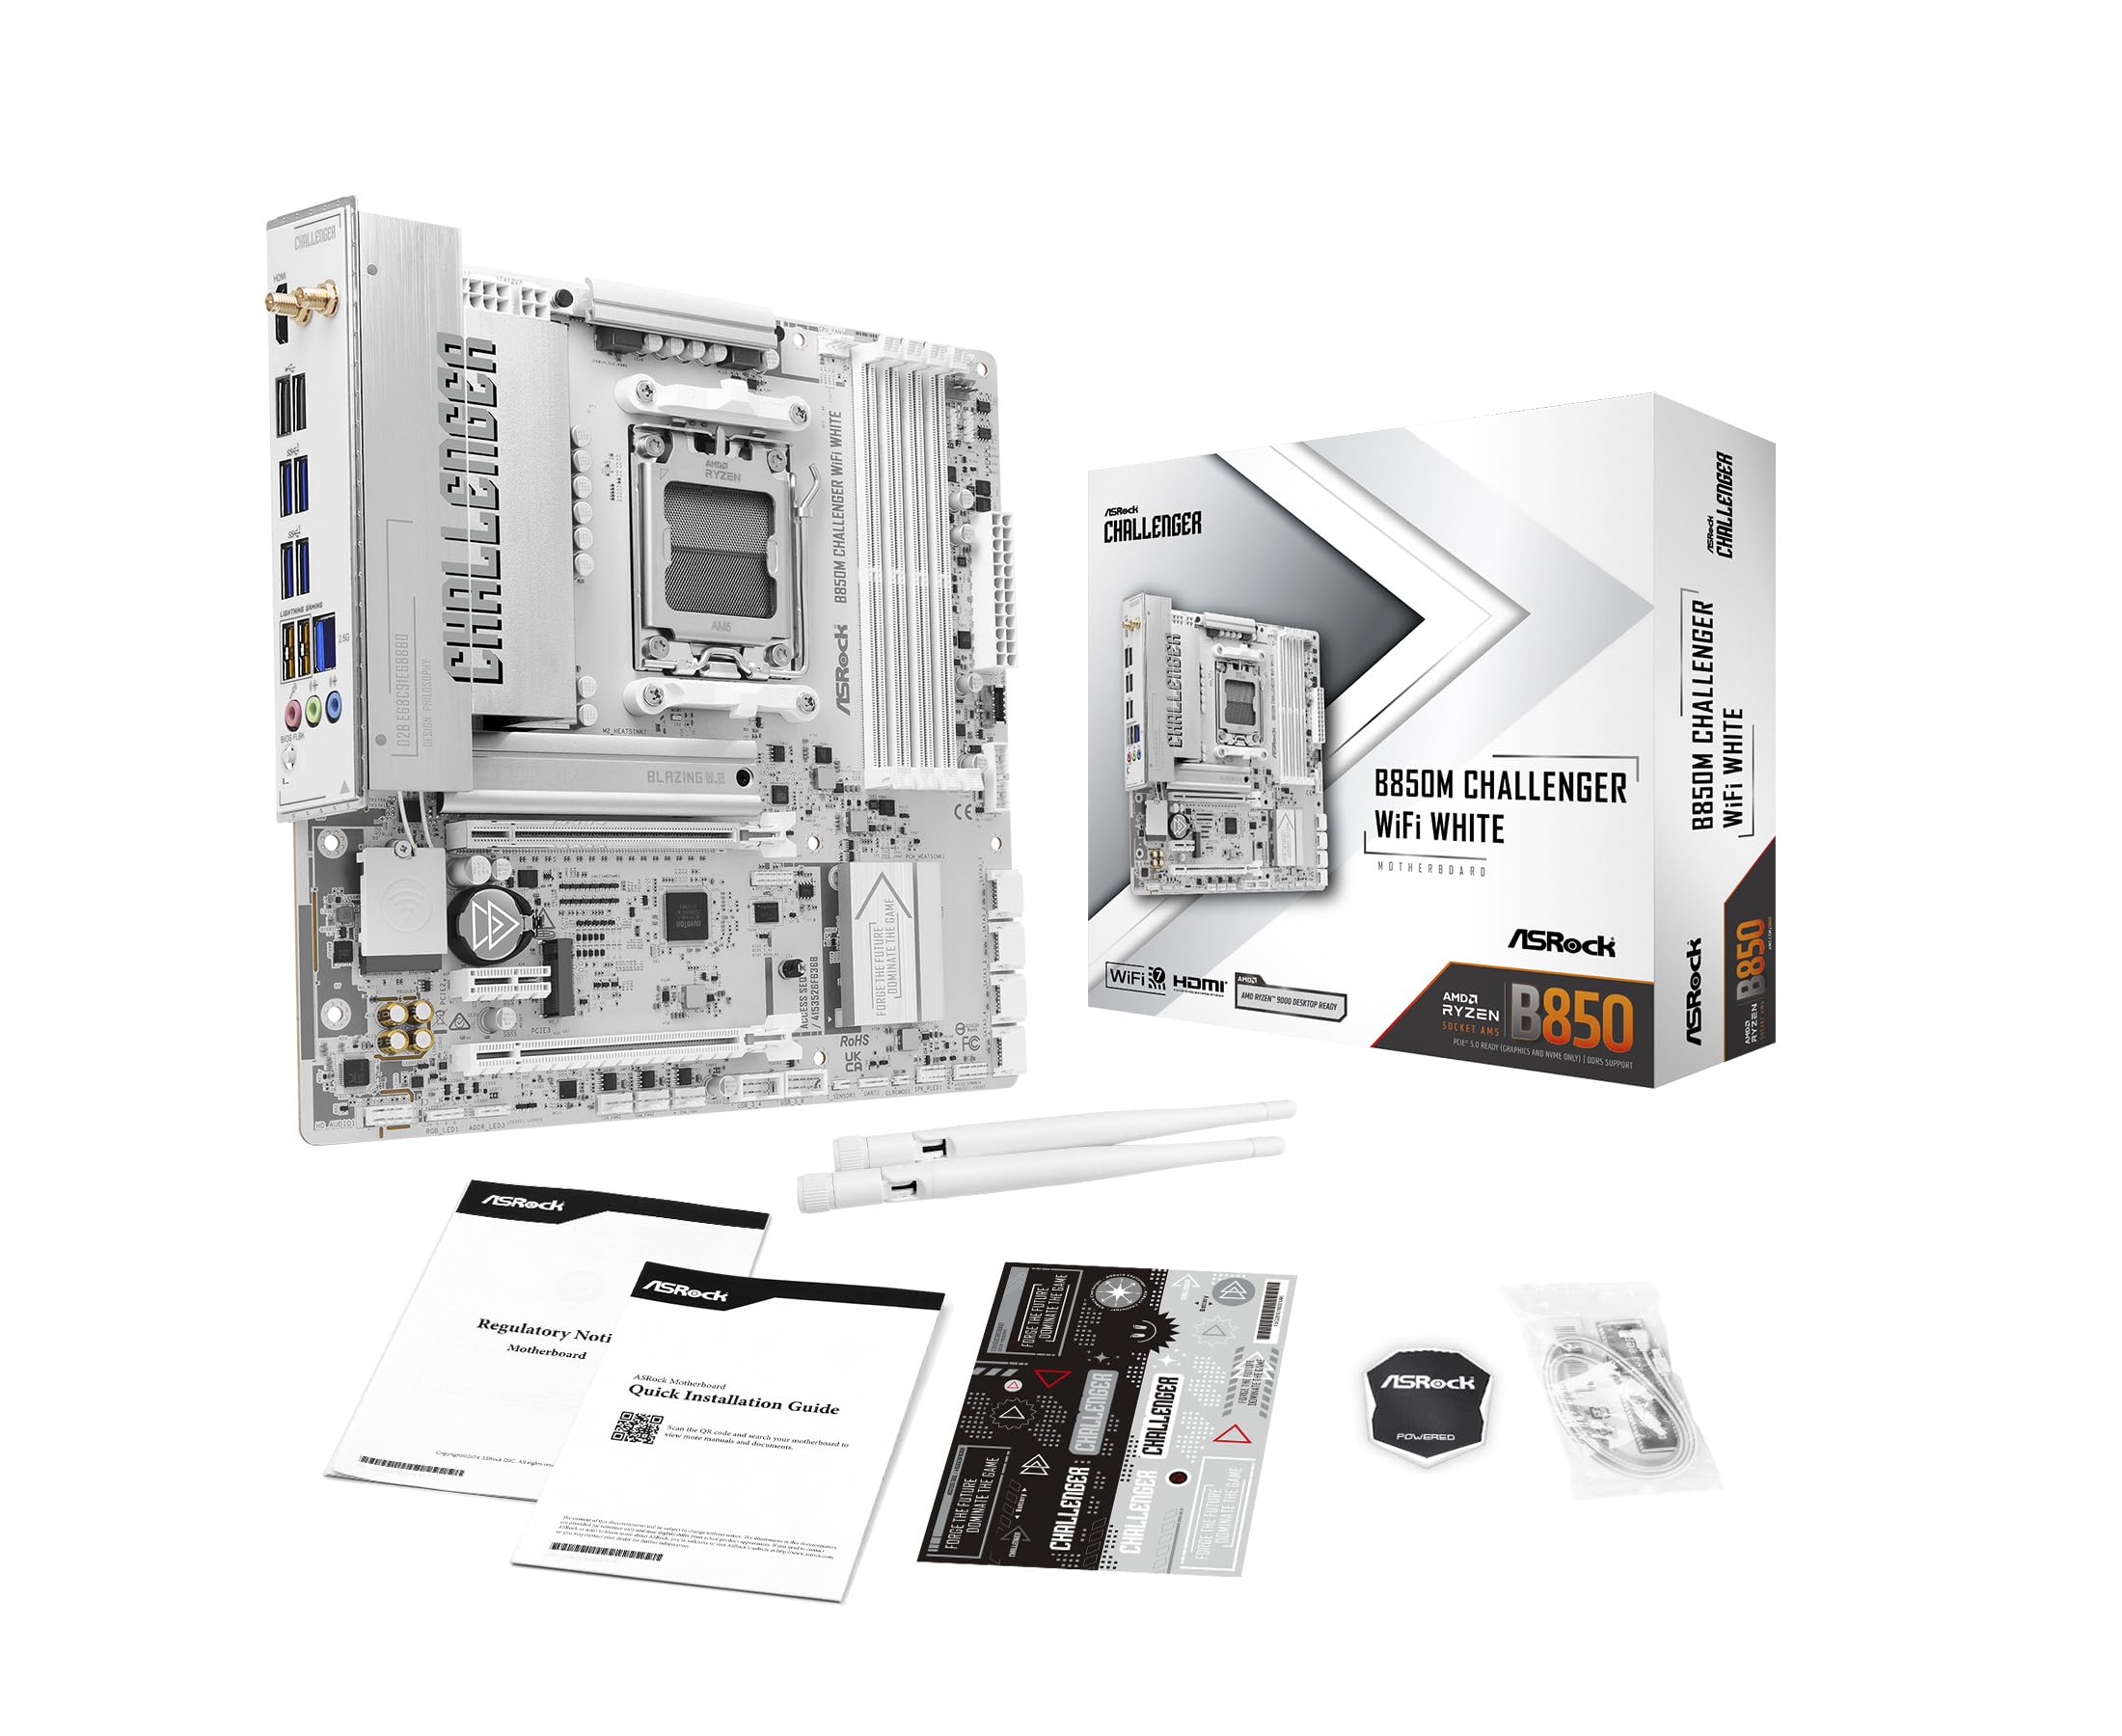
Image: Top-down view of the ASRock B850M Challenger WiFi White Micro-ATX motherboard, highlighting key components such as the CPU socket, DIMM slots, PCIe slots, and M.2 slots.
2.2 Processor Installation
Before installing the processor, ensure the CPU socket cover is removed. The cover has a label instructing to INSTALL PROCESSOR BEFORE REMOVING COVER TO PROTECT SOCKET CONTACTS. SAVE AND REPLACE COVER IF PROCESSOR IS REMOVED. Carefully align the processor with the socket, matching the triangular markers on both the CPU and the socket. Lower the CPU gently into the socket without forcing it. Once seated, close the load plate and secure the retention lever.

Image: Close-up view of the CPU socket on the ASRock B850M Challenger WiFi White motherboard. The protective cover is visible with instructions for processor installation.
2.3 Memory (RAM) Installation
Locate the four DDR5 DIMM slots. Open the clips on both ends of the slot. Align the notch on the DDR5 memory module with the key in the DIMM slot. Insert the module firmly until the clips snap into place, securing the memory. For dual-channel operation, refer to the motherboard manual for recommended slot configurations.
2.4 M.2 SSD Installation
The motherboard features a Blazing M.2 (PCIe Gen5x4) socket. To install an M.2 SSD, remove the M.2 heatsink. Insert the M.2 SSD into the slot at an angle, then gently push it down and secure it with the provided screw or tool-less mechanism. Reattach the M.2 heatsink for optimal thermal performance.
2.5 BIOS Update
Updating the BIOS can improve system stability and compatibility. ASRock motherboards often support BIOS Flashback, allowing updates without a CPU or RAM installed. Prepare a USB drive with the latest BIOS file from the ASRock website. Insert the USB drive into the designated BIOS Flashback port and follow the instructions in the full manual for the specific update procedure.
Video: Motherboard BIOS Update Tutorial. This video demonstrates the process of updating the BIOS on an ASRock motherboard using a USB drive.
3. Operating Instructions
3.1 Initial Boot-up
After assembling your system, connect the power supply, monitor, keyboard, and mouse. Press the power button on your PC case. The system should initiate the boot process. If no display appears, refer to the troubleshooting section.
3.2 BIOS/UEFI Configuration
During boot-up, press the Del or F2 key to enter the BIOS/UEFI setup utility. Here you can configure various system settings, including boot order, memory profiles (XMP/EXPO), fan speeds, and overclocking parameters. Save changes before exiting.
3.3 Driver Installation
After installing your operating system (Windows 10 or 11 recommended), install the necessary drivers for the motherboard components. These include chipset drivers, LAN drivers, Wi-Fi drivers, audio drivers, and any other utility drivers. Drivers can be found on the ASRock support website for your specific motherboard model.
3.4 Network Connectivity
- Wired LAN: Connect an Ethernet cable to the 2.5G LAN port. The Dragon software can help prioritize network traffic for gaming.
- Wireless (WiFi 7): Install the included WiFi antenna. Ensure WiFi 7 drivers are installed. Connect to your wireless network through the operating system settings. Note that WiFi 7 (6GHz band) is supported on Windows 11 only, and availability depends on regional regulations.
- Bluetooth 5.4: Enable Bluetooth in your operating system settings to connect compatible devices.
4. Maintenance
Regular maintenance helps ensure the longevity and optimal performance of your motherboard and PC system.
- Dust Removal: Periodically clean dust from inside your PC case, especially from heatsinks and fans, using compressed air. Ensure the system is powered off and unplugged before cleaning.
- Driver Updates: Keep your motherboard drivers and BIOS updated to the latest versions available on the ASRock website. This can provide performance improvements, bug fixes, and compatibility enhancements.
- Cable Management: Ensure all cables are neatly routed and not obstructing airflow within the case.
- BIOS Battery: The CMOS battery (CR2032) typically lasts several years. If you experience issues with BIOS settings resetting, it may need replacement.
5. Troubleshooting
If you encounter issues with your motherboard, consider the following troubleshooting steps:
- No Display Output:
- Check if the monitor is connected to the graphics card (if dedicated) or the motherboard's integrated graphics port.
- Ensure all power cables (24-pin ATX, 8-pin CPU, PCIe power for GPU) are securely connected.
- Reseat the RAM modules. Try booting with only one RAM stick.
- Verify the CPU is correctly seated and the cooler is properly installed.
- System Not Booting:
- Clear CMOS: Locate the CLRCMOS1 jumper or button on the motherboard and follow the instructions in the full manual to reset BIOS settings.
- Check for any diagnostic LEDs or POST codes on the motherboard, if available, and consult the full manual for their meaning.
- Ensure the power supply is functional and providing adequate power.
- Peripheral Issues (USB, LAN, Audio):
- Ensure all necessary drivers are installed and up to date.
- Check physical connections for cables.
- Test peripherals on another system if possible to rule out device failure.
- Intermittent Stability:
- Check CPU and GPU temperatures to ensure proper cooling.
- Verify RAM stability using memory diagnostic tools.
- Ensure BIOS is updated to the latest stable version.
For more detailed troubleshooting, refer to the comprehensive user manual available on the ASRock support website or contact ASRock technical support.
6. Specifications
| Feature | Specification |
|---|---|
| Brand | ASRock |
| Model Name | B850M CHALLENGER WIFI WHITE |
| CPU Socket | Socket AM5 |
| Compatible Processors | AMD Ryzen 9000/8000/7000 Series |
| Chipset Type | AMD B850 |
| RAM Memory Technology | DDR5 |
| Memory Clock Speed | 8000 MHz (OC) |
| Max RAM Memory Size | 256 GB |
| Memory Slots Available | 4 |
| Graphics Card Interface | Integrated, PCI Express (PCIe 5.0 x16 slot) |
| Total PCIe Ports | 3 |
| Total SATA Ports | 4 |
| Total USB Ports | 15 |
| Ethernet Ports | 1 (2.5G LAN) |
| Wireless Connectivity | WiFi 7 (802.11be), Bluetooth 5.4 |
| Form Factor | Micro ATX (9.6-in x 9.6-in) |
| Platform | Windows 10, Windows 11 |
| Model Number | 90-MXBU50-A0UAYAZ |
Note: Specifications are subject to change without notice. For the most up-to-date information, please refer to the official ASRock product page.
7. Warranty and Support
This ASRock motherboard comes with a 3 Years Manufacturer Warranty. For warranty claims or technical assistance, please contact ASRock support directly.
For any product questions or assistance, you may also contact ASRock directly through Amazon's messaging system.
Additional resources, including the full user manual and updated drivers, can be found on the official ASRock website.


