
1. Introduction
The Rongta TH110 is a versatile Bluetooth handheld label maker designed for efficient organization in various environments, including home, office, and garden. It features a built-in QWERTY keyboard for standalone operation and Bluetooth connectivity for enhanced functionality via a mobile application. This device supports 13 font styles, adjustable layouts, and offers a wide range of built-in borders, icons, and fonts for personalized label creation. Its quick tape replacement system and easy-tear release paper ensure convenience and strong adhesion to multiple surfaces.
2. Package Contents
Please verify that all items listed below are included in your package:
- 1 x Rongta TH110 Label Maker
- 1 x Laminated Label Tape (pre-installed or separate)
- 1 x USB Type-C Cable
- 1 x User Manual

Image: Contents of the Rongta TH110 Label Maker package, including the label maker, a roll of laminated label tape, a USB Type-C cable, and the user manual.
3. Setup
3.1 Powering the Device
The Rongta TH110 label maker offers dual power options:
- Battery Power: Insert 6 x AAA batteries (not included) into the battery compartment located on the underside of the device. Ensure correct polarity.
- USB-C Power: Connect the provided USB Type-C cable to the label maker and a compatible USB power adapter (5V/2A recommended) or a power bank. The device can operate directly from USB power without batteries.

Image: Demonstrates the dual power options for the Rongta TH110, showing the device connected via USB-C cable to a power adapter and the battery compartment with AAA batteries installed.
3.2 Installing Label Tape
- Open the tape compartment cover on the label maker.
- Insert the label tape cartridge, ensuring it clicks securely into place. The tape should feed through the output slot.
- Close the tape compartment cover.
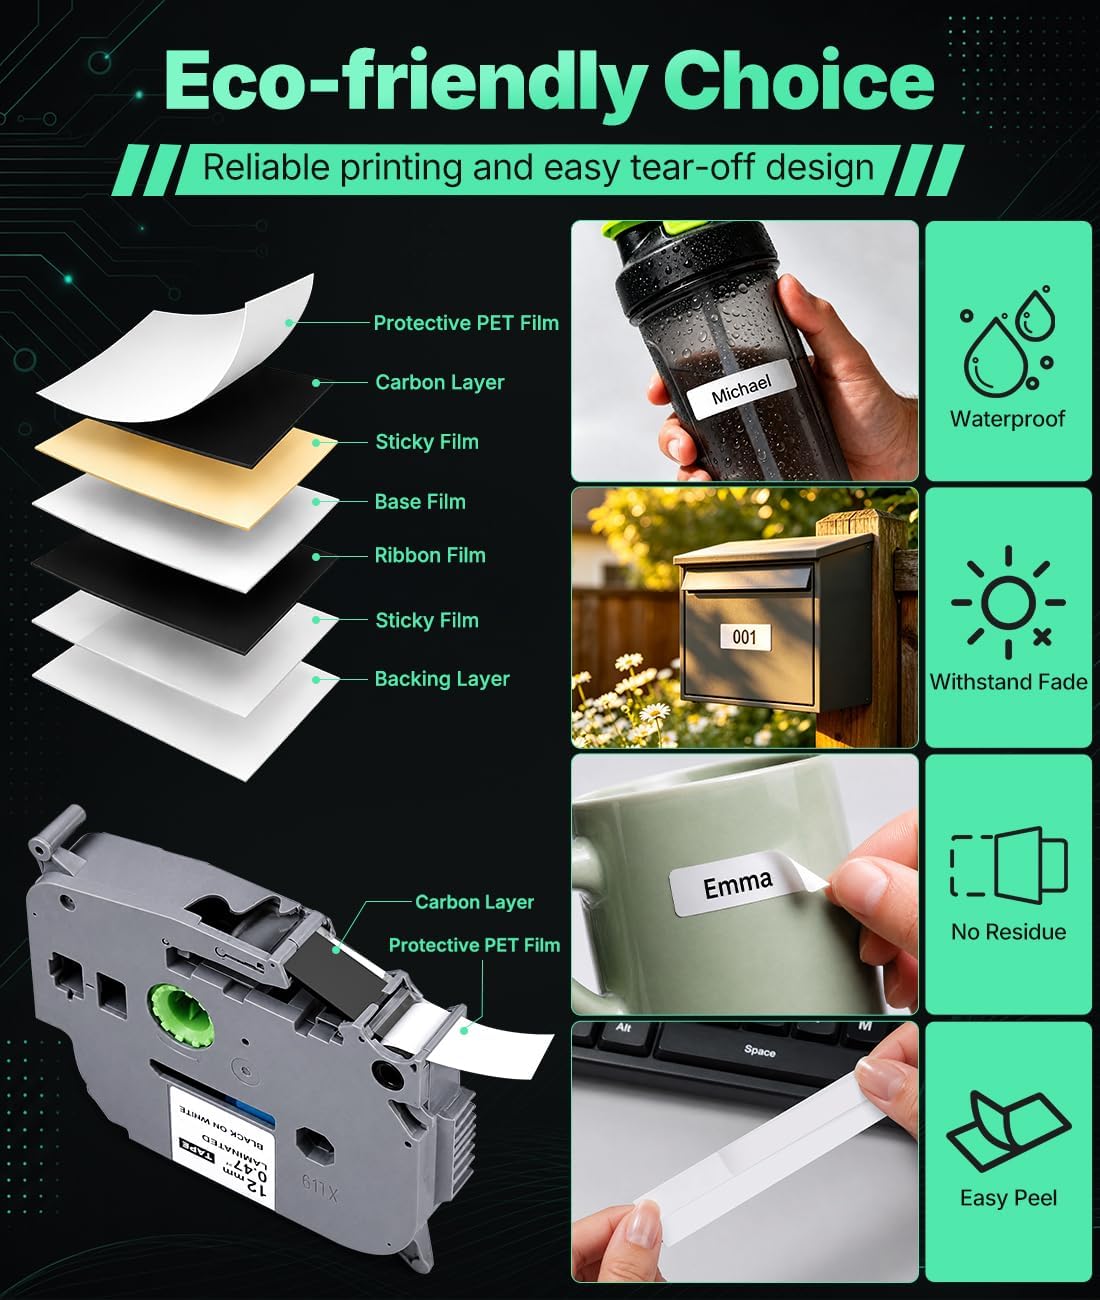
Image: Illustrates the layered structure of the label tape and its features like waterproof, fade resistance, no residue, and easy peel. Also shows the tape cartridge being inserted into the label maker.
3.3 App Installation (Optional)
For advanced features and design options, you can connect your label maker to the companion mobile application:
- Scan the QR code provided in the product packaging or on the device itself, or visit the official Rongta website to download the SoPrint-Abroad app.
- Alternatively, for additional resources, you may find the RTLabel app useful, available at http://www.ttxsapp.com/.
- Enable Bluetooth on your mobile device and follow the app's instructions to pair with the TH110 label maker. The app supports multi-connection for up to one iOS and four Android devices simultaneously.

Image: Shows the Rongta TH110 label maker and a smartphone displaying the companion app interface, highlighting both keyboard input and Bluetooth app editing/printing options. A QR code for app download is visible.
4. Operation
4.1 Basic Label Creation (Using Keyboard)
- Turn on the label maker by pressing the power button. The backlit screen will illuminate.
- Use the QWERTY keyboard to type your desired text.
- Utilize the function keys (e.g., Font, Esc, OK, Labs) and directional arrows to adjust font styles, sizes, add symbols, or change layout options.
- Press the Print button to print your label.

Image: Displays the Rongta TH110 label maker with its screen showing a label being edited. The image also highlights the availability of over 10 fonts, 30 frames, and 500+ symbols for label customization.
4.2 Advanced Label Creation (Using App)
When connected via Bluetooth to the mobile app, you can access a wider range of customization options:
- Select from a greater variety of fonts, icons, and borders.
- Utilize features like mirror printing and vertical printing.
- Preview your label design on the app before printing.
- Send the design to the label maker for printing.
4.3 Built-in Cutter
The TH110 features a built-in cutter for convenient and precise label trimming. After printing, simply press the cutter lever to cleanly cut the label without the need for scissors.

Image: Close-up view of the Rongta TH110 label maker, highlighting its built-in cutter, responsive buttons, and USB-C port. A hand is shown operating the device.
4.4 Cable Labeling Modes
The label maker includes specific modes to simplify electrical and cable identification:
- Cable Wrap: Creates labels that wrap around cables, providing clear identification.
- Cable Flag: Generates labels that fold into a flag shape, ideal for small cables or when space is limited.
- Faceplate: Designed for labeling faceplates or patch panels.

Image: Demonstrates the three cable labeling modes: Cable Wrap, Cable Flag, and Faceplate, showing examples of labels applied to network cables and wall outlets.
4.5 Versatile Applications
The Rongta TH110 is suitable for a wide range of labeling tasks:
- Organizing storage bins for acrylic parts and screws.
- Labeling wires and cables for easy identification in electrical setups.
- Creating safety and warning labels for equipment.
- Asset tagging for equipment and inventory management.

Image: Shows various applications of the Rongta TH110 label maker, including labeling storage bins, wires, safety panels, and laboratory equipment.
5. Maintenance
5.1 Replacing Label Tape
When the label tape runs out or you wish to change tape types, follow the installation steps outlined in Section 3.2. Ensure the device is powered off before replacing cartridges.
5.2 Cleaning the Device
To maintain optimal performance and appearance:
- Wipe the exterior of the label maker with a soft, dry cloth.
- Do not use abrasive cleaners or solvents.
- Periodically check the print head area for any dust or adhesive residue. If necessary, gently clean with a cotton swab lightly dampened with isopropyl alcohol, ensuring it is completely dry before use.
6. Troubleshooting
6.1 Common Issues and Solutions
| Issue | Possible Cause | Solution |
|---|---|---|
| Device does not power on | Low or dead batteries; USB-C cable not connected or faulty. | Replace AAA batteries; ensure USB-C cable is securely connected to a working power source. |
| Labels not printing clearly or blank | Tape cartridge incorrectly installed; print head dirty; tape supply depleted. | Reinstall tape cartridge correctly; clean the print head; replace tape cartridge. |
| Bluetooth connection issues | Bluetooth not enabled on mobile device; incorrect pairing; app issues. | Ensure Bluetooth is on; unpair and re-pair the device; restart the app and label maker. |
| Excessive blank tape before/after print | This is a characteristic of the printer design. | Manually trim excess tape if desired. Consider using the app for more precise control over margins if available. |
| Label tape jams | Tape incorrectly installed; foreign object in tape path. | Open compartment, remove and reinsert tape correctly. Check for obstructions. |
7. Specifications
| Feature | Detail |
|---|---|
| Brand | Rongta |
| Model Name | Handheld Label Maker |
| Model Number | TH110 Label Maker |
| Connectivity Technology | Bluetooth, USB |
| Printing Technology | Thermal |
| Resolution | 203 dpi |
| Max Print Width | 10mm (from description), 12mm (from specifications) |
| Max Print Speed | 20mm/s (from description), 15 ppm (from specifications) |
| Max Print Length | 300mm |
| Power Source | 6 x AAA Batteries, USB-C (5V/2A) |
| Item Weight | 400 Grams |
| Item Dimensions (D x W x H) | 18.5D x 5.4W x 10.9H centimetres |
| Built-in Features | QWERTY Keyboard, Backlit Screen, Built-in Cutter |
| Special Features | Portable, 100+ borders, 500+ icons, 23 languages, 13 font styles, mirror/vertical printing |
| UPC | 798156386078 |
8. Warranty and Support
8.1 Product Warranty
The Rongta TH110 Label Maker comes with a 1-year limited warranty from the date of purchase. This warranty covers manufacturing defects under normal use. Please retain your proof of purchase for warranty claims.
8.2 Customer Support
For technical assistance, troubleshooting, or warranty inquiries, please contact Rongta customer support through their official website or the retailer from whom you purchased the product. Refer to the contact information provided in your product packaging or on the official Rongta website.
