
APYEAR A6
Contents
APYEAR Bike A6 Folding Electric Bicycle User Manual
Model: A6
Introduction
Thank you for choosing the APYEAR Bike A6 Folding Electric Bicycle. This manual provides essential information for the safe operation, maintenance, and troubleshooting of your new electric bike. Please read this manual thoroughly before your first ride and keep it for future reference.
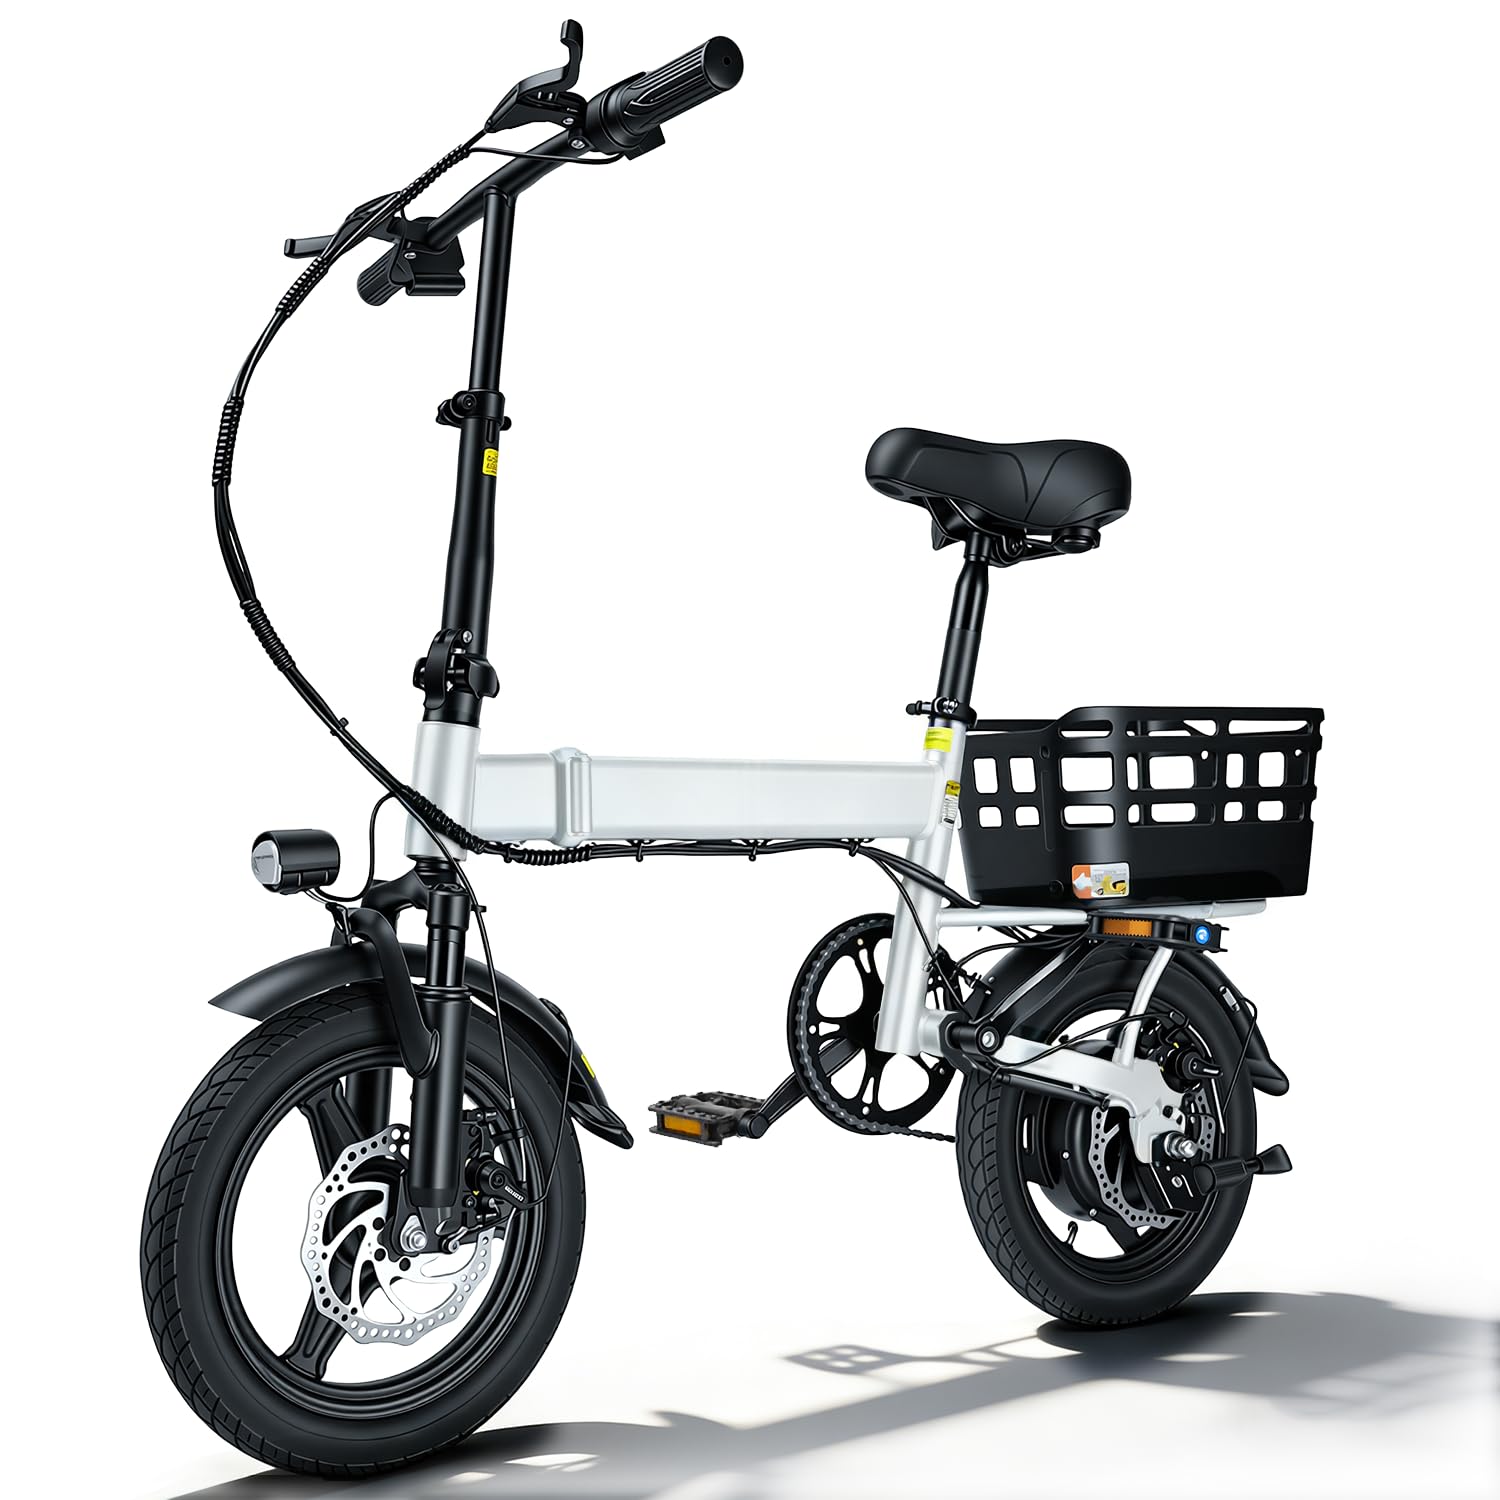
Image: The APYEAR Bike A6, a compact folding electric bicycle.
Safety Information
WARNING: Failure to follow these safety instructions could result in serious injury or death.
- Always wear a helmet that meets safety standards.
- Obey all local traffic laws and regulations.
- Perform a pre-ride inspection before each use (brakes, tires, battery, lights).
- Do not ride under the influence of alcohol or drugs.
- Adjust seat and handlebars to a comfortable and safe riding position.
- Be aware of your surroundings and other road users.
- Do not exceed the maximum weight capacity of the bicycle.
- Keep hands and feet away from moving parts.
- Ensure the battery is securely locked in place before riding.
Package Contents
Please check the box for the following items:
- APYEAR Bike A6 Electric Bicycle (partially assembled)
- Battery Charger
- User Manual (this document)
- Basic Tool Kit (may vary)
Setup and Assembly
Your APYEAR Bike A6 comes partially assembled. Follow these steps to complete the setup:
- Unpacking: Carefully remove the bicycle and all components from the packaging. Retain packaging for future transport or storage.
- Handlebar Installation: Insert the handlebar stem into the fork tube. Ensure it is aligned with the front wheel and tighten the quick-release lever or bolts securely.
- Pedal Installation: Identify the left (L) and right (R) pedals. The left pedal tightens counter-clockwise, and the right pedal tightens clockwise. Apply a small amount of grease to the threads and screw them in firmly.
- Seat Post Adjustment: Insert the seat post into the frame. Adjust the seat height so your feet can comfortably touch the ground when stopped, or so your leg has a slight bend at the knee when the pedal is at its lowest point. Secure with the quick-release lever.
- Tire Inflation: Check tire pressure and inflate to the recommended PSI indicated on the tire sidewall.
- Battery Installation/Charging: Ensure the battery is fully charged before your first ride. Insert the battery into its compartment and lock it if applicable. Refer to the "Charging the Battery" section.
- Brake Check: Test both front and rear brakes to ensure they engage properly and stop the bike effectively. Adjust if necessary.
Operating Instructions
Powering On/Off
- To Power On: Press and hold the power button on the display panel for a few seconds. The display will illuminate.
- To Power Off: Press and hold the power button again until the display turns off.
Pedal Assist System (PAS)
The Bike A6 features a Pedal Assist System. As you pedal, the motor provides assistance, making riding easier. The level of assistance can be adjusted:
- Use the '+' and '-' buttons on the control panel to cycle through the 3 assistance levels.
- Level 1 provides minimal assistance, while Level 3 provides maximum assistance.
- You can also ride the bike without any electrical assistance, like a traditional bicycle.
Throttle Operation (if equipped)
If your model is equipped with a throttle, you can engage the motor without pedaling. Gently twist the throttle grip (usually on the right handlebar) to accelerate. Release the throttle to disengage. Always be mindful of your speed and surroundings when using the throttle.
Braking
The Bike A6 is equipped with Disc Brakes. Use both brake levers simultaneously for effective and safe stopping. The left lever typically controls the front brake, and the right lever controls the rear brake. Apply brakes smoothly to avoid skidding.
Folding and Unfolding
The APYEAR Bike A6 is designed for portability with its folding mechanism.
To Fold:
- Ensure the bike is powered off.
- Lower the seat post completely.
- Fold down the handlebars by releasing the quick-release lever on the stem.
- Locate the main frame hinge (usually in the middle of the frame). Release the safety latch and then the main hinge lever.
- Carefully fold the front and rear sections of the frame together until they latch or secure.
- Some models may have foldable pedals; push them in and fold them up.
To Unfold:
- Reverse the folding process. Ensure all latches and quick-release levers are securely fastened before riding.
- Double-check that the frame hinge is fully locked and the handlebars are secure and aligned.
Charging the Battery
The APYEAR Bike A6 is powered by a rechargeable lithium battery. Proper charging extends battery life.
- Only use the charger provided with your APYEAR Bike A6.
- Ensure the bike is powered off before charging.
- Locate the charging port on the bike (or remove the battery if it's detachable).
- Connect the charger to the charging port, then plug the charger into a standard wall outlet.
- The indicator light on the charger will typically show red during charging and turn green when fully charged.
- Do not overcharge the battery. Disconnect the charger once charging is complete.
- Charging time may vary but typically takes 4-6 hours for a full charge.
- Charge the battery in a well-ventilated area, away from flammable materials.
Maintenance
Regular maintenance ensures the longevity and safe operation of your electric bicycle.
- Tires: Check tire pressure before each ride. Inspect for wear, cuts, or punctures.
- Brakes: Regularly check brake pads for wear and ensure brake levers operate smoothly. Adjust cable tension as needed.
- Chain: Keep the chain clean and lubricated. Inspect for rust or damage.
- Fasteners: Periodically check all bolts, nuts, and quick-release levers for tightness.
- Battery Care: Store the battery in a cool, dry place. If storing for extended periods, charge it to about 50-70% every 1-2 months.
- Cleaning: Clean the bike with a damp cloth. Avoid high-pressure washing directly on electrical components.
- Professional Service: For complex repairs or adjustments, consult a qualified bicycle mechanic.
Troubleshooting
Here are some common issues and their potential solutions:
| Problem | Possible Cause | Solution |
|---|---|---|
| Bike does not power on. | Battery is dead or not properly installed. | Charge the battery. Ensure battery is fully inserted and locked. |
| Motor not assisting. | PAS level is 0, battery low, or brake levers engaged. | Increase PAS level. Charge battery. Ensure brake levers are fully released. |
| Brakes feel weak. | Worn brake pads or loose cable. | Inspect and replace brake pads. Adjust brake cable tension. |
| Unusual noises. | Loose components, dry chain, or rubbing parts. | Check all fasteners. Lubricate chain. Identify and adjust rubbing parts. |
If you encounter issues not listed here or cannot resolve a problem, please contact APYEAR customer support.
Specifications
| Feature | Detail |
|---|---|
| Model Name | Bike A6 |
| Model Number | A6 |
| Bike Type | Electric Bike |
| Brand | APYEAR |
| Age Range | Adult |
| Number of Speeds | 3 |
| Wheel Size | 14 inches |
| Frame Material | Aluminum |
| Suspension Type | Front |
| Special Feature | Foldable |
| Brake Style | Disc |
| Power Source | Electric motor |
| Battery Energy Content | 576 watt-hours |
| Included Components | Charger |
Warranty Information
The APYEAR Bike A6 comes with a Limited Warranty. Please refer to the warranty card included with your product or visit the official APYEAR website for detailed terms and conditions regarding coverage, duration, and claims process.
Customer Support
For further assistance, technical support, or to purchase replacement parts, please contact APYEAR customer service or visit our official brand store:
Visit the APYEAR Store on Amazon
Please have your model number (A6) and purchase details ready when contacting support.
Documents and downloads
Ask a question about this manual
Ask about setup, troubleshooting, compatibility, parts, safety, or missing instructions. Manuals+ will review the question and use this page’s manual context to help answer it.