
1. Introduction
The Klanata HCW-03 is a DC 12V multi-function delayed circuit module designed for precise timing control in various applications. It features an industrial-grade single-chip microcomputer for reliable operation and two adjustable resistors for independent control of ON and OFF durations. This module supports flexible activation methods and offers a wide range of timing specifications.
Package Contents:
- 1 x HCW-03 Delayed Circuit Module
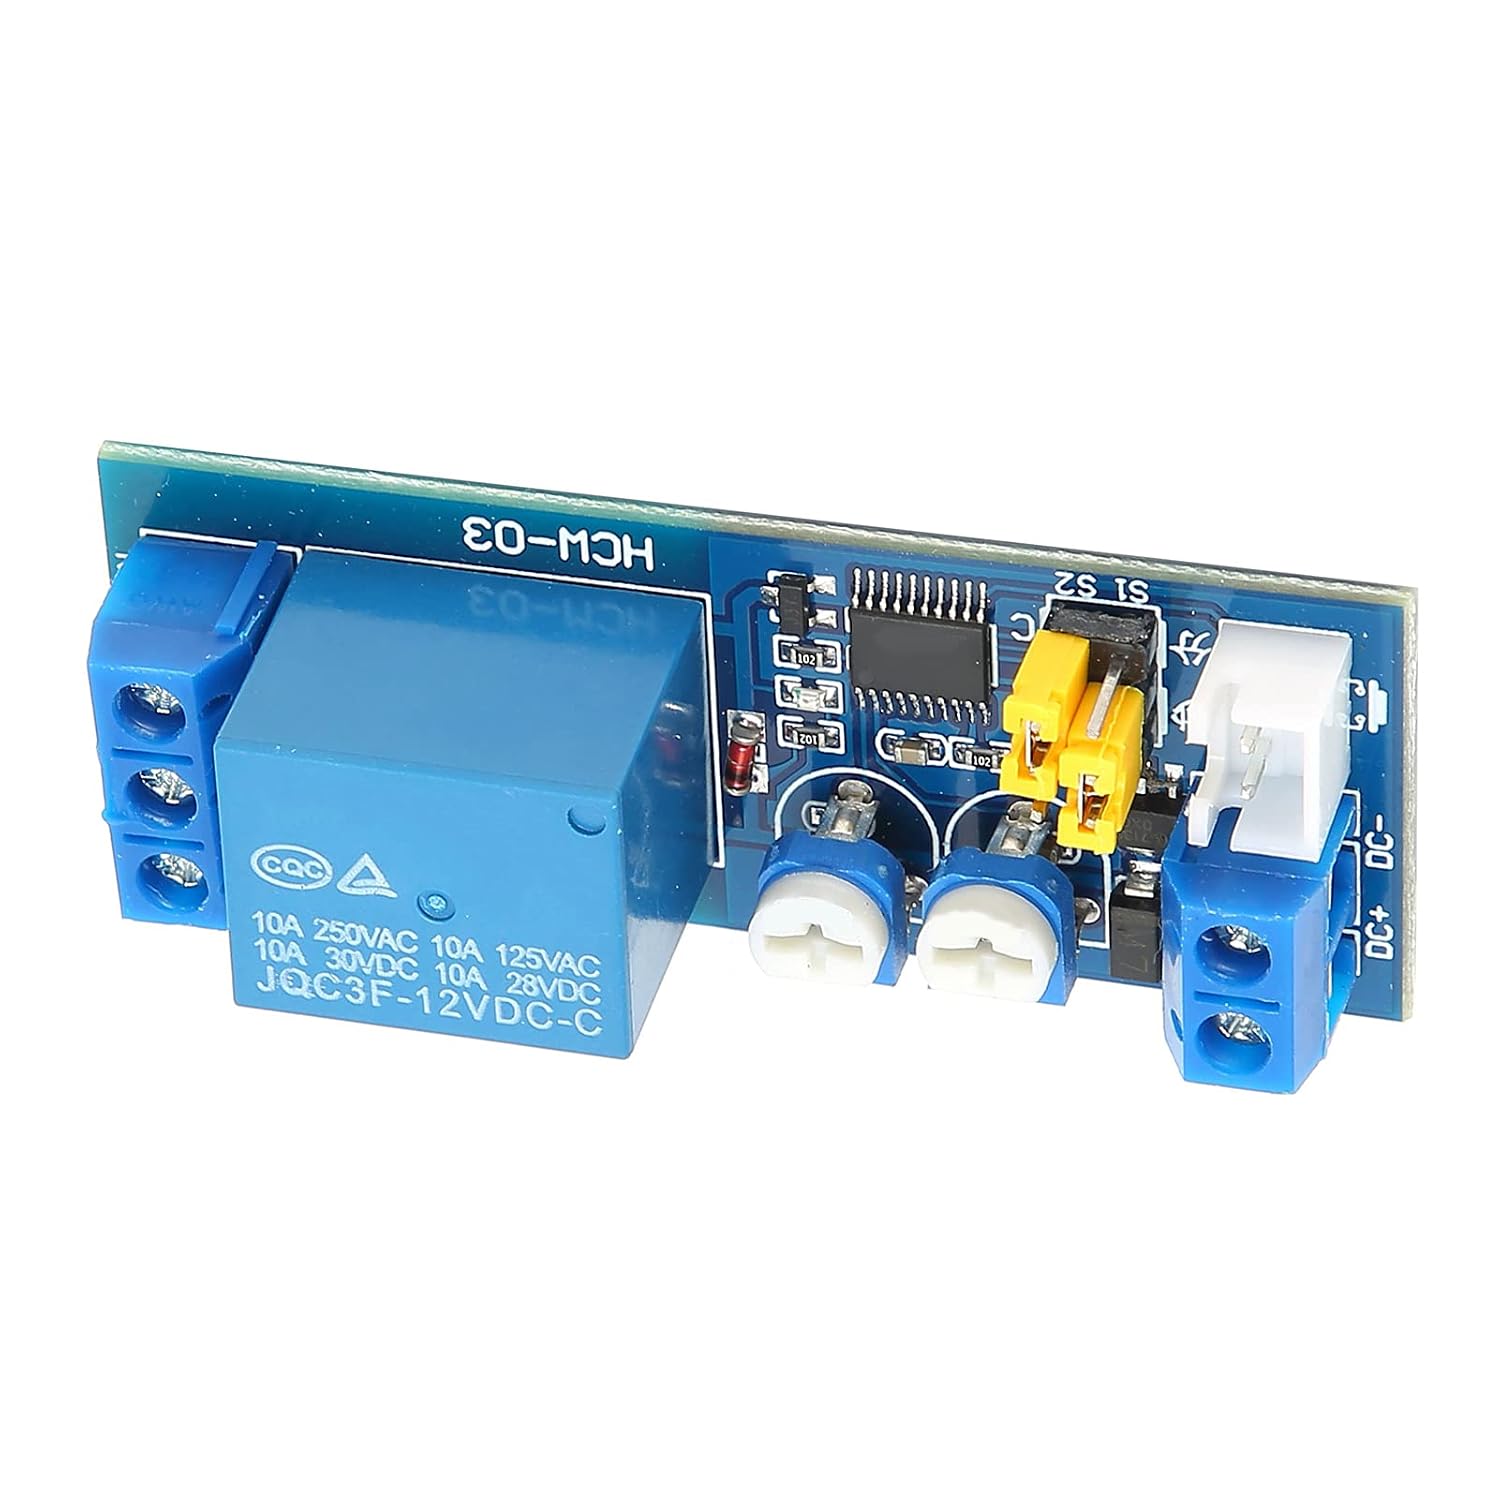
Figure 1: Top view of the HCW-03 Delayed Circuit Module, showing the relay, potentiometers, and terminal blocks.
2. Key Features
- Industrial Grade Control: Utilizes an industrial-grade single-chip microcomputer for robust timing and circuit control.
- Independent Adjustments: Two adjustable resistors (potentiometers) allow independent setting of ON and OFF durations.
- Flexible Activation: Supports timing initiation via external contact activation or a self-reset button short circuit.
- Operational Logic: Initiates a countdown upon power application. If triggered again during the cycle, the connection is immediately disconnected.
- Wide Timing Range: Supports various timing ranges from 0 to 100 seconds up to 24 hours.
3. Specifications
| Parameter | Value |
|---|---|
| Model | HCW-03 |
| Power Supply Voltage | DC 12V |
| Current Rating | 2 A |
| Operation Mode | ON-OFF |
| Contact Type | Metal |
| Switch Type | Toggle |
| Material | Resin |
| Item Dimensions (L x W x H) | 2.36 x 1.18 x 0.78 inches |
| International Protection Rating | IP20 |
| Lower Temperature Rating | 100 Kelvin (-173.15 °C) |
| Upper Temperature Rating | 500 Kelvin (226.85 °C) |
4. Setup and Wiring
Carefully connect the module to your circuit following the instructions below. Ensure the power supply is disconnected before making any connections.
4.1 Power Supply Connection
Connect a DC 12V power supply to the terminal block labeled DC+ and DC-. Ensure correct polarity: DC+ for positive and DC- for negative.

Figure 2: Close-up of the DC power input terminals (DC+, DC-) and the two adjustable potentiometers (T1, T2).
4.2 Relay Output Connection
The module features a relay with three output terminals: NO (Normally Open), COM (Common), and NC (Normally Closed). Connect your load according to your application requirements.
- Normally Open (NO): The circuit is open when the relay is de-energized and closes when the relay is energized.
- Common (COM): This is the common terminal for the relay switch.
- Normally Closed (NC): The circuit is closed when the relay is de-energized and opens when the relay is energized.

Figure 3: Angled view of the HCW-03 module, highlighting the relay and its output terminals (NO, COM, NC) on the right side.
5. Operating Instructions
The HCW-03 module's timing and operational modes are configured using two adjustable potentiometers (T1, T2) and two jumper caps (S1, S2).

Figure 4: Detailed diagram of the HCW-03 module, illustrating the functions of potentiometers T1, T2 and jumper settings S1, S2.
5.1 Adjusting Timing Durations (T1, T2 Potentiometers)
The module has two potentiometers, T1 and T2, for adjusting time durations. These are typically used to set the ON and OFF times in a cycle.
- Turn the potentiometer counter-clockwise (CCW) to decrease the time duration.
- Turn the potentiometer clockwise (CW) to increase the time duration.
- The timing range for T1 and T2 is 0-100 units (seconds or minutes, depending on S1 setting).
- If T1 or T2 is set to its minimum (0Ω), the relay will not operate for that specific timing period.
5.2 Setting Timing Units (S1 Jumper)
The S1 jumper cap determines the timing unit for T1 and T2.
- If the S1 jumper cap is connected to the position marked "秒" (seconds), the T1 and T2 timing unit is 0-100 seconds.
- If the S1 jumper cap is connected to the position marked "分" (minutes), the T1 and T2 timing unit is 0-100 minutes.
5.3 Setting Operational Modes (S2 Jumper)
The S2 jumper cap configures the operational logic of the module.
- Mode 1: Single Execution (S2 connected to 'S')
- The module will execute its timing cycle (T1, T2) once each time it is triggered or energized.
- If T2 is set to 0, the module will perform a single T1 delay and then stop.
- Mode 2: Infinite Loop (S2 connected to 'C')
- The module will repeat its timing cycle (T1, T2) continuously after initial activation, as long as T2 is not 0.
5.4 Triggering Mechanisms and Logic
The module supports different ways to initiate the timing sequence via the trigger input terminal (white connector).
- Trigger Start (White Jumper Cap NOT Shorted):
- When a trigger signal is received (e.g., a momentary short across the trigger input), the relay closes.
- After the T1 duration, the relay disconnects.
- Each new trigger signal restarts the timer.
- If a cycle with T2 is configured, after T1, the relay closes again for T2, then disconnects. This completes one cycle.
- Power On and Start (White Jumper Cap Shorted):
- If the trigger input (white connector) is permanently shorted, the module starts immediately upon power-on.
- The relay closes immediately. After the T1 duration, the relay disconnects.
- If a cycle with T2 is configured (T1 and T2 are not 0), after T1, the relay closes again for T2, then disconnects. This completes one cycle.
6. Typical Applications
The HCW-03 module is versatile and can be used in various timing control scenarios:
- Time-limited Equipment Operation: Automatically power off equipment after a set duration, e.g., a button-triggered device that runs for 5 minutes.
- Repetitive Test Circuits: Create cyclical operations, such as powering a device on for 1 minute and then off for 1 minute repeatedly.
- Intermittent Pumping/Aeration: Control fish tank pumps for intermittent water circulation or oxygen supply.
- General Time Control: Integrate into other equipment requiring precise time-based control.
7. Troubleshooting
If the module is not functioning as expected, consider the following:
- No Power: Verify that the DC 12V power supply is correctly connected to the DC+ and DC- terminals and is providing the correct voltage.
- Relay Not Activating:
- Check the T1 and T2 potentiometer settings. If either is set to its minimum (0Ω), the corresponding timing period will not activate the relay.
- Ensure the S2 jumper is correctly set for the desired operational mode (Single Execution or Infinite Loop).
- If using a trigger, confirm the trigger signal is being received correctly.
- Incorrect Timing:
- Adjust T1 and T2 potentiometers to fine-tune the timing durations.
- Verify the S1 jumper is set to the correct timing unit (seconds or minutes).
- Load Not Switching: Ensure your load is correctly wired to the NO, COM, or NC terminals of the relay. Check the load itself for functionality.
8. Maintenance
The HCW-03 module is designed for low maintenance. To ensure optimal performance and longevity:
- Keep the module clean and free from dust and debris.
- Avoid exposing the module to excessive moisture or extreme temperatures outside its specified operating range (100K to 500K).
- Ensure all connections are secure and free from corrosion.
- Do not attempt to modify the internal circuitry, as this may damage the module and void any potential warranty.
9. Warranty Information
Specific warranty information for the Klanata HCW-03 module is not provided in this manual. Please refer to the product packaging or contact your retailer or Klanata customer support for details regarding warranty terms and conditions.
10. Customer Support
For technical assistance, questions, or support regarding your Klanata HCW-03 Delayed Circuit Module, please contact Klanata customer service through the retailer where the product was purchased or visit the official Klanata website for contact information.