
1. Product Overview
The Godox AD100Pro II is a compact and powerful 100Ws outdoor flash designed for professional photography. It features a 2.4G wireless X system, TTL automatic exposure, and High-Speed Sync (HSS) up to 1/8000s. This manual provides instructions for its safe and effective use.
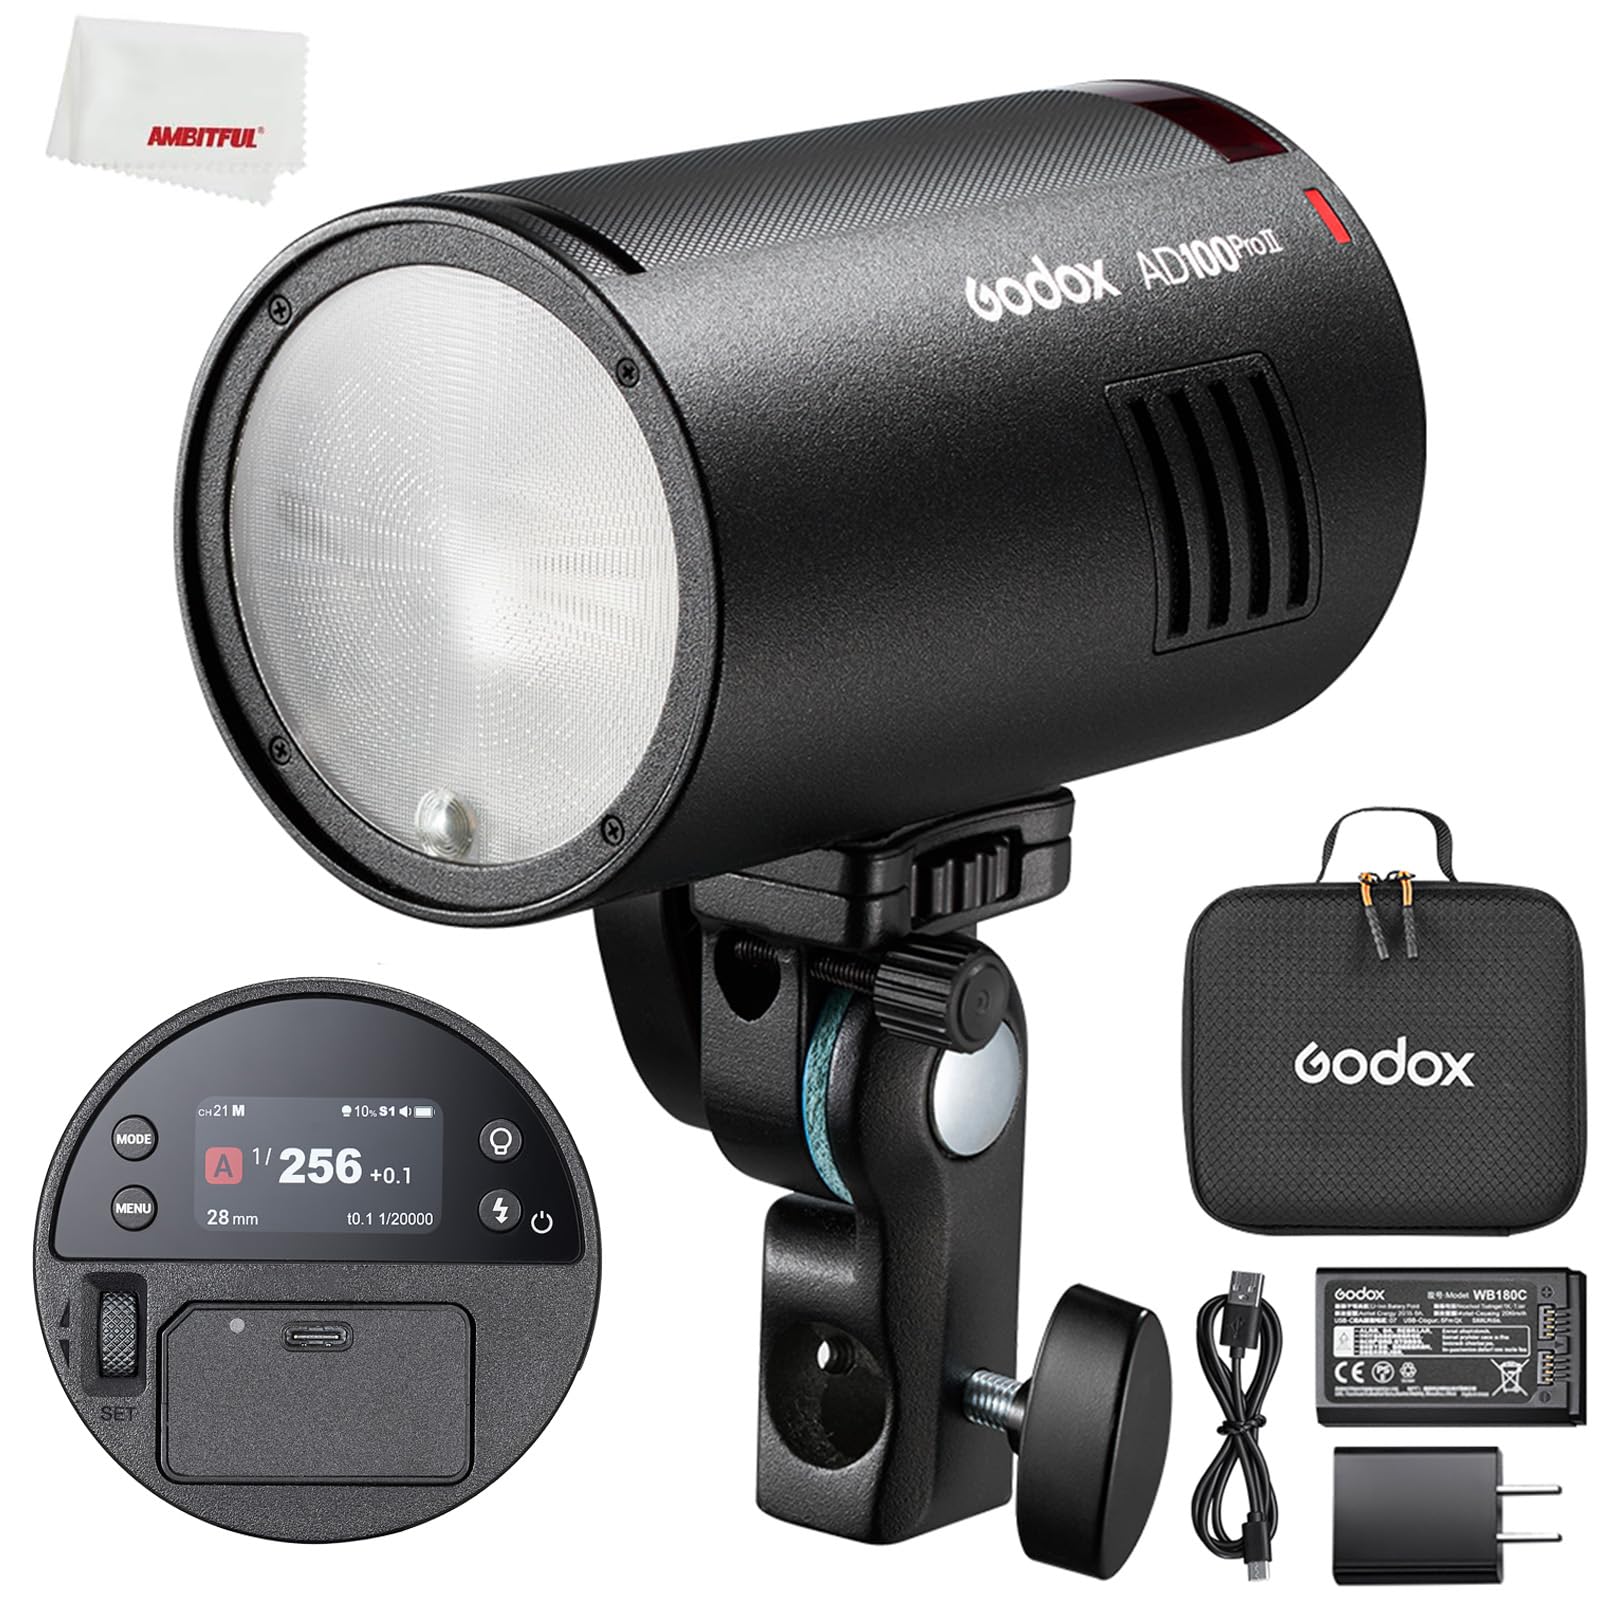
Image 1.1: The Godox AD100Pro II outdoor flash unit.
2. Setup
2.1 Unboxing and Components
Verify that all components are present in the package:
- Flash Body (1)
- Flash Tube (1)
- Lithium Battery (1)
- Power Cord (1)
- Power Adapter (1)
- Portable Bag (1)
2.2 Battery Installation and Charging
- Insert the 3300mAh lithium battery into the battery compartment of the flash unit. Ensure it clicks into place securely.
- To charge the battery, connect the power adapter to the flash unit's USB-C charging port and plug the power cord into a suitable power outlet. The charging indicator will show the charging status. A full charge provides approximately 490 full-power flashes.

Image 2.1: The 3300mAh lithium battery and USB-C charging port for the AD100Pro II.
2.3 Mounting the Flash
The AD100Pro II features dual 1/4" mounting points and a multi-angle bracket for flexible positioning. It is compatible with various DSLR cameras including Sony, Canon, Nikon, Fuji, and Olympus.
- Attach the flash unit to a light stand or other support using one of the 1/4" mounting points.
- Adjust the multi-angle bracket to achieve the desired light direction.
3. Operating Instructions
3.1 Power On/Off and Basic Controls
Press and hold the power button to turn the flash unit on or off. Use the mode and menu buttons to navigate through settings on the full-color display.
3.2 Wireless X System Pairing
The AD100Pro II supports quick-sync pairing with Godox X3/X3Pro triggers for immediate wireless connection.
- Ensure both the flash unit and the Godox X3/X3Pro trigger are powered on.
- Initiate the one-touch sync function on your X3/X3Pro trigger.
- Confirm the wireless sync on the flash unit's display.

Image 3.1: Quick synchronization process with a Godox X3/X3Pro trigger.
For additional flexibility, the flash can connect to an FT433 receiver (sold separately) via its USB-C port for 433MHz control, suitable for multi-lamp setups.

Image 3.2: Illustration of 2.4GHz X Wireless System and 433MHz triggering options.
3.3 TTL and HSS Modes
The AD100Pro II supports full TTL automatic exposure and 1/8000s High-Speed Sync (HSS) for various shooting conditions.
- TTL Mode: Automatically adjusts flash output for correct exposure.
- HSS Mode: Allows synchronization with shutter speeds up to 1/8000s, useful for freezing motion or overpowering ambient light.
- Front/Rear Curtain Sync: Provides creative control over light trails and motion blur.

Image 3.3: Examples of TTL Auto Flash and HSS (High-Speed Sync) in use.
3.4 Adjustable Zoom
The built-in 28-85mm adjustable zoom allows fine-tuning of the beam spread to match different focal lengths, providing control over lighting coverage.
3.5 Color-Coded Group Indicator
A ring of 16 color-coded indicator lights simplifies multi-light setups by allowing instant identification and management of different light groups. This enhances workflow efficiency during adjustments and lamp position changes.

Image 3.4: The color-coded group indicator assisting in a multi-light setup.
3.6 Versatile Modifier Ecosystem
The AD100Pro II features a built-in magnetic mount compatible with Godox's round-head accessories, including the AK-R1 kit, AK-R22 Collapsible Diffusion Dome, and AK-R21 Projection Attachment. With the S3 adapter, it also supports Bowens-mount modifiers such as UL softboxes and BDR reflectors, offering broad creative flexibility.

Image 3.5: Overview of compatible accessories for the AD100Pro II, including the AK-R1 kit and S3 Speedlight Bracket.
4. Maintenance
Proper maintenance ensures the longevity and optimal performance of your AD100Pro II flash unit.
- Cleaning: Use a soft, dry cloth to clean the flash body. For the flash tube, use a lens cleaning cloth and solution if necessary. Avoid abrasive materials or harsh chemicals.
- Storage: Store the flash in its portable bag in a cool, dry place away from direct sunlight and extreme temperatures. Remove the battery if storing for extended periods.
- Battery Care: Recharge the battery periodically if not in use to maintain its health. Avoid fully discharging the battery for prolonged periods.
5. Troubleshooting
If you encounter issues with your AD100Pro II, refer to the following common problems and solutions:
| Problem | Possible Cause | Solution |
|---|---|---|
| Flash does not power on | Low or uncharged battery; improperly installed battery | Charge the battery; ensure battery is correctly inserted. |
| Flash does not fire wirelessly | Incorrect trigger settings; flash not paired; interference | Check trigger channel/group; re-pair flash; move away from interference sources. |
| Inconsistent flash output | Low battery; flash overheating; incorrect mode | Recharge battery; allow flash to cool; verify flash mode (TTL/Manual). |
| Slow recycle time | Low battery; high power setting | Charge battery; reduce flash power output. |
6. Specifications
| Feature | Detail |
|---|---|
| Model | AD100Pro II |
| Power Output | 100Ws |
| Recycle Time | 0.01~1.5s |
| Flashes Per Charge | Approx. 490 (full power) |
| Wireless System | 2.4GHz Godox X System, 433MHz (with optional FT433 receiver) |
| Sync Speed | Up to 1/8000s (HSS) |
| Battery | 3300mAh Lithium Battery |
| Zoom Range | 28-85mm (adjustable) |
| Item Weight | 2.2 pounds |
| Package Dimensions | 3.94 x 3.94 x 3.94 inches |
| Compatible Mountings | Sony, Canon, Nikon, Fuji, Olympus DSLR Cameras |
| Included Components | Flash Body, Flash Tube, Lithium Battery, Power Cord, Power Adapter, Portable Bag |
7. Warranty and Support
For warranty information and technical support, please refer to the official GODOX website or contact your authorized dealer. Keep your purchase receipt as proof of purchase for warranty claims.
Manufacturer: GODOX