
1. Introduction
Thank you for choosing the Ninja CRISPi PRO XL Air Fryer. This manual provides essential information for the safe and efficient operation, maintenance, and troubleshooting of your appliance. Please read it thoroughly before first use and keep it for future reference.
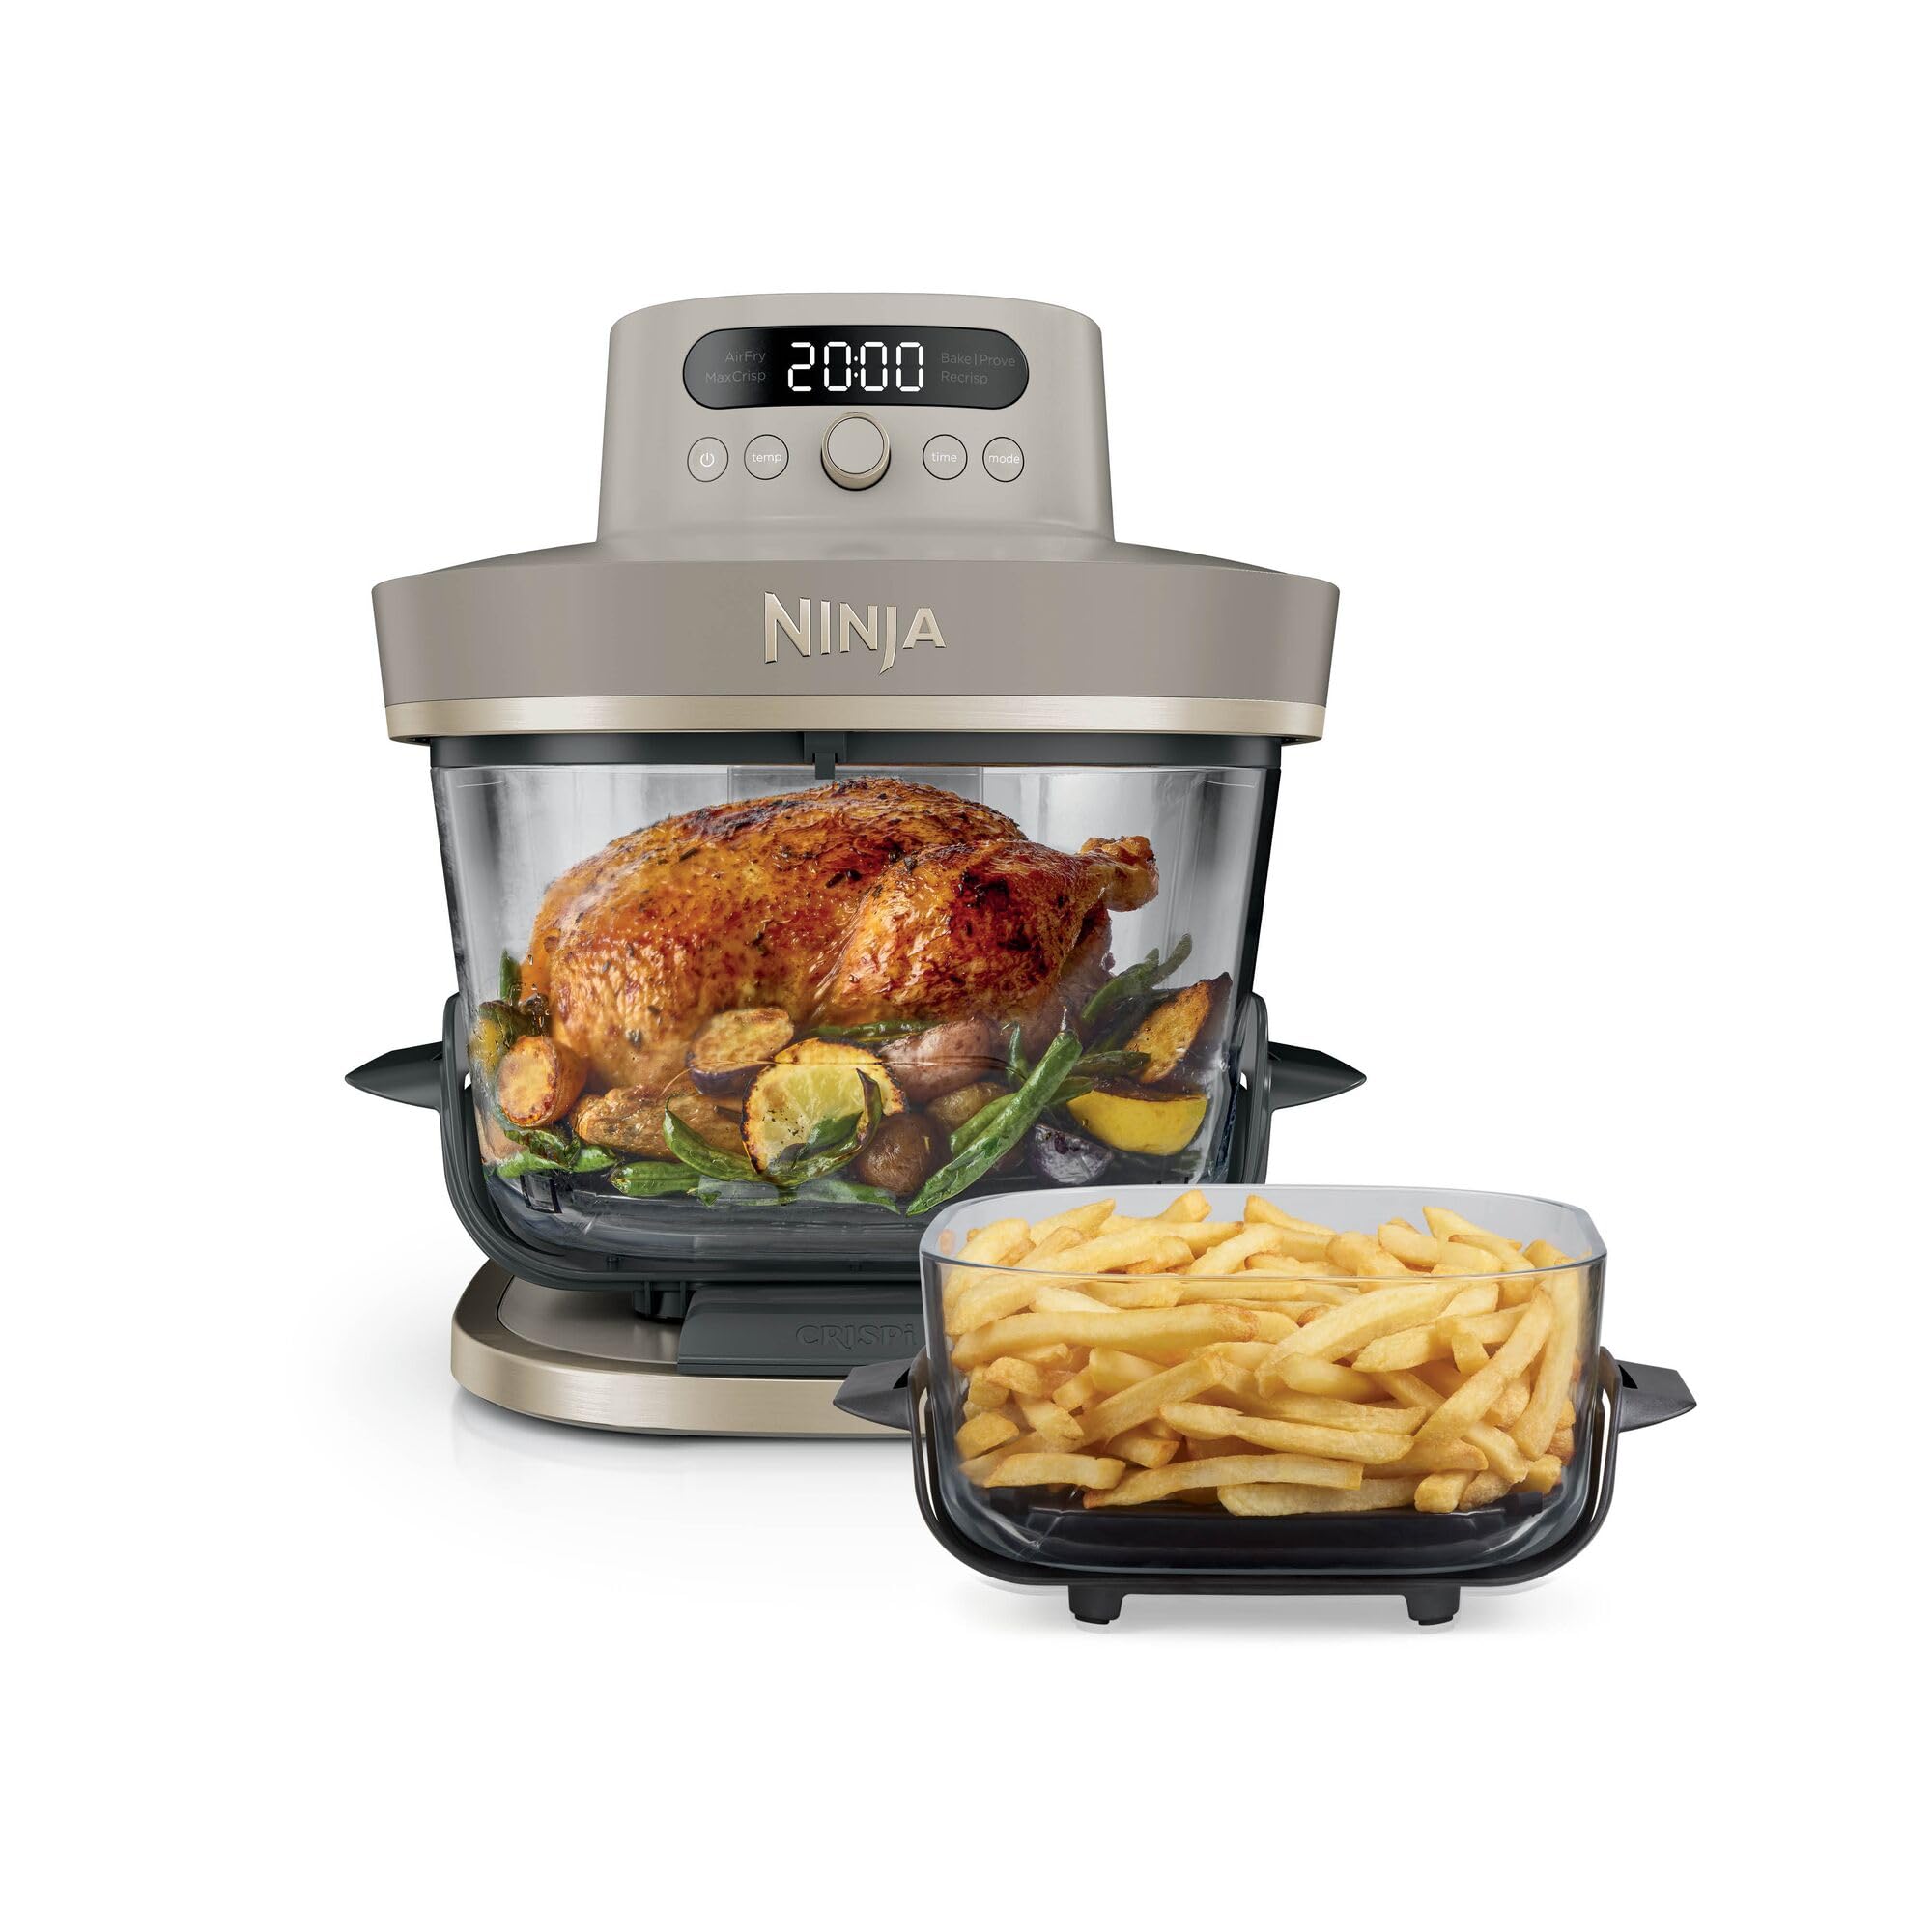
Image 1.1: The Ninja CRISPi PRO XL Air Fryer in Light Gold.
2. Important Safety Information
Always follow basic safety precautions when using electrical appliances to reduce the risk of fire, electric shock, injury, or damage. This appliance is for household use only.
- Read all instructions before use.
- Do not touch hot surfaces. Use handles or knobs.
- To protect against electric shock, do not immerse cord, plugs, or the main unit in water or other liquid.
- Close supervision is necessary when any appliance is used by or near children.
- Unplug from outlet when not in use and before cleaning. Allow to cool before putting on or taking off parts.
- Do not operate any appliance with a damaged cord or plug, or after the appliance malfunctions or has been damaged in any manner.
- The use of accessory attachments not recommended by the appliance manufacturer may cause injuries.
- Do not use outdoors.
- Do not let cord hang over edge of table or counter, or touch hot surfaces.
- Do not place on or near a hot gas or electric burner, or in a heated oven.
- Extreme caution must be used when moving an appliance containing hot oil or other hot liquids.
- Always attach plug to appliance first, then plug cord into the wall outlet. To disconnect, turn any control to “off”, then remove plug from wall outlet.
- Do not use appliance for other than intended use.
- Ensure the appliance is placed on a stable, heat-resistant surface.
3. Product Overview and Components
The Ninja CRISPi PRO XL Air Fryer is designed for versatile cooking with its unique glass containers and multiple functions. It includes:
- CRISPi PRO XL Air Fryer (2050 W)
- 5.7 L CleanCrisp Glass Container
- 2.3 L CleanCrisp Glass Container
- Removable Modular Base
- 2 Non-stick Plates
- 2 Lids
- Recipe Book (Note: Some users report the recipe book may not be in English. Refer to online resources for additional recipes.)

Image 3.1: Overview of the Ninja CRISPi PRO XL Air Fryer and its included accessories.
4. Setup
4.1 Unpacking and Initial Cleaning
- Remove all packaging materials, stickers, and labels from the unit.
- Wash the glass containers, non-stick plates, and lids in warm, soapy water or in the dishwasher. Rinse and dry thoroughly.
- Wipe the main unit with a damp cloth. Do not immerse the main unit in water.
4.2 Assembly
- Place the main unit on a stable, heat-resistant countertop.
- Insert the modular base into the main unit. Ensure it clicks securely into place. The modular base is adjustable to accommodate both the 2.3 L and 5.7 L glass containers.
- Place the desired CleanCrisp glass container onto the modular base.
- Insert a non-stick plate into the glass container if required for your recipe.

Image 4.1: Adjusting the modular base to fit different container sizes.
5. Operating Instructions
5.1 Powering On and Basic Controls
- Plug the power cord into a grounded wall outlet. The display will illuminate.
- Press the Power button (U) to turn the unit on.
- Use the control knob and buttons to select your desired cooking function, temperature, and time.

Image 5.1: Precise temperature control using the digital display and knob.
5.2 Cooking Functions
The Ninja CRISPi PRO XL features 5 preset cooking functions:
- Max Crisp: For achieving maximum crispiness on foods like frozen fries or chicken nuggets.
- Air Fry: For cooking with little to no oil, resulting in crispy textures.
- Bake: For preparing baked goods like cakes, cookies, or bread.
- Prove: For proofing dough, creating an ideal environment for rising.
- Re-crisp: For reheating leftovers and restoring their original crispiness.

Image 5.2: Visual representation of the 5 cooking programs.
5.3 Using the Glass Containers
The appliance comes with two CleanCrisp glass containers (5.7 L and 2.3 L) for various cooking needs.
- 5.7 L Container: Ideal for larger meals, such as a whole chicken or family-sized portions, serving up to 6 people.
- 2.3 L Container: Suitable for smaller portions, snacks, side dishes, or reheating, serving up to 4 people.
The transparent glass allows you to monitor cooking progress without opening the unit, maintaining consistent temperatures.

Image 5.3: The 5.7 L container is suitable for family-sized meals.

Image 5.4: The 2.3 L container is ideal for snacks and side dishes.
5.4 Cooking Process
The CleanCrisp glass containers are designed for a seamless cooking experience:
- Prepare: Place fresh or frozen ingredients directly into the glass container.
- Cook: Select one of the 5 customizable cooking programs with temperatures up to 205°C.
- Serve: The ergonomic handles allow for easy transport from the kitchen to the table.
- Store: Use the included lids to store leftovers directly in the glass containers.
- Re-crisp: Reheat leftovers in the same container to restore crispiness.

Image 5.5: The complete cooking and storage cycle with CleanCrisp containers.
6. Cleaning and Maintenance
Proper cleaning and maintenance ensure the longevity and optimal performance of your Ninja CRISPi PRO XL Air Fryer.
6.1 Cleaning Instructions
- Always unplug the appliance and allow it to cool completely before cleaning.
- The CleanCrisp glass containers, non-stick plates, and lids are dishwasher safe for easy cleaning.
- For stubborn food residue, soak the glass containers in warm, soapy water before washing.
- Wipe the exterior of the main unit with a clean, damp cloth. Do not use abrasive cleaners or scouring pads.
- Ensure all parts are completely dry before reassembling or storing the appliance.

Image 6.1: CleanCrisp glass containers, non-stick plates, and lids are dishwasher safe.
6.2 Storage
Store the appliance in a cool, dry place. The glass containers can be nested for compact storage.
7. Troubleshooting
If you encounter any issues with your Ninja CRISPi PRO XL Air Fryer, refer to the following common problems and solutions:
| Problem | Possible Cause | Solution |
|---|---|---|
| Appliance does not turn on. | Not plugged in; power outlet malfunction; unit not properly assembled. | Ensure the power cord is securely plugged into a working outlet. Check if the modular base is correctly installed. |
| Food is not cooking evenly. | Overcrowding the container; incorrect temperature or time settings. | Do not overcrowd the container; cook in smaller batches if necessary. Adjust temperature and time according to recipe guidelines. Shake or flip food halfway through cooking. |
| Food is not crispy. | Too much moisture; insufficient cooking time/temperature; overcrowding. | Pat food dry before air frying. Increase cooking time or temperature. Ensure not to overcrowd the container. Use the 'Max Crisp' function for optimal crispiness. |
| White smoke coming from the unit. | Grease or food residue on heating element; high-fat food cooking. | Unplug and let cool. Clean the heating element area if accessible. For high-fat foods, ensure proper ventilation and consider using less oil. |
| Appliance emits a burning smell. | Food residue on heating element or in container; new appliance smell. | For first use, a slight odor is normal. If persistent, unplug and clean thoroughly. Ensure no food particles are stuck. |
8. Specifications
- Model Name: CRISPi PRO XL
- Model Number: AS090EUSD
- UPC: 622356386968
- Power Output: 2100 Watts
- Voltage: 240 Volts
- Capacity: 5.7 Liters (main container) + 2.3 Liters (secondary container)
- Dimensions (DxWxH): 30P x 31l x 28H cm
- Weight: 5.17 Kilograms
- Material: Stainless Steel, Plastic, Glass (internal material: Glass)
- Temperature Range: 90°C (Min) to 205°C (Max)
- Control Method: Button
- Air Frying Technology: Hot Air Circulation
- Non-stick Coating: No (CleanCrisp glass containers are PFAS-free)
- Dishwasher Safe: Yes (containers, plates, lids)
- Special Features: 5 preset cooking programs (Max Crisp, Air Fry, Bake, Prove, Re-crisp), includes 2 glass containers with lids, manual temperature and time settings.

Image 8.1: Dimensions of the Ninja CRISPi PRO XL Air Fryer.
9. Warranty and Support
9.1 Warranty Information
Your Ninja CRISPi PRO XL Air Fryer is covered by a manufacturer's warranty. Please refer to the warranty card included in your product packaging for specific terms, conditions, and duration. Keep your proof of purchase for warranty claims.
9.2 Customer Support
For product support, spare parts, or service, please visit the official Ninja website or contact their customer service department. Contact details can typically be found in your product packaging or on the official brand website.
Online Resources: Ninja Brand Store on Amazon
