
1. Introduction
Thank you for choosing the Zuomeng HY-130 Garage Parking Aid. This device is designed to assist you in parking your vehicle accurately and safely in your garage, utilizing an ultrasonic sensor and a tri-color LED indicator. Please read this manual thoroughly before installation and operation to ensure proper use and to maximize the product's lifespan.
2. Safety Information
- Always ensure the device is securely mounted to prevent it from falling and causing damage or injury.
- Do not expose the device to extreme temperatures, direct sunlight for prolonged periods, or excessive moisture.
- Keep the ultrasonic sensor clean and free from obstructions to ensure accurate detection.
- This device is an aid and should not replace careful driving and visual checks during parking. Always exercise caution.
- Use only the specified power adapter (DC 5V) or AA batteries. Do not mix old and new batteries or different types of batteries.
- If using batteries, replace them promptly when the low battery alert is activated.
3. Package Contents
Please check the package for the following items:
- Zuomeng HY-130 Parking Aid Unit
- Ultrasonic Sensor with Cable
- DC 5V Power Adapter
- Mounting Hardware (screws, anchors)
- User Manual
4. Product Overview
The Zuomeng HY-130 features a main display unit with tri-color LEDs and control buttons, connected to an external ultrasonic sensor. It offers flexible power options and two parking modes.
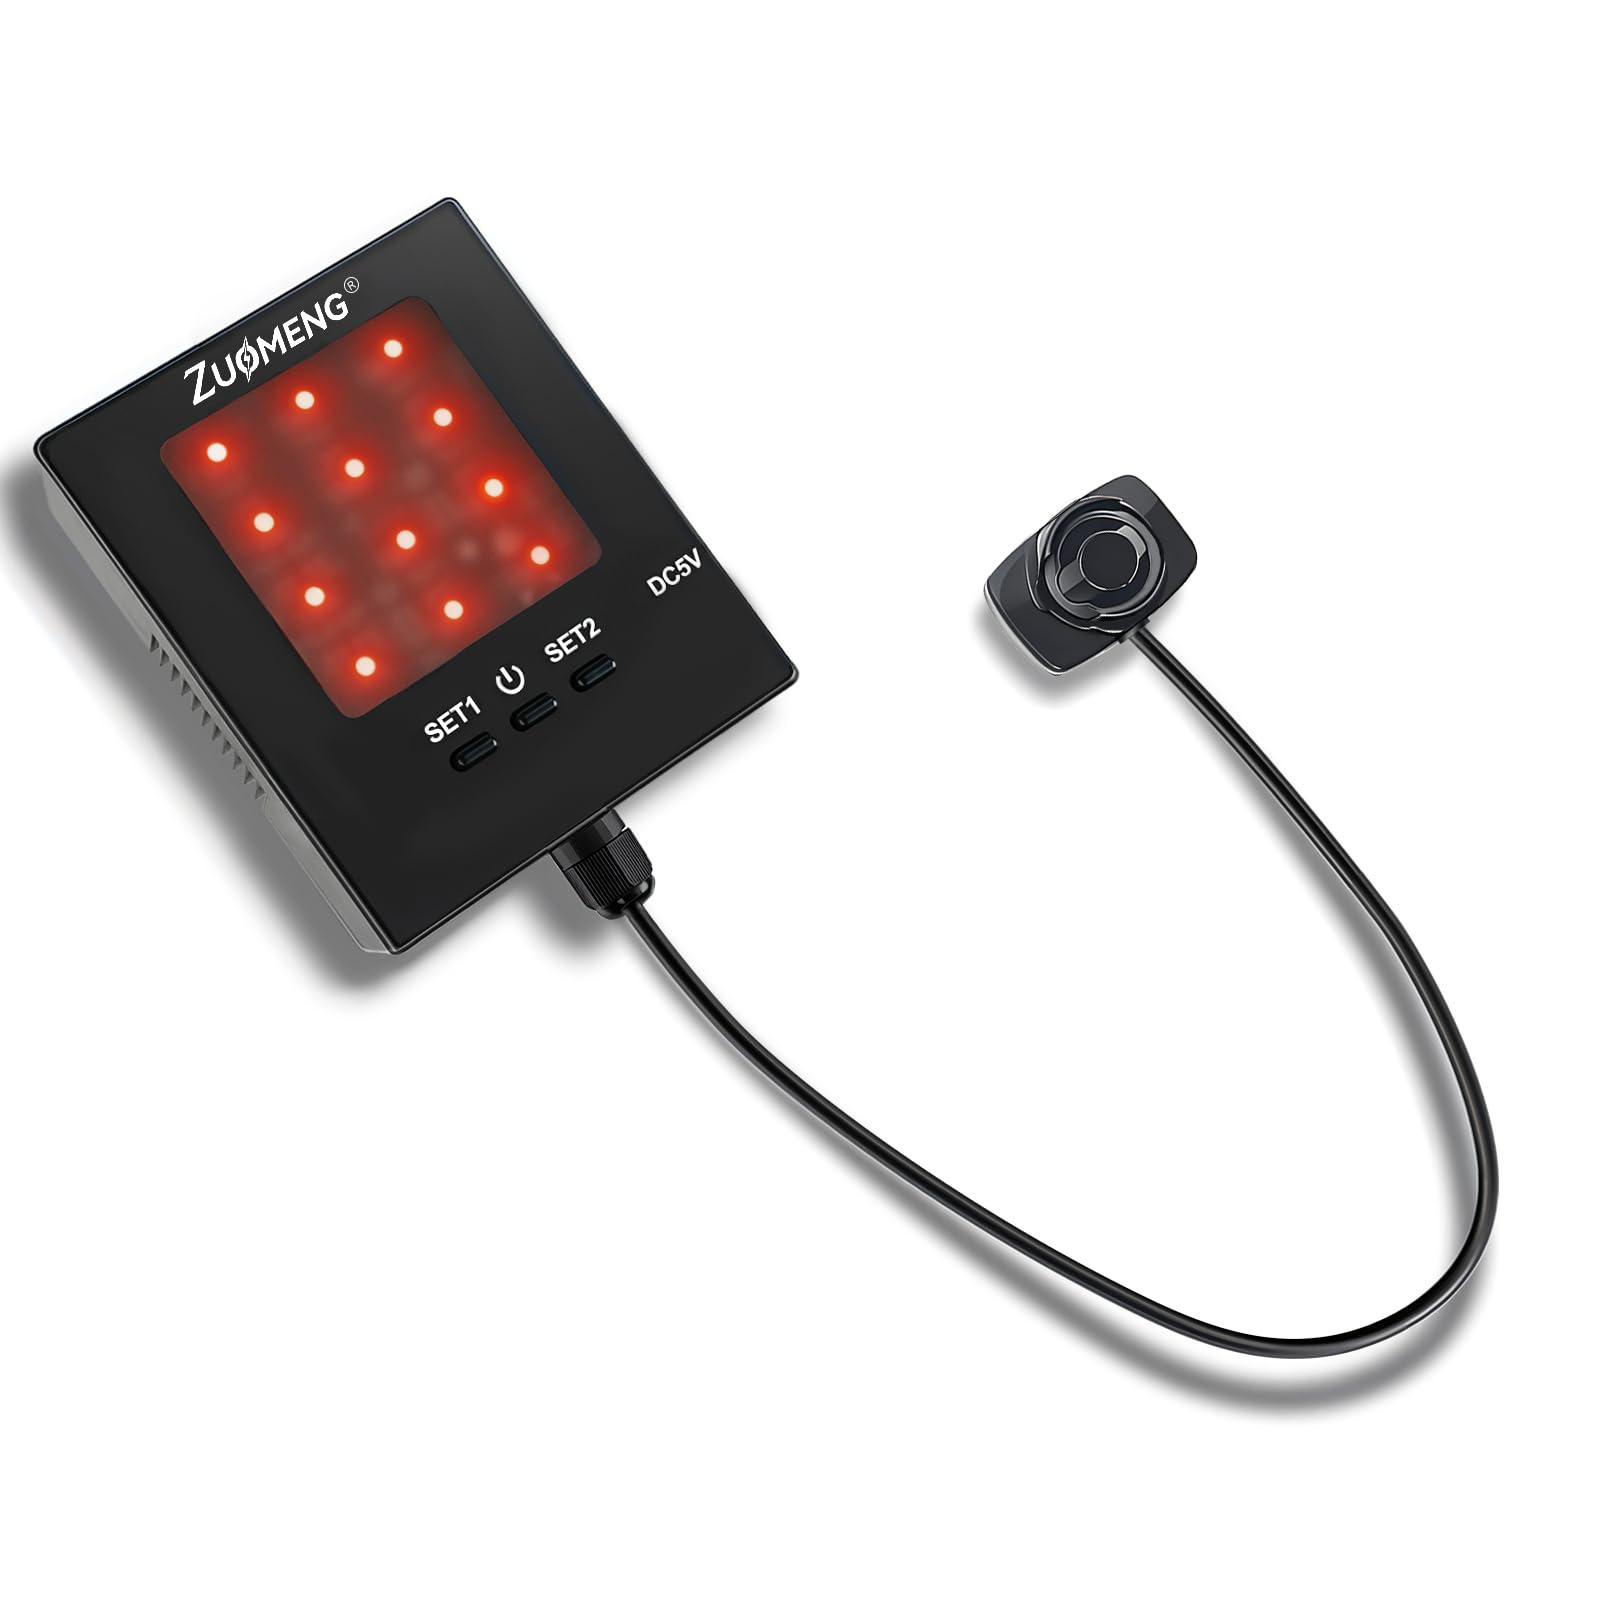
Figure 4.1: Zuomeng HY-130 Parking Aid main unit and sensor. The main unit displays LED lights, and the sensor detects vehicle distance.
4.1 Main Unit Components
- LED Display Panel: Shows green, yellow, and red lights to indicate distance.
- SET1 Button: Used for setting the parking distance for Mode 1.
- SET2 Button: Used for setting the parking distance for Mode 2.
- Power Button: Turns the device on/off.
- DC 5V Port: For connecting the power adapter.
- Sensor Port: For connecting the ultrasonic sensor cable.
4.2 Ultrasonic Sensor
The external ultrasonic sensor accurately measures the distance between your vehicle and the garage wall. It connects to the main unit via a cable, allowing flexible placement.

Figure 4.2: The ultrasonic sensor emits waves to detect the vehicle's position, guiding parking.
5. Setup & Installation
5.1 Power Options
The device can be powered by either the included DC 5V power adapter or 2 x AA batteries (not included).
- Adapter Power: Connect the DC 5V power adapter to the main unit's DC 5V port and plug it into a standard wall outlet.
- Battery Power: Open the battery compartment on the back of the main unit and insert 2 x AA batteries, ensuring correct polarity. Close the compartment securely.

Figure 5.1: The parking aid can be powered by the included DC 5V adapter or two AA batteries (not included).
5.2 Mounting the Unit and Sensor
Choose a suitable location for the main unit and sensor. The main unit should be visible from your driver's seat, and the sensor should be positioned to detect your vehicle's front bumper accurately.
- Position the Main Unit: Mount the main unit on a wall or shelf in your garage where the LED display is clearly visible when you are parking. Use the provided mounting hardware (screws/anchors) to secure it.
- Position the Sensor: The sensor should be mounted at the approximate height of your vehicle's front bumper. Ensure there are no obstructions between the sensor and where your bumper will be when parking. The sensor cable is approximately 7.1 feet long, allowing flexibility.
- Connect the Sensor: Plug the sensor cable into the designated sensor port on the main unit.

Figure 5.2: Example of the parking aid main unit and sensor mounted on a garage wall.

Figure 5.3: Dimensions of the main unit (3.3in x 3.9in) and sensor cable length (7.1ft).
5.3 Setting Parking Distance
The device allows you to set your desired parking distance. It has two memory settings (SET1 and SET2) for different vehicles or parking positions.
- Park your vehicle in the desired final parking position.
- Press and hold either the SET1 or SET2 button for 3 seconds until the LEDs flash, indicating the distance is saved.
- The device will now use this saved distance as the "stop" point for the selected mode.
6. Operation
6.1 Powering On/Off
Press the Power Button once to turn the device on or off. The device retains its last settings due to its memory function.
6.2 Parking Modes (Auto & Manual)
The Zuomeng HY-130 offers two modes for parking assistance:
- Automatic Mode: The device automatically detects your vehicle as it approaches and provides guidance.
- Manual Mode: Allows for more precise control, typically used after initial setup or for specific parking scenarios.

Figure 6.1: The device supports both Automatic (A) and Manual (M) parking modes.
6.3 Tri-Color LED Guidance
The LED display provides visual cues to guide your parking:
- Green Light: Indicates that your vehicle is still a safe distance away and you can proceed forward.
- Yellow Light: Signals that you are approaching your target parking spot and should slow down.
- Red Light: Indicates that you have reached your desired parking position and should stop.

Figure 6.2: The LED display uses green, yellow, and red lights to guide your vehicle to the correct parking position.

Figure 6.3: The system provides clear visual feedback, making parking intuitive.
7. Maintenance
- Cleaning: Wipe the main unit and sensor with a soft, dry cloth. Do not use abrasive cleaners or solvents.
- Sensor Obstruction: Periodically check that the ultrasonic sensor is free from dust, dirt, or any obstructions that could interfere with its operation.
- Battery Replacement: If using battery power, replace batteries when the low battery alert is displayed. Ensure to use 2 x AA batteries of the same type and age.
8. Troubleshooting
| Problem | Possible Cause | Solution |
|---|---|---|
| Device does not power on. | No power from adapter or dead batteries. | Check power adapter connection or replace batteries. |
| Inaccurate distance detection. | Sensor obstructed or improperly positioned. | Clean the sensor. Ensure it is mounted at bumper height and has a clear line of sight. Re-calibrate parking distance. |
| LEDs do not change color. | Sensor not detecting vehicle or incorrect distance setting. | Verify sensor connection. Ensure vehicle is within detection range. Re-set parking distance. |
| Settings are not saved after power cycle. | Power interruption or issue with memory function. | Ensure stable power supply. If using batteries, check battery level. Re-set the desired parking distance. |
9. Specifications
- Model: HY-130
- Power Input: DC 5V (via adapter) or 2 x AA Batteries
- Sensor Type: Ultrasonic
- Indicator: Tri-Color LED (Green, Yellow, Red)
- Modes: Automatic, Manual
- Memory Function: Yes (for parking distance settings)
- Main Unit Dimensions: Approximately 3.3 in x 3.9 in (8.4 cm x 9.9 cm)
- Sensor Cable Length: Approximately 7.1 ft (2.16 m)
- Weight: Approximately 270 g
10. Warranty & Support
Zuomeng products are designed for reliability and performance. For warranty information or technical support, please refer to the documentation included with your purchase or contact Zuomeng customer service through the retailer where the product was purchased. Please have your model number (HY-130) and purchase date available when contacting support.