1. Product Overview
The NACKEO Star03 is a versatile portable device combining an 8000A peak current car battery jump starter with a 160 PSI air compressor. It is designed for emergency vehicle starting, tire inflation, and as a portable power bank and LED light source.
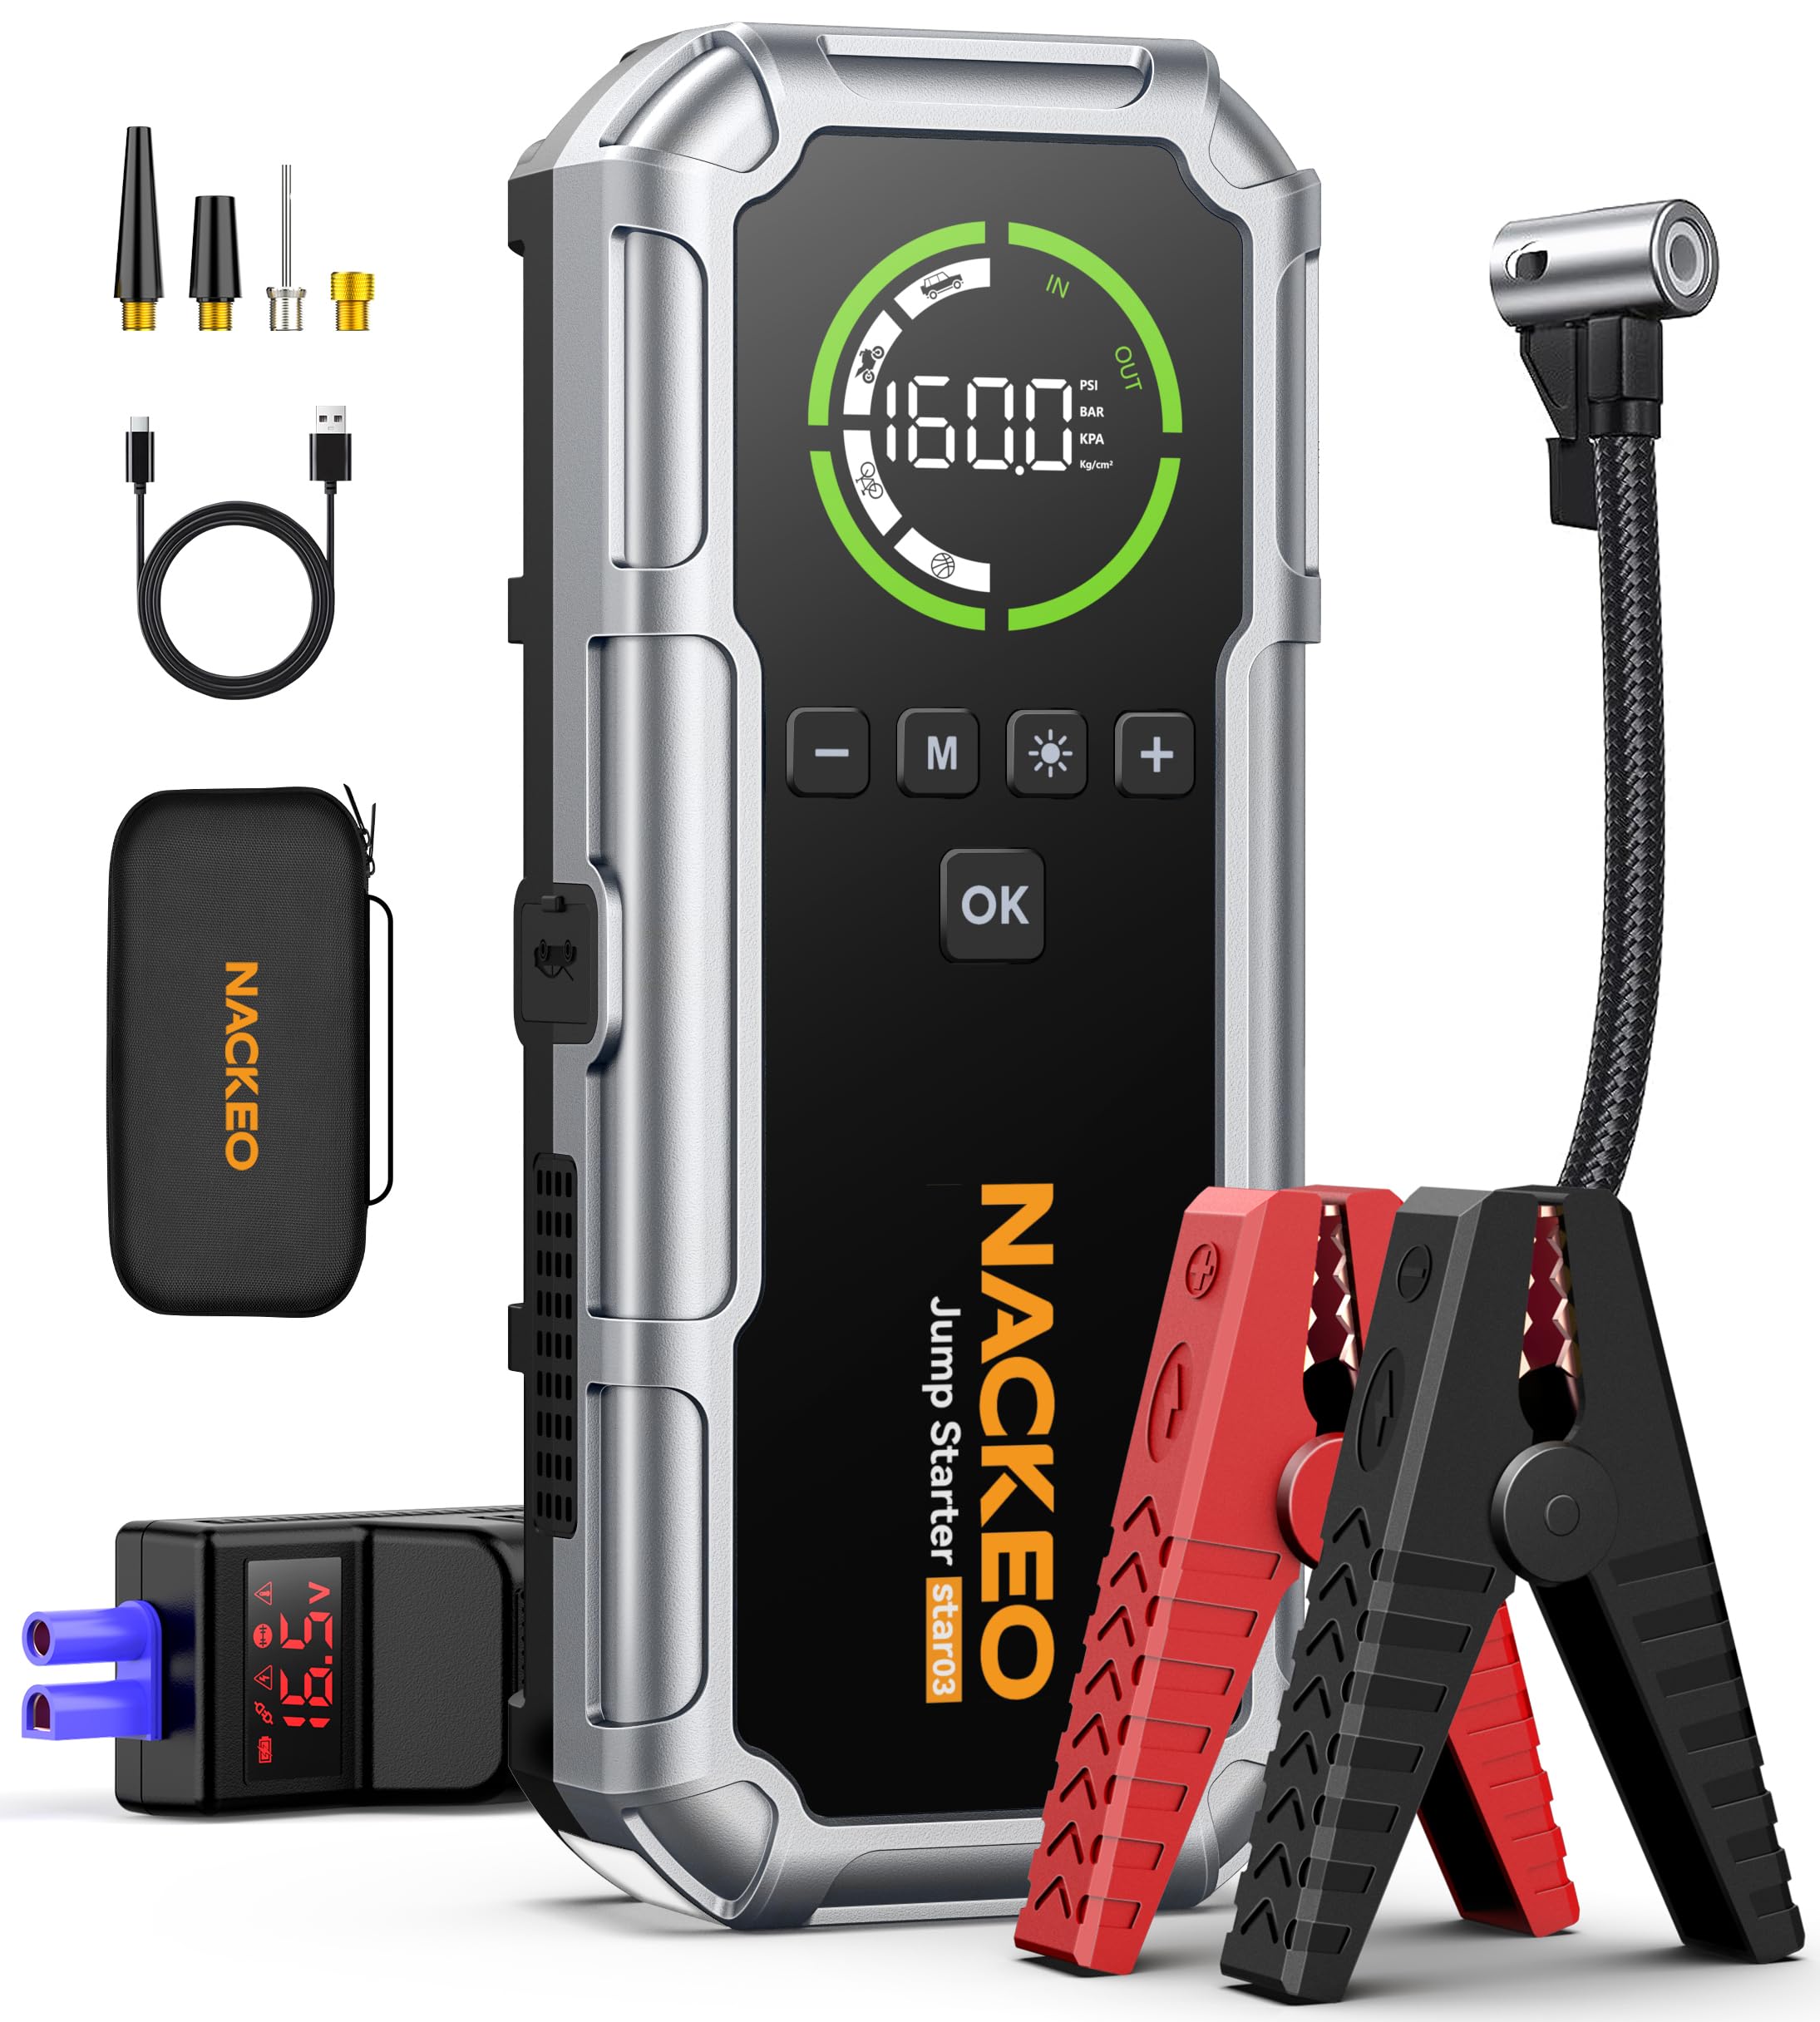
Image: The NACKEO Star03 device, showcasing its compact design and integrated features.
Key Features:
- 8000A Peak Current: Capable of starting all 12V gasoline engines and up to 10L diesel engines.
- 160 PSI Air Compressor: Built-in air pump with 4 inflation modes (Car, Motorcycle, Bicycle, Ball) and auto shut-off.
- 3 LED Lighting Modes: Steady, Strobe, and SOS for various emergency situations.
- Smart Jumper Clamps: Features a built-in display and audible alerts for safe operation.
- 3.3" LCD Display: High-definition screen shows battery power, output status, charging progress, and fault warnings.
- 10 Safety Protections: Includes overcharge, short-circuit, and reverse-polarity protection.
- Portable Power Bank: USB-C input and USB output for charging various devices.
2. What's in the Box
Verify that all components are present upon unboxing:

Image: All items included in the NACKEO Star03 package, laid out for inspection.
- 1x NACKEO Star03 Jump Starter with Air Compressor
- 1x Heavy-Duty Jumper Cables
- 1x Detachable Extended Air Hose
- 4x Inflation Nozzles
- 1x USB-C Charging Cable (charger not included)
- 1x Portable EVA Carrying Case
- 1x User Manual
3. Setup and Charging
Initial Charging:
Before first use, fully charge the NACKEO Star03 device. Connect the provided USB-C charging cable to the device's USB-C input port and to a compatible USB wall adapter (not included). The LCD display will show charging progress.
Image: The NACKEO Star03 connected for charging, illustrating the USB-C input.
Understanding the Display:
The 3.3-inch LCD display provides real-time information:
- Battery Power: Shows remaining charge level.
- Output Status: Indicates active functions (jump start, air compressor, power bank).
- Charging Progress: Displays charging status when connected.
- Fault Warnings: Alerts for incorrect operation or safety issues.

Image: A detailed view of the NACKEO Star03's LCD display, showing various indicators.
4. Operating Instructions
4.1. Jump Starting a Vehicle
Ensure the jump starter has at least 20% battery power before attempting to jump start a vehicle.
- Step 1: Connect Jumper Cables to Device
Insert the blue end of the heavy-duty jumper cables into the jump starter's dedicated port. Ensure a secure connection. - Step 2: Connect Clamps to Car Battery
Attach the red (+) clamp to the positive terminal of the car battery. Attach the black (-) clamp to the negative terminal of the car battery. The smart clamps will provide visual and audible feedback if connected incorrectly. - Step 3: Start Vehicle
Once the clamps are correctly connected and the device indicates readiness, start your car engine. If the car does not start immediately, wait 30 seconds and try again. Do not attempt more than 3 consecutive starts. - Step 4: Disconnect
Once the engine starts, immediately disconnect the black (-) clamp from the car battery, then the red (+) clamp, and finally remove the jumper cables from the jump starter.

Image: Visual guide demonstrating the three steps for jump starting a vehicle.
Video: Official NACKEO AUTO demonstration of the jump starter and air compressor in use.
4.2. Using the Air Compressor
The built-in air compressor can inflate tires and other inflatables up to 160 PSI.
- Step 1: Connect Air Hose
Screw the detachable air hose securely onto the air compressor port on the device. Attach the other end to the tire valve or appropriate inflation nozzle. - Step 2: Select Mode and Set Pressure
Short press the "OK" button to activate. Press the "M" button to cycle through inflation modes (Car, Motorcycle, Bicycle, Ball) and pressure units (PSI, BAR, KPA, kg/cm²). Use the "+" and "-" buttons to adjust the target pressure value. - Step 3: Start Inflation
Long press the "OK" button to begin inflation. The device will automatically stop when the preset pressure is reached. - Step 4: Disconnect
Once inflation is complete, disconnect the air hose from the tire valve and the device.
Image: Visual guide demonstrating the three steps for inflating car tires.
Image: The NACKEO Star03's versatility in inflating different items with various pressure ranges.
4.3. Using the LED Light
The NACKEO Star03 features three LED lighting modes for different situations:
- Steady Light: Press the light button once for continuous illumination, ideal for repairs or general lighting.
- Strobe Light: Press the light button a second time for a flashing strobe, useful for attracting attention.
- SOS Mode: Press the light button a third time for the SOS signal, designed for emergency signaling.
- Press the button a fourth time to turn off the light.

Image: The NACKEO Star03's LED light illuminating an engine bay, demonstrating its utility.
4.4. Using as a Power Bank
The device can charge other electronic devices via its USB output port.
- Connect your device's charging cable to the USB output port on the NACKEO Star03.
- The device will automatically begin charging your connected electronic device.

Image: The NACKEO Star03 functioning as a power bank, charging a smartphone in a car.
5. Safety Precautions
Always observe the following safety guidelines to prevent injury or damage:
- Do not attempt to jump start a vehicle with less than 20% charge on the NACKEO Star03.
- Ensure correct polarity when connecting jumper clamps (red to positive, black to negative). The smart clamps provide protection against incorrect connections.
- Do not connect the red and black clamps together.
- Avoid prolonged cranking of the engine. If the vehicle does not start after 3 attempts, consult a mechanic.
- Keep the device away from children.
- Do not expose the device to extreme temperatures or moisture.
- Do not disassemble or modify the device.
- When using the air compressor, do not over-inflate tires. Utilize the auto shut-off feature.
6. Maintenance and Storage
- Cleaning: Wipe the device with a dry, soft cloth. Do not use harsh chemicals or abrasive cleaners.
- Charging: For optimal battery life, recharge the device every 3-6 months, even if not in use.
- Storage: Store the NACKEO Star03 in its EVA carrying case in a cool, dry place, away from direct sunlight and extreme temperatures.
- Cable Care: Inspect jumper cables and air hose for damage before each use. Replace if worn or damaged.
7. Troubleshooting
| Problem | Possible Cause | Solution |
|---|---|---|
| Device does not turn on. | Battery is completely discharged. | Charge the device fully using the USB-C cable. |
| Vehicle does not start. | Low device battery, incorrect clamp connection, severely dead car battery. | Ensure device has >20% charge. Recheck clamp connections (red to +, black to -). If still no start after 3 attempts, seek professional assistance. |
| Air compressor not inflating. | Air hose not securely connected, incorrect pressure setting, device battery low. | Ensure air hose is tightly screwed. Verify pressure setting and inflation mode. Charge the device if battery is low. |
| Smart clamps alarm sounds. | Incorrect polarity connection, short circuit. | Immediately disconnect clamps and re-connect with correct polarity (red to +, black to -). |
8. Specifications
| Feature | Detail |
|---|---|
| Model | Star03 |
| Peak Output Current | 8000 Amps |
| Air Compressor Pressure | 160 PSI |
| Battery Cell Composition | Lithium Ion |
| Voltage | 12 Volts |
| Product Dimensions | 3.35"D x 8.8"W x 1.77"H |
| Item Weight | 2.7 Pounds |
| Automotive Fit Type | Universal Fit (All 12V vehicles, All Gas/10L Diesel) |
| LED Light Modes | Steady, Strobe, SOS |
9. Warranty and Support
The NACKEO Star03 Jump Starter with Air Compressor comes with a 2-YEAR Warranty and lifetime technical support.
For any after-sales questions, technical assistance, or warranty claims, please contact NACKEO customer support through the retailer where the product was purchased or refer to the contact information provided in the included user manual.
Please retain your proof of purchase for warranty validation.