
1. Product Overview
The OBDMONSTER N300 Pro Digital Timing Light is a diagnostic tool designed for precise engine timing adjustments and measurements. It features a 2.6-inch high-definition backlit LCD display and is compatible with 12V gasoline engines, including both 2-stroke and 4-stroke configurations. This device offers comprehensive measurement capabilities for Voltage, RPM, Advance Angle, and Dwell Angle.
The package also includes 6 pieces of 8985 Harmonic Balancer Timing Tape stickers, suitable for balancers with diameters ranging from 5.25 inches to 8.00 inches, to assist in accurate ignition timing.
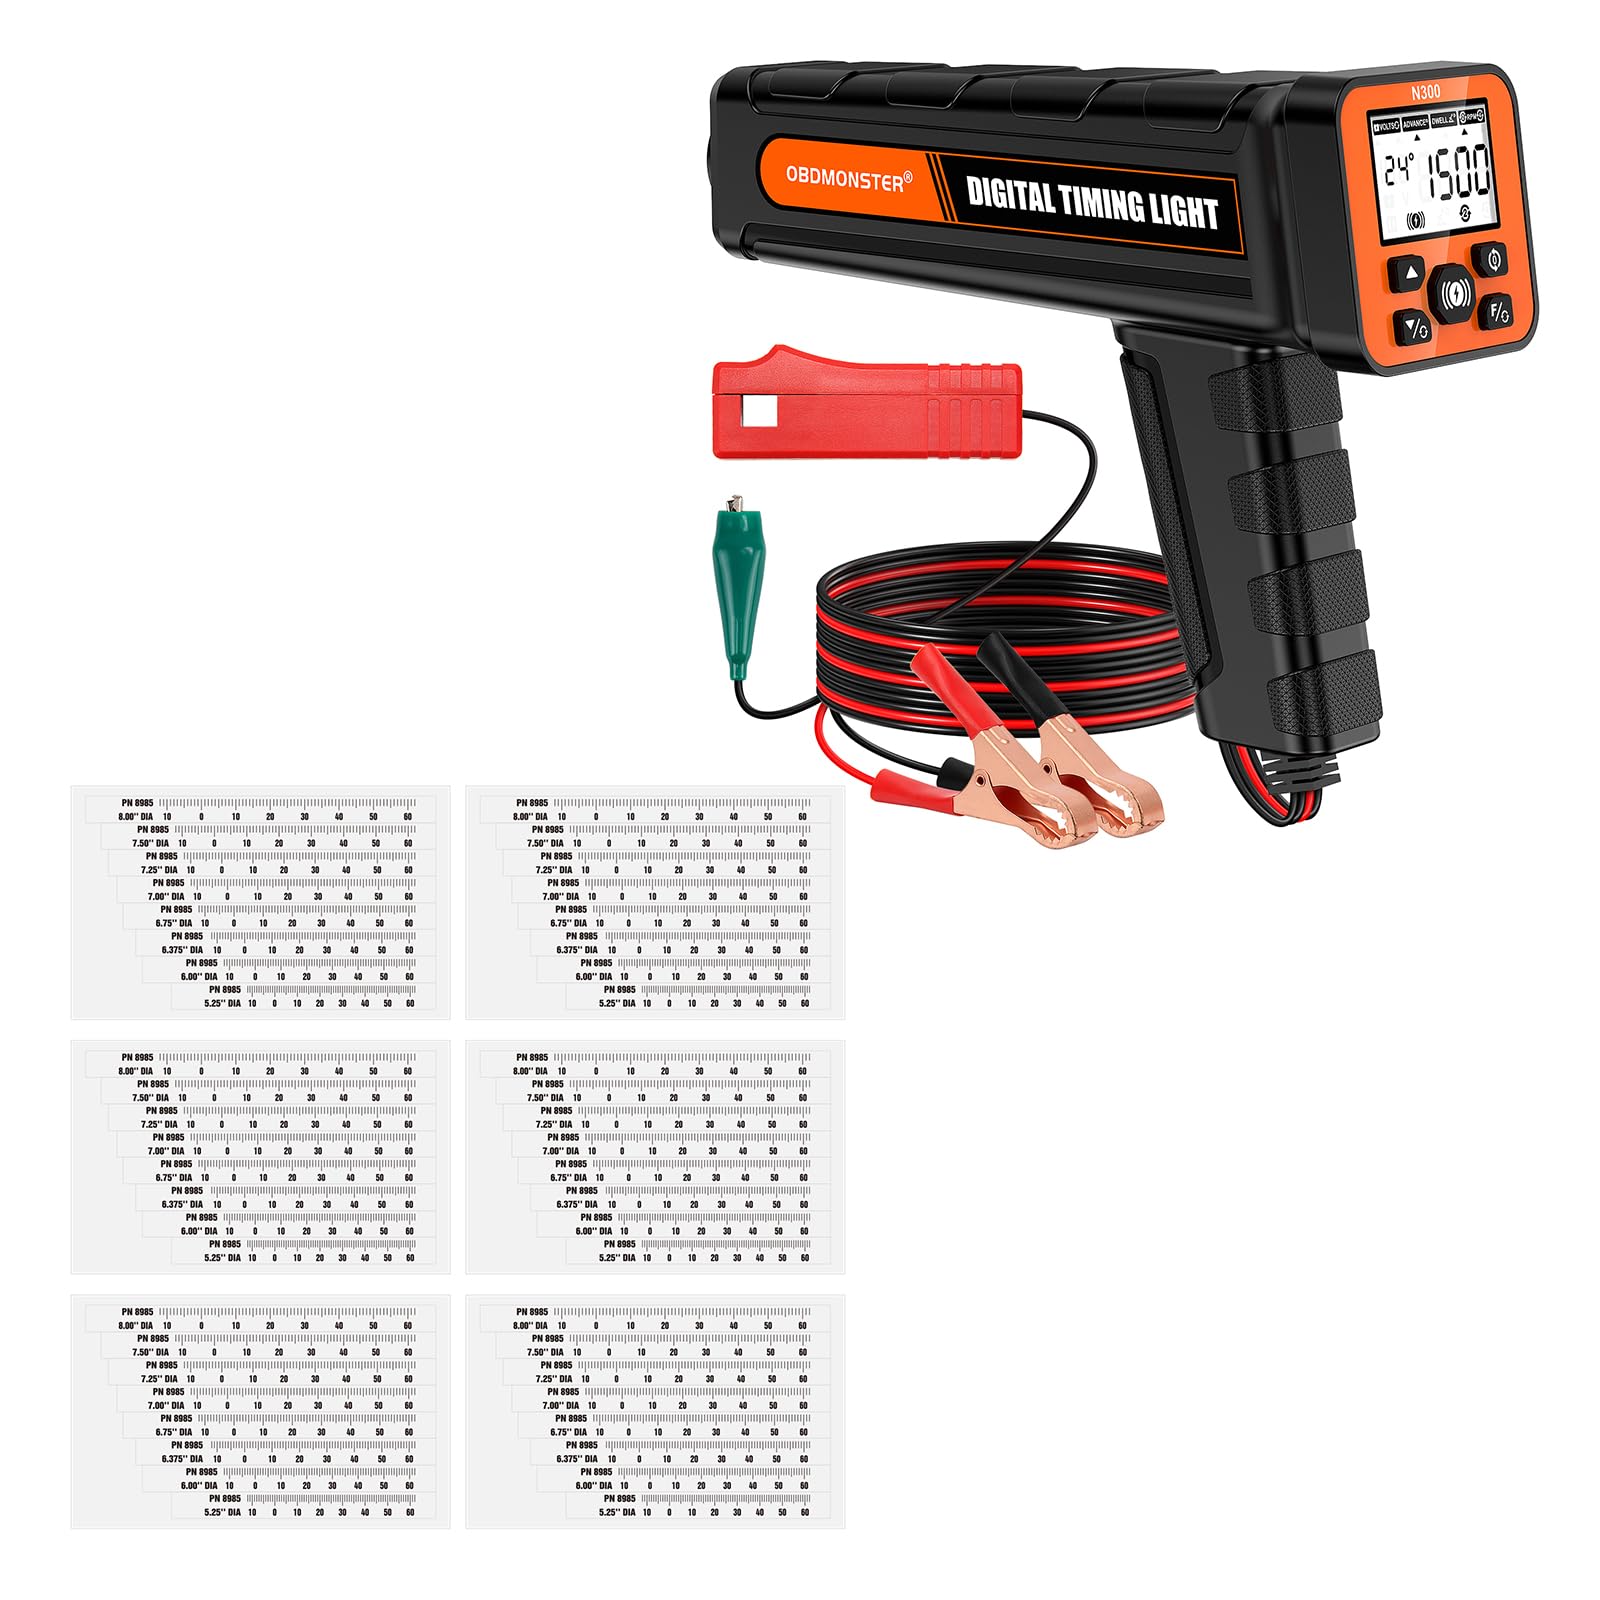
Image 1.1: The OBDMONSTER N300 Pro Digital Timing Light, showing the main unit, inductive pickup, and power clamps.
2. Key Features
- Comprehensive Measurement: Measures Voltage, RPM, Advance Angle (0°-90°), and Dwell Angle (0°-90°).
- Wide Engine Compatibility: Works with 12V gasoline engines (2-stroke & 4-stroke), including DIS, conventional, electronic, and computer-controlled ignition systems. Not suitable for diesel engines.
- Dual-Screen Display: The 2.6-inch LCD simultaneously displays advance angle and RPM for ease of use.
- Harmonic Balancer Timing Tapes: Includes 6 precision adhesive stickers for balancers from 5.25" to 8.00" in diameter, aiding in accurate ignition timing.
- Dwell Angle Mode: Helps set the correct dwell angle and displays cylinder values, compatible with 2- to 12-cylinder engines.
- RPM Reading: In Voltage/RPM mode, it helps identify recommended engine speed for timing advance tests.

Image 2.1: Key features of the N300 Pro Digital Timing Light, highlighting its display, RPM tachometer, adjustable advance angle, voltage test, dwell angle check, and cable length.
3. Setup Instructions
3.1 Connecting the Timing Light
- Ensure Vehicle is Off: Before connecting, ensure the vehicle's engine is turned off and the ignition is in the OFF position.
- Connect Power Clamps: Connect the red positive (+) clamp to the vehicle's 12V battery positive terminal. Connect the black negative (-) clamp to the vehicle's 12V battery negative terminal or a suitable ground point on the chassis.
- Connect Inductive Pickup: Attach the inductive pickup clamp to the spark plug wire of cylinder #1. Ensure the arrow on the pickup points towards the spark plug.
- Auxiliary Battery for 6V Systems: If working on a 6-volt electrical system, an auxiliary 12-volt battery is required to power the timing light. Connect the timing light's power clamps to the auxiliary 12V battery.
3.2 Applying Harmonic Balancer Timing Tape
The included harmonic balancer timing tapes are designed to provide precise markings for engines with balancers ranging from 5.25 inches to 8.00 inches in diameter. These tapes are used to ensure accurate ignition timing measurements.
- Measure Balancer Diameter: Accurately measure the diameter of your engine's harmonic balancer.
- Select Correct Tape: Choose the timing tape that matches your balancer's diameter from the provided set.
- Clean Surface: Ensure the surface of the harmonic balancer is clean and free of grease or dirt.
- Apply Tape: Carefully apply the adhesive timing tape to the harmonic balancer, aligning it correctly according to the engine's timing marks.

Image 3.1: The set of 6 harmonic balancer timing tape stickers included with the timing light.

Image 3.2: Close-up view of the harmonic balancer timing tapes, showing various diameters and degree markings.
4. Operating Instructions
4.1 Powering On and Mode Selection
Once connected to the vehicle's 12V battery, the timing light will power on. Use the mode selection buttons on the device to cycle through the available measurement modes: Voltage/RPM, Advance Angle, and Dwell Angle.
4.2 Advance Angle Mode
This mode is used to check and set ignition timing. It is crucial for resolving issues like poor acceleration and low fuel efficiency. The dual-screen display will show both the advance angle (0°-90°) and the engine RPM (200-9,999) simultaneously.
- Start the engine and allow it to reach normal operating temperature.
- Select the Advance Angle mode on the timing light.
- Aim the timing light at the harmonic balancer's timing marks.
- Observe the advance angle and RPM readings on the display. Adjust engine timing as required by your vehicle's specifications.

Image 4.1: The N300 Pro Digital Timing Light being used in Advance Angle Mode, showing the dual display for advance angle and RPM.
4.3 Dwell Angle Mode
The Dwell Angle mode allows you to set the correct dwell angle, which helps prevent ignition coil burnout and roadside breakdowns. This mode is compatible with 2- to 12-cylinder engines and displays cylinder values.
- Start the engine.
- Select the Dwell Angle mode on the timing light.
- Observe the dwell angle and cylinder values on the display. Adjust as per vehicle specifications.
4.4 Voltage / RPM Mode
This mode provides readings for engine voltage and RPM. The RPM reading can be used to identify the recommended engine speed for conducting timing advance tests.
- Start the engine.
- Select the Voltage / RPM mode on the timing light.
- Observe the voltage and RPM readings on the display.
5. Maintenance
- Cleaning: Keep the timing light clean and free from oil, grease, and dirt. Use a soft, dry cloth for cleaning. Do not use abrasive cleaners or solvents.
- Storage: Store the device in a dry, cool place away from direct sunlight and extreme temperatures.
- Cable Inspection: Regularly inspect the cables and clamps for any signs of wear, damage, or fraying. Replace if necessary.
6. Troubleshooting
- No Power: Ensure the red and black clamps are securely connected to a 12V battery with correct polarity. Check for corroded battery terminals.
- Inaccurate Readings: Verify the inductive pickup is correctly attached to the spark plug wire of cylinder #1, with the arrow pointing towards the spark plug. Ensure the engine is at operating temperature.
- Rough Idling/Hard Starting: These symptoms often indicate incorrect timing. Use the Advance Angle mode to check and adjust the ignition timing according to your vehicle's service manual.
- Display Issues: If the display is dim or flickering, check the battery connections. If the issue persists, contact customer support.
7. Specifications
| Feature | Specification |
|---|---|
| Model | N300 Pro |
| Display | 2.6" LCD High-Definition Backlit Display |
| Voltage Measurement | 9V-16V |
| RPM Range | 200-9,999 RPM |
| Advance Angle Range | 0°-90° |
| Dwell Angle Range | 0°-90° |
| Engine Compatibility | 12V Gasoline Engines (2-stroke & 4-stroke), 2-12 cylinder engines |
| Ignition System Compatibility | DIS, conventional, electronic, computer-controlled systems |
| Cable Length | 6 FT |
| Harmonic Balancer Tape Diameter Range | 5.25" to 8.00" |
| Not Suitable For | Diesel Engines |

Image 7.1: The N300 Pro Digital Timing Light is compatible with 12V gas engines found in cars, boats, motorcycles, and tractors.