
1. Introduction
This manual provides detailed instructions for the installation, operation, and maintenance of your NR NIRIDER Wireless 4 Gang Switch Panel and 3-Inch CREE LED Pod Lights. Please read this manual thoroughly before installation and use to ensure proper function and safety. Keep this manual for future reference.
2. Product Overview
The NR NIRIDER Wireless 4 Gang Switch Panel offers convenient control over your vehicle's auxiliary lighting and accessories. Coupled with the powerful 3-inch CREE LED Pod Lights, this system provides enhanced visibility and functionality for various applications.
2.1 Components
- Wireless 4 Gang Switch Panel
- Control Box/Relay Box
- 3-Inch CREE LED Pod Lights (Pair)
- Mounting Hardware and Wiring Harness
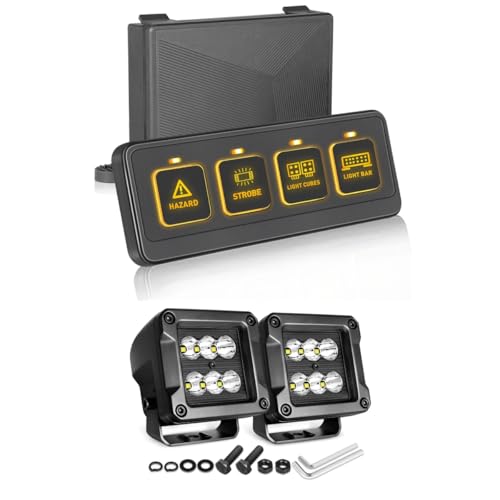
Figure 1: The wireless 4-gang switch panel and its accompanying control box.

Figure 2: A pair of 3-inch CREE LED Pod Lights with included bolts, nuts, washers, and Allen wrenches for installation.
3. Setup and Installation
Proper installation is crucial for the performance and longevity of the system. It is recommended to have this product installed by a professional if you are unfamiliar with automotive electrical systems.
3.1 General Installation Steps
- Mount the Control Box: Select a secure, dry location in your vehicle's engine bay or cabin for the control box. Ensure it is away from excessive heat and moisture.
- Connect Power: Connect the main power wires from the control box to your vehicle's battery, ensuring proper fusing.
- Wire Accessories: Connect your LED pod lights and other accessories to the designated output terminals on the control box. Each output is controlled by a specific switch on the panel.
- Mount the Switch Panel: Choose a convenient and accessible location for the wireless switch panel within your vehicle's cabin. The panel can be mounted on the dashboard, visor, or other flat surfaces using the provided mounting options.
- Test Functionality: After all connections are made, test each switch to ensure the connected accessories operate correctly.
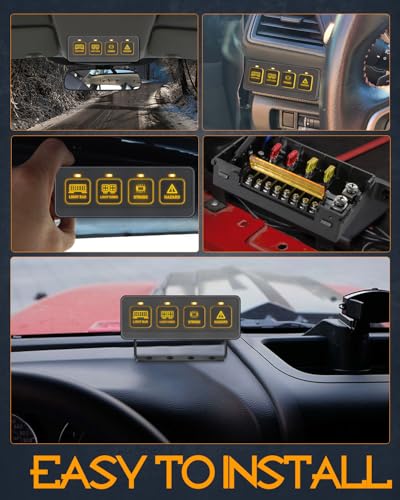
Figure 3: Examples of switch panel mounting locations and the wiring harness/fuse box for the control unit.
4. Operating Instructions
The wireless switch panel allows for remote control of your connected accessories. Each of the four buttons corresponds to a specific output on the control box.
4.1 Wireless Control
The switch panel communicates wirelessly with the control box, offering flexibility in mounting and operation. The effective range for wireless control is up to 150 feet, allowing for remote activation of your lights or accessories.
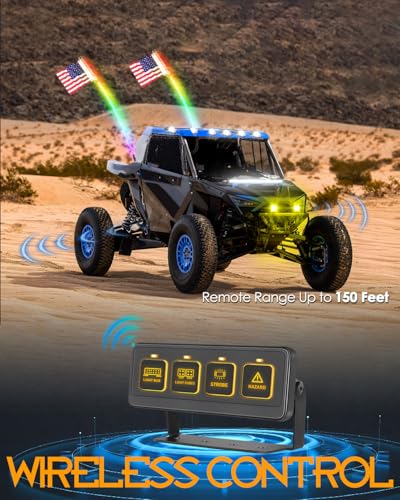
Figure 4: Illustration of the wireless control capability, showing the switch panel remotely operating vehicle lights.
4.2 Lighting Options
The system supports various lighting modes, which can be selected via the switch panel. The 3-inch CREE LED Pod Lights are designed to provide powerful illumination.
- Constant Light: Standard steady illumination for general use.
- Slow Strobe: A slower flashing pattern, often used for caution or signaling.
- Strobe: A regular flashing pattern.
- Fast Strobe: A rapid flashing pattern for high visibility or emergency situations.
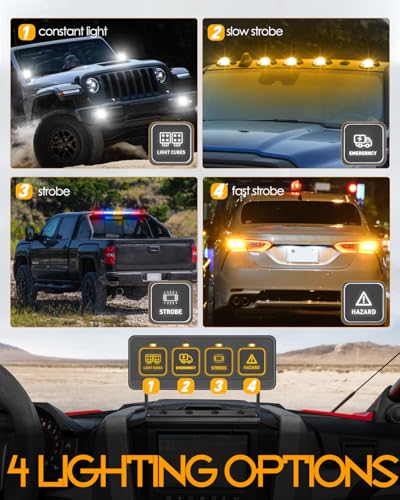
Figure 5: Visual representation of the four available lighting options: constant light, slow strobe, strobe, and fast strobe.
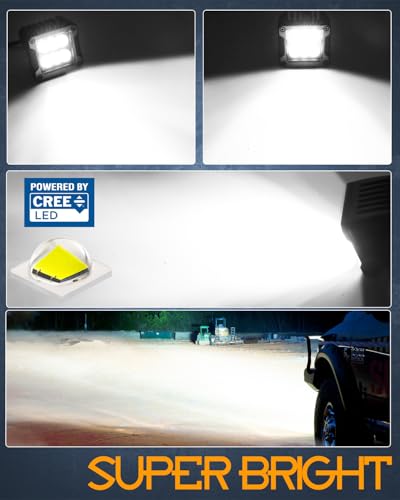
Figure 6: The 3-inch LED pod lights are powered by CREE LEDs, providing a super bright and focused beam.
5. Maintenance
To ensure optimal performance and longevity of your NR NIRIDER system, follow these maintenance guidelines:
- Regular Cleaning: Keep the switch panel and LED pod lights clean from dirt, dust, and debris. Use a soft, damp cloth for cleaning. Avoid abrasive cleaners.
- Inspect Wiring: Periodically check all wiring connections for tightness and signs of wear or corrosion. Secure any loose connections.
- Check Fuses: If an accessory stops working, check the fuse in the control box. Replace blown fuses with ones of the correct amperage.
- Environmental Protection: While the components are designed for outdoor use, avoid prolonged exposure to extreme conditions (e.g., submersion in water, extreme temperatures) that exceed their specifications.
6. Troubleshooting
If you encounter issues with your NR NIRIDER system, refer to the following troubleshooting tips:
- No Power to Switch Panel:
- Ensure the control box is properly connected to the vehicle's power source.
- Check the main fuse for the control box.
- Accessory Not Turning On:
- Verify that the accessory is correctly wired to the control box output.
- Check the fuse for that specific output on the control box.
- Ensure the accessory itself is functional.
- Wireless Panel Not Responding:
- Check the battery in the wireless switch panel (if applicable).
- Ensure there are no significant obstructions between the panel and the control box.
- Confirm the panel is within the effective wireless range (up to 150 feet).
- Lights Flickering or Dim:
- Inspect wiring for loose connections or corrosion.
- Check vehicle's battery voltage to ensure adequate power supply.
If problems persist after attempting these steps, please contact customer support.
7. Specifications
| Feature | Specification |
|---|---|
| Brand Name | NR NIRIDER |
| Model | Wireless 4 Gang Switch Panel with 3 Inch CREE LED Pod Lights |
| ASIN | B0GJZSJVKQ |
| Switch Panel Control | 4 Gang Wireless |
| LED Type | CREE LED |
| Wireless Range | Up to 150 feet (approximate) |
8. Warranty and Support
NR NIRIDER products are designed for durability and performance. For specific warranty information, please refer to the product packaging or the official NR NIRIDER website. If you require technical assistance or have questions not covered in this manual, please contact NR NIRIDER customer support through their official channels.