
1. Important Safety Information
Read and understand all safety warnings, instructions, illustrations, and specifications provided with this power tool. Failure to follow all instructions listed below may result in electric shock, fire, and/or serious injury.
General Safety Warnings
- Work Area Safety: Keep the work area clean and well-lit. Cluttered or dark areas invite accidents.
- Electrical Safety: Avoid body contact with earthed or grounded surfaces such as pipes, radiators, ranges, and refrigerators. There is an increased risk of electric shock if your body is earthed or grounded.
- Personal Safety: Always wear eye protection, long pants, and sturdy footwear. Do not operate the trimmer when barefoot or wearing open-toed sandals.
- Keep Children Away: Do not allow children or untrained individuals to operate this tool. Keep bystanders, children, and pets at least 50 feet (15 meters) away from the operating area.
- Inspect Before Use: Before each use, inspect the trimmer for any damaged or loose parts. Do not operate if any part is damaged.
- Battery Safety: Use only with specified HART 20V batteries and chargers. Refer to your battery and charger manuals for specific safety instructions.
2. Product Overview
The HART 20-Volt 13-inch String Trimmer HGST06 is a versatile, battery-powered tool designed for light to medium-duty trimming and edging tasks. Its cordless design offers freedom of movement without the hassle of power cords.
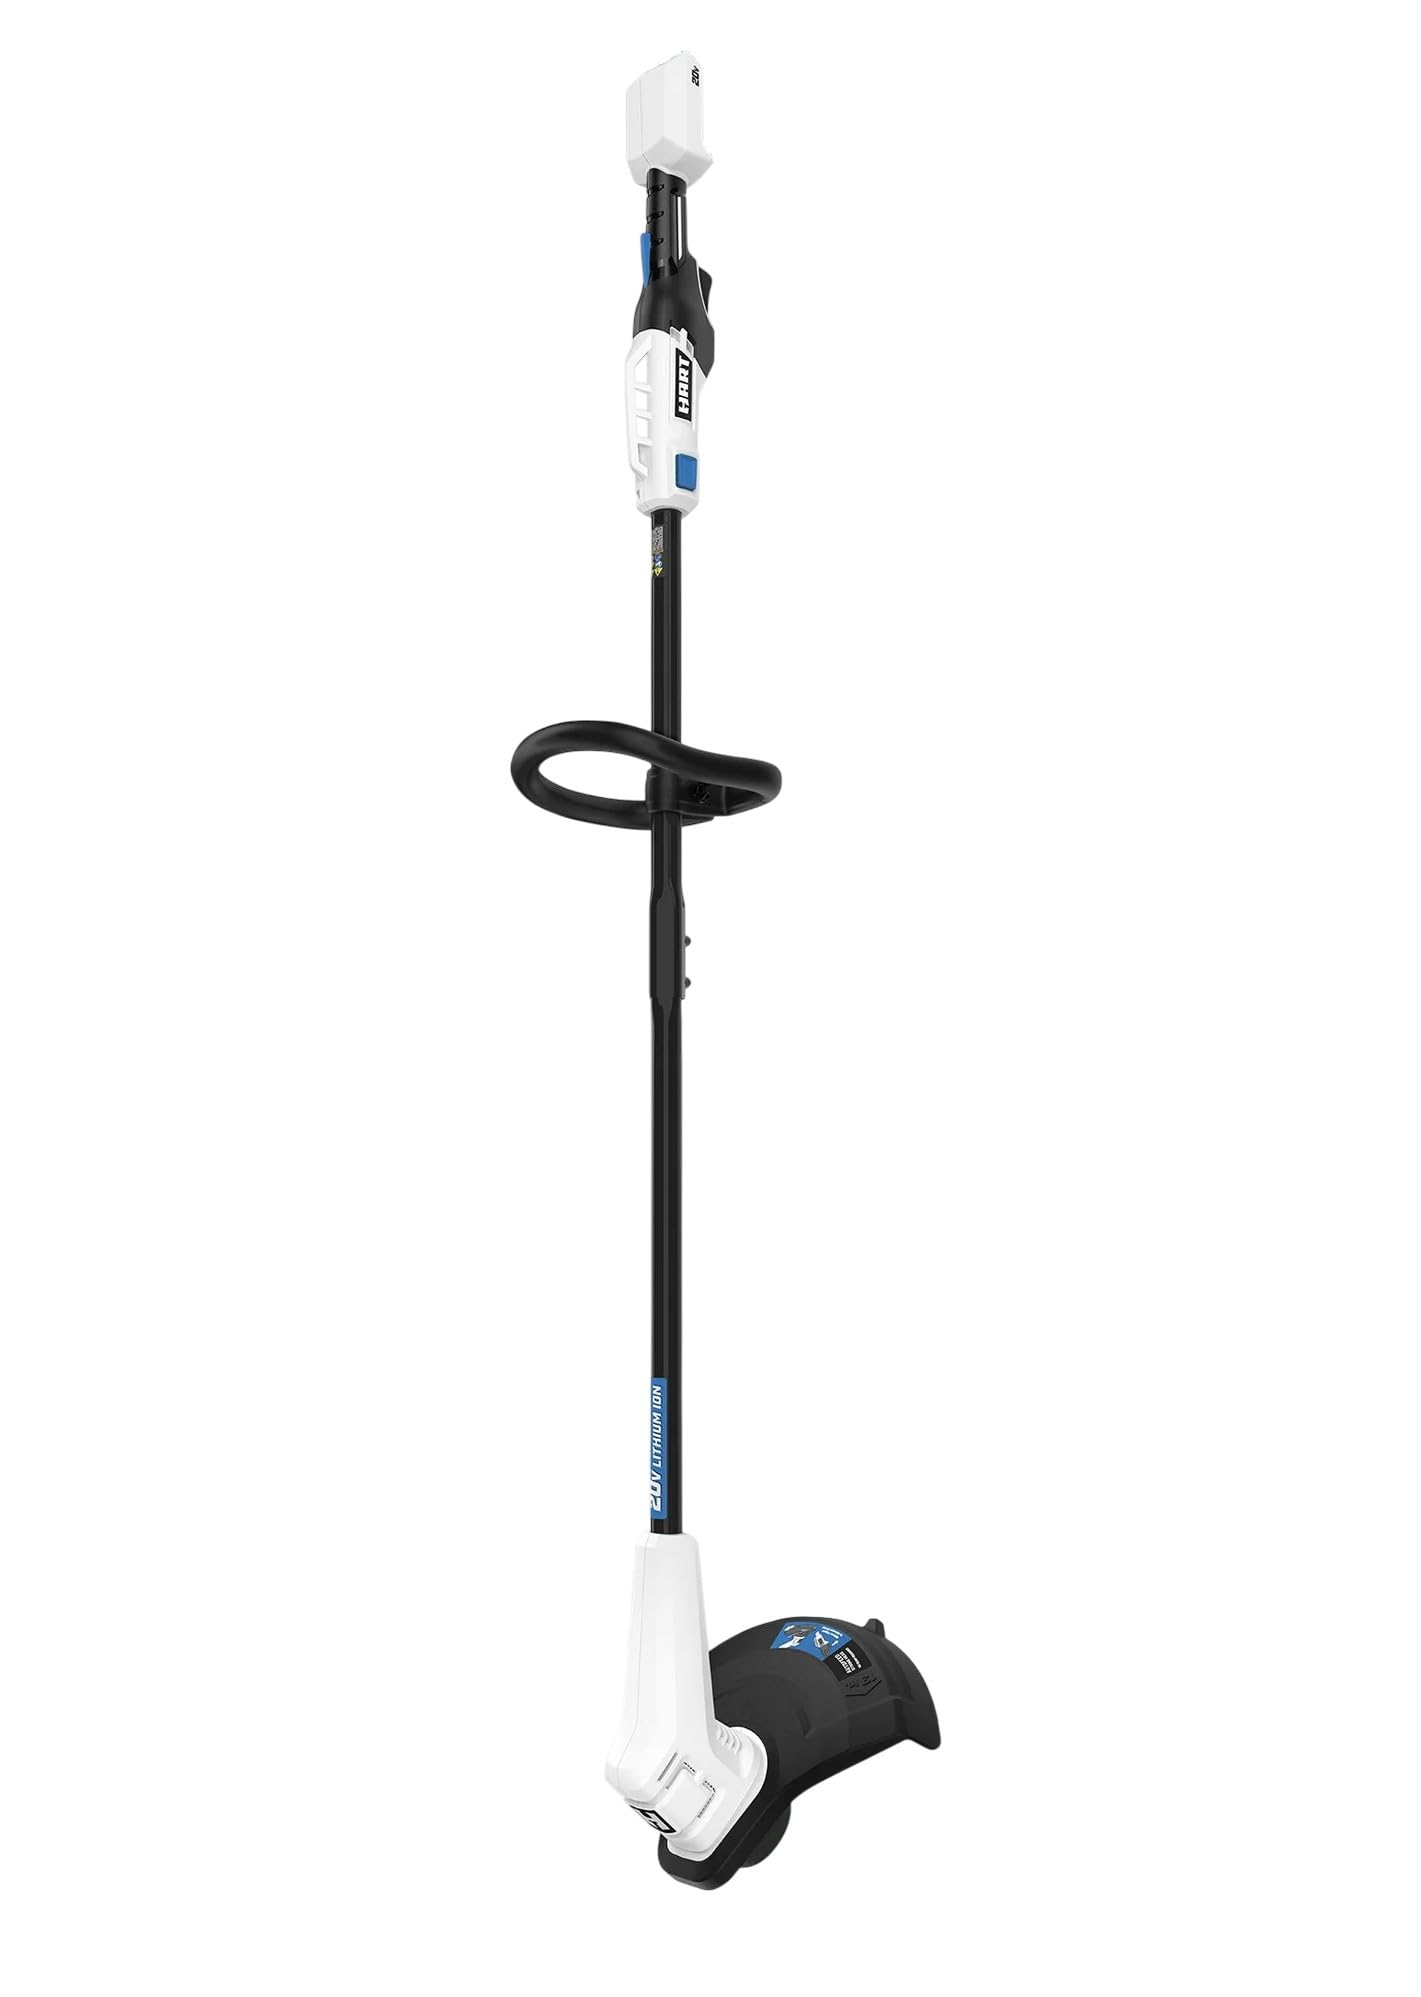
Figure 1: HART 20-Volt 13-inch String Trimmer. This image displays the complete string trimmer unit, highlighting its ergonomic design and the battery slot.
Key Features
- Cordless Operation: Powered by a HART 20V battery (not included) for unrestricted movement.
- 13-inch Cutting Swath: Ideal for various trimming applications.
- Auto-Feed Head: Automatically releases 1/4 inch of line when the trigger is released, eliminating the need for manual bumping.
- Edger Function: Easily converts from a trimmer to a dedicated edger by rotating the shaft.
- Lightweight Design: Enhances maneuverability and reduces user fatigue.
- Eco-Friendly: Produces low noise, minimal vibration, and zero emissions compared to gas-powered alternatives.
Note: The HART 20V battery and charger are sold separately and are not included with this tool.
3. Setup and Assembly
This section guides you through the initial setup and assembly of your string trimmer.
3.1 Attaching the Guard
- Align the guard with the mounting slots on the trimmer head.
- Secure the guard using the provided screws and a screwdriver. Ensure it is firmly attached before use.
3.2 Installing the Auxiliary Handle
- Slide the auxiliary handle onto the shaft.
- Adjust the handle to a comfortable operating position.
- Tighten the handle securely using the knob or lever provided.
3.3 Battery Installation
- Ensure the trimmer is turned off and the trigger is disengaged.
- Align the ribs on the battery with the grooves in the trimmer's battery port.
- Slide the battery into the port until it clicks into place.
- To remove the battery, press the release latch and pull the battery out.
4. Operation
Follow these instructions for safe and effective operation of your string trimmer.
4.1 Starting and Stopping
- To Start: Ensure a charged battery is installed. Press and hold the safety lock-out button, then squeeze the trigger switch.
- To Stop: Release the trigger switch. The cutting line will stop rotating.
4.2 Trimming Operation
- Hold the trimmer firmly with both hands.
- Maintain a comfortable stance, keeping the trimmer head parallel to the ground.
- Swing the trimmer from side to side, using the tip of the line to cut grass and weeds.
- Avoid cutting into hard objects, fences, or trees, as this can damage the line and the trimmer.
- The auto-feed head will automatically advance the line as needed.
4.3 Edging Operation
- Turn off the trimmer and remove the battery.
- Locate the shaft rotation collar or button.
- Rotate the trimmer shaft 90 degrees until it locks into the edging position.
- Reinstall the battery.
- Hold the trimmer with the wheel on the guard resting on the pavement or hard surface, guiding the line along the edge.
4.4 Adjusting Cutting Swath
The cutting swath can be adjusted between 11 inches and 13 inches. Refer to the trimmer head for specific adjustment mechanisms, which typically involve repositioning a small blade or guide on the guard.
5. Maintenance
Regular maintenance ensures optimal performance and extends the life of your trimmer.
5.1 Cleaning
- Always remove the battery before cleaning.
- Use a clean, damp cloth to wipe down the exterior of the trimmer.
- Remove any grass, dirt, or debris from the guard and trimmer head.
- Do not use harsh chemicals or abrasive cleaners.
5.2 Line Replacement
When the cutting line runs out, it needs to be replaced. This model features an auto-feed head, but the spool itself will need replacement or manual winding.
- Remove the battery from the trimmer.
- Locate the tabs or buttons on the trimmer head cover and press them to remove the cover.
- Remove the empty spool.
- Install a new pre-wound spool or manually wind new trimmer line onto the existing spool according to the instructions provided with the replacement line.
- Thread the line through the eyelets on the trimmer head.
- Replace the spool and cover, ensuring it clicks securely into place.
5.3 Storage
- Remove the battery before storing the trimmer.
- Store the trimmer in a dry, well-ventilated area, away from direct sunlight and extreme temperatures.
- Keep out of reach of children.
6. Troubleshooting
This section addresses common issues you might encounter with your string trimmer.
| Problem | Possible Cause | Solution |
|---|---|---|
| Trimmer does not start | Battery not installed correctly Battery not charged Safety lock-out not engaged | Ensure battery is fully seated Charge the battery Press safety lock-out button before squeezing trigger |
| Cutting line does not advance | Line tangled or jammed Spool empty Line too short | Remove battery, clear obstruction Replace spool Replace spool or manually advance line if possible |
| Motor runs but line does not spin | Trimmer head damaged Line severely jammed | Inspect trimmer head for damage, replace if necessary Remove battery, clear obstruction from head |
| Excessive vibration | Damaged cutting line Loose components | Replace cutting line Check all screws and fasteners, tighten as needed |
7. Specifications
| Feature | Specification |
|---|---|
| Model Number | HGST06 |
| Power Source | 20-Volt Battery (not included) |
| Cutting Width | 13 Inches (adjustable 11"-13") |
| Item Weight | 5 Pounds |
| Cordless | Yes |
| Assembly Required | Yes |
| Manufacturer | Hart |
8. Warranty and Support
For warranty information and customer support, please refer to the documentation included with your purchase or visit the official HART Tools website. Keep your proof of purchase for warranty claims.
If you require assistance with assembly, operation, or troubleshooting beyond the scope of this manual, contact HART customer service.
