
1. Introduction
Thank you for choosing the jely Wireless Indoor Outdoor Weather Station. This device provides real-time monitoring of indoor and outdoor temperature and humidity, along with weather forecasts, a DCF radio-controlled clock, and an alarm function. Please read this manual carefully before use to ensure proper operation and to maximize the product's lifespan.

Figure 1: Main Weather Station Unit and Wireless Remote Sensor.
2. Key Features
- Real-time Weather Monitoring: Displays 6 types of weather forecasts (sunny, cloudy, overcast, light rain, heavy rain, snow) based on atmospheric pressure, temperature, and humidity changes.
- Temperature Alert: An alarm sounds when the outdoor temperature exceeds or falls below a user-defined range.
- Multifunction Color LCD Display: Features a clear digital color display with adjustable brightness for easy reading. Monitors temperature, humidity, and atmospheric pressure.
- DCF Radio Clock & Alarm: Automatically receives current time and date. Includes an alarm clock with a 5-minute snooze function.
- Multi-site Monitoring: Supports up to 3 wireless remote sensors (one sensor included). The wireless range can reach up to 80 meters in open areas.
- Dual Power Modes: Can be powered by an AC adapter (included) for continuous display or by 3 AAA batteries (not included) for portable use with an energy-saving auto-off display.

Figure 2: Overview of the Multifunction Display.
3. Package Contents
Please check the package contents upon opening:
- jely Weather Station Main Unit
- Wireless Remote Sensor (1 unit)
- AC Power Adapter
- User Manual
4. Setup Instructions
4.1 Powering the Main Unit
- Using AC Adapter (Recommended for continuous display): Connect the included AC adapter to the main unit's power port and plug it into a standard wall outlet. The display will remain continuously lit.
- Using Batteries (for portable use): Open the battery compartment on the back of the main unit. Insert 3 AAA batteries (not included), ensuring correct polarity (+/-). The display will light up for 10-15 seconds and then turn off to save power. Press any button to temporarily illuminate the screen.
4.2 Powering the Remote Sensor
Open the battery compartment on the back of the wireless remote sensor. Insert 2 AAA batteries (not included), ensuring correct polarity (+/-).
4.3 Pairing the Sensor with the Main Unit
The main unit and remote sensor should automatically pair within a few minutes after both are powered on. If pairing does not occur, or if you are adding additional sensors:
- Ensure both the main unit and sensor have fresh batteries or are connected to power.
- Place the sensor near the main unit during the initial setup.
- On the main unit, press and hold the 'CHANNEL' or 'SEARCH' button (refer to the button layout in the operating section) to initiate a search for the remote sensor.
- Once connected, the outdoor temperature and humidity will appear on the main unit's display.

Figure 3: Multi-site monitoring with up to 3 sensors.
4.4 Placement
- Main Unit: Place the main unit indoors on a flat surface using its integrated stand, or mount it on a wall using the hanging hole. Avoid direct sunlight or heat sources.
- Remote Sensor: Place the remote sensor outdoors in a shaded, dry location, protected from direct rain and sunlight, to ensure accurate readings. Ensure it is within the 80-meter wireless range of the main unit.

Figure 4: Tabletop and Wall Mount Options.
5. Operating Instructions
5.1 Display Overview
The color LCD display shows various information simultaneously:
- Indoor Temperature & Humidity
- Outdoor Temperature & Humidity (from remote sensor)
- Weather Forecast Icons
- Time & Date (DCF controlled)
- Moon Phase
- Comfort Level Indicator

Figure 5: Detailed LCD Display Layout.
5.2 Button Functions
The main unit typically has buttons for setting, mode, alarm, channel, and snooze/light. Refer to the specific button labels on your device.
- SET: Enters setting mode for time, date, alarm, etc.
- MODE: Switches between display modes or confirms settings.
- ALARM: Activates/deactivates the alarm or enters alarm setting mode.
- CHANNEL: Cycles through connected remote sensors (CH1, CH2, CH3) or initiates a sensor search.
- SNZ/LIGHT: Activates the snooze function during an alarm or adjusts display brightness/backlight.
5.3 Time and Date Setting (DCF)
The weather station automatically synchronizes time and date via the DCF radio signal. This process usually occurs overnight. Ensure the station is placed away from electronic interference for optimal reception.
- If manual setting is required (e.g., in areas without DCF reception), press and hold the 'SET' button to enter time/date setting mode. Use the '+' or '-' buttons (if available) to adjust values and 'SET' again to confirm.
5.4 Alarm and Snooze Function
- To set the alarm, press the 'ALARM' button to enter alarm setting mode. Use the adjustment buttons to set the desired alarm time.
- When the alarm sounds, press the 'SNZ/LIGHT' button to activate the 5-minute snooze function.
- To stop the alarm, press any other button.
5.5 Weather Forecast
The station predicts weather for the next 12-24 hours based on atmospheric pressure changes. The forecast icons include sunny, partly cloudy, cloudy, rainy, stormy, and snowy. These are predictions and may not always match actual weather conditions.

Figure 6: Weather Forecast Icons.
5.6 Display Brightness
When powered by the AC adapter, the display backlight is continuously on. Press the 'SNZ/LIGHT' button to cycle through 3 brightness levels (100%, 50%, 0%).
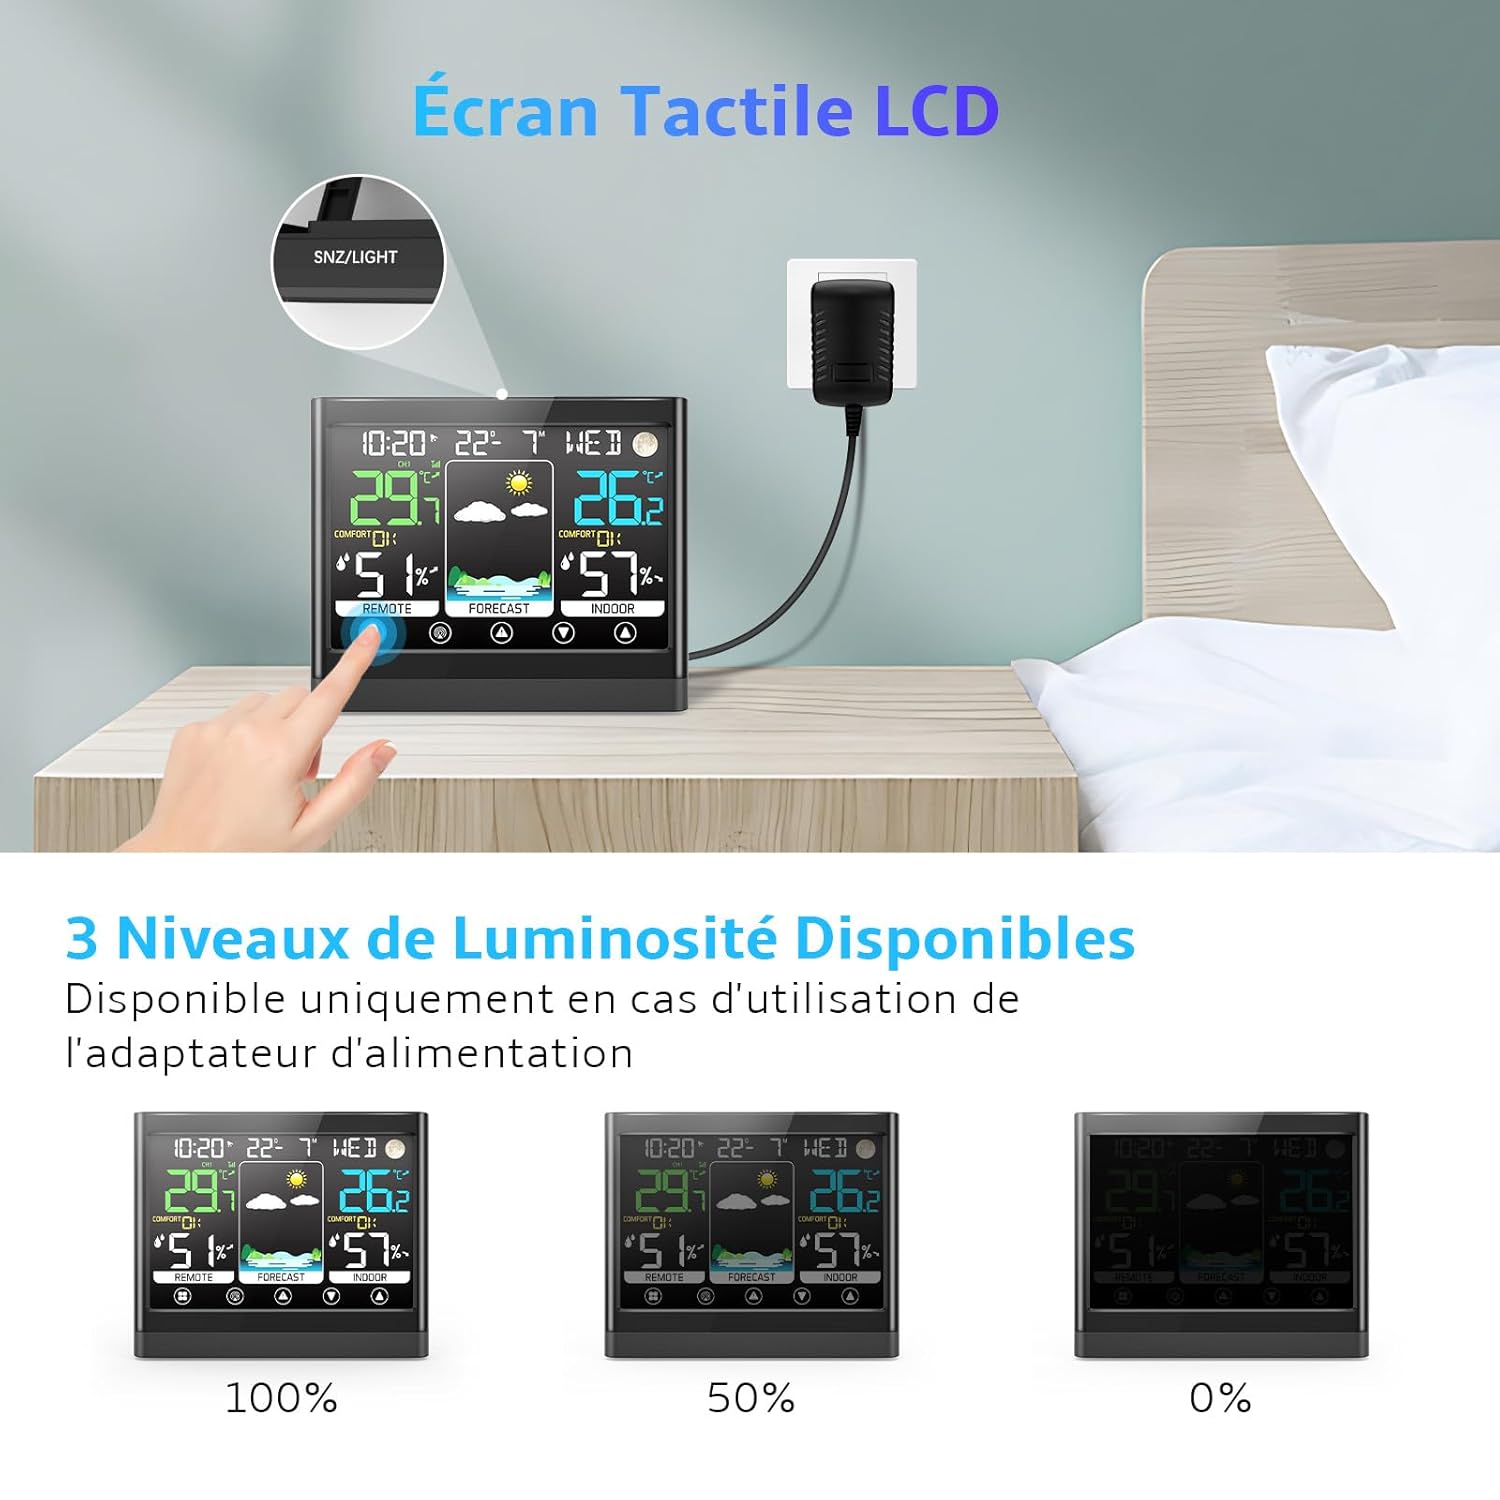
Figure 7: Adjustable Display Brightness.
6. Maintenance
- Cleaning: Wipe the main unit and sensor with a soft, damp cloth. Do not use abrasive cleaners or solvents.
- Battery Replacement: Replace batteries in both the main unit and remote sensor when the low battery indicator appears on the display. Ensure correct polarity.
- Storage: If not in use for an extended period, remove all batteries from both units. Store in a cool, dry place.
7. Troubleshooting
| Problem | Possible Cause | Solution |
|---|---|---|
| No outdoor temperature/humidity reading. | Sensor not paired or out of range; low sensor battery. | Ensure sensor batteries are fresh. Re-pair the sensor (see Section 4.3). Move sensor closer to the main unit. |
| Inaccurate temperature/humidity readings. | Sensor exposed to direct sunlight/rain; poor ventilation. | Relocate the sensor to a shaded, well-ventilated area, protected from elements. |
| Display is dim or blank (on battery power). | Energy-saving mode activated; low main unit battery. | Press 'SNZ/LIGHT' to illuminate. Replace main unit batteries or use AC adapter for continuous display. |
| DCF time synchronization fails. | Interference; weak signal; incorrect time zone setting. | Move the unit away from electronic devices. Try manual time setting if DCF signal is consistently weak. |
8. Specifications
| Feature | Detail |
|---|---|
| Brand | jely |
| Model Number | QY-WSDJ |
| Material | Acrylonitrile Butadiene Styrene (ABS) |
| Display Type | Color LCD |
| Power Source (Main Unit) | AC Adapter (included) or 3 x AAA Batteries (not included) |
| Power Source (Remote Sensor) | 2 x AAA Batteries (not included) |
| Temperature Accuracy | ±1 °C |
| Wireless Range | Up to 80 meters (open area) |
| Connectivity Technology | RF (Radio Frequency) for sensors, potential Wi-Fi/Bluetooth for app (if applicable) |
| Dimensions (Main Unit) | Approx. 11.5 cm (Width) x 2 cm (Depth) x 2.4 cm (Height) |
| Included Components | Weather Station, Wireless Sensor, AC Adapter, Manual |
9. Warranty and Support
jely products are designed for reliability and performance. For specific warranty information, please refer to the warranty card included with your purchase or contact jely customer support.
If you encounter any issues or have questions regarding your jely Weather Station, please contact our customer support team through the retailer where you purchased the product or visit the official jely brand store online.
Online Brand Store: jely Official Store
