
1. Introduction
Thank you for choosing the VASAGLE Shoe Cabinet. This manual provides essential information for the safe assembly, operation, and maintenance of your new shoe cabinet. Please read these instructions carefully before beginning assembly and retain them for future reference.
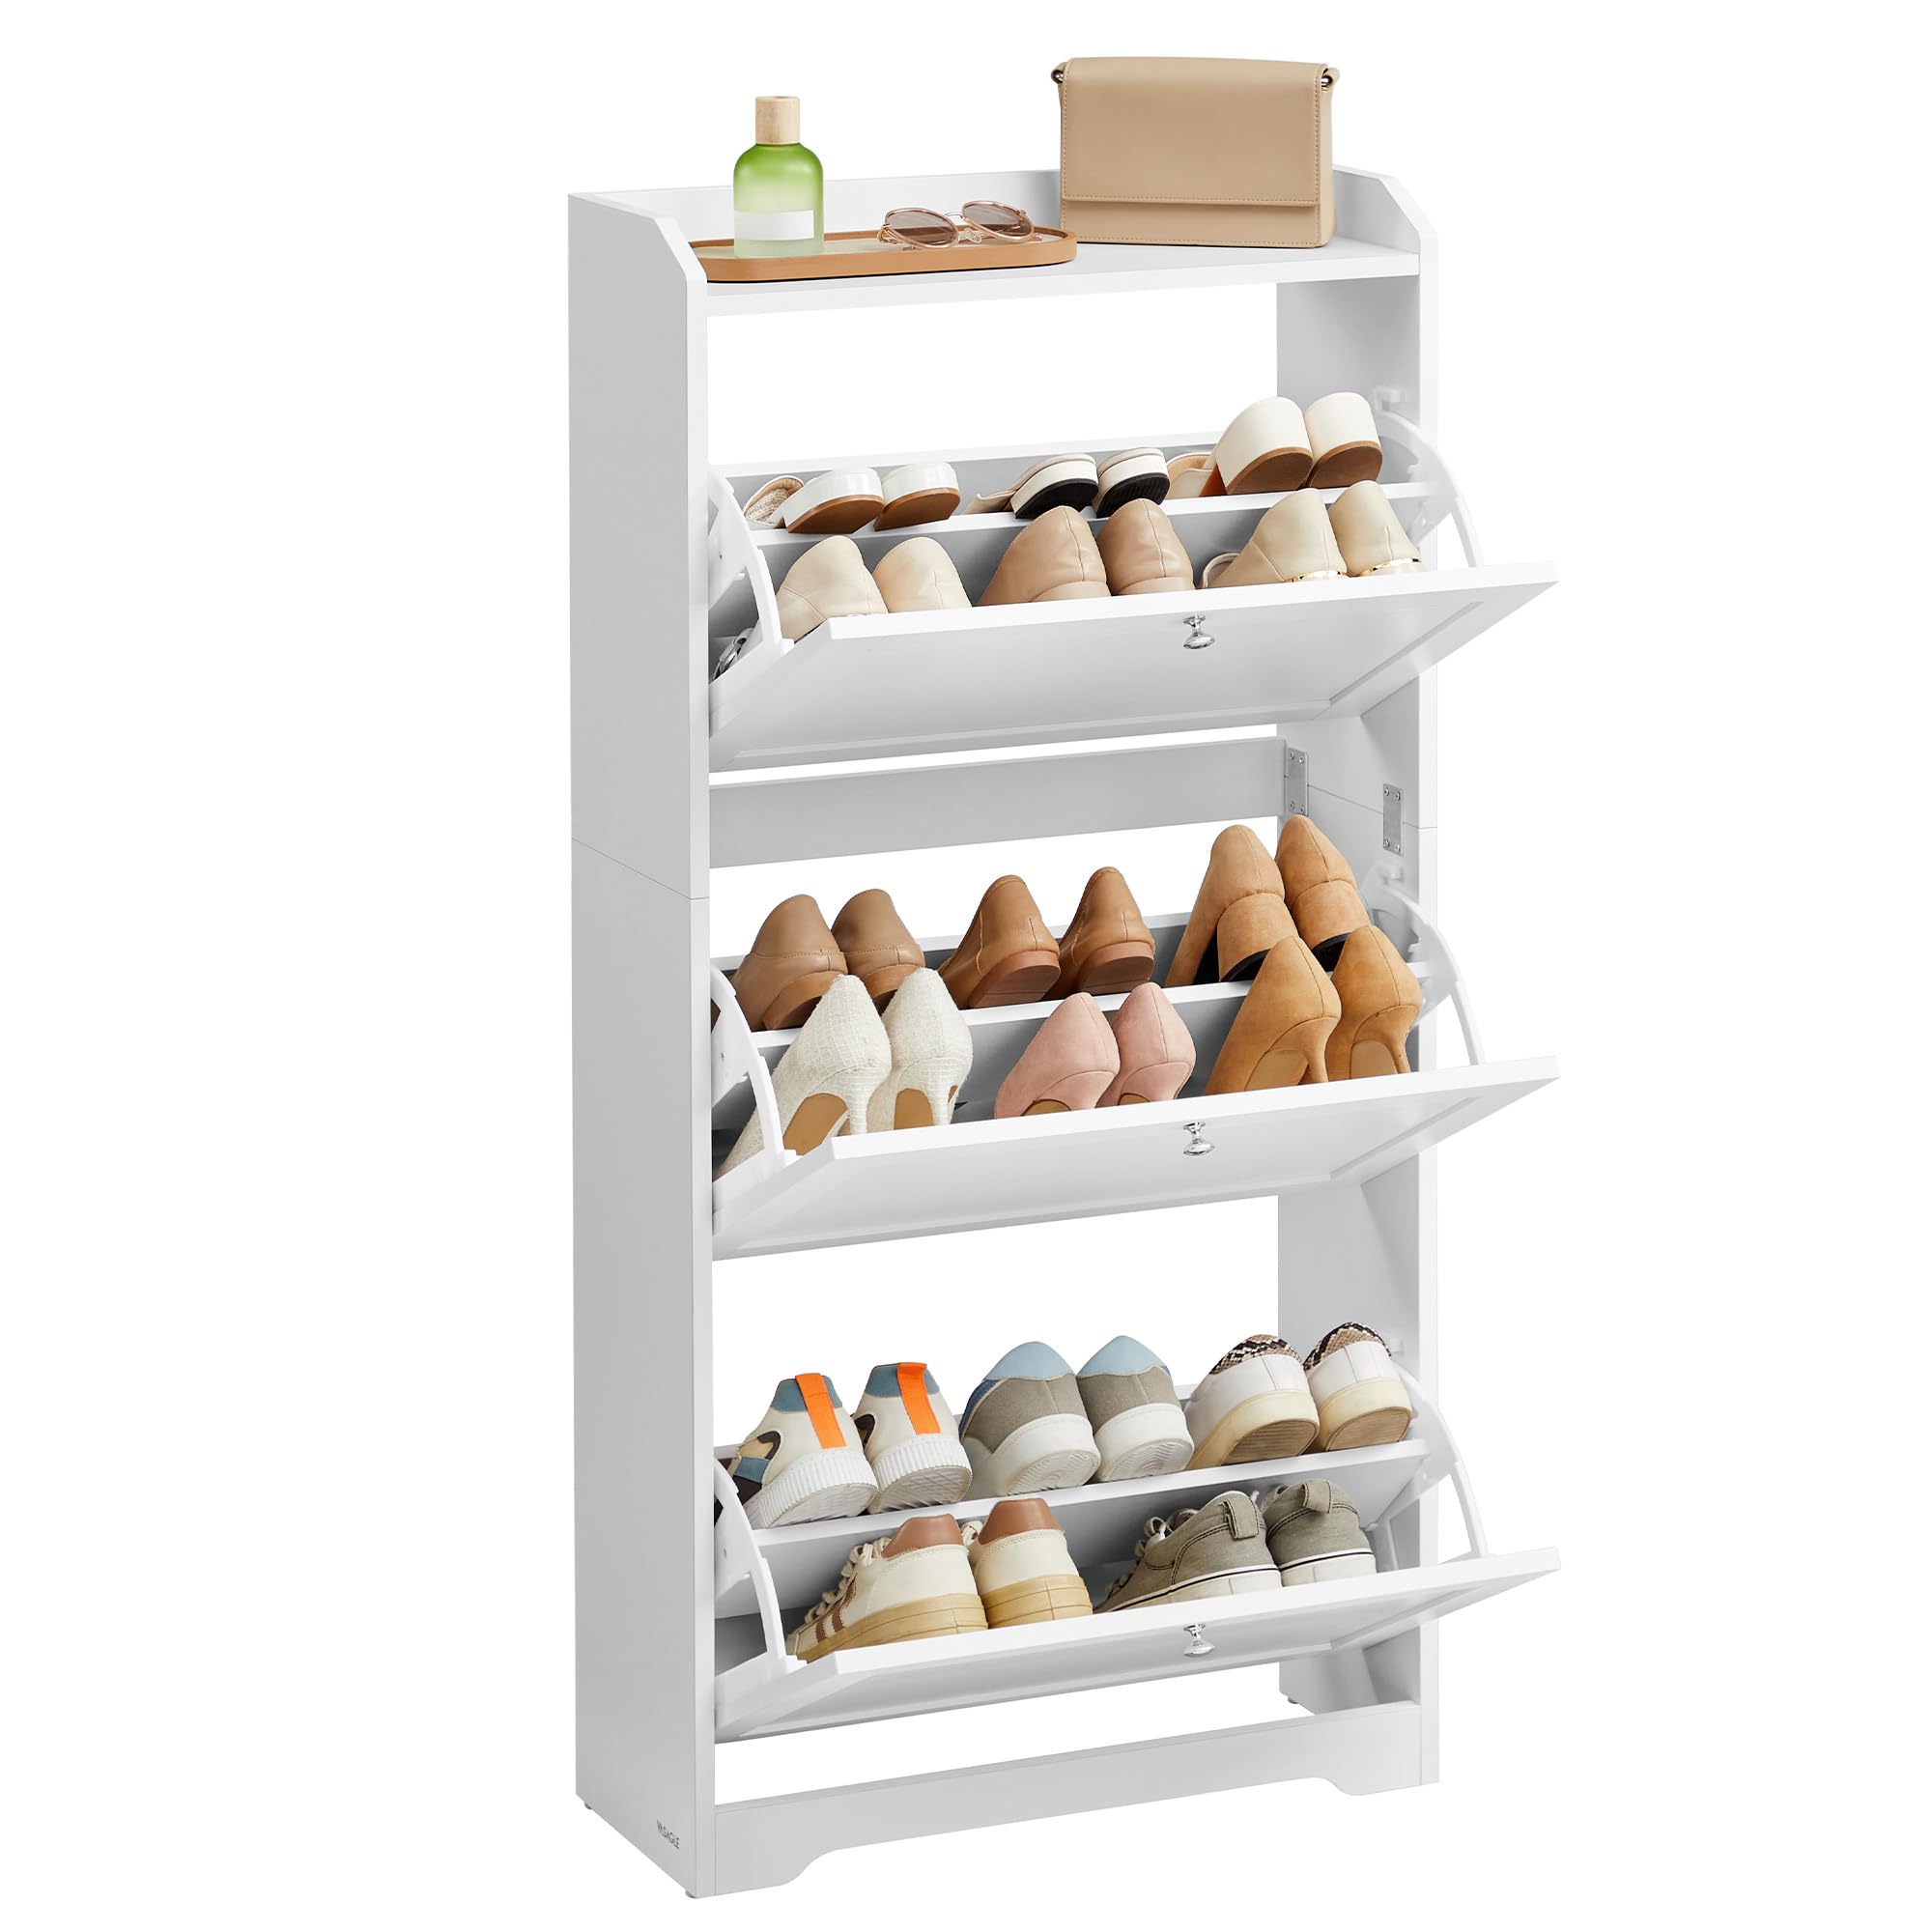
Image 1.1: The VASAGLE Shoe Cabinet in Cloud White, featuring three flip drawers and a top shelf.
2. Safety Information
- Always secure the cabinet to the wall using the provided anti-tip kit to prevent tipping and potential injury.
- Do not allow children to climb on or play with the cabinet.
- Ensure all screws and fasteners are tightened securely before use. Periodically check and re-tighten as necessary.
- Place the cabinet on a flat, stable surface.
- Do not exceed the maximum weight capacity of 22 pounds for the top surface.

Image 2.1: Detail of the anti-tip kit, which must be installed for safety.
3. Package Contents
Before assembly, verify that all components listed below are present and undamaged. If any parts are missing or damaged, please contact customer support.
- 1 x Shoe Cabinet (main unit)
- 1 x Accessory Kit (contains hardware)
- 1 x Anti-Tip Kit
- 1 x Instructions Manual (this document)
4. Setup and Assembly
Assembly of this shoe cabinet is required. Please follow the detailed step-by-step instructions provided in the separate assembly guide included in your package. Ensure you have adequate space and the necessary tools (usually a screwdriver) before starting.
- Unpack Components: Carefully remove all parts from the packaging and lay them out on a clean, soft surface to prevent scratches.
- Identify Parts: Refer to the parts list in the assembly guide to identify each component and hardware piece.
- Follow Assembly Steps: Assemble the cabinet structure according to the numbered steps in the assembly guide. Pay close attention to diagrams and warnings.
- Install Anti-Tip Kit: Once the cabinet is fully assembled, install the anti-tip kit to a sturdy wall stud as instructed. This is a critical safety step.
- Final Check: Ensure all connections are secure and the cabinet is stable.

Image 4.1: The cabinet includes foot pads to protect your floor.
5. Operating Instructions
This shoe cabinet is designed for efficient shoe storage and organization in your entryway or other living spaces.
5.1 Using the Flip Drawers
- Each of the three drawers flips open to reveal two compartments for shoes.
- Gently pull the metal knob to open a drawer.
- Place shoes into the compartments. The cabinet can hold approximately 12-20 pairs of shoes (up to US size 10), depending on shoe type and size.
- Push the drawer back until it clicks into a closed position.

Image 5.1: The metal knob allows for easy opening and closing of the flip drawers.
5.2 Adjustable and Removable Dividers
- Each drawer features a detachable divider with 3 adjustable levels.
- To adjust the divider, gently lift it and reposition it into one of the three slots to accommodate different shoe heights (e.g., flats, heels, boots).
- For taller items or larger shoes, the divider can be completely removed.

Image 5.2: Illustration of the 3-level adjustment and detachable divider for various shoe types.
5.3 Top Shelf Usage
- The top surface of the cabinet can be used for displaying small decorative items, keys, or other entryway essentials.
- The raised edges on the top shelf help prevent items from sliding off.

Image 5.3: The top shelf features raised edges for secure placement of items.
6. Maintenance
Proper care will ensure the longevity and appearance of your shoe cabinet.
- Cleaning: Wipe the cabinet surfaces with a soft, damp cloth. Avoid harsh chemicals or abrasive cleaners, which can damage the finish.
- Spills: Immediately wipe up any spills to prevent moisture damage.
- Inspection: Periodically check all screws and connections to ensure they remain tight. Re-tighten if necessary.
- Avoid Direct Sunlight: Prolonged exposure to direct sunlight can cause fading or discoloration.

Image 6.1: The cabinet surface is designed to be easy to clean with a damp cloth.
7. Troubleshooting
If you encounter any issues with your shoe cabinet, refer to the following common solutions:
- Cabinet Wobbles: Ensure the cabinet is placed on a level surface. Check that all assembly screws are fully tightened. Verify the anti-tip kit is securely installed.
- Drawers Not Closing Smoothly: Check for any obstructions inside the drawer compartments. Ensure shoes are not overfilling the compartments. Verify that the drawer mechanism was assembled correctly according to the instructions.
- Missing Parts: If you discover missing parts during assembly, do not proceed. Contact customer support immediately for assistance.
8. Specifications
| Feature | Detail |
|---|---|
| Brand | VASAGLE |
| Model Number | ULBC036WB02S |
| Color | Cloud White |
| Material | Engineered Wood (Particle Board) |
| Product Dimensions (D x W x H) | 9.5"D x 23.6"W x 47.7"H (24 cm D x 60 cm W x 121.2 cm H) |
| Item Weight | 42.8 Pounds |
| Number of Flip Drawers | 3 |
| Shoe Capacity | 12-20 pairs (up to US size 10) |
| Weight Capacity (Top Surface) | 22 Pounds |
| Assembly Required | Yes |
| Mounting Type | Floor Mount (with anti-tip kit for wall anchoring) |

Image 8.1: Detailed dimensions of the VASAGLE Shoe Cabinet.
9. Warranty and Support
For warranty information, product support, or to report missing/damaged parts, please refer to the contact details provided in your purchase documentation or visit the official VASAGLE website. Please have your model number (ULBC036WB02S) and purchase date ready when contacting support.


