1. Introduction
This instruction manual provides essential information for the installation, adjustment, and maintenance of your maXpeedingrods Coilover Struts. These coilovers are designed to enhance vehicle handling and allow for ride height customization.
Compatibility:
- Toyota Corolla E140 AZE141L XRS (2009-2010)
- Toyota Corolla E140/E160 ZRE142L LE (2009-2013)
- Toyota Corolla E150/E170 ZRE172L (2014-2019)
- Toyota Matrix E140 LE (2009-2014)
Important: Professional installation is highly recommended for safety and optimal performance.
2. Product Features
The maXpeedingrods Coilover Struts incorporate several design features for performance and durability:
- Adjustable Ride Height: Allows for lowering the vehicle by 25-75mm, depending on the specific vehicle model, to achieve a lower center of gravity and a more aggressive stance.
- Adjustable Pre-load Spring Tension: Enables fine-tuning to reduce unwanted shaking motions.
- Adjustable Camber Plate and Pillow Ball Top Mount: (For some models) Designed to sharpen steering response.
- CNC Machined Aluminum Top Mounts and Lockers: Provides excellent strength while saving weight.
- Heavy Duty Steel Lower Mounts: Ensures high durability and reliability.
- High Tensile Springs: Tested for 600,000 continuous cycles to ensure high tensile strength, with distortion less than 0.04%. Special surface treatment enhances durability and performance.
- Long Rubber Dust Boots: Fitted to all inserts to protect the damper from dust and debris, extending lifespan.
- Twin-Tube Structure: Provides excellent handling and control characteristics for most driving conditions.
- Corrosion Finish: Anodized aluminum and powder-coated carbon steel parts offer enhanced corrosion resistance.

Figure 2.1: Height Adjustable feature, showing independent ride height and spring tension settings.
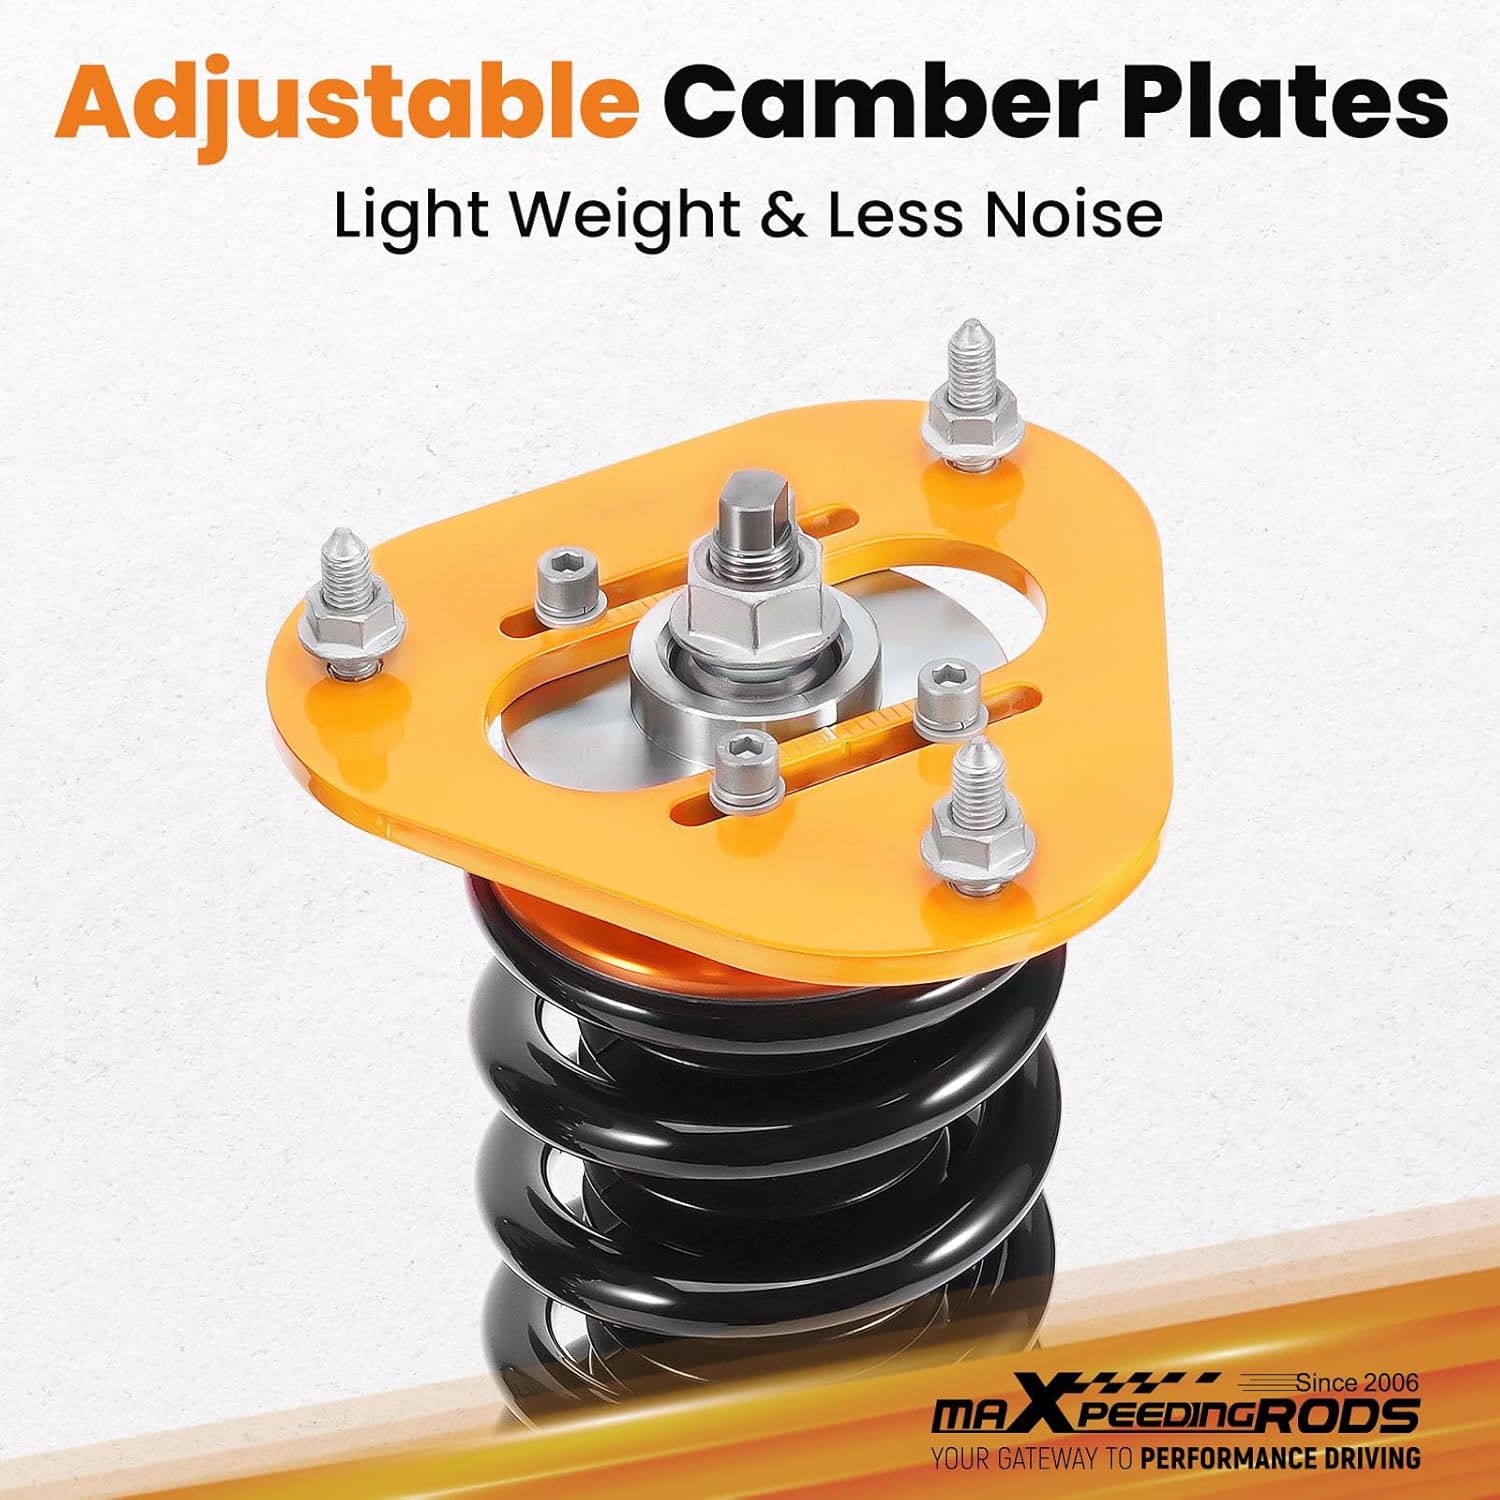
Figure 2.2: Adjustable Camber Plates, designed for light weight and reduced noise.

Figure 2.3: Full Length Dust Boot, protecting the rod and piston from dust.

Figure 2.4: High Rigidity Springs, made from 55CrSi steel cold-bent coil springs.

Figure 2.5: Twin-Tube Structure, illustrating separated oil and gas chambers for sufficient stroke and comfortable ride.
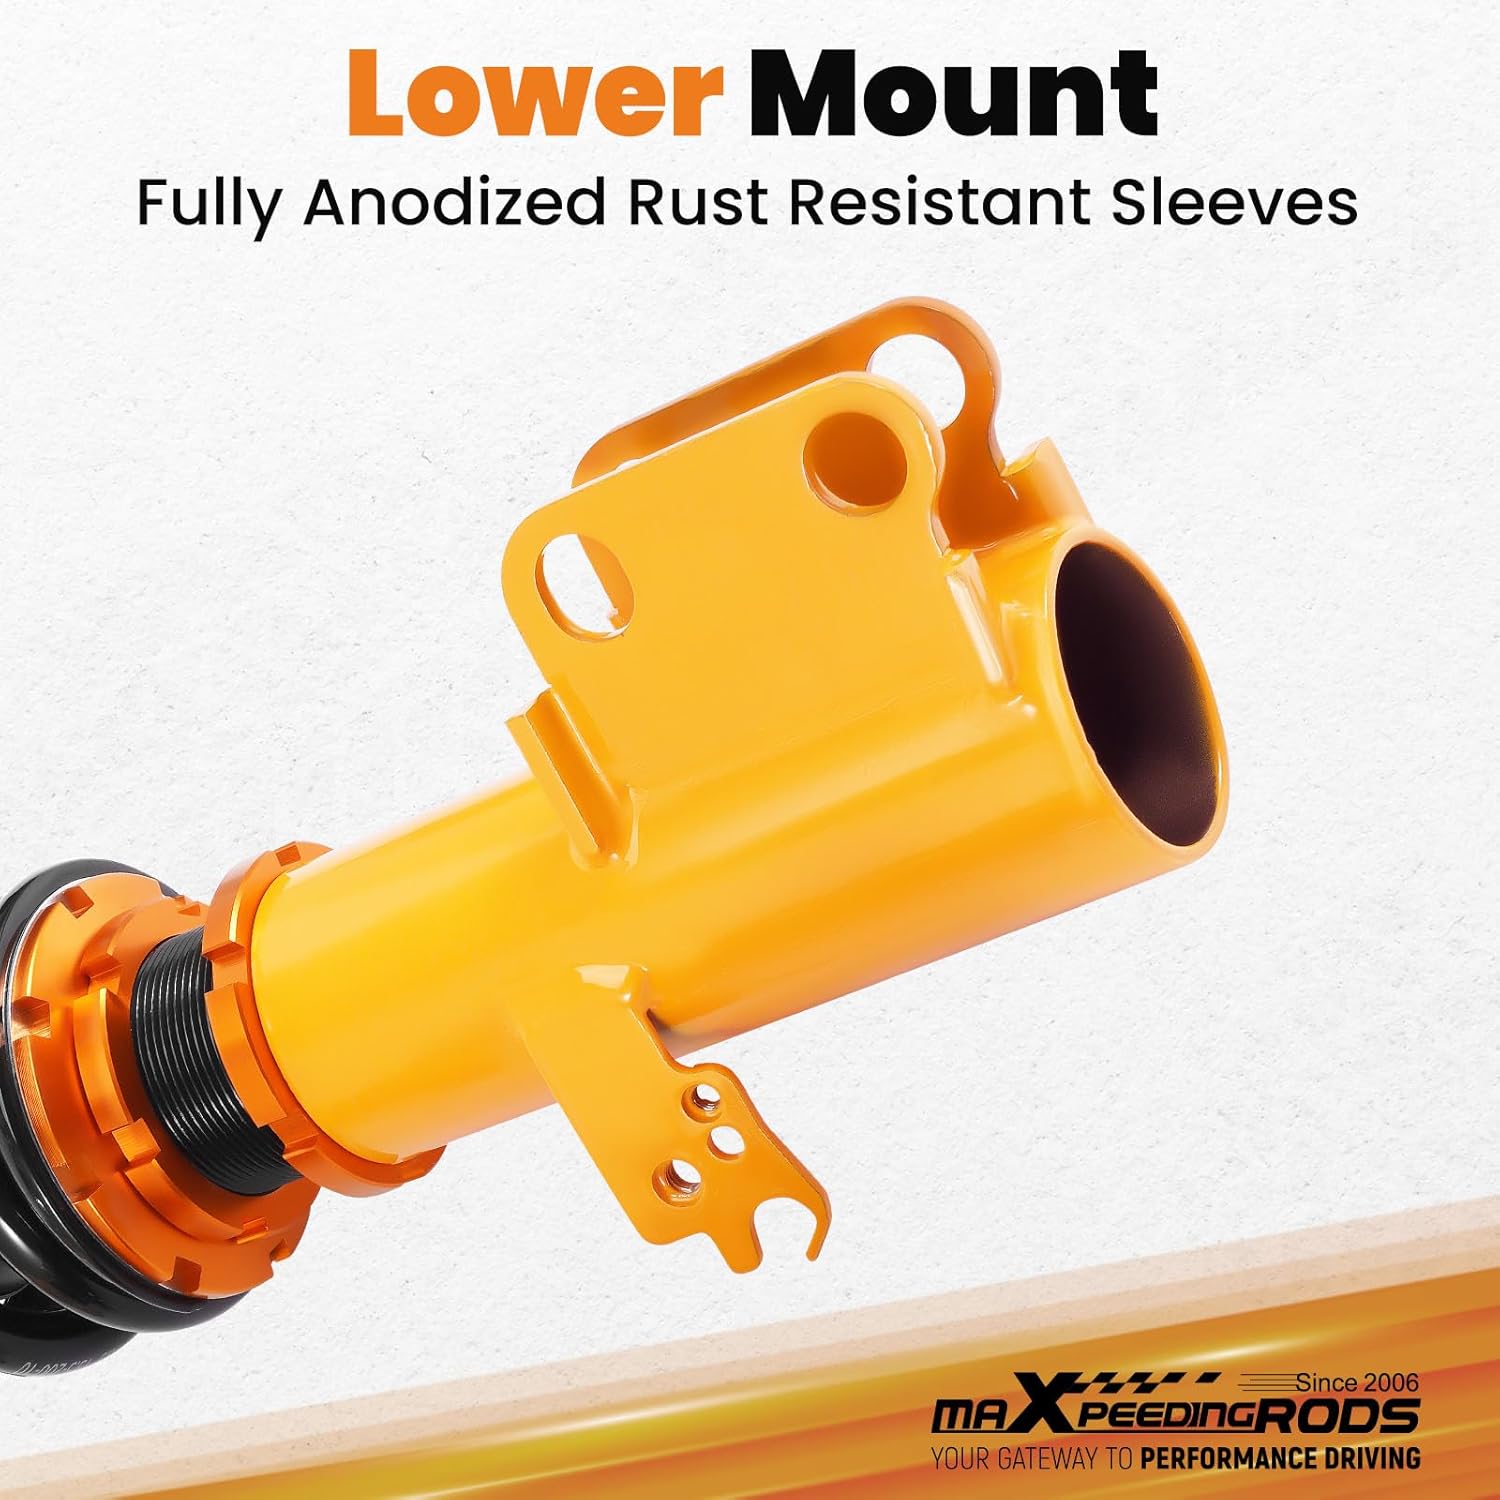
Figure 2.6: Lower Mount, featuring fully anodized rust-resistant sleeves.
3. Specifications
| Feature | Detail |
|---|---|
| Front Top Mount | Pillow ball with camber plate |
| Rear Top Mount | Standard rubber |
| Damping Adjustable | Not available |
| Height Adjustable | Yes, lowering 25-75mm (vehicle model dependent) |
| Camber Adjustable | Available (for some models) |
| Front Spring Rate | 7 kg/mm (392 lbs/in) |
| Rear Spring Rate | 6 kg/mm (336 lbs/in) |
| Front Spring Inner Diameter | 70.5mm |
| Rear Spring Inner Diameter | 70.5mm |
| Front Spring Length | 200 mm |
| Rear Spring Length | 160 mm |
| Advised Spring Preload | 7-10 mm |
| Color | Golden body with black spring |
| Product Dimensions | 63.9 x 50.7 x 20.2 cm |
| Item Weight | 26.9 kg |
| Manufacturer Part Number | HG27YX |

Figure 3.1: Dimension Details for front and rear coil-overs, including spring rates and lengths.
4. Package Contents
Verify that all components are present and undamaged upon opening the package:
- 2 x Front Coil-overs
- 2 x Rear Coil-overs
- 2 x C Spanners (for adjustment)

Figure 4.1: Packaging List, showing all included components.
5. Installation (Setup)
Installation of coilover struts requires specialized tools and automotive knowledge. It is strongly recommended that installation be performed by a qualified professional technician.
General Installation Steps (Consult a professional service manual for your specific vehicle model):
- Vehicle Preparation: Safely lift and support the vehicle. Remove wheels.
- Remove OEM Suspension: Disconnect brake lines, ABS sensors, and sway bar links as necessary. Unbolt the top mount and lower mount of the existing strut assembly. Carefully remove the old strut.
- Install New Coilover: Position the new maXpeedingrods coilover strut into place. Secure the top mount bolts and lower mount bolts according to vehicle specifications. Ensure all lines and sensors are reconnected correctly.
- Initial Adjustments: Before lowering the vehicle, perform initial ride height and spring preload adjustments as described in Section 6.
- Final Assembly: Reinstall wheels and lower the vehicle.
- Post-Installation Checks: After installation, it is crucial to perform a wheel alignment to ensure proper vehicle handling and tire wear. Check all fasteners for proper torque after a short driving period.
Warning: Improper installation can lead to severe vehicle damage or personal injury.
6. Operation and Adjustment
The maXpeedingrods coilovers allow for precise adjustments to customize your vehicle's ride and handling characteristics.
6.1. Ride Height Adjustment
Ride height is adjusted by rotating the lower mount on the threaded shock body. Use the provided C spanners for this adjustment.
- Loosen the lower locking collar using a C spanner.
- Rotate the entire lower mount to raise or lower the vehicle. Rotating clockwise typically lowers the vehicle, and counter-clockwise raises it.
- Once the desired height is achieved, tighten the lower locking collar securely against the lower mount.
- Ensure both sides of the vehicle (front or rear axle) are adjusted evenly to maintain balance.
Refer to Figure 2.1 for a visual representation of height adjustment.
6.2. Spring Preload Adjustment
Spring preload affects initial suspension compression and can influence ride comfort and handling. The advised preload is 7-10 mm.
- Loosen the upper locking collar (above the spring) using a C spanner.
- Rotate the spring perch to increase or decrease spring compression.
- Measure the preload. The spring should be compressed by 7-10 mm from its free length when the vehicle is at rest and off the ground.
- Once the desired preload is set, tighten the upper locking collar securely against the spring perch.
Refer to Figure 2.1 for a visual representation of spring tension settings.
6.3. Camber Adjustment (If applicable)
For models equipped with adjustable camber plates, camber can be adjusted by loosening the bolts on the top mount and sliding the pillow ball mount. This adjustment should be done by a professional during a wheel alignment.
Refer to Figure 2.2 for a visual representation of adjustable camber plates.
7. Maintenance
Regular maintenance ensures the longevity and optimal performance of your maXpeedingrods Coilover Struts.
- Regular Inspection: Periodically inspect the coilovers for any signs of damage, leaks, or loose components. Check rubber boots for tears.
- Cleaning: Keep the coilover bodies and springs clean from dirt, salt, and debris. Use mild soap and water, then rinse thoroughly.
- Lubrication: If operating in harsh conditions, consider applying a thin layer of anti-corrosion lubricant to exposed threads and locking collars to prevent seizing.
- Torque Checks: After initial installation and periodically thereafter, check the torque of all mounting bolts and locking collars.
The full-length dust boots (Figure 2.3) are designed to protect the damper rod and piston, but regular inspection is still advised.
8. Troubleshooting
This section addresses common issues that may arise with coilover suspension systems.
8.1. Noise from Suspension
- Clunking/Rattling: Check all mounting bolts (top hat, lower mount) for proper torque. Inspect sway bar end links and other suspension components for looseness or wear.
- Squeaking: May indicate dry bushings or spring rub. Ensure springs are seated correctly and consider lubricating contact points if safe to do so.
- Creaking: Often related to top mounts or spring seats. Re-check installation and ensure components are properly seated.
8.2. Uneven Ride Height
- Verify that ride height adjustments are identical on both sides of an axle. Measure from the wheel hub to the fender lip for accuracy.
- Ensure spring preload is set evenly.
8.3. Poor Ride Quality / Bounciness
- Too Stiff: Check spring preload. Excessive preload can make the ride overly harsh.
- Too Soft/Bouncy: While damping is not adjustable on this model, ensure the coilovers are not bottoming out or topping out. Adjust ride height if necessary.
If issues persist, consult a professional mechanic or contact maXpeedingrods customer support.
9. Warranty and Support
maXpeedingrods provides comprehensive support for its products:
- Warranty: A 1-year limited warranty is offered for quality-related issues, effective from the date of purchase.
- Technical Support: Lifetime technical support is available.
For any questions, technical assistance, or warranty claims, please contact maXpeedingrods customer support directly.
You can visit the official maXpeedingrods store for more information: maXpeedingrods Store