Introduction
The Shark ChillPill is a versatile 3-in-1 personal cooling system designed for both indoor and outdoor use. It integrates a high-speed fan, an InstaChill cooling plate, and a dry-touch misting function to provide customizable cooling relief. This manual provides essential information for the safe and effective operation and maintenance of your device.
Product Overview
The Shark ChillPill system includes the main device and interchangeable attachments for various cooling modes. It is designed to be portable and adaptable to your needs.
Included Components
- ChillPill device
- Fan Cap
- Dry-Touch Misting Pod
- InstaChill Cooling Plate
- USB-C charging cable
- 3 replacement misting wicks
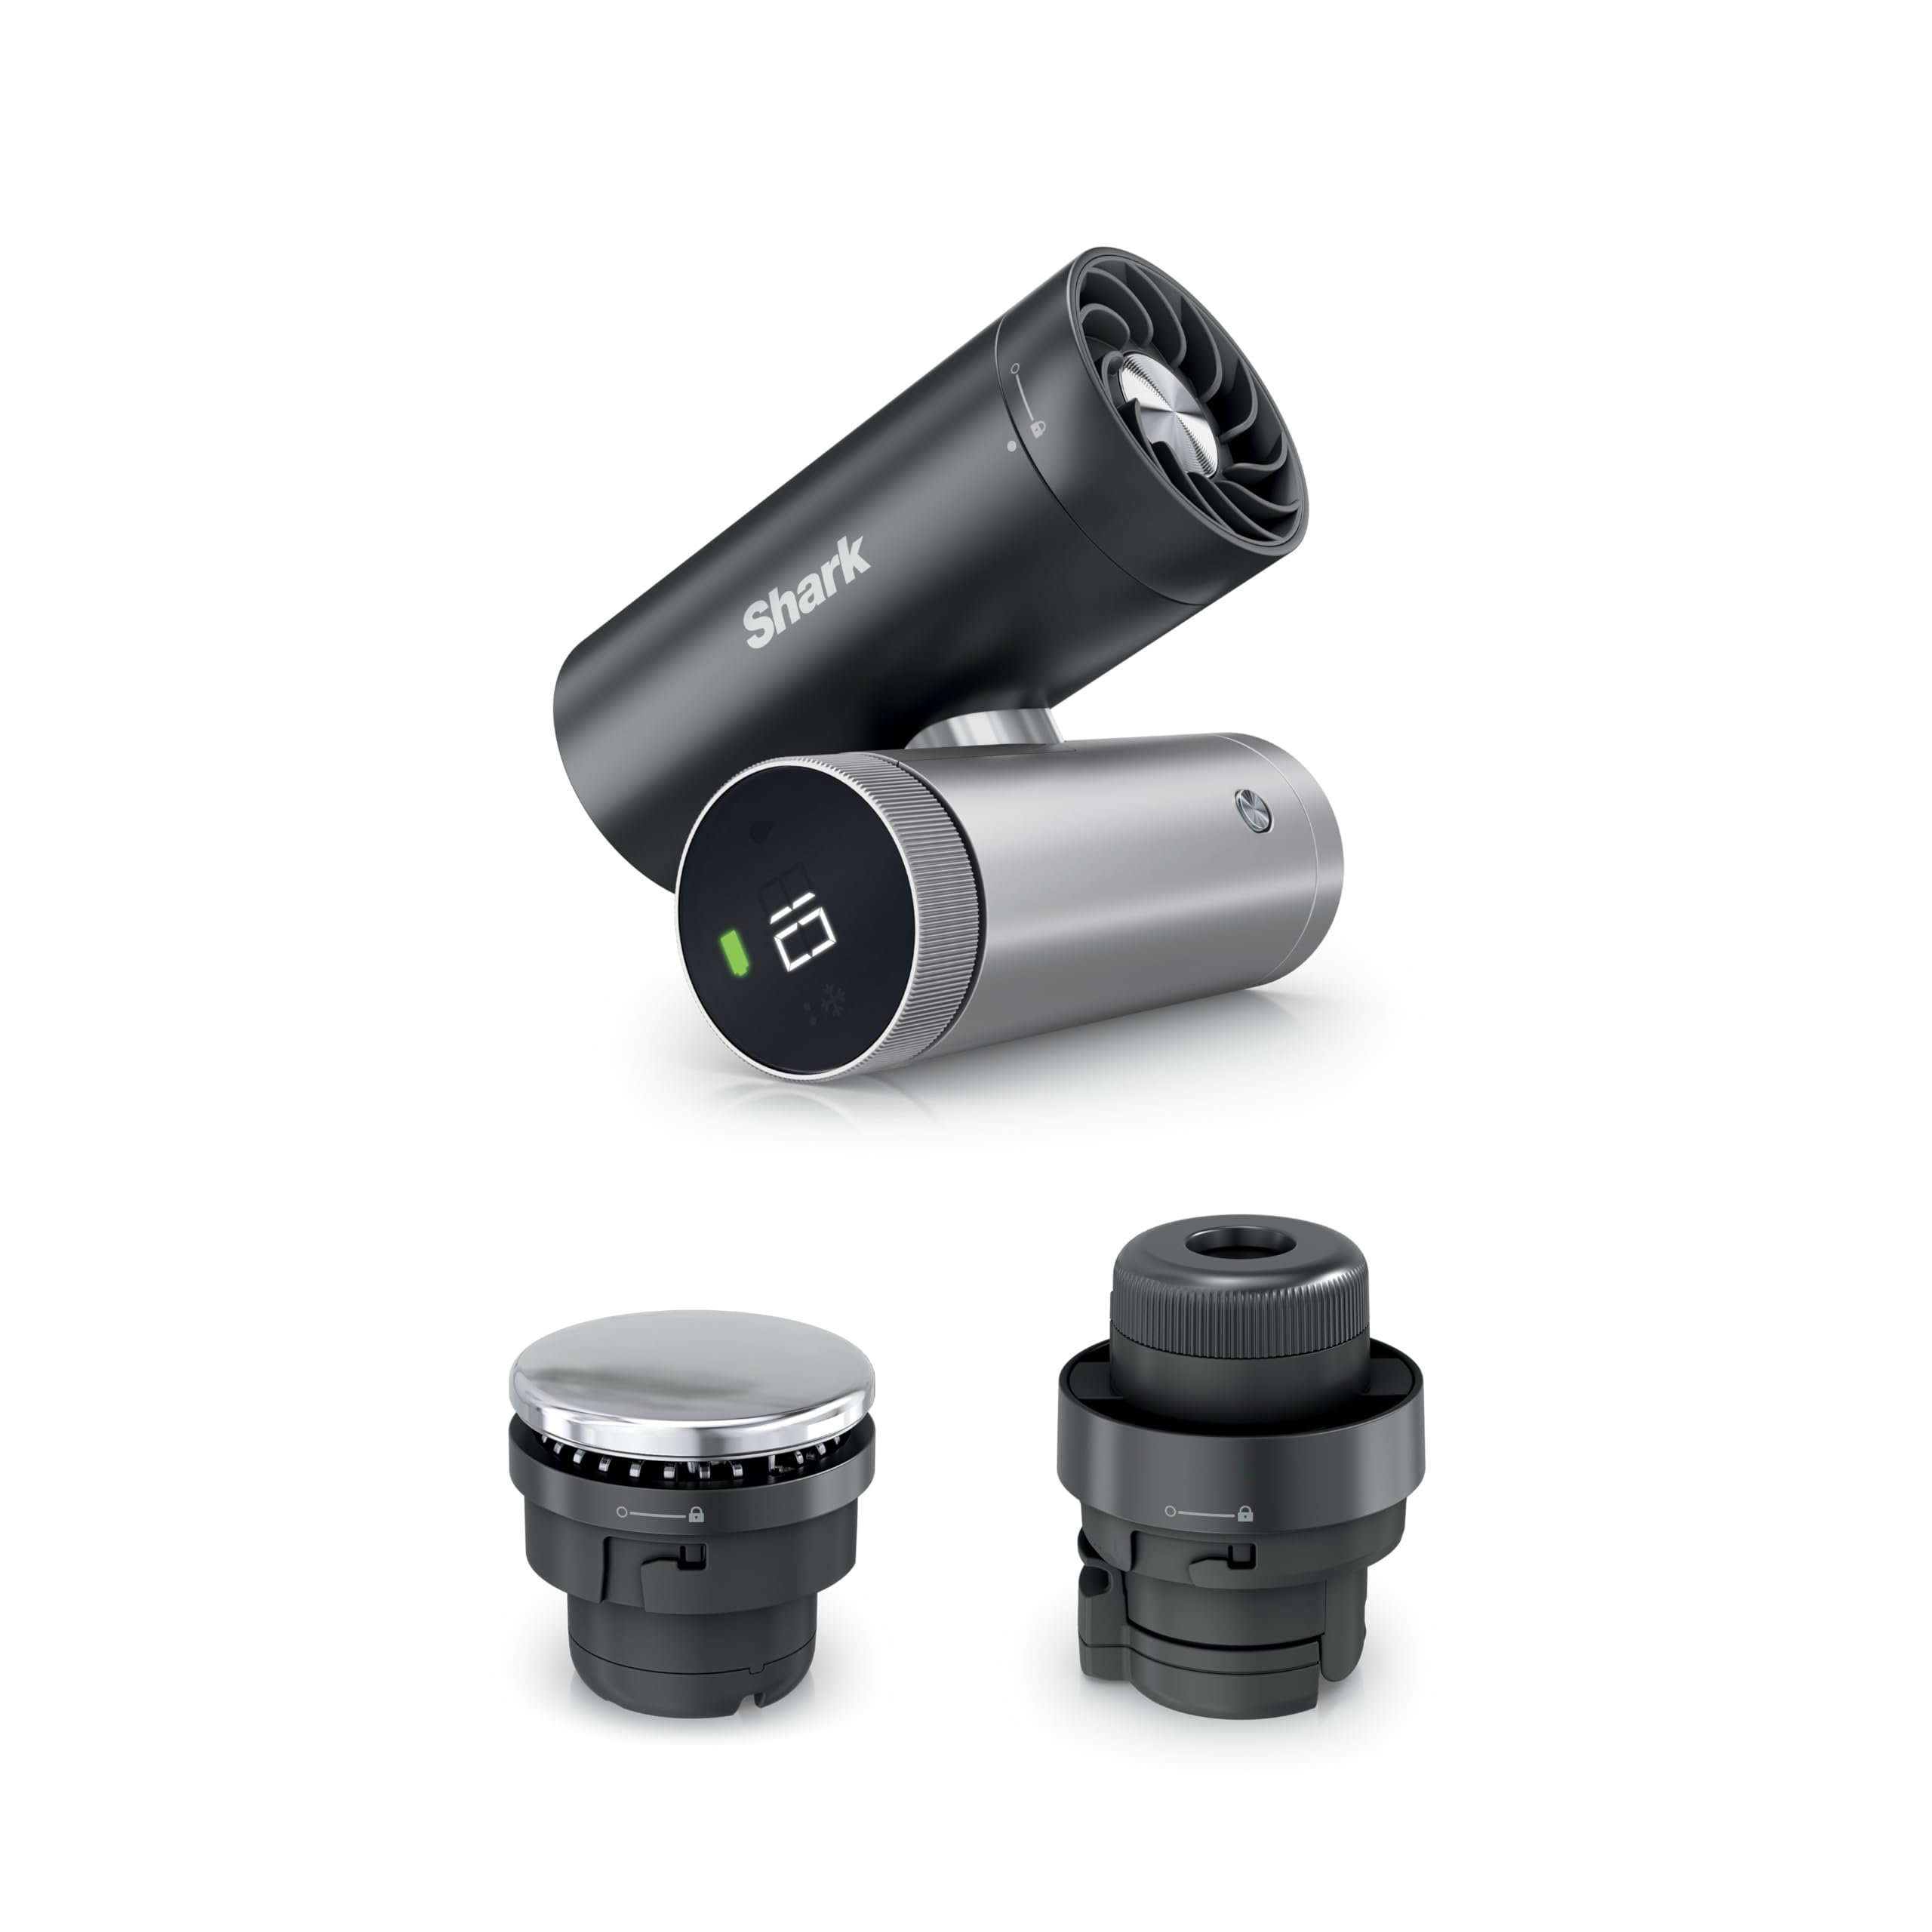
Figure 1: The Shark ChillPill 3-in-1 Personal Cooling System.

Figure 2: Visual representation of the three core cooling functions.
Setup
Charging the Device
Before first use, fully charge your Shark ChillPill. The device recharges via a USB-C cable.
- Locate the USB-C charging port on the device.
- Connect the provided USB-C cable to the port and a compatible power source.
- The battery indicator on the display will show charging status. A full charge takes approximately 3.5 hours.

Figure 3: The USB-C charging port for convenient recharging.
Attaching and Detaching Components
The ChillPill features interchangeable attachments. To swap them:
- Ensure the device is powered off.
- Twist the current attachment counter-clockwise to unlock and remove it.
- Align the desired attachment (Fan Cap, Misting Pod, or Cooling Plate) with the device and twist clockwise until it locks securely into place.
Operating Instructions
General Operation
- Power On/Off: Press and hold the power button on the display for 2 seconds.
- Mode Selection: The device automatically detects the attached component and displays the corresponding icon (fan, water droplet, or snowflake).
- Adjusting Settings: Rotate the dial on the display to adjust speed or mist intensity.
Using the High-Speed Fan
The fan mode delivers powerful airflow, ideal for sustained cooling.
- Attach the Fan Cap to the device.
- Power on the device. The fan icon will appear.
- Rotate the dial to select from 10 fan speeds. Speeds 1-5 are suitable for indoor use, while 6-10 provide stronger airflow for outdoor conditions.
- For hands-free use, twist the device to position the fan for tabletop mode.

Figure 4: The high-speed fan providing powerful airflow.

Figure 5: The device can be twisted for convenient tabletop use.
Using the Dry-Touch Misting Pod
The dry-touch mist provides evaporative cooling without soaking clothes.
- Attach the Dry-Touch Misting Pod.
- Open the water reservoir cap on the Misting Pod and fill with clean water. Close the cap securely.
- Power on the device. The water droplet icon will appear.
- Rotate the dial to select between constant mist or interval mist mode. Interval mode conserves water for longer use.

Figure 6: The dry-touch mist providing a refreshing cool down.
Using the InstaChill Cooling Plate
The cryo-inspired cooling plate drops skin temperature on contact.
- Attach the InstaChill Cooling Plate.
- Power on the device. The snowflake icon will appear.
- Press the cooling plate directly against your skin (e.g., neck, wrists) for immediate cooling. The plate chills in seconds.

Figure 7: Applying the InstaChill Cooling Plate to the skin.
Official Product Video
Video 1: Official demonstration of the Shark ChillPill 3-in-1 Personal Cooling System, showcasing its fan, mist, and cooling plate functions.
Maintenance
Cleaning the Device
To ensure optimal performance and hygiene, regularly clean your ChillPill.
- Wipe the exterior of the device and attachments with a soft, damp cloth.
- Do not submerge the main device in water.
- For the Dry-Touch Misting Pod, empty any remaining water after every use to prevent buildup.
Misting Wick Replacement
The misting wicks in the Dry-Touch Misting Pod should be replaced periodically to maintain mist quality.
- Replace the misting wick every 30 days or if mist output decreases.
- Refer to the included replacement wicks and instructions for proper installation.
Troubleshooting
If you encounter issues with your Shark ChillPill, refer to the following common solutions:
- Device not turning on: Ensure the device is fully charged. Connect to the USB-C charger and allow it to charge for at least 15 minutes before attempting to power on again.
- Mist not dispensing: Check if the Dry-Touch Misting Pod is correctly attached and filled with water. Ensure the misting wick is properly installed and not clogged. Replace the wick if necessary.
- Fan not strong enough: Rotate the dial to increase the fan speed. Ensure the fan cap is securely attached.
- Cooling plate not cold: Ensure the InstaChill Cooling Plate is securely attached and the device is powered on in cooling mode (snowflake icon). Allow a few seconds for the plate to chill.
Specifications
| Feature | Detail |
|---|---|
| Model Number | FA022 |
| Product Dimensions | 1.77 x 3.31 x 4.4 inches |
| Item Weight | 12.3 ounces |
| Manufacturer | SharkNinja |
| Form Factor | Handheld |
| Battery Life (Fan Mode) | Up to 11 hours (low speed), Up to 1.5 hours (max speed) |
| Charging Time | 3.5 hours via USB-C |
| Cooling Plate Temperature Drop | Up to 16°F on contact |
Warranty and Support
The Shark ChillPill is manufactured by SharkNinja. For warranty information, product registration, or customer support, please refer to the documentation included with your purchase or visit the official SharkNinja website. Keep your proof of purchase for any warranty claims.


