
Important Safety Instructions
Read all instructions carefully before installing, operating, or performing maintenance on this product. Failure to follow these instructions can result in serious injury or death.
- Always disconnect power to the pump before servicing.
- Ensure the pump is installed by a qualified electrician in accordance with all local and national electrical codes.
- The pump must be installed on a solid, level foundation that can support its weight.
- Do not operate the pump if it is damaged or has exposed electrical wiring.
- Keep children and pets away from the pump during operation.
- Ensure proper ventilation around the pump to prevent overheating.
- Never run the pump dry. Always ensure the pump is primed with water before starting.
- Use only genuine replacement parts.
Product Overview
The Garvee 1.5 HP Dual Voltage Swimming Pool Pump is designed for efficient water circulation in both above-ground and in-ground pools. It features a powerful motor, a durable housing, and a convenient strainer basket for debris collection.
Key Components
- Motor: 1.5 HP pure copper motor with thermal overload protection.
- Pump Housing: Commercial-grade reinforced thermoplastic construction.
- Strainer Basket: Detachable for easy cleaning, visible through a transparent lid.
- Connection Ports: Multiple options for various hose and pipe sizes.
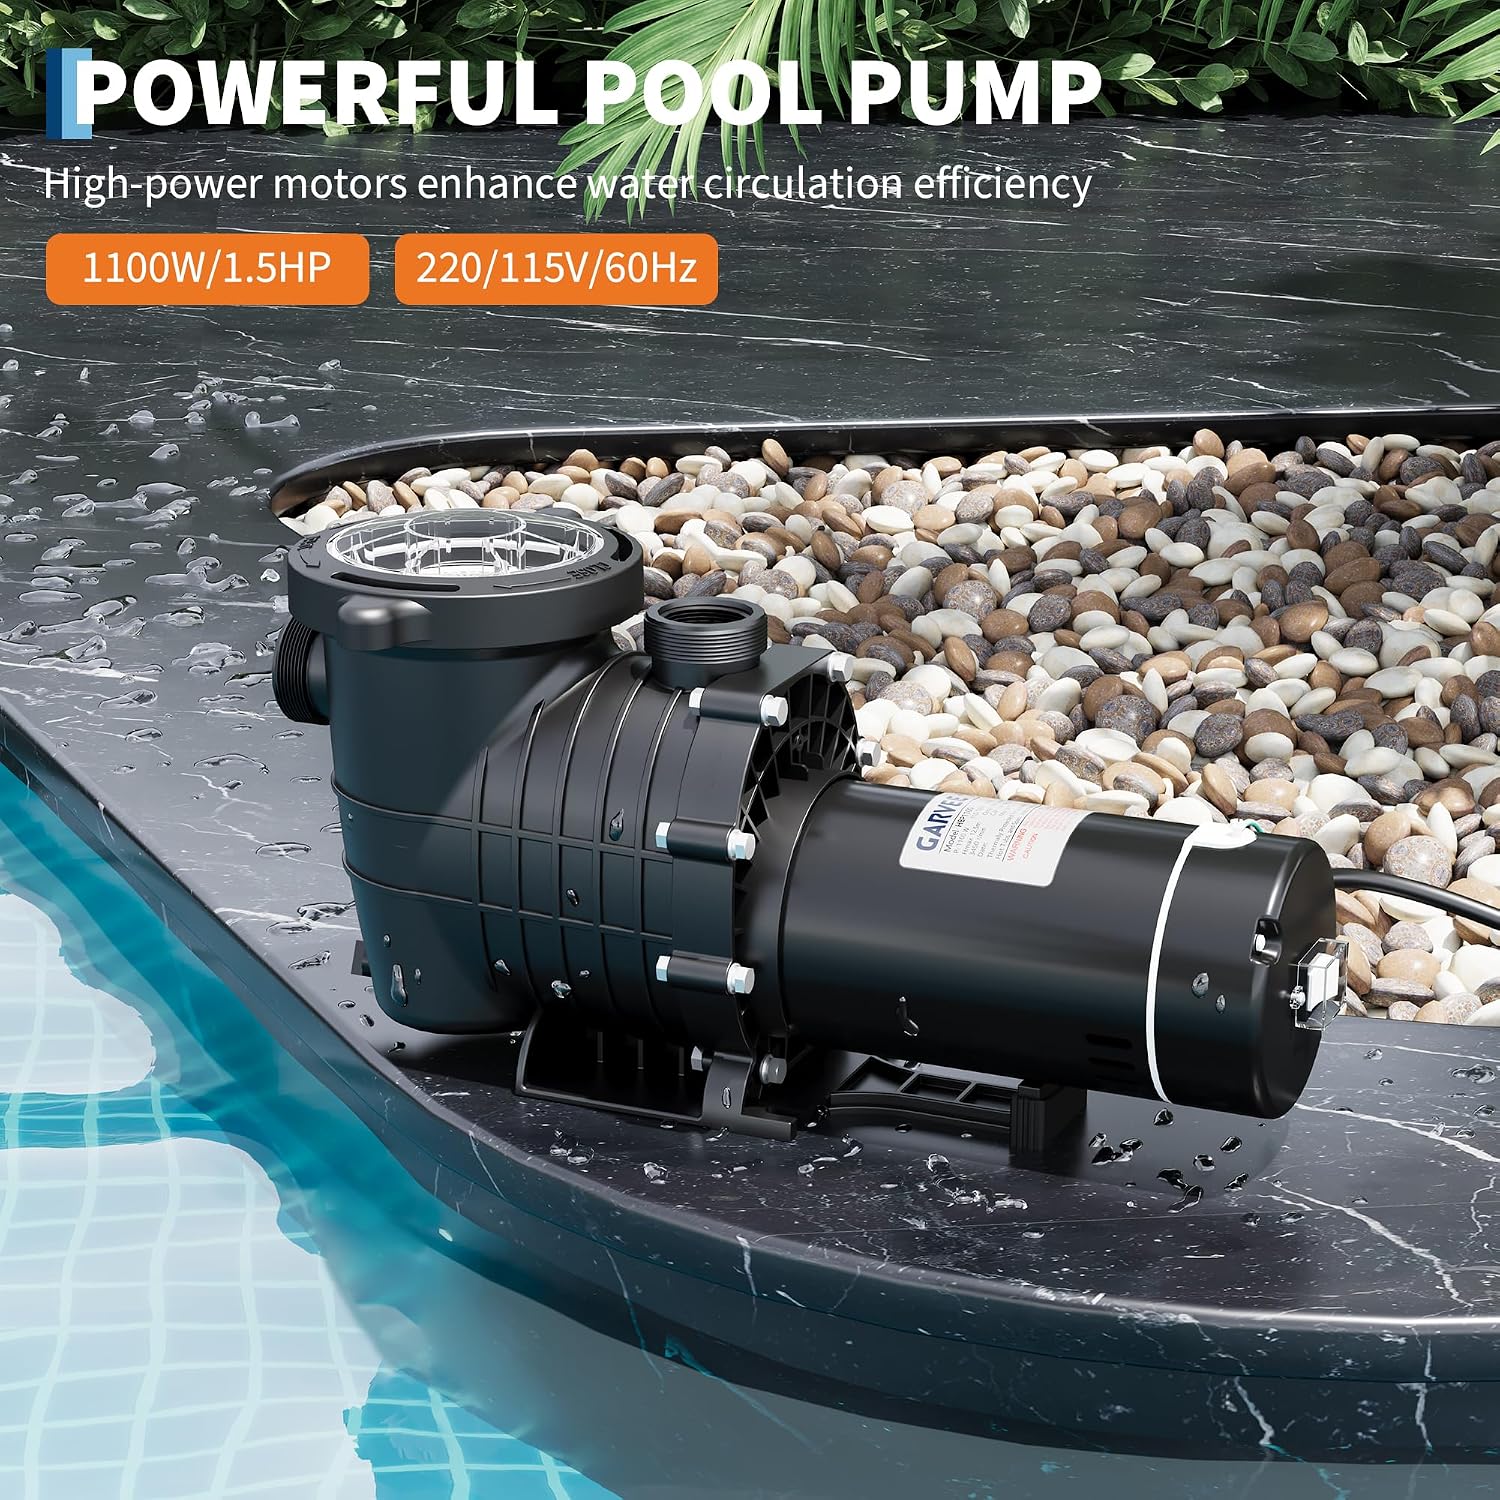
Image: The Garvee 1.5 HP Dual Voltage Swimming Pool Pump, showcasing its robust design and powerful circulation capabilities.

Image: An internal view of the pump's 1100W high-efficiency motor, highlighting its over-temperature protection and low-noise design.

Image: The detachable filter basket and transparent lid, allowing for easy monitoring of debris and simplified cleaning.
Setup and Installation
Site Selection
Choose a dry, well-ventilated area for pump installation, protected from direct sunlight and extreme weather. The pump should be placed as close to the pool as possible, below water level if feasible, to ensure optimal priming and performance. Ensure the surface is level and stable.
Electrical Connection
This pump supports dual voltage (115V/220V). Ensure the pump is wired correctly for your specific electrical supply. All electrical connections must comply with local and national electrical codes. A dedicated circuit with appropriate overcurrent protection is recommended. Consult a qualified electrician for proper wiring.
Plumbing Connection
The pump offers multiple connection options for various hose and pipe sizes. Use the appropriate connectors (2x 1.5 inch, 2x 2 inch, and 2x 1.25-1.5 inch) to ensure a secure, leak-free connection to your pool's plumbing system. Apply thread sealant to all threaded connections.
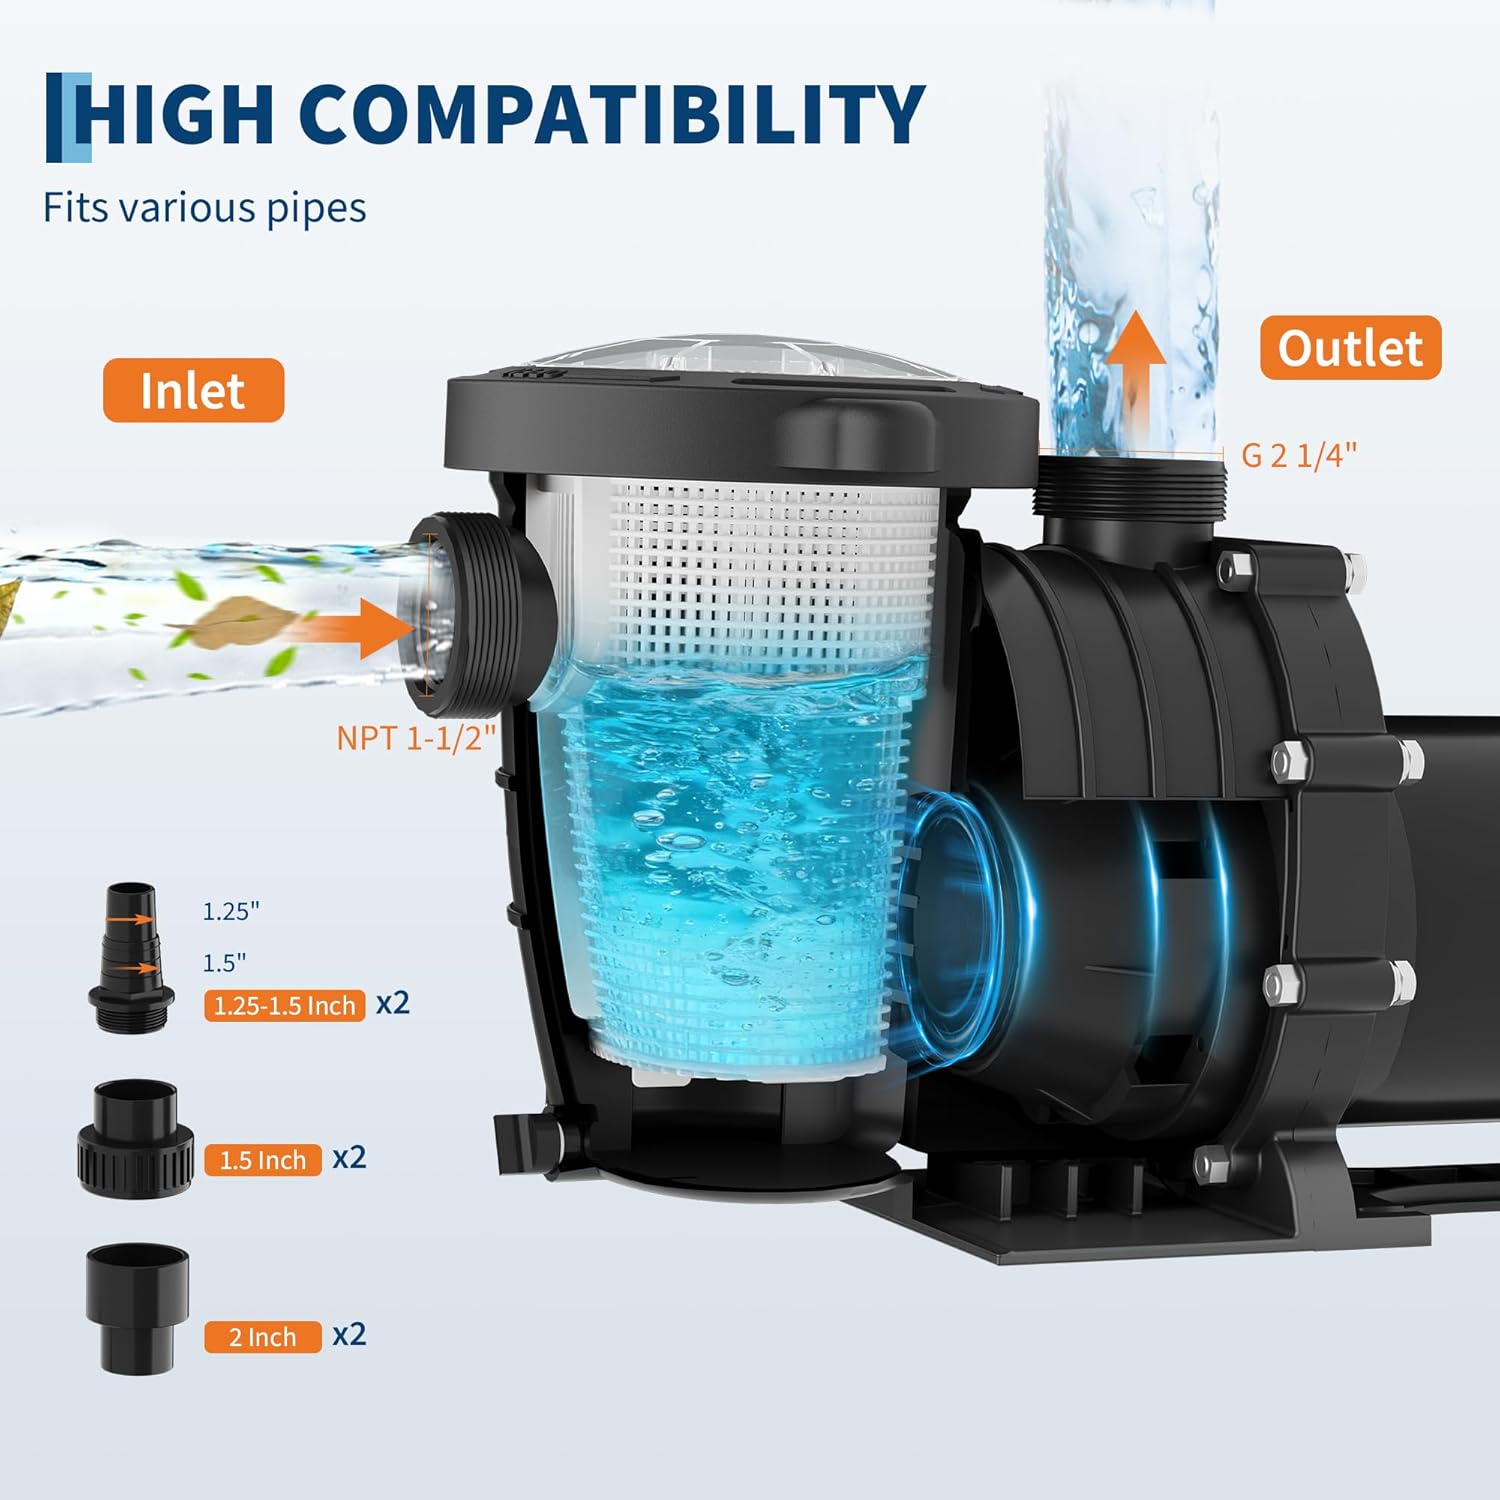
Image: A diagram illustrating the pump's high compatibility with various pipe sizes, including NPT 1-1/2" inlet and G 2-1/4" outlet, along with different connector types.
Priming the Pump
- Ensure all valves are open and water can flow freely to the pump.
- Remove the transparent lid of the strainer basket.
- Fill the strainer basket housing with water until it reaches the suction pipe level.
- Replace the lid, ensuring it is securely tightened to prevent air leaks.
- Turn on the pump. It should begin to draw water and circulate it. If not, repeat the priming process.
Operating Instructions
Starting the Pump
After successful installation and priming, turn on the power supply to the pump. The pump will begin circulating water. Observe the water flow and ensure there are no unusual noises or leaks.
Monitoring Operation
Regularly check the transparent lid of the strainer basket for debris accumulation. A clear lid allows for easy visual inspection without interrupting pump operation. Ensure consistent water flow and pressure.
Maintenance
Cleaning the Strainer Basket
- Turn off the pump and disconnect power.
- Unscrew and remove the transparent lid.
- Lift out the detachable strainer basket.
- Empty any collected debris and rinse the basket thoroughly with water.
- Inspect the O-ring on the lid for damage and ensure it is clean.
- Place the clean basket back into the housing and securely reattach the lid.
- Reprime the pump if necessary before restarting.
Regular Inspection
Periodically inspect the pump for any signs of wear, damage, or leaks. Check electrical connections for tightness and ensure the power cord is intact. Listen for unusual noises during operation, which may indicate a problem.
Winterization
Before freezing temperatures arrive, drain all water from the pump and plumbing system to prevent damage from ice expansion. Store the pump in a dry, protected area if it is not designed for year-round outdoor use in freezing climates.
Troubleshooting
| Problem | Possible Cause | Solution |
|---|---|---|
| Pump does not start | No power, tripped breaker, faulty wiring, motor overload. | Check power supply, reset breaker, inspect wiring (consult electrician), allow motor to cool. |
| Low water flow | Clogged strainer basket, air leak in suction line, low water level in pool, restricted plumbing. | Clean strainer basket, check for air leaks, ensure adequate pool water level, inspect plumbing for blockages. |
| Pump runs but does not prime | Insufficient water in pump housing, air leak in suction line, clogged impeller. | Refill pump housing, check all connections for air leaks, inspect and clean impeller. |
| Excessive noise | Air leak, cavitation, worn bearings, debris in impeller. | Check for air leaks, ensure proper water flow, inspect impeller for debris, contact service for worn bearings. |
| Water leaks | Loose connections, damaged O-rings/seals, cracked housing. | Tighten connections, replace O-rings/seals, contact service for housing damage. |
Specifications
| Feature | Specification |
|---|---|
| Model Number | 1.5 HP Dual Voltage |
| Horsepower | 1.5 HP |
| Power | 1100W |
| Voltage | 115V/220V (Dual Voltage) |
| Max Flow Rate | 6500 GPH |
| Product Dimensions | 22.9 x 9.9 x 11.5 inches |
| Item Weight | 30 pounds |
| Manufacturer | Garvee |

Image: Detailed technical specifications including Max Flow, Horsepower, Voltage, and Power, along with pump dimensions.

Image: A table outlining compatible pool sizes and volumes (in gallons) for various Garvee pump styles, including the 1.5 HP Dual Voltage model.
Warranty and Support
This product is covered by the manufacturer's standard warranty. Please refer to the warranty card included with your purchase for specific terms and conditions. For technical assistance, troubleshooting beyond this manual, or warranty claims, please contact Garvee customer support through their official website or the retailer where the product was purchased.