Reboot RB360
Reboot RB360 7-in-1 Multiprocess Welder & Plasma Cutter Instruction Manual
Comprehensive guide for setup, operation, and maintenance of your Reboot RB360 welding and cutting machine.
1. Introduction
This manual provides essential information for the safe and effective use of the Reboot RB360 Multiprocess Welder and Plasma Cutter. The RB360 is a versatile 7-in-1 machine capable of Gas MIG, Flux Core MIG, Stick (MMA), LIFT TIG, Plasma Cutting, Spot Welding, and Aluminum Welding. Please read this manual thoroughly before operating the equipment.
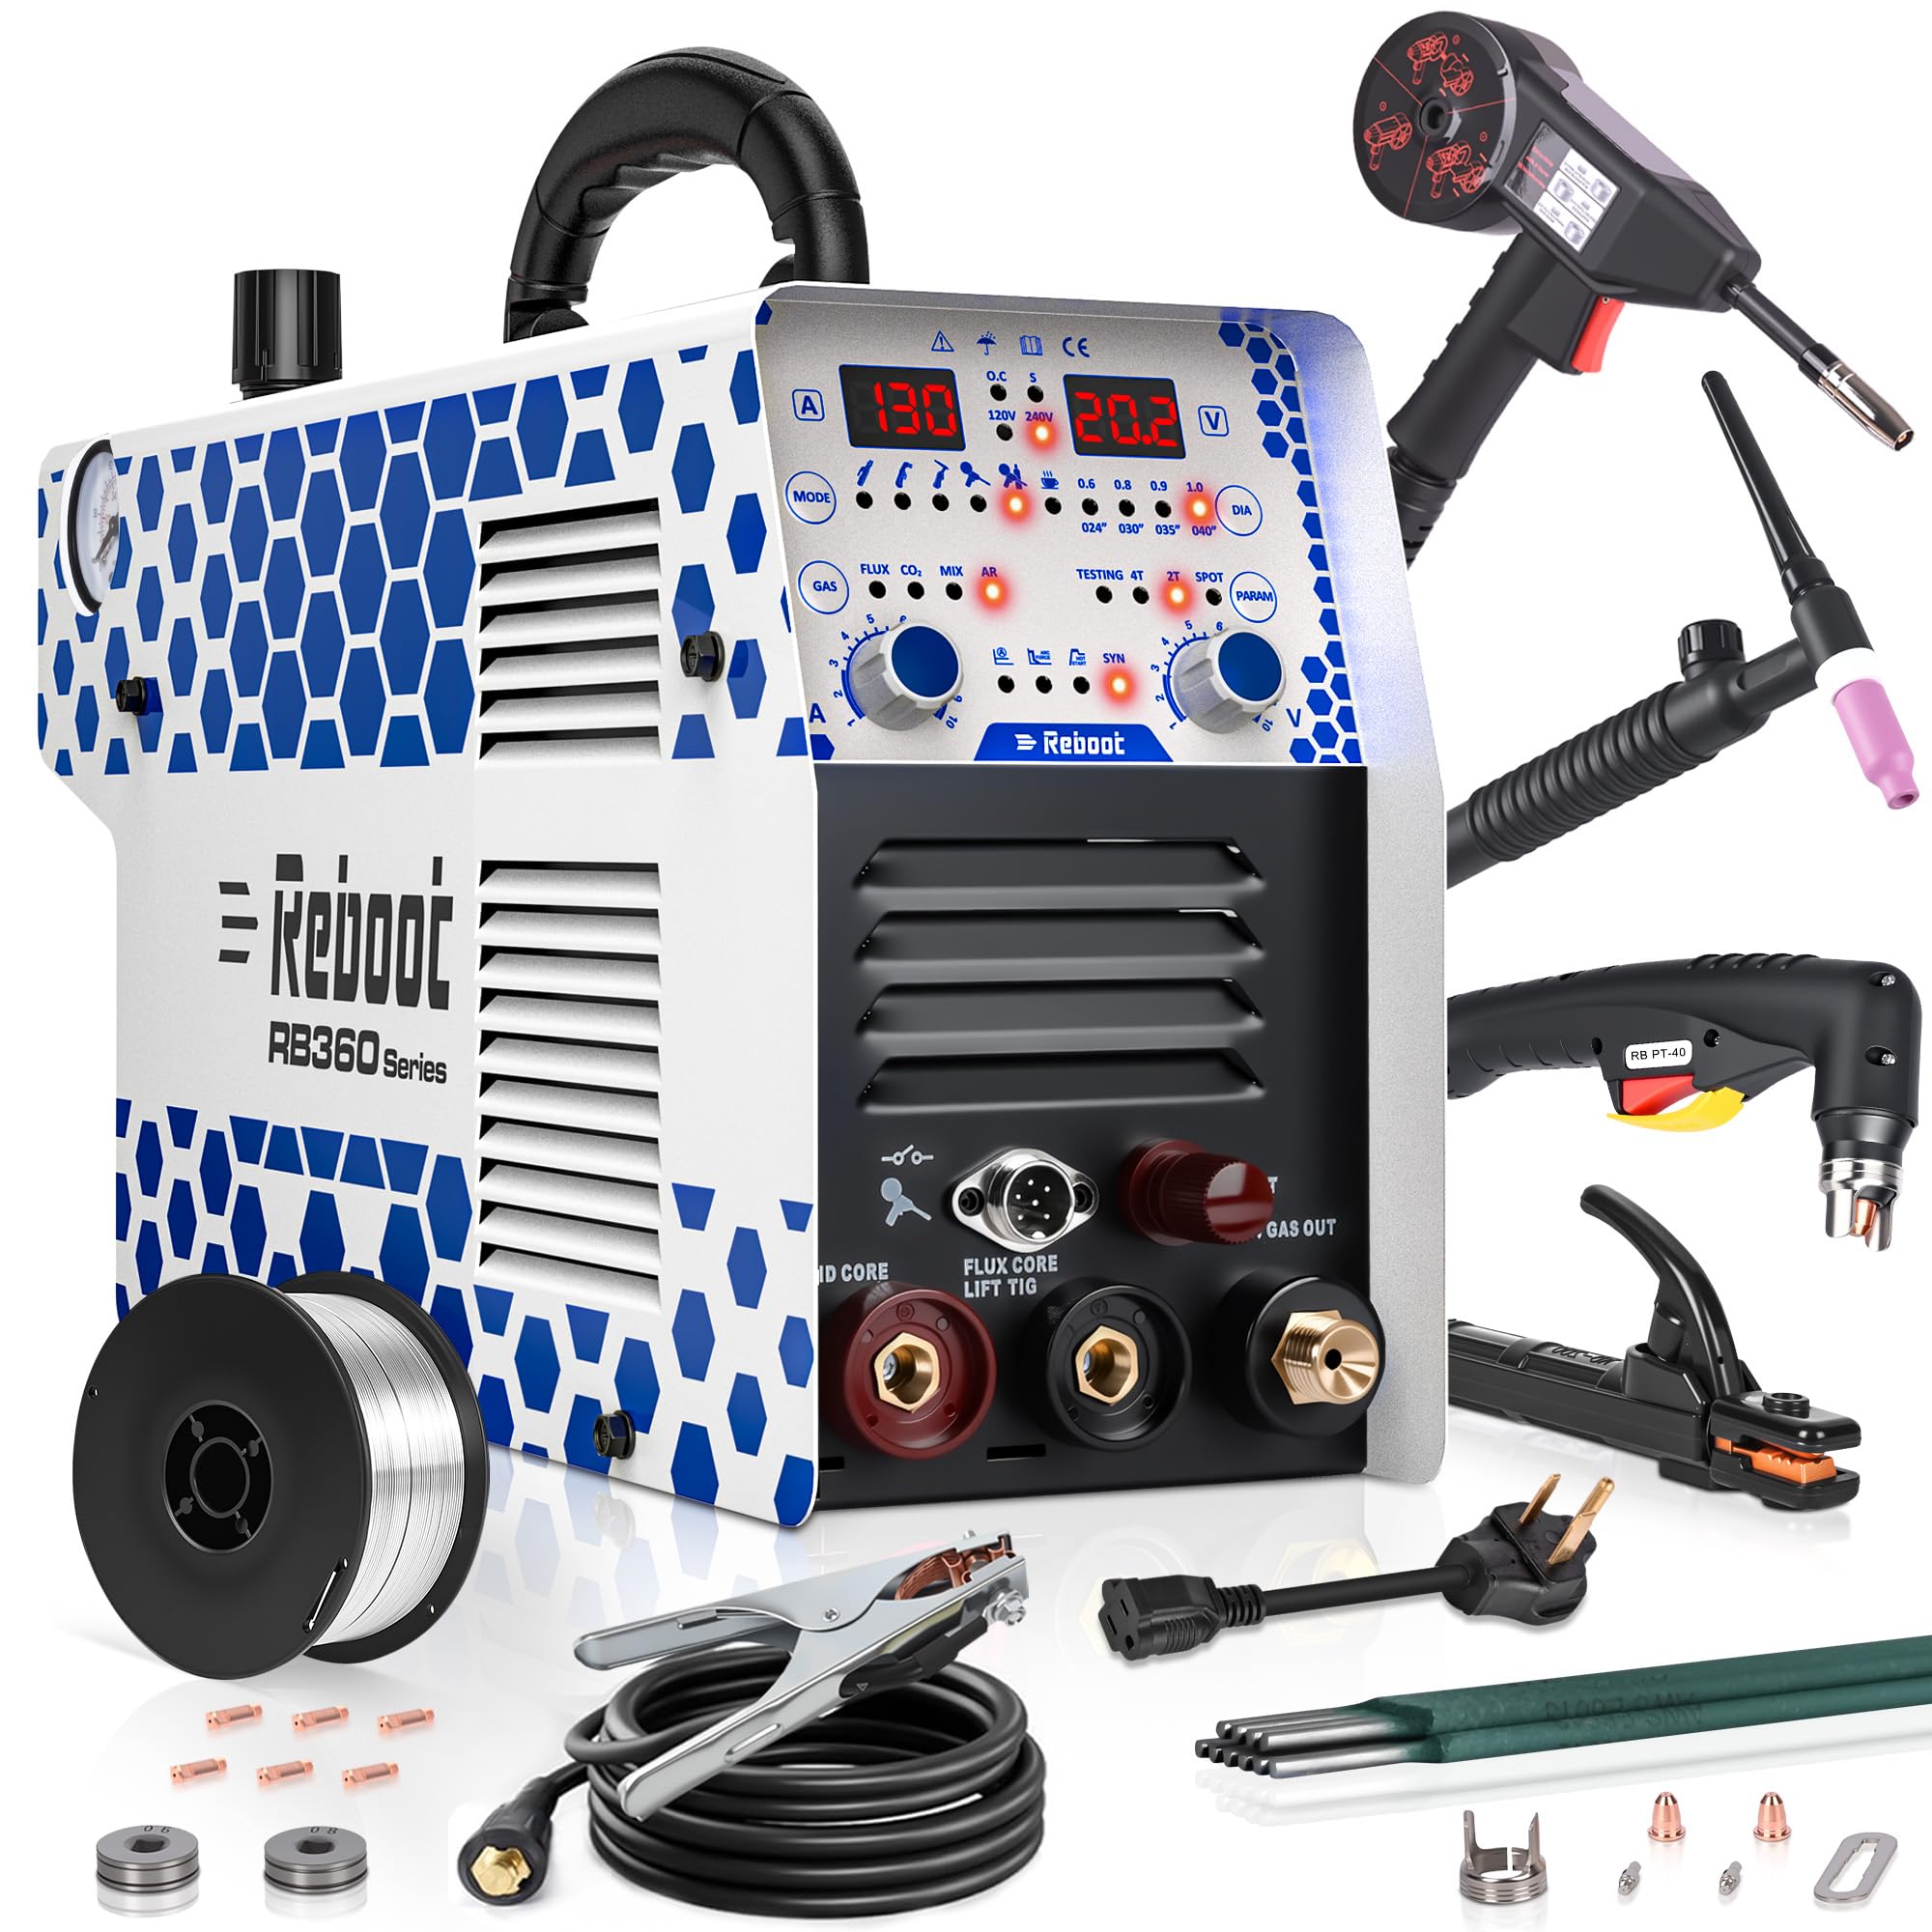
Figure 1: Reboot RB360 Multiprocess Welder and Plasma Cutter with included accessories.
2. Safety Precautions
Always prioritize safety when operating welding and cutting equipment. Failure to follow safety guidelines can result in serious injury or death. Refer to the comprehensive user manual for a complete list of safety instructions.
- Eye and Face Protection: Always wear a welding helmet with appropriate shade lenses and safety glasses.
- Body Protection: Wear flame-resistant clothing, gloves, and protective footwear.
- Ventilation: Ensure adequate ventilation to remove fumes and gases.
- Electrical Safety: Ensure proper grounding and inspect cables for damage. Do not operate in wet conditions.
- Fire Prevention: Keep flammable materials away from the work area. Have a fire extinguisher readily available.
- Gas Cylinder Safety: Secure gas cylinders to prevent tipping. Handle with care.
- Work Area: Keep the work area clean and free of clutter.
3. Product Components and Panel Introduction
Familiarize yourself with the main components and control panel of the Reboot RB360.

Figure 2: RB360 Control Panel Overview.
3.1 Control Panel Features:
- Current Display: Shows the welding or cutting current.
- Voltage/Parameter Display: Shows voltage or other selected parameters.
- Mode Switching: Button to cycle through different operating modes (MIG, TIG, MMA, CUT).
- Welding Wire Diameter: Selector for wire diameter in MIG modes.
- Gas Selector: For MIG modes, select gas type (Flux, CO2, Mix, Ar).
- Function Selection: Additional function settings for specific modes.
- Current Control: Knob to adjust welding/cutting current.
- Voltage Control: Knob to adjust voltage (primarily for MIG).
- Fatigue Alert (Teacup Function): Indicator light that illuminates after 40 minutes of continuous operation, reminding the user to take a break.
- MMA Settings: Specific settings for Stick welding.
- Synergic/Manual MIG: Switch between synergic (automatic parameter adjustment) and manual MIG modes.
3.2 Machine Connections:

Figure 3: RB360 Function Introduction and Connection Points.
- Solid Core Terminal: For solid wire MIG welding.
- Flux Core / LIFT TIG Terminal: For flux-cored wire MIG and LIFT TIG welding.
- Pilot / Cut / Gas Out: Connection for plasma cutting torch and gas output.
- Quick Air Connector: Shared interface for compressed air (plasma cutting) and MIG shielding gas.
- Spool Gun Control Port: For connecting the spool gun control wire.
4. Setup and Initial Connections
Before operating the RB360, ensure all connections are secure and correct for the desired welding or cutting process.
4.1 Unboxing and Included Accessories:
Upon receiving your RB360, carefully unbox the unit and verify all components are present. The package typically includes the RB360 machine, ground clamp, electrode holder, LIFT TIG torch, plasma cutting torch, spool gun, welding wire, gas hose, and a user manual.
Video 1: Reboot RB360 Welding Unboxing & Detailed Overview. This video demonstrates the unboxing process and highlights the various components included with the machine.

Figure 4: Detailed view of included accessories.
4.2 Spool Gun Installation and Wiring:
The spool gun is essential for aluminum MIG welding. Proper installation of the wire and connections are crucial.
- Unscrew the nozzle and remove the contact tip from the spool gun.
- Open the cover of the spool gun and remove the spring, washer, and nut.
- Match the feed roll to your wire diameter (e.g., 1.0mm wire needs a 1.0mm feed roll).
- Install the anti-recoil spring.
- Thread the wire in the correct direction through the mechanism and onto the spool.
- Fit the washer and secure the spool with the nut.
- Ensure the wire is aligned to the liner.
- Test the wire feed by pressing the trigger.
- Install the correct contact tip (e.g., 1.0mm tip for 1.0mm wire).
- Tighten the nozzle and secure the cover.
- Connect the spool gun's ground clamp to the negative terminal of the RB360.
- Connect the spool gun's power cable to the positive terminal of the RB360.
- Connect the spool gun's control wire to the spool gun control port and the gas line to the gas inlet.
- Connect the gas line from the CO2 cylinder to the welder inlet and adjust the lift regulator (CW to increase, CCW to decrease).
Video 2: Installation and Welding of the New Spool Gun. This video provides a step-by-step guide for spool gun setup and connection.
5. Operating Instructions
The Reboot RB360 offers multiple welding and cutting modes. Select the appropriate mode and settings for your task.
5.1 MIG Welding (Gas & Gasless Flux Core):
The RB360 supports both Gas MIG (with shielding gas) and Gasless Flux Core MIG welding. Ensure the correct wire type and gas (if applicable) are selected on the panel.
- Gas MIG: Use solid wire and connect appropriate shielding gas (e.g., CO2 or mixed gas). Connect the ground clamp to the workpiece and the welding gun to the positive terminal.
- Flux Core MIG: Use flux-cored wire. No external shielding gas is required. Connect the ground clamp to the positive terminal and the welding gun to the negative terminal.
- Adjust current and voltage using the control knobs. The machine offers synergic and manual modes for parameter adjustment.
Video 3: Reboot RB360 Machine GASLESS MIG Welding. Demonstrates setup and operation for gasless MIG welding.
Video 4: Reboot RB360 Machine GAS MIG Welding. Demonstrates setup and operation for gas MIG welding.
5.2 Aluminum Welding:
For aluminum welding, use the dedicated Aluminum MIG mode with the spool gun and pure argon shielding gas. Ensure the correct aluminum wire and feed roll are installed in the spool gun.

Figure 5: Welding aluminum with the spool gun.
Video 5: Reboot RB360 Machine Aluminum Welding. Shows the aluminum welding process using the RB360.
5.3 Stick (MMA) Welding:
For Stick welding, connect the electrode holder and ground clamp as per the polarity requirements of your electrode. The RB360 features Hot Start for easy arc ignition and Arc Force to prevent electrode sticking.
Video 6: Reboot RB360 Machine STICK Welding. Demonstrates the Stick welding process.
5.4 LIFT TIG Welding:
For LIFT TIG welding, connect the TIG torch to the negative terminal and the ground clamp to the positive terminal. Ensure pure argon shielding gas is connected. LIFT TIG provides a stable arc for precise welding.
Video 7: Reboot RB360 Machine LIFT TIG Welding. Shows the LIFT TIG welding process.
5.5 Plasma Cutting:
The RB360 features a non-high frequency plasma cutter. Connect the plasma torch to the "Pilot / Cut / Gas Out" port and the ground clamp to the workpiece. Ensure an air compressor is connected to the quick air connector and set to the recommended pressure (e.g., 60 PSI).
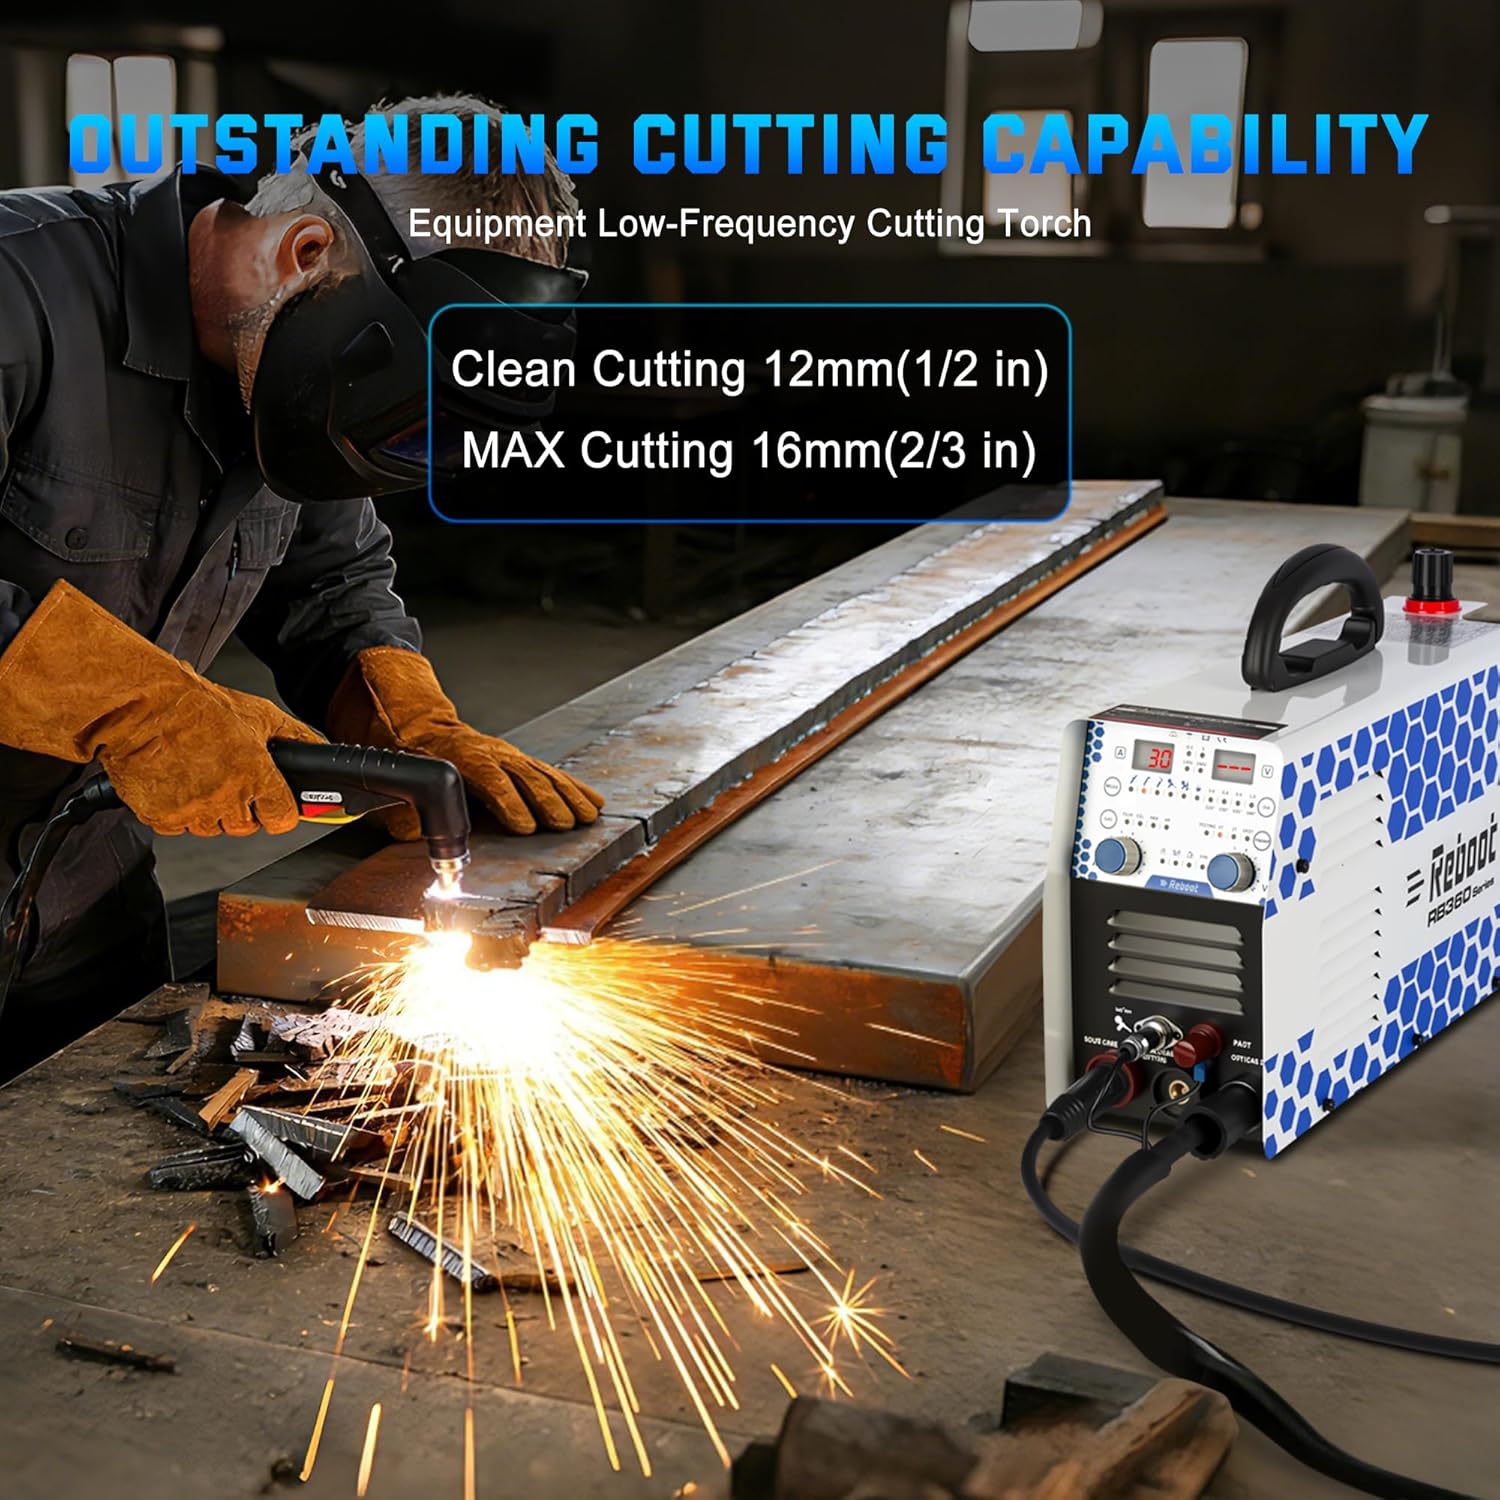
Figure 6: Plasma cutting operation.
5.6 Spot Welding:
The Spot Welding function is ideal for thin metals, providing strong, neat spots with minimal distortion. Use 2T mode for simple press-and-weld operation.

Figure 7: Spot welding application.
5.7 2T/4T Mode and Fatigue Alert:
- 2T Mode: Press and hold the trigger to weld, release to stop. Suitable for short welds and spot welding.
- 4T Mode: Press the trigger to start welding, release, and press again to stop. Ideal for long, continuous welds to reduce operator fatigue.
- Fatigue Alert (Teacup Function): A unique indicator light on the panel will illuminate if cumulative operation exceeds 40 minutes per hour, reminding you to take a break to prevent overwork and ensure machine longevity.

Figure 8: Teacup Function (Fatigue Alert) indicator.
6. Maintenance
Regular maintenance ensures the longevity and optimal performance of your Reboot RB360. Refer to the detailed user manual for comprehensive maintenance procedures.
- Cleaning: Regularly clean the machine's exterior and internal components (fans, vents) to prevent dust and debris buildup. Use compressed air for internal cleaning.
- Cable Inspection: Inspect all cables, torches, and clamps for wear, cuts, or damage before each use. Replace damaged components immediately.
- Consumables: Check and replace welding tips, nozzles, electrodes, and plasma cutting consumables (electrodes, nozzles, swirl rings, shield cups) as needed.
- Wire Feeder: Keep the wire feeder mechanism clean and ensure drive rolls are appropriate for the wire size and type.
- Gas Lines: Inspect gas lines for leaks and ensure connections are tight.
7. Troubleshooting
This section provides general guidance for common issues. For detailed troubleshooting steps, consult the comprehensive user manual.
| Problem | Possible Cause | Solution |
|---|---|---|
| No Arc / Poor Arc Start | Incorrect settings, poor ground connection, worn consumables, wrong polarity. | Verify settings, check ground clamp, replace consumables, ensure correct polarity. |
| Wire Feeding Issues (MIG) | Incorrect drive roll tension, wrong drive roll size, clogged liner, tangled wire. | Adjust tension, use correct drive rolls, clean liner, untangle wire. |
| Poor Plasma Cut Quality | Low air pressure, worn plasma consumables, incorrect cutting speed/current. | Check air pressure, replace consumables, adjust settings. |
| Machine Overheating | Exceeding duty cycle, blocked vents, high ambient temperature. | Allow machine to cool, clear vents, operate within duty cycle limits. |
8. Specifications
| Feature | Detail |
|---|---|
| Model Number | RB360 |
| Manufacturer | Reboot |
| Item Weight | 28.4 pounds |
| Package Dimensions | 20 x 14.5 x 12 inches |
| Power Source | AC (120V/240V Dual Voltage) |
| Included Components | RB360 Multiprocess Machine, Ground Clamp, Electrode Holder, LIFT TIG Torch, Plasma Cutting Torch, Spool Gun, Welding Wire, Gas Hose, User Manual |
| Functions | Gas MIG, Flux Core MIG, Stick (MMA), LIFT TIG, Plasma Cutting, Spot Welding, Aluminum Welding |
9. Warranty and Support
For warranty information, technical support, or to purchase replacement parts, please refer to the contact information provided in your physical user manual or visit the official Reboot website. The detailed manuals cover safety, setup, all welding modes, and maintenance, providing clear step-by-step guidance.
Related Documents - RB360
 |
Reboot RB360 Series Inverter Welding Machine User Manual Comprehensive user manual for the Reboot RB360 Series Inverter Welding Machine. Includes setup, operation, safety precautions, and troubleshooting for MIG, TIG, MMA, and plasma cutting. |
 |
Reboot RBM2000 Inverter Welding Machine User Manual Comprehensive user manual for the Reboot RBM2000 5-in-1 inverter welding machine. Includes safety precautions, installation guides for MIG, TIG, and Stick welding, technical parameters, and troubleshooting tips. |
 |
Reboot RBM-1500 Multi-Function Welding Machine Operation Manual Comprehensive operation manual for the Reboot RBM-1500 multi-function welding machine, detailing its features, setup, operation modes (MMA, MIG, LIFT TIG), technical specifications, and troubleshooting. Learn how to use this IGBT PWM technology welder for various applications. |
 |
Reboot RBM2100D Recommended Weld Settings Guide A comprehensive guide detailing recommended welding settings for the Reboot RBM2100D multi-process welder. This document covers settings for MIG, TIG, and Stick welding processes, including various electrode types, wire types, and wire diameters, along with control panel descriptions and installation instructions. |
 |
Reboot Inverter Welding Machine RBM205/RBM2500/RBM2500D PRO User Manual Comprehensive user manual for the Reboot RBM205, RBM2500, and RBM2500D PRO inverter welding machines. Includes safety guidelines, installation instructions, operation procedures, and troubleshooting for MIG, TIG, and Stick welding. |
 |
Reboot RBM1600 Operation Manual: Your Guide to MMA, MIG, and LIFT TIG Welding Comprehensive operation manual for the Reboot RBM1600 welding machine. Learn to use MMA, MIG (Gas/Gasless), and LIFT TIG modes with detailed instructions, technical specifications, and troubleshooting tips for optimal performance. |
Ask a question about this manual
Ask about setup, troubleshooting, compatibility, parts, safety, or missing instructions. Manuals+ will review the question and use this page’s manual context to help answer it.