
Reemix H1232
Contents
Reemix Electric Knife Sharpener H1232 User Manual
Model: H1232
1. Introduction
Thank you for choosing the Reemix Electric Knife Sharpener. This manual provides essential information for the safe and effective operation, maintenance, and troubleshooting of your new sharpener. Please read all instructions carefully before first use and retain this manual for future reference.
This electric knife sharpener is designed to restore and maintain the sharpness of various kitchen knives with its advanced 4-stage sharpening system and diamond abrasives.
2. Safety Instructions
- Always place the sharpener on a stable, flat, and dry surface before use.
- Keep hands and fingers away from the sharpening slots during operation.
- Do not immerse the sharpener in water or any other liquid.
- Unplug the sharpener from the power outlet when not in use, before cleaning, or before performing any maintenance.
- Do not operate the sharpener with a damaged cord or plug, or if the appliance malfunctions or has been damaged in any manner.
- This appliance is intended for household use only. Do not use outdoors.
- Keep out of reach of children.
- Use caution when handling sharpened knives, as they will be extremely sharp.
- Do not attempt to sharpen ceramic knives or scissors with this device, unless specifically indicated for ceramic knives in the product overview. This sharpener is designed for metal kitchen knives.
3. Product Overview
The Reemix Electric Knife Sharpener features a comprehensive 4-stage sharpening system designed to restore and refine knife edges. Each stage utilizes diamond abrasives for optimal performance and durability.
Key Features:
- 4-Stage Sharpening System: Includes Repair, Coarse, Medium, Fine, and Polish stages.
- Diamond Abrasives: Ensures efficient and long-lasting sharpening for various metal knife types.
- 20° Fixed Angle Guide: Provides a consistent and precise sharpening angle, eliminating guesswork.
- Non-Slip Base: Heavy-duty rubber base ensures stability during use.
- Metal Shavings Collector: Removable bottom tray collects metal filings for easy cleanup.
Sharpening Stages:
- Stage 1 (Repair): For severely dull or damaged blades, including chipped edges.
- Stage 2 (Coarse Grinding): 220# Diamond for initial sharpening of very dull knives.
- Stage 3 (Medium Grinding): 360# Diamond for general sharpening and edge refinement.
- Stage 4 (Fine Grinding): 600# Diamond for fine-tuning the edge.
- Stage 5 (Polishing): 1200# Ceramic for final polishing and honing to a razor-sharp finish.

Figure 3.1: Detailed view of the 4-stage sharpening system.

Figure 3.2: The sharpener is suitable for various metal kitchen knife types.
4. Setup
- Unpack: Carefully remove the sharpener and all packaging materials. Inspect the unit for any damage.
- Placement: Place the sharpener on a clean, dry, stable, and non-slip surface, such as a kitchen countertop. Ensure there is sufficient space around the unit for safe operation.
- Power Connection: Plug the power cord into a standard electrical outlet. Ensure the power switch on the sharpener is in the 'OFF' position before plugging it in.

Figure 4.1: The Reemix Electric Knife Sharpener set up on a countertop.
5. Operating Instructions
Always ensure the sharpener is securely placed and the power cord is connected before starting. Use light, consistent pressure and a smooth pulling motion for best results.
General Sharpening Steps:
- Power On: Turn the power switch to the 'ON' position. The sharpener will begin to operate.
- Select Stage: Choose the appropriate sharpening stage based on the knife's condition.
- Insert Knife: Hold the knife handle firmly. Insert the knife blade into the chosen sharpening slot, ensuring the blade rests against the guide at the correct 20° angle.
- Pull Through: With light, consistent downward pressure, slowly pull the knife blade through the slot from heel to tip. Repeat this motion 3-5 times for each side of the blade. Alternate between the left and right slots for even sharpening.
- Progress Through Stages: For very dull knives, start with Stage 1 (Repair) or Stage 2 (Coarse), then proceed to Stage 3 (Medium), Stage 4 (Fine), and finally Stage 5 (Polish). For knives that only need a touch-up, you may start directly at Stage 4 or 5.
- Clean Blade: After sharpening, carefully wipe the knife blade with a damp cloth to remove any metal residue before use.
- Power Off: Turn the power switch to the 'OFF' position and unplug the sharpener when finished.
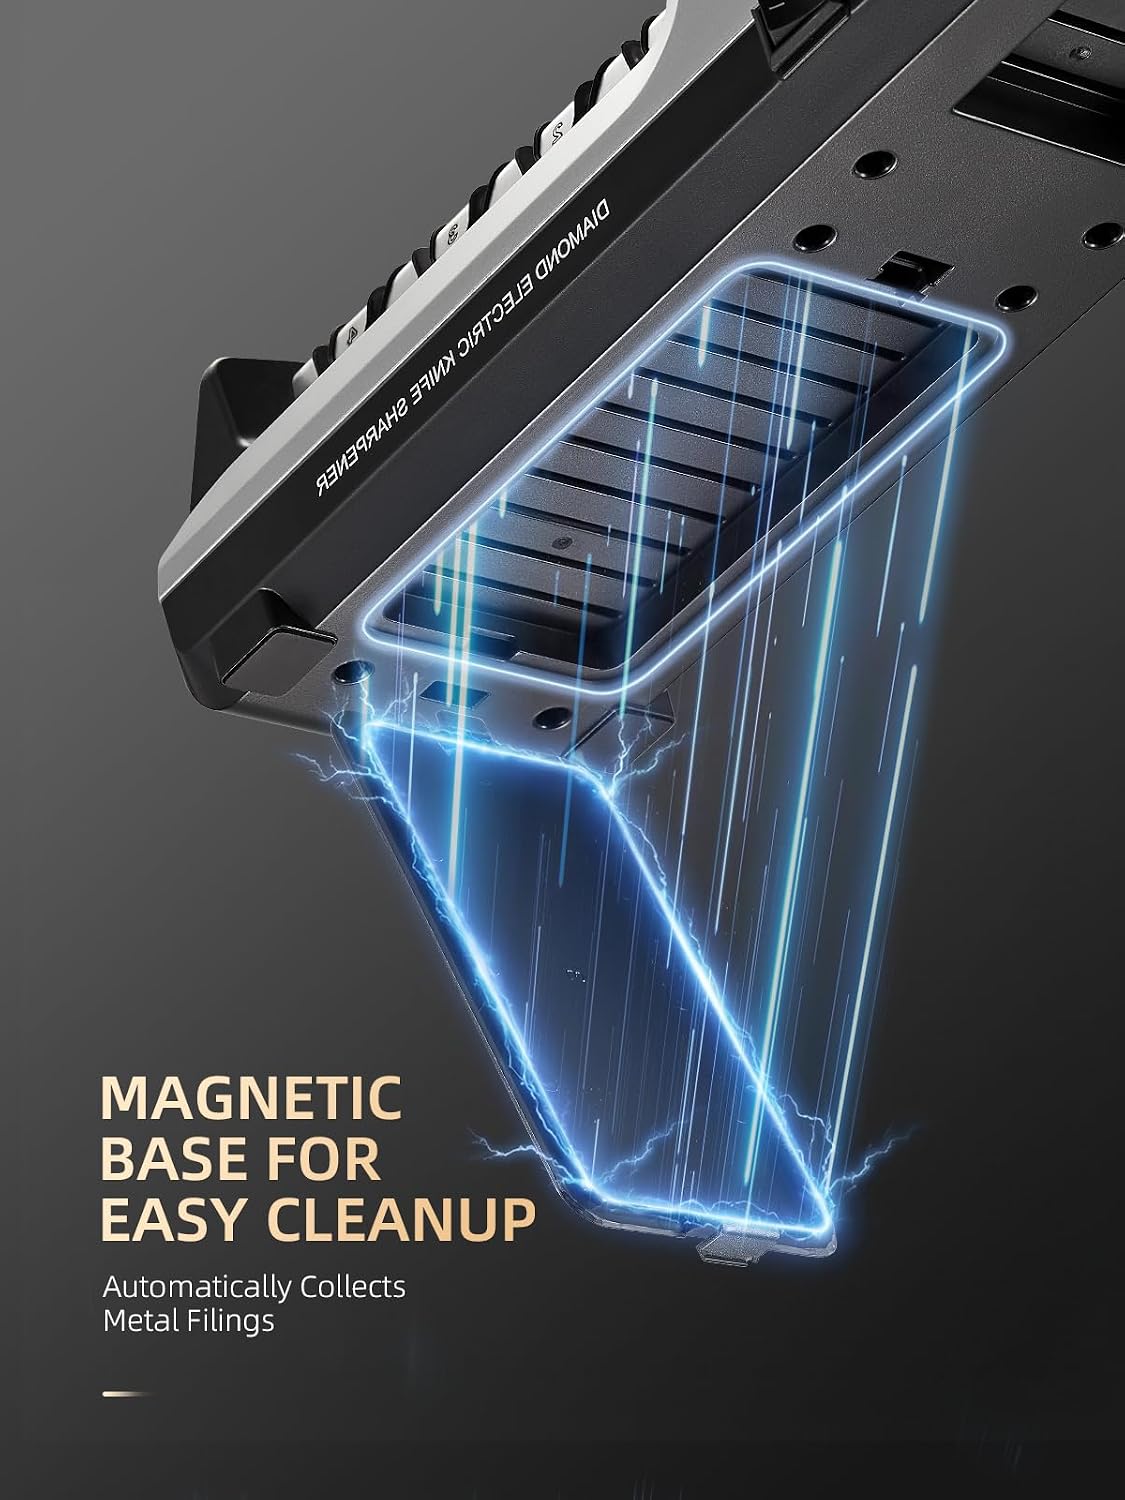
Figure 5.1: Step-by-step guide for using the sharpener.

Figure 5.2: The 20° fixed angle ensures precise sharpening.
6. Maintenance
- Cleaning the Unit: Ensure the sharpener is unplugged before cleaning. Wipe the exterior with a soft, damp cloth. Do not use abrasive cleaners or immerse the unit in water.
- Emptying Metal Shavings Collector: The sharpener features a removable bottom tray that collects metal filings. Regularly remove and empty this tray to prevent buildup. To access, gently slide out the tray from the bottom of the unit.
- Storage: Store the sharpener in a dry place, away from direct sunlight and moisture, when not in use.

Figure 6.1: The magnetic base and removable tray simplify cleanup of metal shavings.
7. Troubleshooting
| Problem | Possible Cause | Solution |
|---|---|---|
| Sharpener does not turn on. | Not plugged in; power switch off; power outlet malfunction. | Ensure the power cord is securely plugged into a working outlet. Check the power switch is in the 'ON' position. Test the outlet with another appliance. |
| Knife is not sharpening effectively. | Incorrect sharpening stage used; insufficient passes; too much pressure; blade type incompatibility. | Ensure you are using the correct sharpening stage for the knife's condition. Make sure to pull the knife through 3-5 times per side. Apply light, consistent pressure. Confirm the knife is a metal kitchen knife compatible with the sharpener. |
| Excessive noise during operation. | Foreign object in slot; unit malfunction. | Unplug the unit and carefully inspect sharpening slots for any obstructions. If the noise persists, discontinue use and contact customer support. |
8. Specifications
- Model: H1232
- Color: Sliver
- Material: Acrylonitrile Butadiene Styrene, Stainless Steel
- Product Dimensions: 4.5"L x 3.6"W x 12.6"H
- Grit Type: Diamond (220#, 360#, 600#), Ceramic (1200#)
- Sharpening Angle: Fixed 20°
- Power Source: Electric (specific voltage/wattage not provided, refer to product label)
9. Warranty and Support
For warranty information or technical support, please refer to the product packaging or contact Reemix customer service. Keep your purchase receipt as proof of purchase.
For further assistance, please visit the official Reemix website or contact their customer support channels.
Ask a question about this manual
Ask about setup, troubleshooting, compatibility, parts, safety, or missing instructions. Manuals+ will review the question and use this page’s manual context to help answer it.