
1. Introduction
The QIDI Max4 Combo is an advanced 3D printer designed for industrial applications, complex molds, and custom prototypes. It features an ultra-large build volume of 390×390×340mm, a 65℃ heated chamber, and compatibility with a wide range of materials. This manual provides essential information for the safe and efficient operation of your QIDI Max4 Combo 3D Printer.
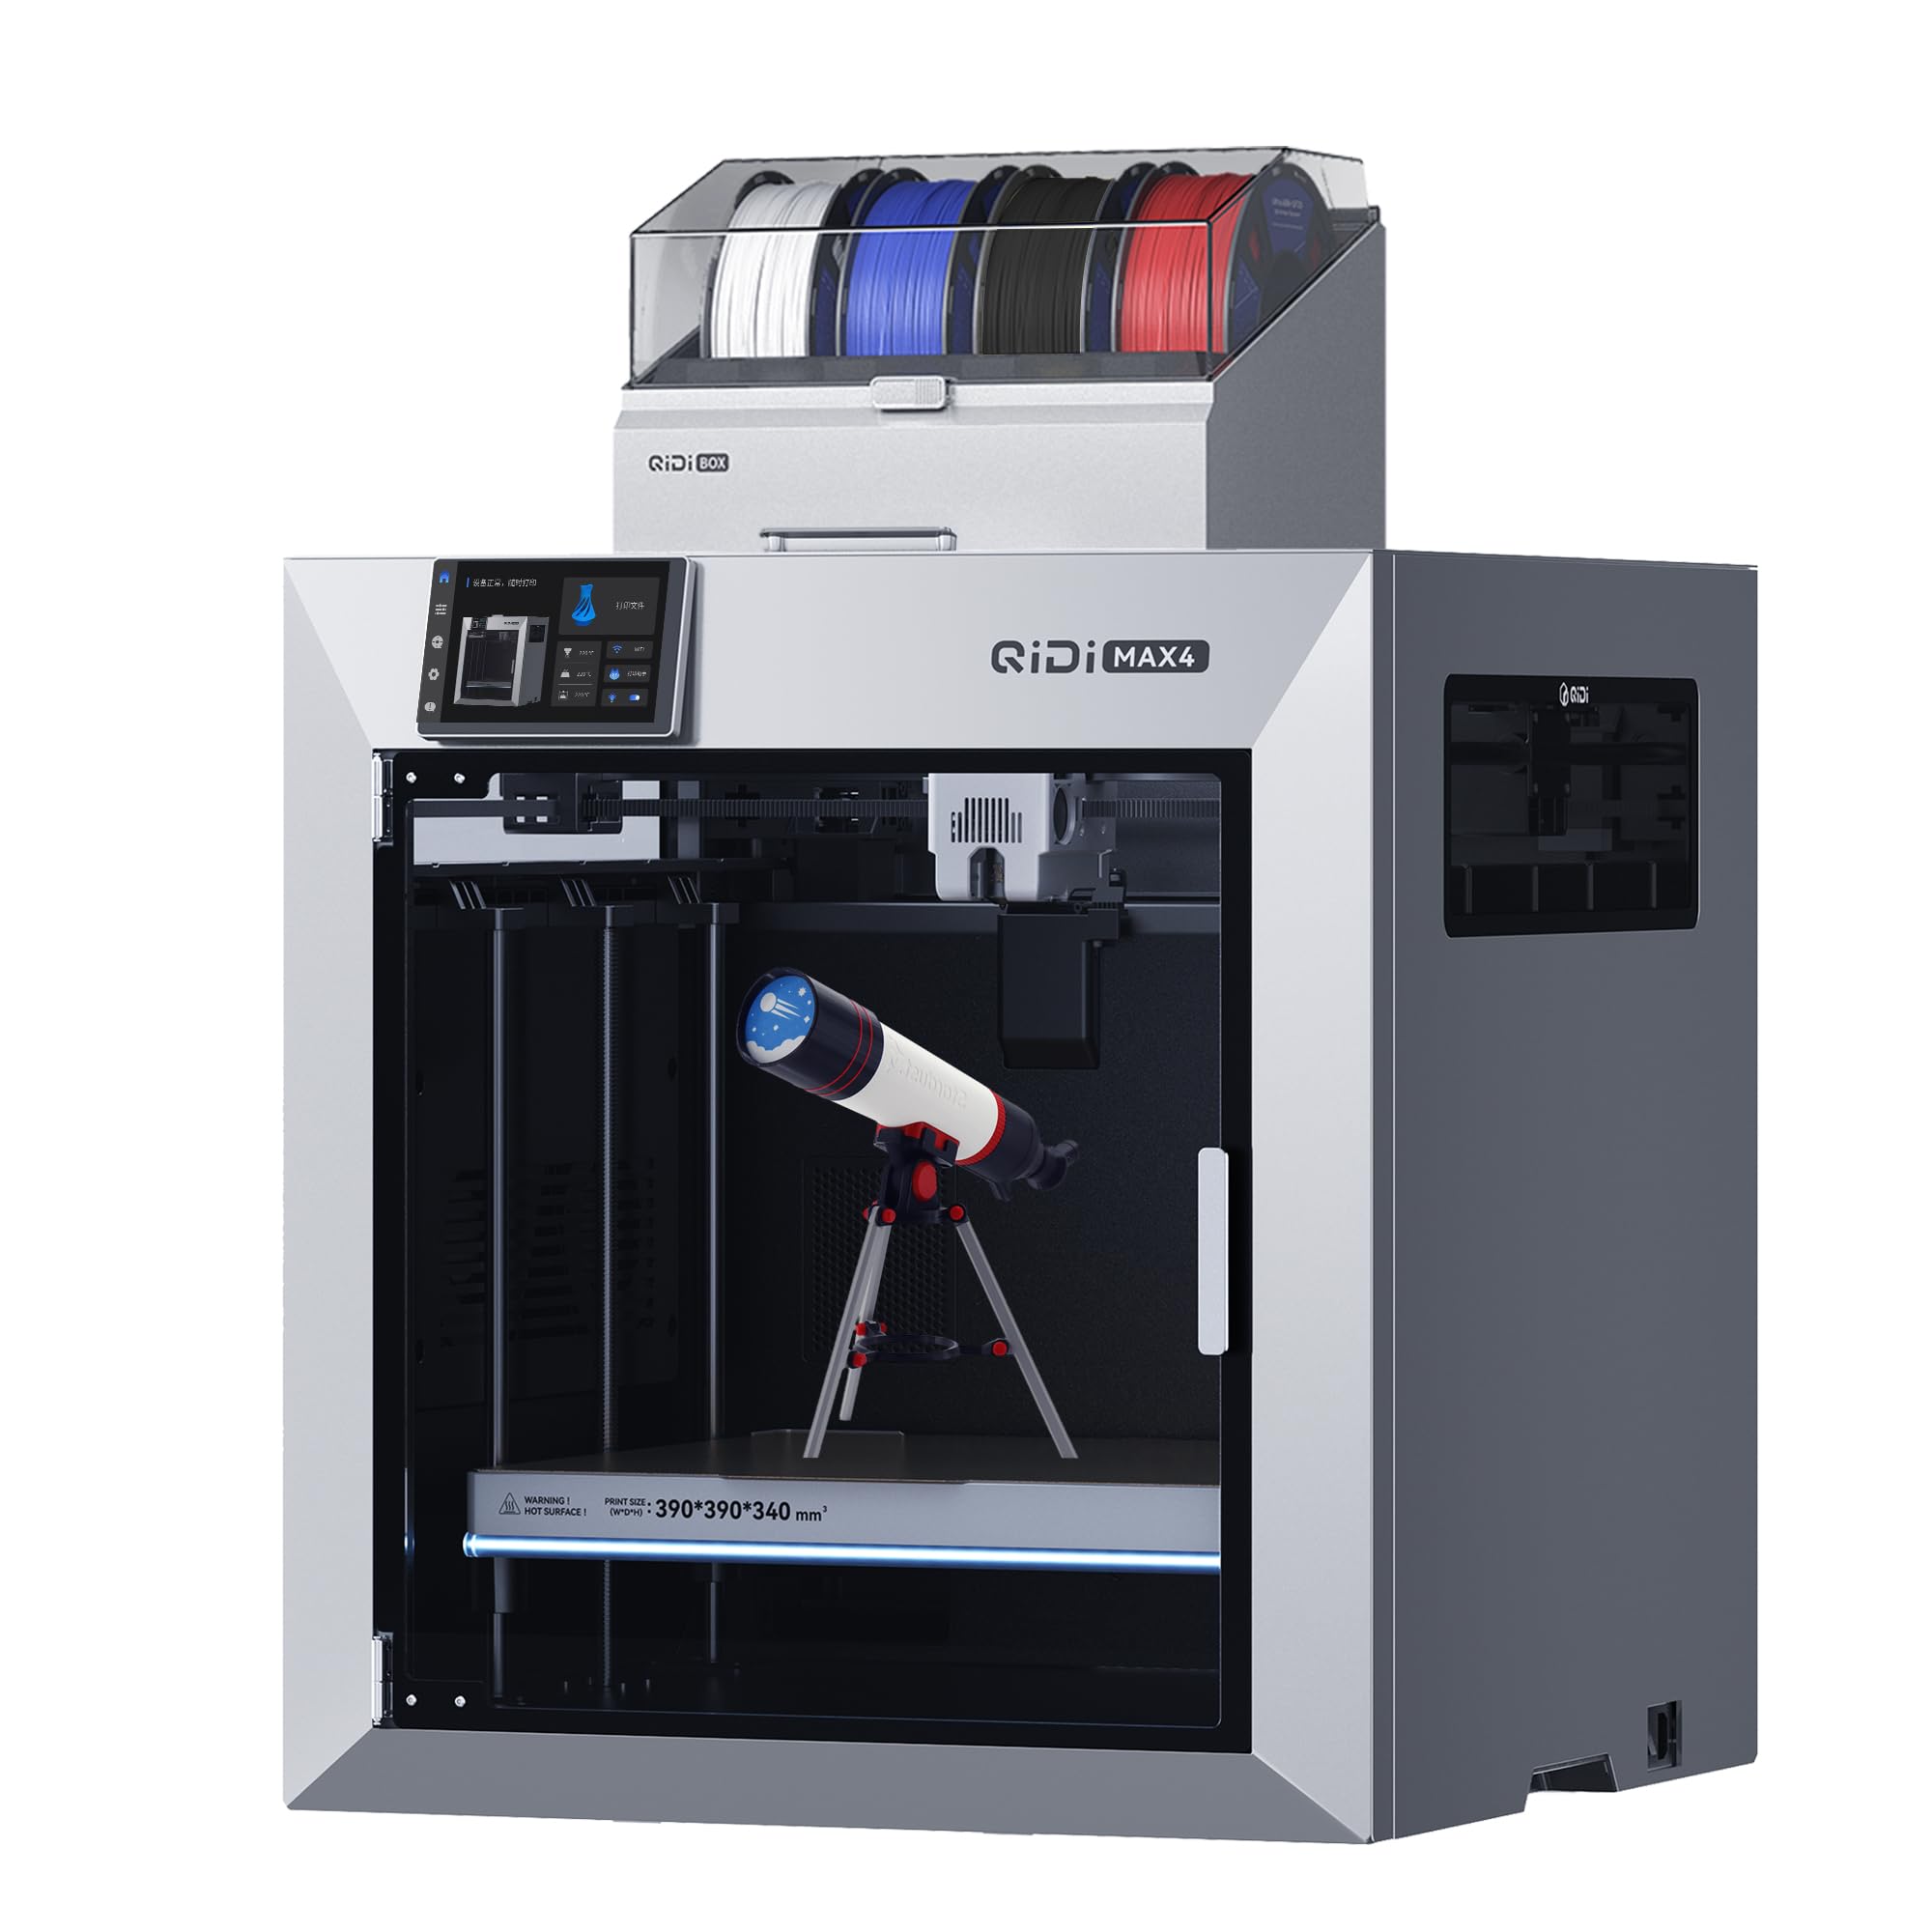
Image: The QIDI Max4 Combo 3D Printer, a large-format industrial 3D printer.
2. Safety Information
Always read and understand all safety warnings and instructions before operating the 3D printer. Failure to do so may result in injury or damage to the printer. Keep hands clear of moving parts during operation. Ensure proper ventilation when printing, especially with materials that produce fumes. The printer operates at high temperatures; avoid touching the hotend or heated bed during or immediately after printing. Use only recommended power supplies and accessories.

Image: Illustration of the flame-retardant chamber design, highlighting safety features.
3. Setup
3.1 Package Contents
Verify that all components are present in the package:
- Max4 3D Printer
- Max4 QIDI BOX
- Camera, USB2.0 Flash Drive, Glue Stick
- Tool Kits, Spare Parts Kits, Holder Cover
- Filament Extension Bracket, Extension Bracket Fixing Block, Filament Spool Holder
- Quick Start Guide, Power Cord, Ethernet Cable

Image: Visual representation of the accessories included in the QIDI Max4 Combo package.
3.2 Unboxing and Initial Preparation
The QIDI Max4 Combo is designed for easy setup. Carefully remove the printer from its packaging. Follow the on-screen instructions on the printer's touch screen for initial calibration and removal of protective materials.
Video: QIDI Max4 Combo Unboxing. This video demonstrates the process of unboxing the printer and preparing it for first use, including removing protective packaging from the heat bed and print head.
Ensure the heat bed is unlocked and any foam packaging is removed from beneath it. Also, remove any protective material from the print head before proceeding with operation.
4. Operating Instructions
4.1 User Interface and Control
The QIDI Max4 Combo features a 5-inch HD touch screen with an optimized interface for smooth operation. Navigate through menus to control printer settings, monitor print progress, and manage files.

Image: The 5-inch HD touch screen displaying the printer's user interface for control and monitoring.
4.2 Filament Loading and Management
The QIDI BOX facilitates multi-material printing and intelligent filament management. Load filament into the QIDI BOX, ensuring it feeds smoothly into the printer. The system supports real-time filament level monitoring and automatic pausing when filament runs out.

Image: The QIDI BOX system, illustrating its capability for multi-color and multi-material printing with intelligent filament management.
4.3 Starting a Print
Prepare your 3D model using QIDI Studio or a compatible slicer. Transfer the file to the printer via USB or network. Select the desired file on the touch screen and initiate the print. The printer's nozzle acts as a sensor for precision leveling, ensuring optimal first-layer adhesion.

Image: Diagram showing the nozzle functioning as a sensor for precise, zero-deviation bed leveling.
4.4 Advanced Features
- Heated Chamber: The 65℃ active heated chamber and full-surface silicone heated bed ensure even temperature distribution, strong first-layer adhesion, and prevent warping, especially with high-temperature materials.
- AI Camera Monitoring: The built-in AI camera detects printing abnormalities, such as spaghetti-like failures, and can pause printing to prevent material waste and save time.
- High Precision & Stability: Equipped with closed-loop motors on X/Y axes, a 2mm lead screw, and an anti-backlash nut on the Z-axis for smooth and precise printing.
- Wide Material Compatibility: The 40mm³/s high-flow hotend with a hardened steel nozzle supports standard materials (PLA/ABS) and industrial-grade abrasive materials (carbon fiber-reinforced nylon, ABS-CF, PC, PPS-CF).

Image: The 3rd generation heated chamber, capable of reaching 65℃, designed to eliminate warping and improve layer adhesion.

Image: Comparison showing the QIDI Max4's evenly heated bed versus other printers, ensuring consistent temperature distribution.

Image: The AI camera actively monitoring a print for common problems like spaghetti failures.

Image: Detailed view of the 2mm lead screw and anti-backlash nut on the Z-axis for enhanced layer precision.

Image: Exploded view of the powerful FOC closed-loop stepper motor, contributing to high speed and acceleration.

Image: Illustration of the new 1.5GT custom belt with higher tooth density for smoother, more precise motion.

Image: Diagram showing the linear guide rail and CoreXY system, ensuring stable and reliable print quality.

Image: The hotend heating up to 370℃, featuring a ceramic throat and new heat dissipation module to reduce clogging.
5. Maintenance
5.1 General Cleaning
Regularly clean the printer's smooth base and interior to prevent debris accumulation. Use a soft brush or cloth to remove filament scraps and dust. The bottom handle design facilitates easy movement for cleaning.

Image: Illustrations showing the easy-to-clean smooth base and bottom handle for convenient printer movement.
5.2 Nozzle and Hotend Care
The bimetal hardened steel nozzle is designed for durability. If clogging occurs, refer to the troubleshooting section. The printer's design aims to reduce clogging by up to 90% with active chamber heating and cold air blowing on the extruder (Polar Cooler, sold separately).

Image: Diagram illustrating how active chamber heating and cold air on the extruder reduce clogging by 90%.
5.3 Air Filtration System
The integrated triple filtration system captures 99.5% of dust and particles, contributing to a safer printing environment. Periodically check and replace filters as needed to maintain optimal performance.

Image: Exploded view of the triple filtration system, designed for home health and safety.
5.4 Filament Drying
The QIDI BOX includes a 65℃ drying feature to keep filaments dry during printing, which is crucial for print quality, especially with hygroscopic materials. Ensure filaments are stored in a dry environment when not in use.
6. Troubleshooting
This section addresses common issues encountered during 3D printing. For more detailed troubleshooting, consult the official QIDI TECHNOLOGY support resources.
- Warping: Ensure the heated bed temperature is appropriate for the filament type. The 65℃ heated chamber helps mitigate warping for many materials. Apply a thin layer of glue stick to the build plate for enhanced adhesion if needed.
- Clogging: Verify the hotend temperature is correct for the filament. Ensure the filament path is clear and free of debris. The Polar Cooler (sold separately) can help reduce clogging by cooling the extruder.
- Spaghetti-like Failures: The AI camera is designed to detect and pause prints in case of such failures. Check bed adhesion, filament flow, and model slicing settings.
- Filament Tangles/Shredding: Ensure filament spools are properly mounted and unwinding smoothly. Avoid using brittle or old filament in the QIDI BOX, as it can lead to tangles or shredding by the gears.
- Bed Adhesion Issues: Clean the build plate thoroughly. Ensure proper bed leveling, which is simplified by the nozzle's sensor function. Adjust initial layer settings in your slicer.
- Temperamental Toolhead Sensor: If the toolhead sensor provides false triggers, ensure the printer is on a stable, level surface. If issues persist, contact customer support.
7. Specifications
| Feature | Specification |
|---|---|
| Print Size (W*D*H) | 390*390*340mm |
| Printer Dimensions | 550*578*612mm |
| Package Dimensions | 700*710*750mm |
| Gross Weight | Max4: 49.5kg, Max4 Combo: 56kg |
| Net Weight | Max4: 40kg, Max4 Combo: 46.5kg |
| Print Head Temperature | ≤ 370℃ |
| Included Build Plate Type | Dual-Sided Textured PEI Plate |
| Hot Bed Temperature | ≤ 120℃ |
| Max Speed of Tool Head | 800mm/s |
| Acceleration | ≤ 30000mm/s² |
| XY Structure | CoreXY, 15GT 10mm Width Belt, FOC Closed-Loop Stepper Motor |
| X/Y Axis | X: High Hardness Linear Guide Rail, Y: 12mm Linear Steel Shafts |
| Z Axis | Independent 2mm lead screw motors x2, 12mm Linear Steel Shafts x4 |
| Printing Platform | Aluminum Plate Silicone Heated Bed |
| Nozzle | Bimetal Nozzle |
| Nozzle Diameter | 0.4mm (0.2/0.6/0.8mm Optional) |
| Extruder Gear | Direct Extruder, Hardened Steel Dual Gears |
| Supported Filament | PLA, ABS, ASA, PETG, TPU, PA, PC, Carbon/Glass-Fiber Reinforced Polymer, etc. |
| Filament Diameter | 1.75mm |
| Multi-Color Printing | Compatible with QIDI BOX (Multi-color) |

Image: Diagram illustrating the large 390x390x340mm build volume of the QIDI Max4 Combo.
8. Warranty and Support
QIDI TECHNOLOGY provides responsive customer support and replacement parts. The warranty period for the QIDI Max4 Combo is 30 days, which is longer than many industry standards. Replacement parts are often shipped from within the U.S. for U.S. customers. For technical assistance or warranty claims, please contact QIDI TECHNOLOGY customer service directly.