
1. Introduction
Thank you for choosing the LIORQUE CH-05 Digital Alarm Clock. This clock features a large LED display, dual alarm functionality, adjustable brightness and volume, a convenient snooze function, weekend mode, and dual USB charging ports. This manual provides detailed instructions for setup, operation, and maintenance to ensure optimal performance.


2. Package Contents
- LIORQUE CH-05 Digital Alarm Clock
- Power Adapter
- User Manual
- 1 Non-standard Battery (pre-installed for backup)

3. Setup
3.1 Power Connection
- Connect the provided power adapter to the USB-C input port on the back of the alarm clock.
- Plug the power adapter into a standard wall outlet.
- The clock will power on, and the display will illuminate. The internal battery retains settings during power outages.
3.2 Initial Time Setting
Upon first power-up or after a prolonged power loss without battery backup, you may need to set the time.
- Press and hold the SET button (usually located on the top or back) until the hour digits flash.
- Use the + and - buttons to adjust the hour.
- Press SET again to confirm the hour and move to minute adjustment.
- Use the + and - buttons to adjust the minutes.
- Press SET one more time to save the time setting.
- To switch between 12-hour and 24-hour format, press the 12/24H button (if available) or cycle through by pressing SET after minute adjustment.


4. Operating Instructions
4.1 Alarm Setting (Dual Alarms)
The clock supports two independent alarms (Alarm 1 and Alarm 2).
- Press the Alarm 1 button (or Alarm 2 button) once. The alarm icon and hour digits will flash.
- Use the + and - buttons to adjust the alarm hour.
- Press the Alarm 1 button again to confirm the hour and move to minute adjustment.
- Use the + and - buttons to adjust the alarm minutes.
- Press the Alarm 1 button one more time to save the alarm setting. The alarm icon will remain lit, indicating the alarm is active.
- To deactivate an alarm, press the corresponding Alarm button until its icon disappears from the display.
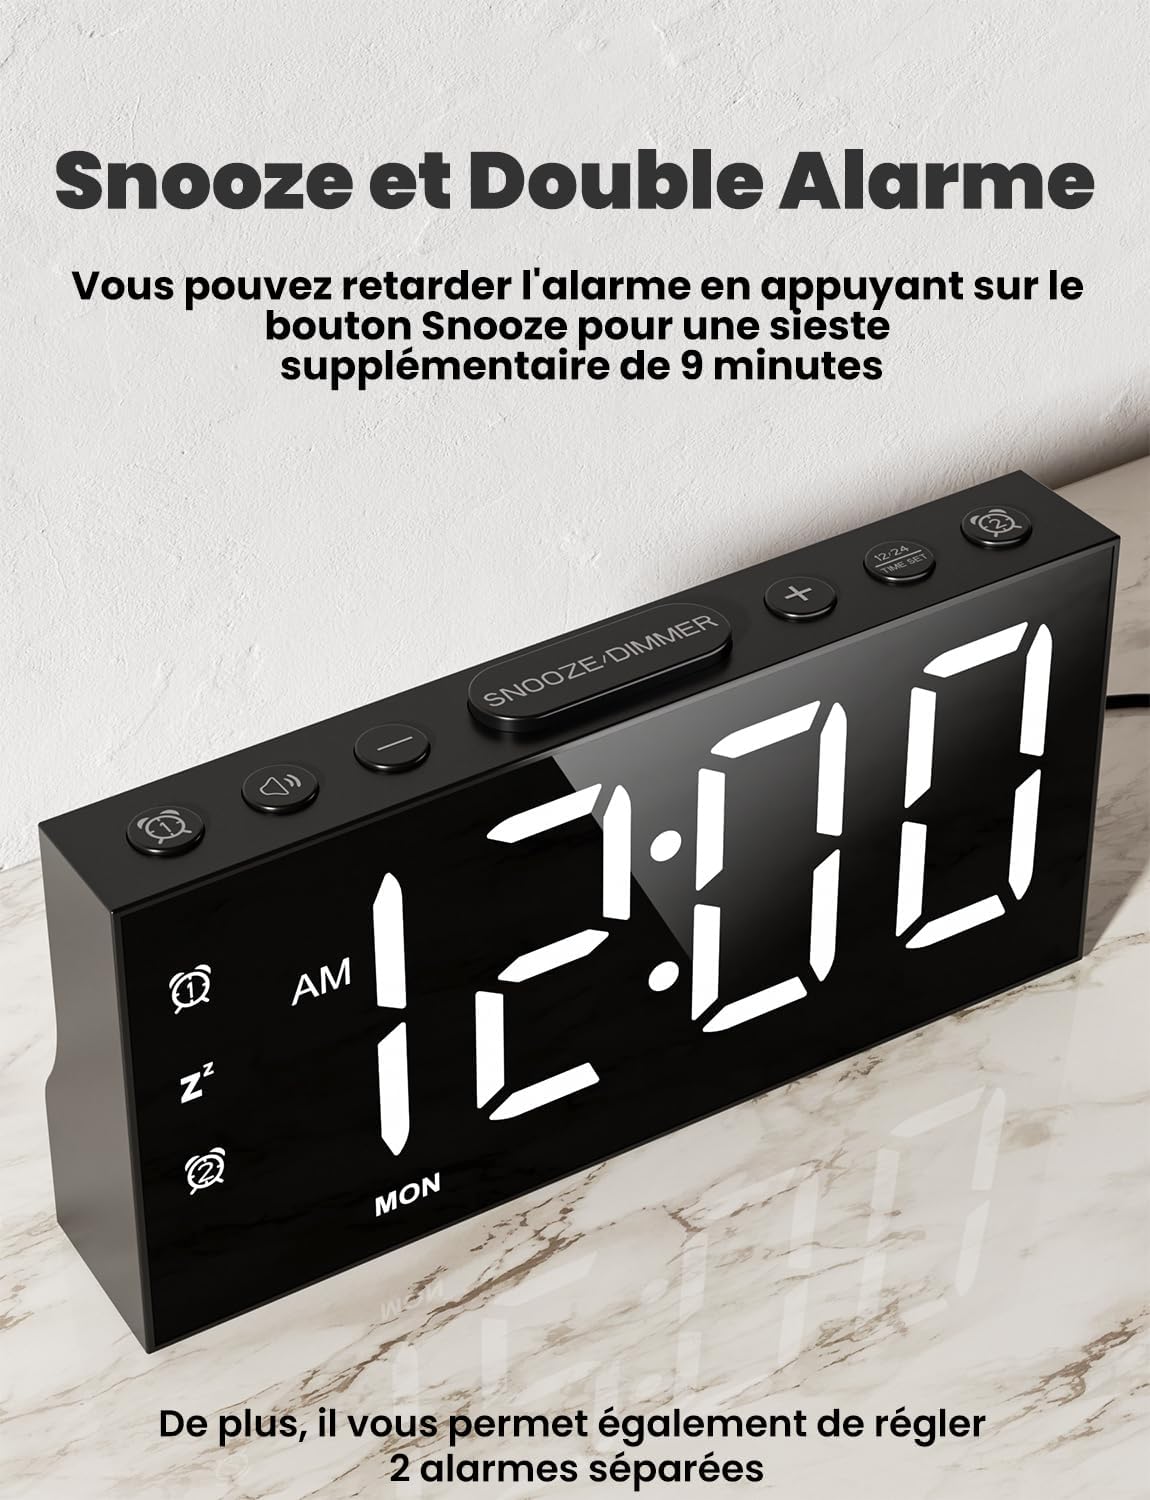

4.2 Snooze Function
When the alarm sounds, press the large SNOOZE/DIMMER button on top of the clock to activate the snooze function. The alarm will pause for 9 minutes and then sound again.
4.3 Weekday and Weekend Mode
The clock allows you to customize when your alarms are active.
- On the back of the clock, locate the alarm mode switches for Alarm 1 and Alarm 2.
- Slide the switch to select the desired mode:
- MON-SUN: Alarm active every day.
- MON-FRI: Alarm active only on weekdays.
- SAT-SUN: Alarm active only on weekends.
- Customize: Allows for specific day selection (refer to advanced settings in the full manual for detailed customization).

4.4 Brightness Adjustment
The clock offers 5 levels of display brightness, including the option to turn the display completely off.
- Press the SNOOZE/DIMMER button repeatedly to cycle through the 5 brightness levels (100%, 75%, 50%, 25%, 0% off).
- Select the brightness level that is comfortable for your environment.

4.5 Volume Adjustment
The alarm volume can be adjusted to 5 different levels.
- While the alarm is sounding, or during alarm setup, press the Volume button (often combined with + or -) to cycle through the volume levels (L01 to L05).
- Choose the volume that suits your preference.

4.6 Daylight Saving Time (DST)
To activate or deactivate Daylight Saving Time:
- Locate the DST switch on the back of the clock.
- Slide the switch to ON to advance the time by one hour for DST.
- Slide the switch to OFF to revert the time to standard.
4.7 USB Charging Ports
The clock is equipped with two 5V/1A USB-A output ports for charging small electronic devices.
- Connect your device's USB charging cable to one of the USB output ports on the back of the clock.
- Ensure your device is compatible with 5V/1A charging.
- Note: Avoid charging high-power devices, as this may damage the clock or the device.

5. Maintenance
- Clean the clock with a soft, dry cloth. Do not use abrasive cleaners or solvents.
- Keep the clock away from direct sunlight, extreme temperatures, and high humidity.
- Do not disassemble the clock. This will void the warranty.
6. Troubleshooting
| Problem | Possible Cause | Solution |
|---|---|---|
| Clock display is off or flickering. | Power adapter not connected properly; brightness set to 0%. | Ensure power adapter is securely plugged in. Press SNOOZE/DIMMER button to increase brightness. |
| Alarm does not sound. | Alarm not activated; volume set to minimum; incorrect weekday/weekend mode. | Check if alarm icon is lit. Increase alarm volume. Verify alarm mode switch (MON-SUN, MON-FRI, SAT-SUN). |
| USB charging is slow or not working. | Device requires more than 5V/1A; cable issue; clock not powered. | Ensure device is compatible with 5V/1A. Try a different USB cable. Confirm clock is powered on. |
| Time is incorrect after power outage. | Internal backup battery depleted or not present. | Reset the time manually. Ensure the internal battery is functional for future backup. |
7. Specifications
| Feature | Detail |
|---|---|
| Brand | LIORQUE |
| Model Number | CH-05 |
| Color | Black |
| Display Type | Digital LED |
| Screen Size | 7 Inches |
| Product Dimensions (L x H) | 17.5 x 11.2 cm (approx. 6.9 x 4.4 inches) |
| Power Source | Electric (Adapter Included) with Battery Backup |
| Batteries | 1 Non-standard Battery (Included) |
| Alarm Function | Dual Alarms, Snooze (9 min), Weekday/Weekend Mode |
| Brightness Levels | 5 (including display off) |
| Volume Levels | 5 |
| USB Output | 2 x 5V/1A USB-A Ports |
| Special Features | DST (Daylight Saving Time) Function |
8. Warranty and Support
LIORQUE products are designed for reliability and performance. For any questions, technical support, or warranty claims, please refer to your purchase documentation or contact LIORQUE customer service through the retailer where the product was purchased.
Please retain your proof of purchase for warranty purposes.