
1. Introduction
This manual provides essential information for the safe and efficient operation of your new TABU Washer and Dryer Combo Set. Please read all instructions carefully before installation and use, and retain this manual for future reference.
The TABU Washer and Dryer Combo Set includes a 18LBS Full-Automatic Washing Machine and a 2.6 Cu.Ft Compact Dryer, designed for household use in smaller spaces.

Figure 1: TABU Full-Automatic Washing Machine
2. Safety Instructions
WARNING: To reduce the risk of fire, electric shock, or injury, follow these basic precautions:
- Read all instructions before using the appliance.
- Do not wash or dry articles that have been previously cleaned in, washed in, soaked in, or spotted with gasoline, dry-cleaning solvents, or other flammable or explosive substances, as they emit vapors that could ignite or explode.
- Do not allow children to play on or in the appliance. Close supervision is necessary when the appliance is used near children.
- Before the appliance is removed from service or discarded, remove the door to the washing compartment and the dryer drum.
- Do not reach into the appliance if the tub or drum is moving.
- Do not install or store this appliance where it will be exposed to the weather.
- Do not tamper with controls.
- Do not repair or replace any part of the appliance or attempt any servicing unless specifically recommended in this manual.
- Always disconnect the appliance from the power supply before cleaning or performing any maintenance.
3. Product Overview
3.1 Washing Machine Components
The washing machine features a large stainless steel inner tub and an intuitive control panel.

Figure 2: Washing Machine Key Features
- LED Control Panel: For program selection, water level, and time settings.
- Transparent Glass Top Cover: Allows visibility into the wash cycle.
- Stainless Steel Inner Tub: Durable and rust-resistant, accommodates up to 18 lbs of laundry.
- Water Inlet: Connection point for water supply.
- Drain Hose: For water discharge.
- Built-in Filter: Collects lint and debris during washing.
3.2 Dryer Components
The compact dryer is designed for efficient drying with a user-friendly interface.
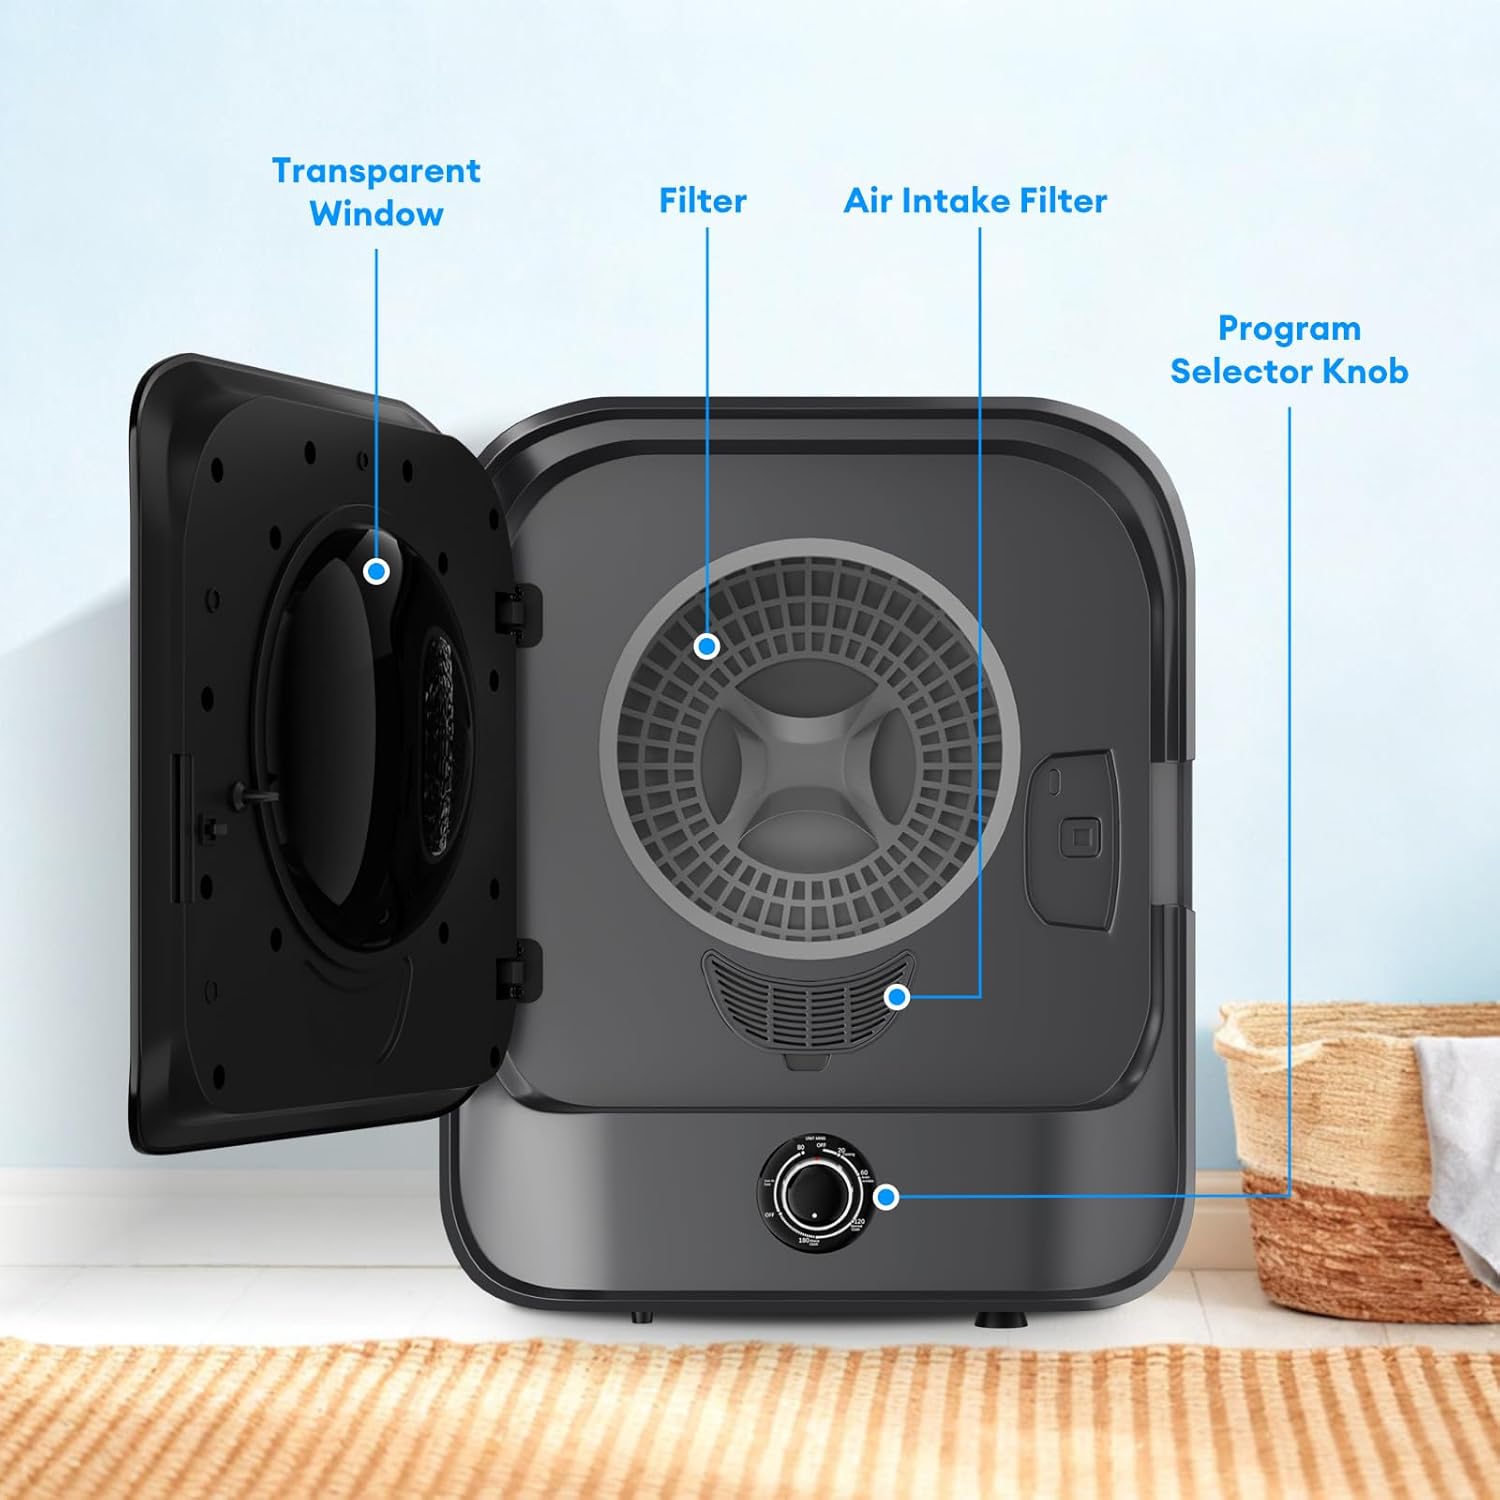
Figure 3: Dryer Internal Components
- Transparent Window: Allows monitoring of the drying process.
- Lint Filter: Collects lint and must be cleaned regularly.
- Air Intake Filter: Filters incoming air.
- Program Selector Knob: Used to select drying modes and time.
4. Setup and Installation
4.1 Unpacking
Carefully remove all packaging materials. Inspect the appliance for any shipping damage. Keep packaging materials away from children.
4.2 Placement
Place the washer and dryer on a firm, level surface. Ensure adequate space around the units for ventilation and connections. Avoid direct sunlight or extreme temperatures.
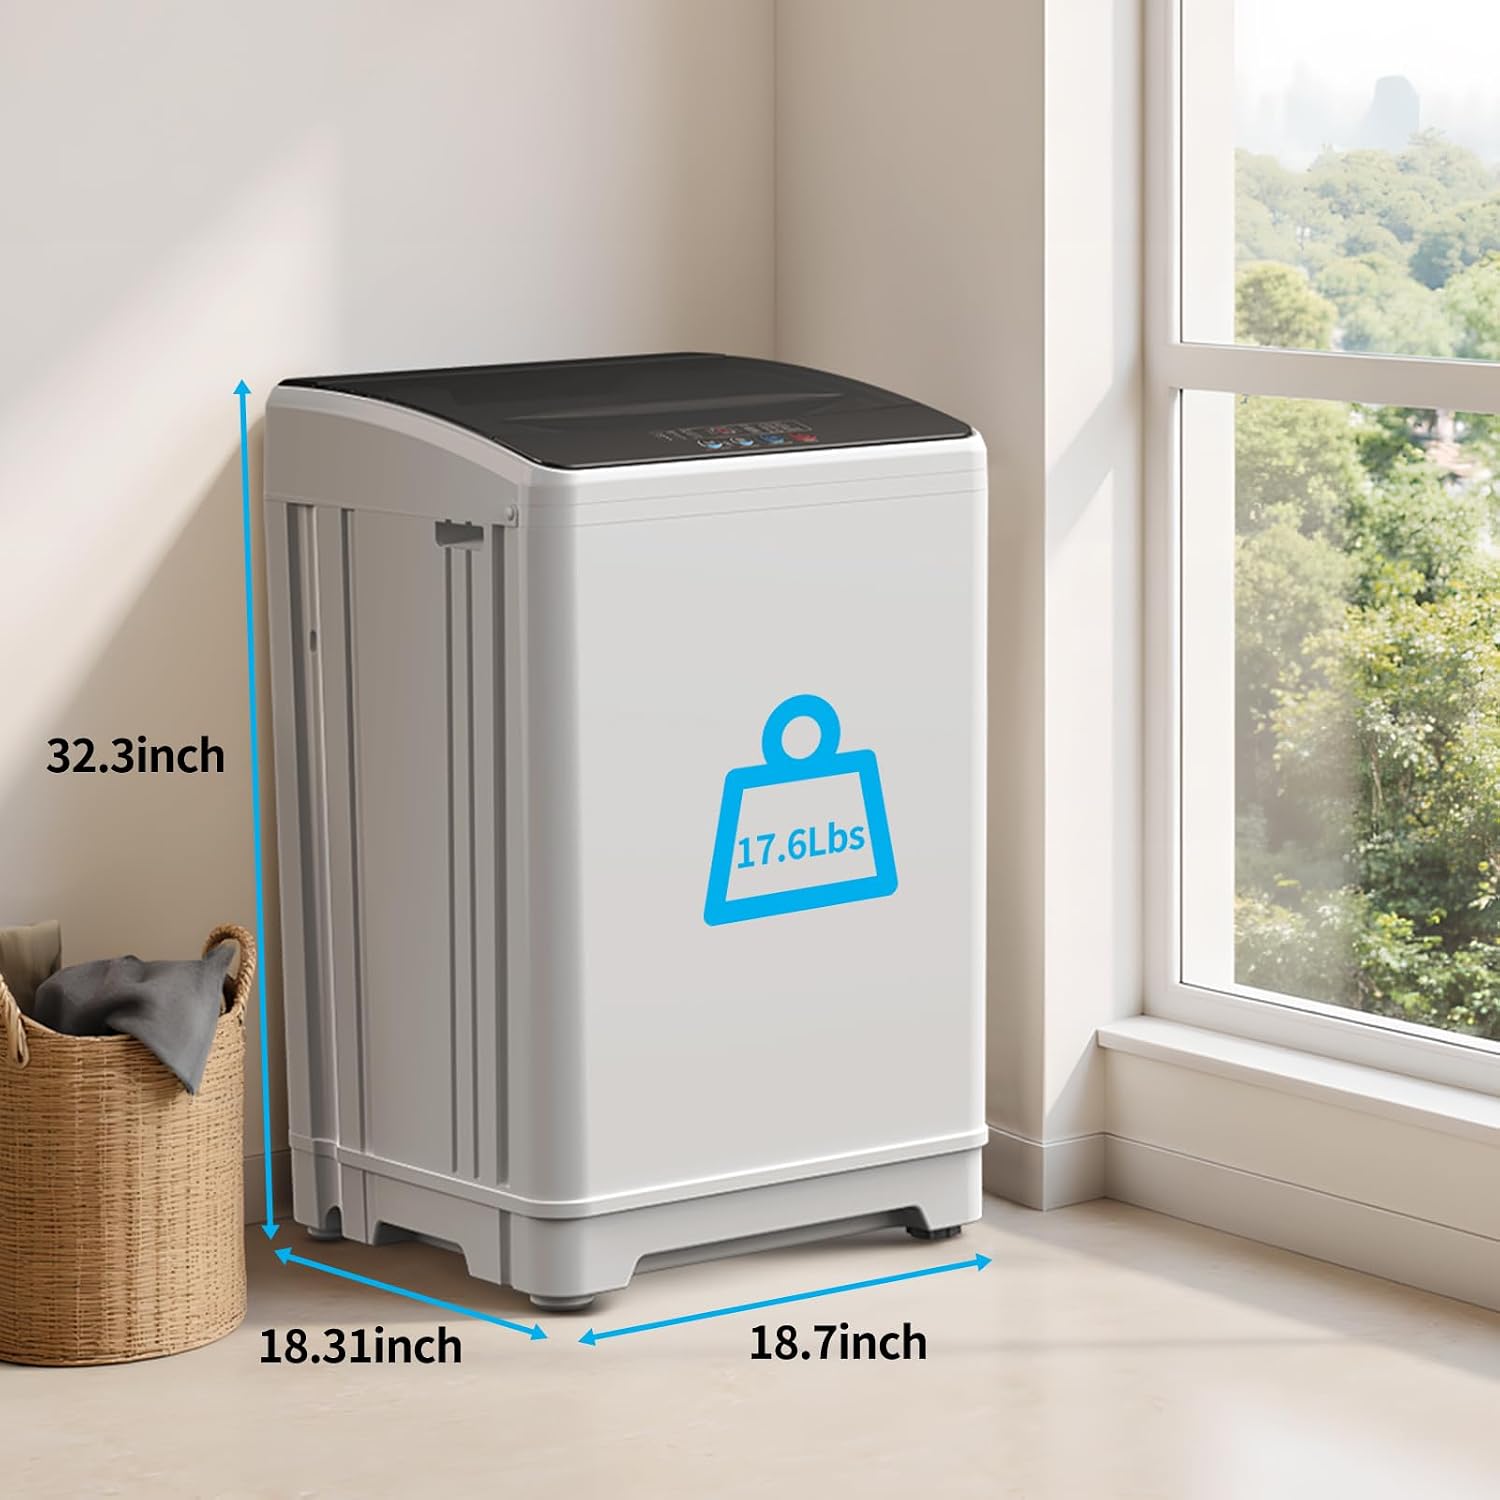
Figure 4: Washing Machine Dimensions
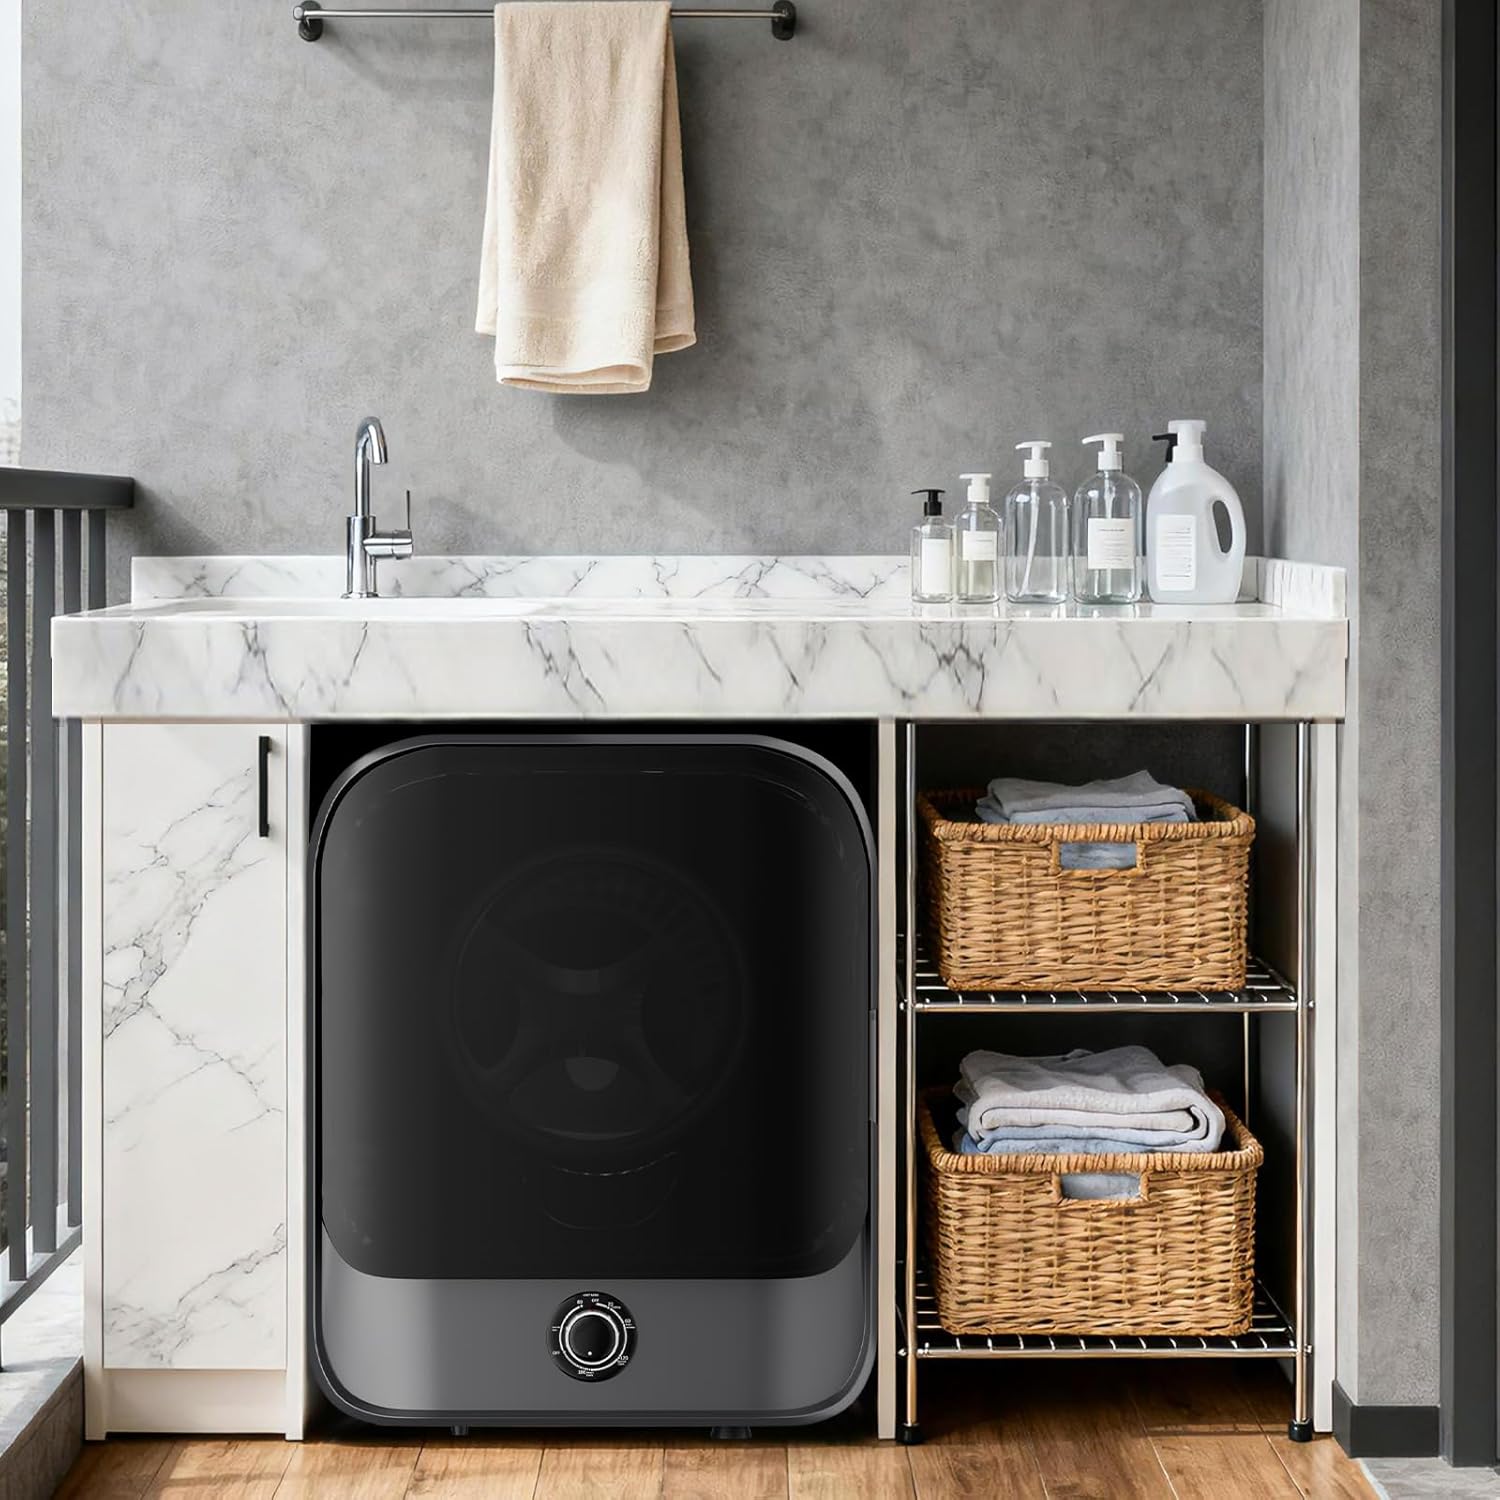
Figure 5: Compact Dryer Placement Example
4.3 Water and Drain Connections (Washer)
- Connect the water inlet hose to a cold water tap and to the designated inlet on the back of the washing machine. Ensure connections are tight to prevent leaks.
- Position the drain hose into a sink or standpipe, ensuring it is securely fastened to prevent dislodging during operation.
4.4 Power Connection
Plug both the washer and dryer into separate, grounded electrical outlets. Do not use extension cords or adapters.
5. Operating Instructions
5.1 Washing Machine Operation

Figure 6: Washing Machine Control Panel
- Load Laundry: Open the top lid and place clothes loosely into the stainless steel tub. Do not overload (maximum 18 lbs).
- Add Detergent: Pour the appropriate amount of detergent into the dispenser.
- Select Program: Use the control panel to choose one of the 10 washing programs (e.g., Normal, Soak, Quick Wash).
- Set Water Level: Select one of the 8 available water levels based on your load size.
- Delay Start (Optional): If desired, set a delay time for the wash cycle to begin later.
- Start Cycle: Press the Start/Pause button to begin the wash cycle. The machine will automatically adjust balance during operation to prevent excessive vibration.
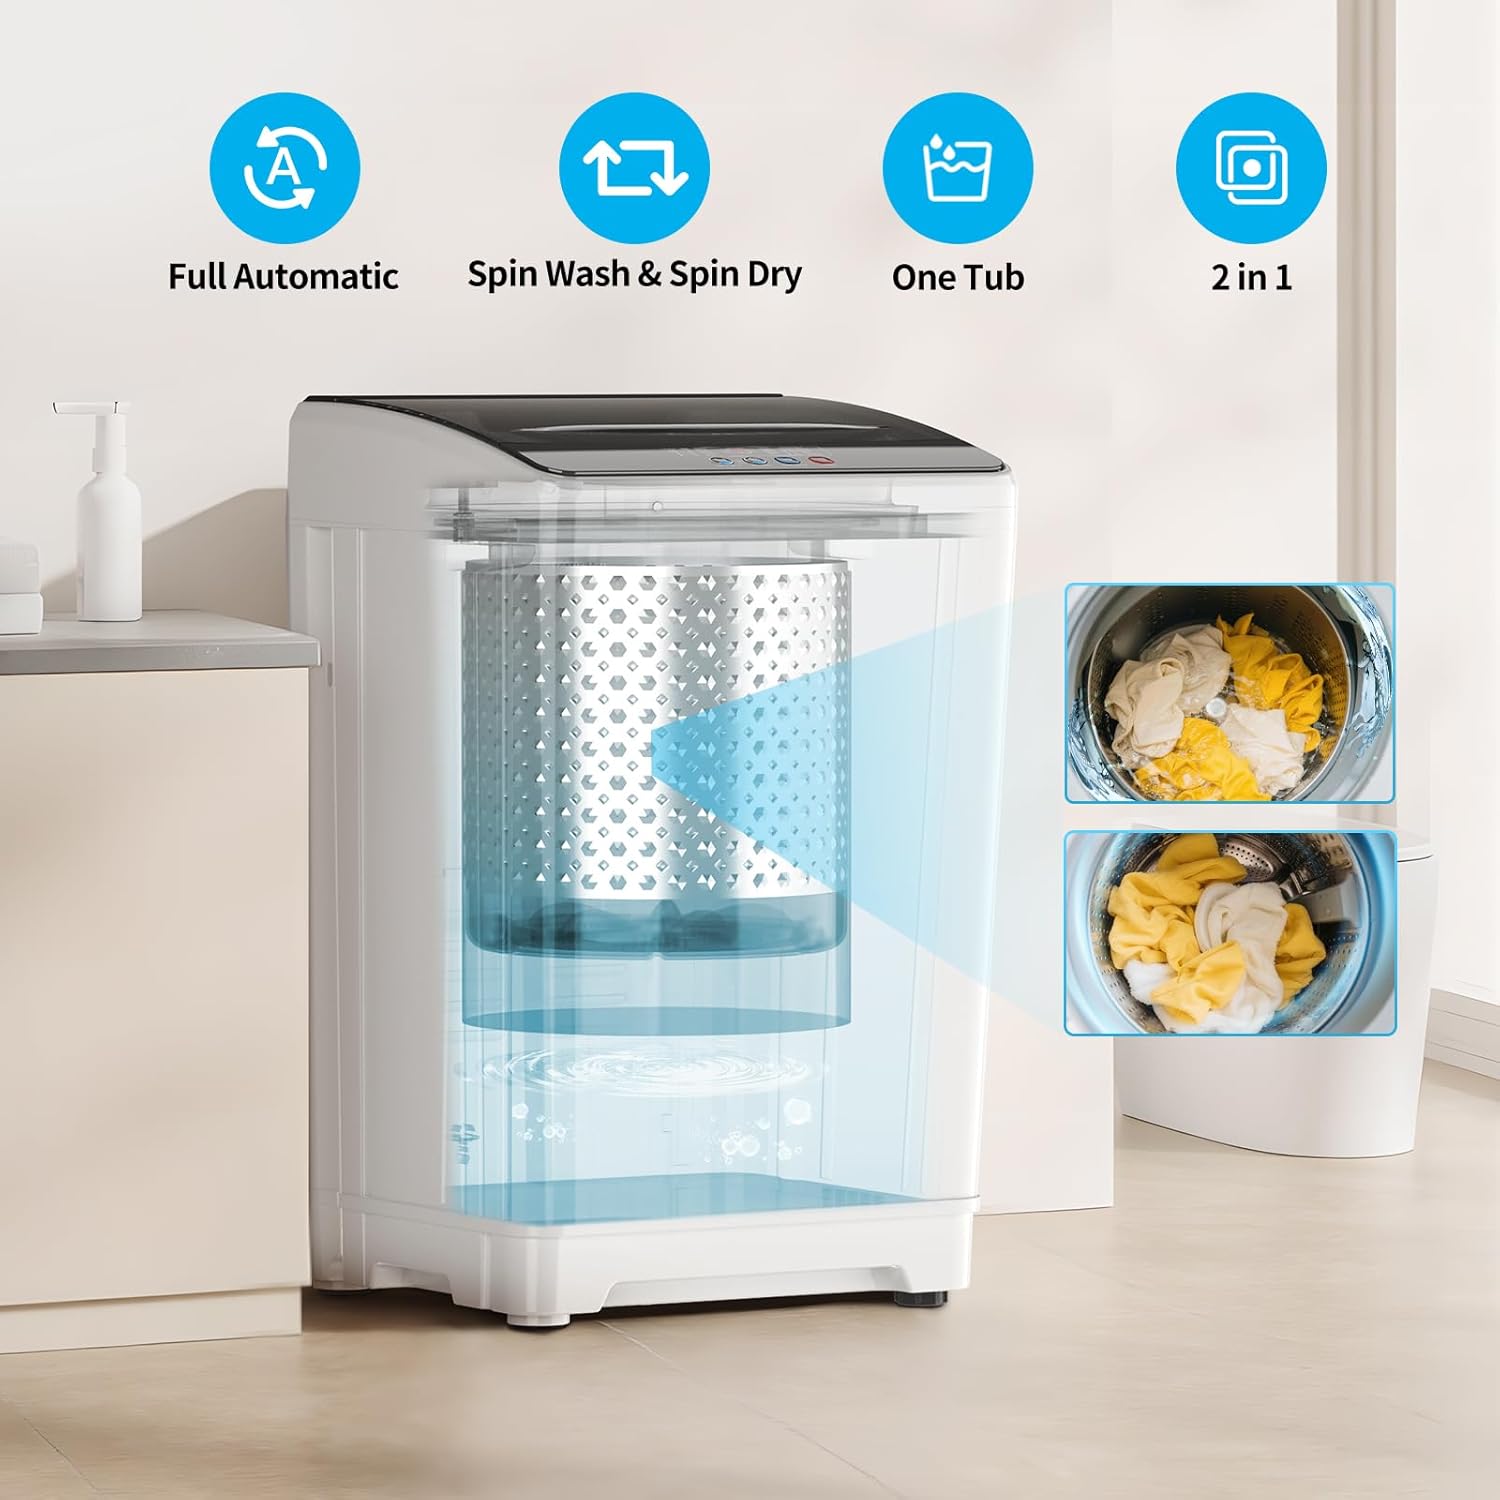
Figure 7: Washing Machine 2-in-1 Functionality
5.2 Dryer Operation
The compact dryer offers multiple drying modes for various fabric types.

Figure 8: Dryer Timer Settings
- Load Laundry: Place washed clothes into the dryer drum. Do not overload.
- Select Drying Mode: Turn the program selector knob to choose one of the 4 drying modes:
- Auto: Automatically adjusts drying time based on humidity.
- Delicates Dry: For small clothes or delicate fabrics.
- Air Dry: Uses cool air to freshen clothes.
- Timer Setting: Manually set drying time (30/60/90 minutes).
- Start Cycle: Press the Start button to begin drying. The dryer can reach temperatures up to 149°F for effective drying and sterilization.
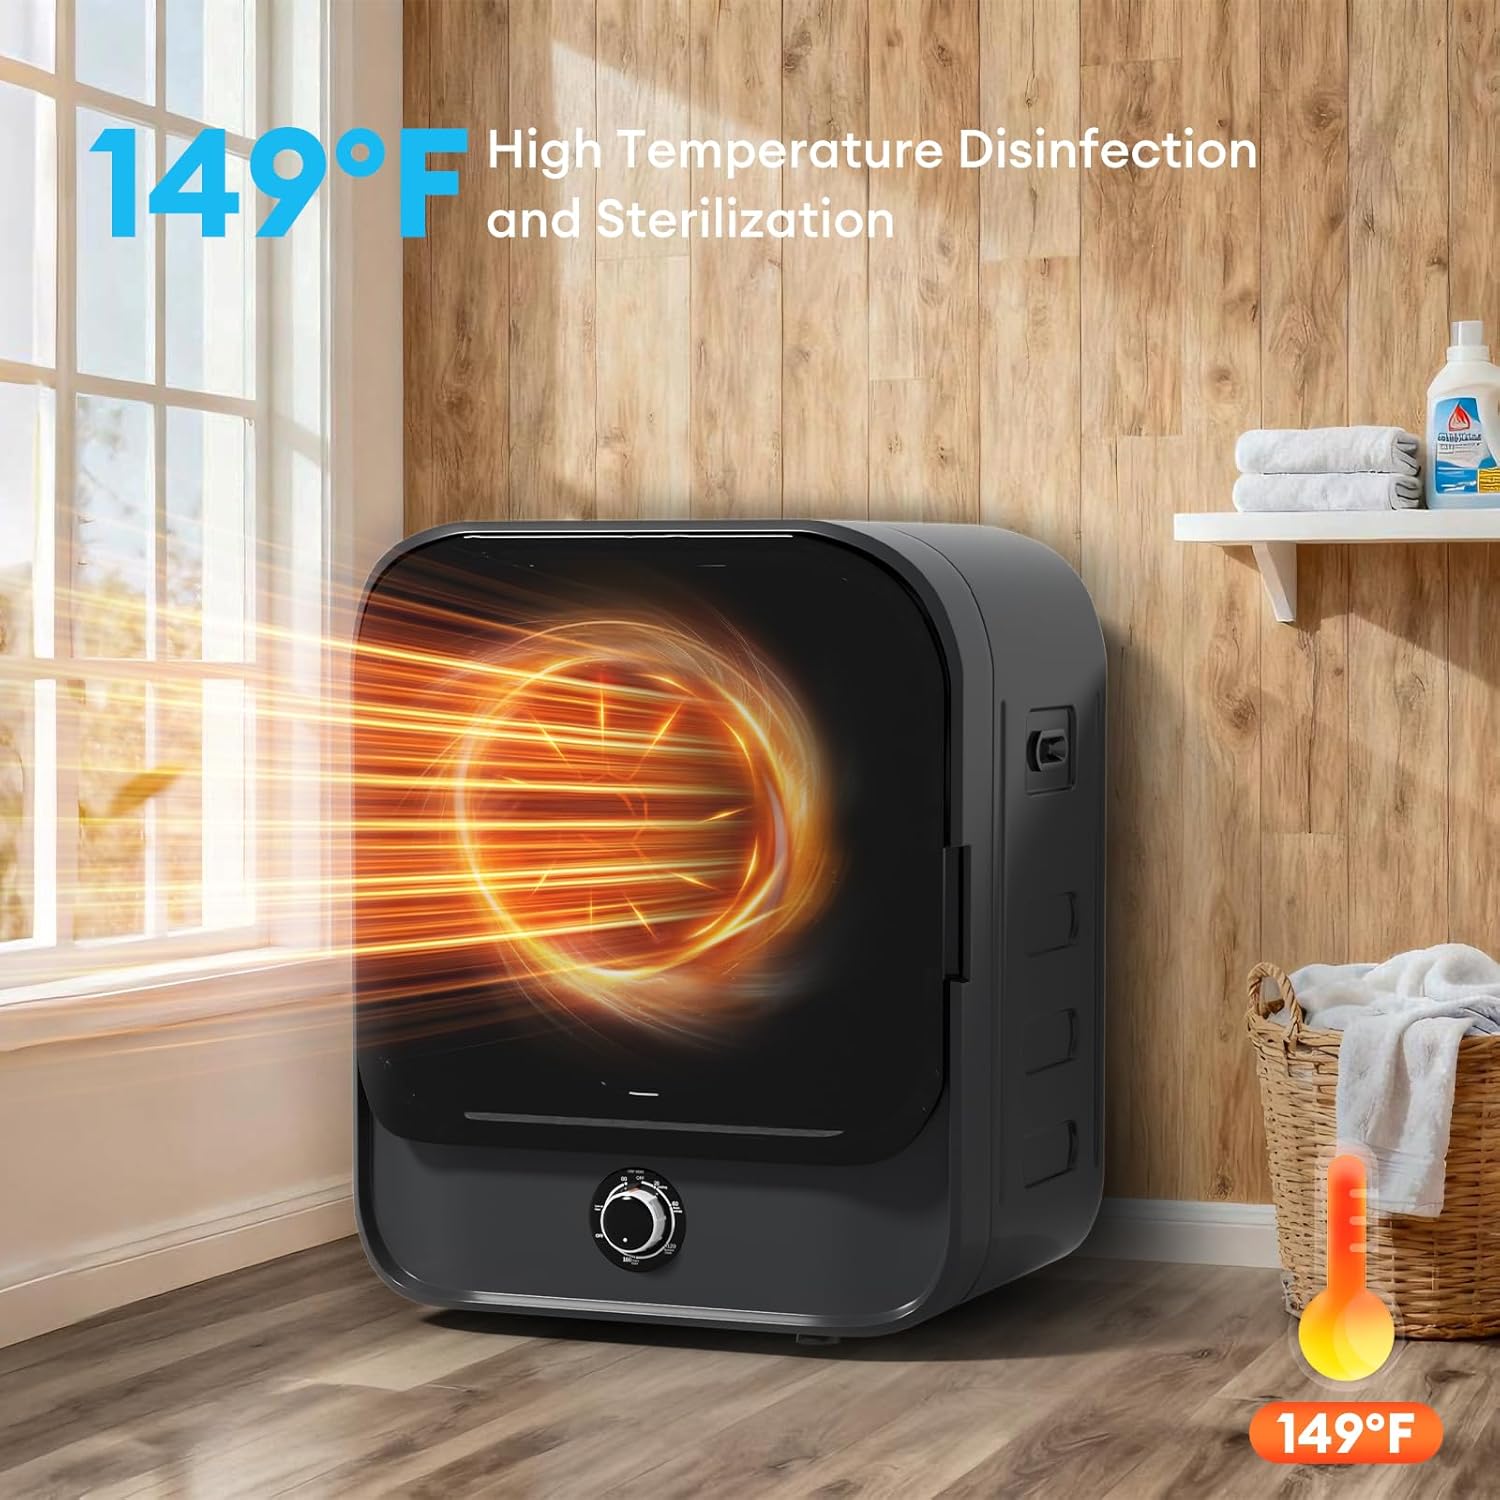
Figure 9: Dryer High Temperature Disinfection
6. Maintenance
Regular maintenance ensures optimal performance and extends the lifespan of your appliance.
6.1 Cleaning the Washer
- Exterior: Wipe the exterior with a soft, damp cloth. Do not use abrasive cleaners.
- Inner Tub: Periodically run a cleaning cycle with a washing machine cleaner or a mixture of vinegar and baking soda to remove residue and odors.
- Built-in Filter: Regularly check and clean the built-in filter to prevent lint buildup.
6.2 Cleaning the Dryer
- Lint Filter: Clean the lint filter after every load to maintain drying efficiency and prevent fire hazards.
- Air Intake Filter: Periodically clean the air intake filter to ensure proper airflow.
- Exterior: Wipe the exterior with a soft, damp cloth.
7. Troubleshooting
Before contacting customer support, refer to the following common issues and solutions:
| Problem | Possible Cause | Solution |
|---|---|---|
| Washer does not start | Power cord unplugged; Lid not closed properly; Water supply off. | Ensure power cord is securely plugged in; Close lid completely; Check water supply connection. |
| Excessive vibration (Washer) | Uneven load; Appliance not level. | Redistribute laundry evenly; Adjust leveling feet to ensure the appliance is stable. |
| Dryer not drying effectively | Lint filter clogged; Overloaded; Incorrect drying mode. | Clean lint filter; Reduce load size; Select appropriate drying mode and time. |
| Dryer takes too long to dry | Lint filter clogged; Air intake blocked; Overloaded. | Clean lint filter and air intake filter; Do not overload the dryer. |
8. Specifications
| Feature | Detail |
|---|---|
| Brand | TABU |
| Model Numbers | 4101521 (Washer) / 4100431 (Dryer) |
| Washer Capacity | 18 pounds |
| Dryer Capacity | 2.6 Cu.Ft |
| Color | White&Black |
| Product Dimensions (Washer) | 18.31"D x 18.7"W x 32.3"H |
| Operation Mode | Automatic |
| Drum Material | Stainless Steel |
| Number of Washing Cycles | 10 |
| Number of Drying Cycles/Modes | 4 |
| Access Location | Top Load (Washer) |
| UPC | 764143650736 |
9. Warranty & Support
9.1 Warranty Information
This product comes with a manufacturer's warranty. Please refer to the warranty card included with your purchase for specific terms and conditions, including coverage duration and claim procedures. Keep your proof of purchase for warranty service.
9.2 Customer Support
For technical assistance, replacement parts, or any questions not covered in this manual, please contact TABU customer support. Contact details can typically be found on the product packaging, the official TABU website, or your purchase documentation.

