Introduction
Thank you for choosing the Garvee Outdoor Dog Kennel. This manual provides essential information for the safe assembly, operation, and maintenance of your new kennel. Please read these instructions thoroughly before beginning assembly and retain them for future reference. This kennel is designed to provide a secure and comfortable outdoor enclosure for large and medium-sized dogs, as well as other suitable animals.

An overview of the Garvee Outdoor Dog Kennel, showcasing its spacious design and secure enclosure for multiple dogs.
Safety Information
- Ensure all components are securely fastened before allowing pets into the kennel.
- Regularly inspect the kennel for any signs of wear, damage, or loose parts. Tighten or replace as necessary.
- Do not allow children to play unsupervised near or inside the kennel.
- Position the kennel on a level, stable surface to prevent tipping.
- Keep the area around the kennel clear of debris and hazards.
- The waterproof canopy provides protection from sun and rain; however, ensure adequate ventilation, especially in hot weather.
Package Contents
Before assembly, verify that all parts listed below are present and undamaged. If any parts are missing or damaged, contact customer support.
- Galvanized Iron Pipe Panels (various sizes for walls, door, and roof frame)
- Waterproof Canopy Cover
- Canopy Straps/Bungees
- Connecting Clamps/Hardware
- Door Latch Mechanism
- Stainless Steel Feeding Bowls (2)
- Assembly Tools (e.g., wrench, hex key - may vary)
- Instruction Manual
Assembly Instructions
Assembly typically requires two people. Follow these steps carefully.
- Prepare the Area: Choose a flat, level, and clear outdoor space for the kennel. Ensure sufficient room for assembly and future access.
- Unpack Components: Carefully unbox all parts and lay them out, identifying each component against the package contents list.
- Assemble Wall Panels: Connect the galvanized iron pipe panels using the provided clamps or connectors. Start by forming the base perimeter, then add vertical panels. Ensure all connections are secure.
- Install Door Panel: Integrate the door panel into the desired position within the wall structure. Ensure the hinges operate smoothly and the door latch aligns correctly.
- Construct Roof Frame: Assemble the roof frame components according to the diagrams in your specific manual. Attach the roof frame to the top of the wall panels.
- Attach Waterproof Canopy: Drape the waterproof canopy over the assembled roof frame. Secure the canopy using the provided straps or bungees, ensuring it is taut and covers the entire roof area to prevent water pooling.
- Install Feeding Door (if applicable): If your model includes a separate feeding door mechanism, install it into the designated opening. Place the stainless steel bowls into their holders.
- Final Inspection: Double-check all connections, bolts, and latches to ensure they are tight and secure. Confirm the door opens and closes freely and the latch engages properly.
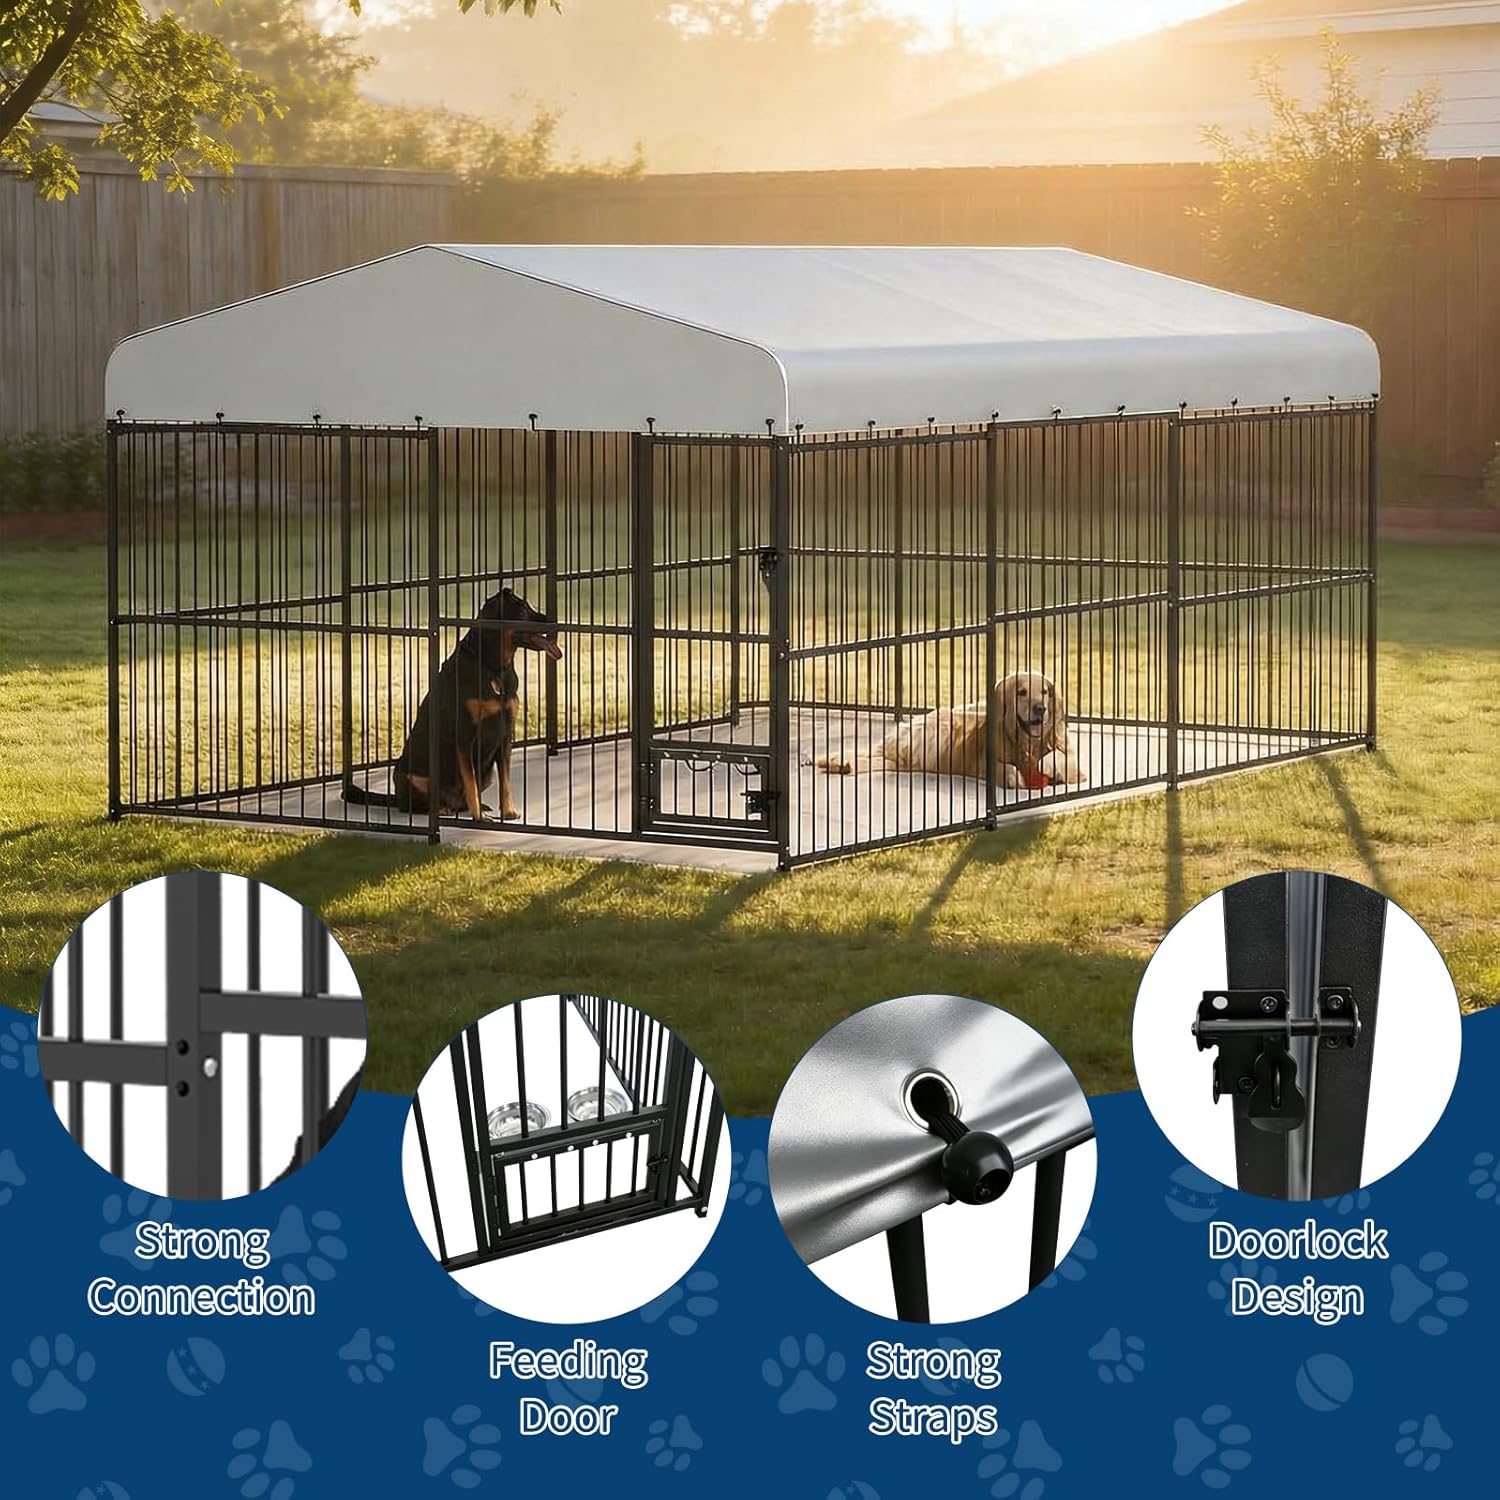
Close-up images highlighting key structural and functional elements: robust panel connections, the convenient feeding door, secure canopy straps, and the reliable door lock mechanism.
Operating Instructions
Using the Feeding Door
The kennel features a user-friendly feeding door designed for convenience. To feed your pet, simply unlatch the small feeding door, swing it open, and place food or water into the stainless steel bowls. The bowls are removable for easy cleaning. After feeding, securely close and latch the feeding door to prevent escape.

A detailed view of the user-friendly feeding door, equipped with removable stainless steel bowls for easy feeding and cleaning, and a secure doorlock.
Canopy Protection
The waterproof canopy provides essential protection from rain and harmful UV rays. Ensure the canopy is always securely fastened to the roof frame, especially during windy conditions. Periodically check the canopy for any tears or damage that might compromise its protective function.

The kennel features a waterproof and anti-UV canopy, providing protection from rain and harmful ultraviolet rays for pets.
Maintenance
- Cleaning: Regularly clean the kennel panels with mild soap and water. Rinse thoroughly and allow to air dry. The feeding bowls should be cleaned daily.
- Canopy Care: Wipe the canopy clean with a damp cloth. Avoid harsh chemicals that could damage the material. Ensure the canopy is dry before prolonged storage to prevent mildew.
- Hardware Check: Periodically check all bolts, clamps, and latches for tightness. Tighten any loose hardware to maintain structural integrity.
- Rust Prevention: While made of galvanized iron, inspect for any scratches or chips in the coating that could lead to rust. Touch up with rust-inhibiting paint if necessary.
Troubleshooting
- Kennel feels unstable: Ensure the kennel is placed on a completely level surface. Double-check all panel connections and tighten any loose clamps or bolts.
- Door not latching properly: Inspect the door frame and latch mechanism for any obstructions or misalignment. Adjust the hinges or latch components as needed.
- Canopy collecting water: Ensure the canopy is stretched taut and securely fastened to the roof frame. Adjust the straps to create proper tension and slope for water runoff.
- Missing or damaged parts: Refer to the package contents list. If parts are missing or damaged upon arrival, contact Garvee customer support with your purchase details.
Specifications
| Product Dimensions (L x W x H) | 177.17" x 118.11" x 70.87" (10 x 15 x 7 FT) |
| Material | Galvanized Iron |
| Color | Black |
| Item Weight | 104.2 Pounds |
| Model Number | RH1To_ShT37079jSPy1Cdg75 |
| UPC | 824126212488 |
| Special Feature | Durable, Waterproof Canopy, Feeding Door |
| Recommended Breed Size | Large, Medium |
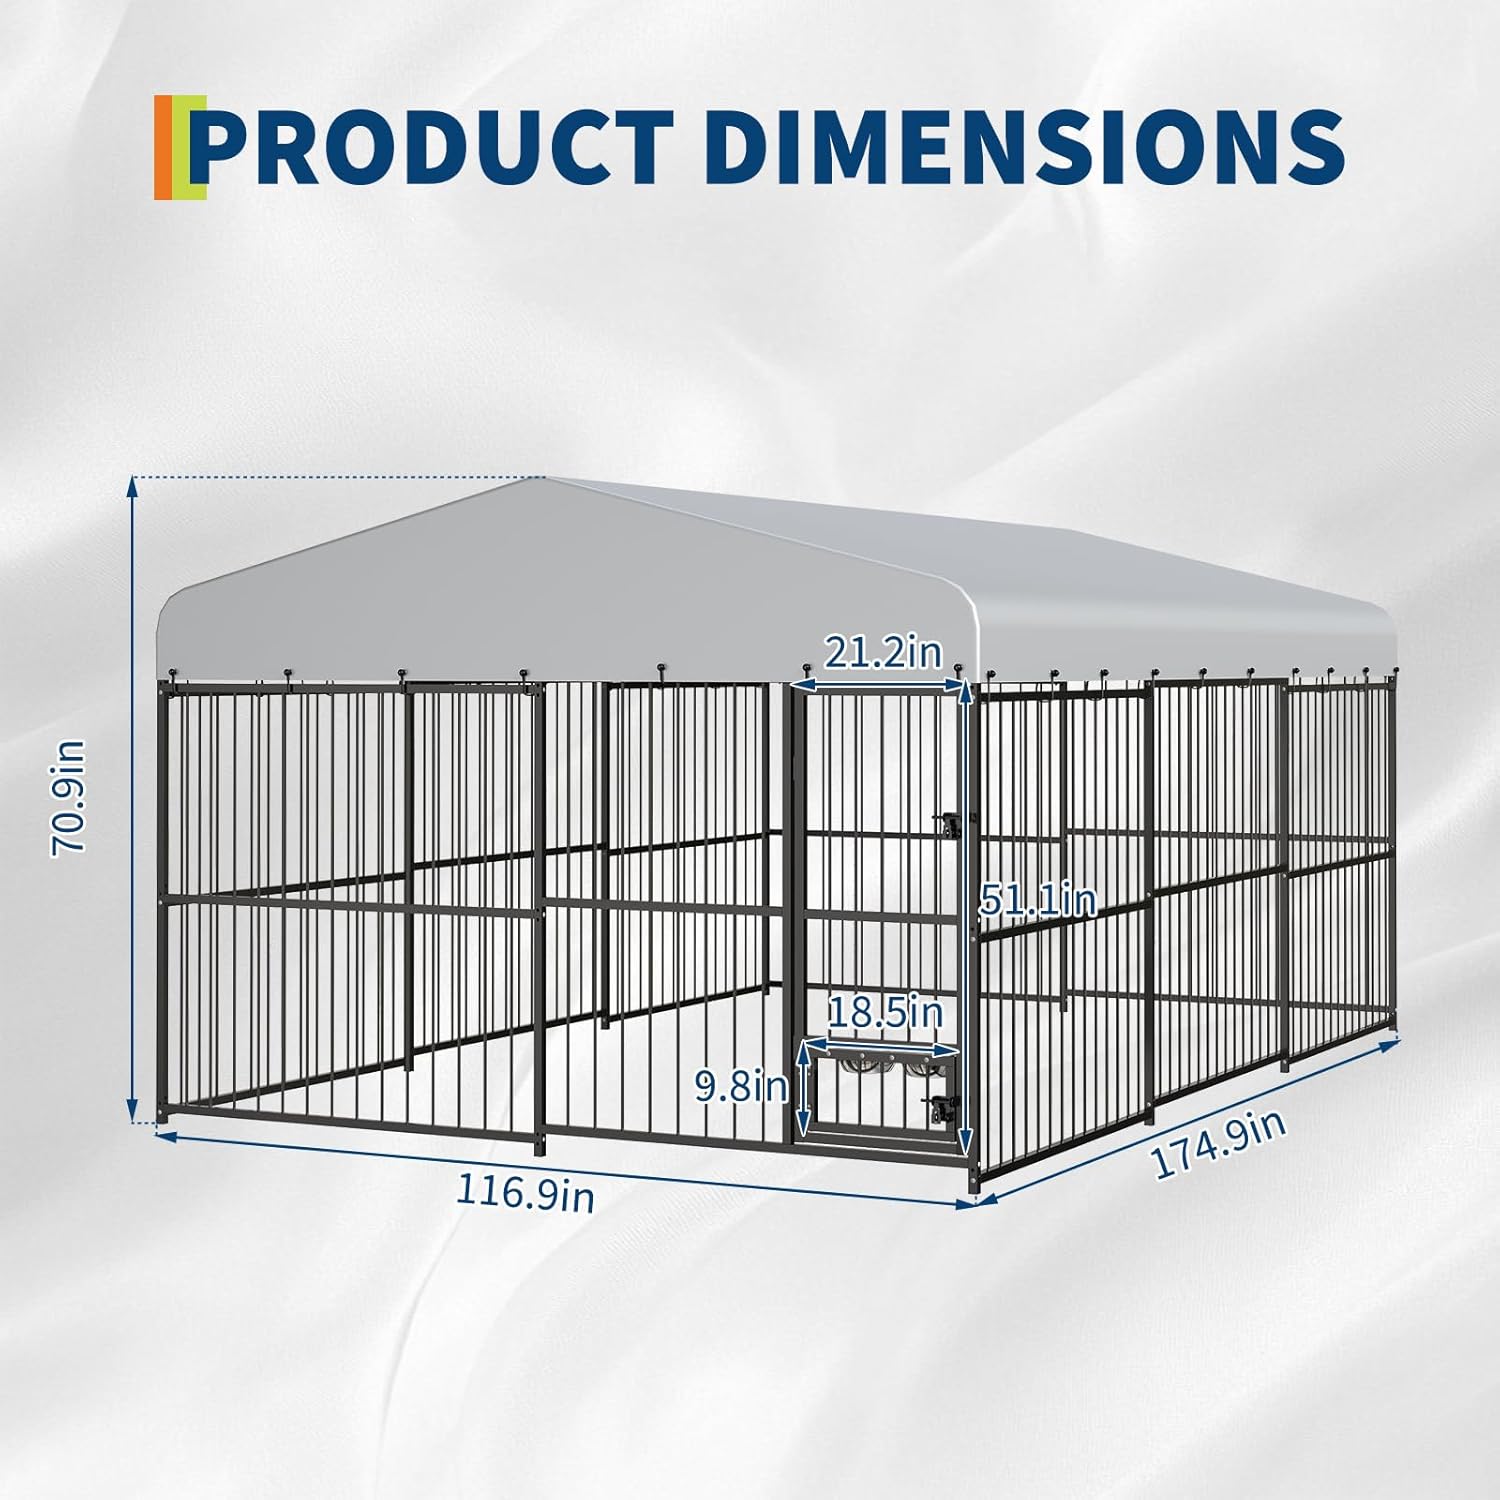
A technical drawing detailing the overall dimensions of the kennel, including length, width, and height measurements for planning placement.
Warranty and Support
Specific warranty information for the Garvee Outdoor Dog Kennel is not provided in the product details. For warranty claims, technical support, or to inquire about replacement parts, please contact Garvee customer service directly through their official website or the retailer where the product was purchased. Please have your model number (RH1To_ShT37079jSPy1Cdg75) and proof of purchase available.


