
1. Product Overview
This manual provides detailed instructions for the TiFFCOFiO 20A Outdoor Digital Pool Timer, Model MH1006. This device is designed for automated control of outdoor electrical appliances such as pool pumps, lights, and other equipment. It features a user-friendly dial programming method, a large digital display, and a durable, weather-resistant construction suitable for outdoor environments.
2. Important Safety Instructions
Please read and understand all instructions before using this product. Failure to follow these instructions may result in electric shock, fire, or serious injury.
- Outdoor Use Only: This timer is designed for outdoor use. Ensure it is installed in a location protected from direct heavy rain or prolonged immersion. While weather-resistant, it is not fully submersible.
- Proper Grounding: Always plug the timer into a grounded 3-prong outlet. Do not remove the grounding prong.
- Electrical Rating: Do not exceed the maximum electrical rating of 20A, 2500W, or 1.5HP. Overloading the timer can cause damage or fire.
- Secure Connections: Ensure all plugs are fully inserted into the timer's outlets.
- Children and Pets: Keep the timer and connected devices out of reach of children and pets.
- Inspection: Regularly inspect the timer and its cord for any signs of damage. Do not use if damaged.
- Disconnect Power: Always disconnect power before performing any maintenance or cleaning.
3. Package Contents
- TiFFCOFiO 20A Outdoor Digital Pool Timer Unit
- User Manual
4. Product Features
- Dial Programmable Method: Simplifies setting up to 6 distinct ON/OFF programs.
- Large LCD Display: Features a display three times larger than traditional timers for enhanced readability.
- Quick Program Review: Easily view all set programs by rotating the central dial.
- Outdoor Weather-Resistant Design: Equipped with a protective cover to withstand various weather conditions.
- Integrated 2-Foot Extension Cord: Provides convenient reach to power outlets.
- Two Grounded Electrical Outlets: Allows control of two devices simultaneously.
- High Capacity: Supports electrical loads up to 20 Amperes, 2500 Watts, and 1.5 Horsepower.
- ETL Listed: Certified for safety and reliability standards.

Figure 4.1: The timer's large LCD screen and programming dial, highlighting its clear display and easy programming method.
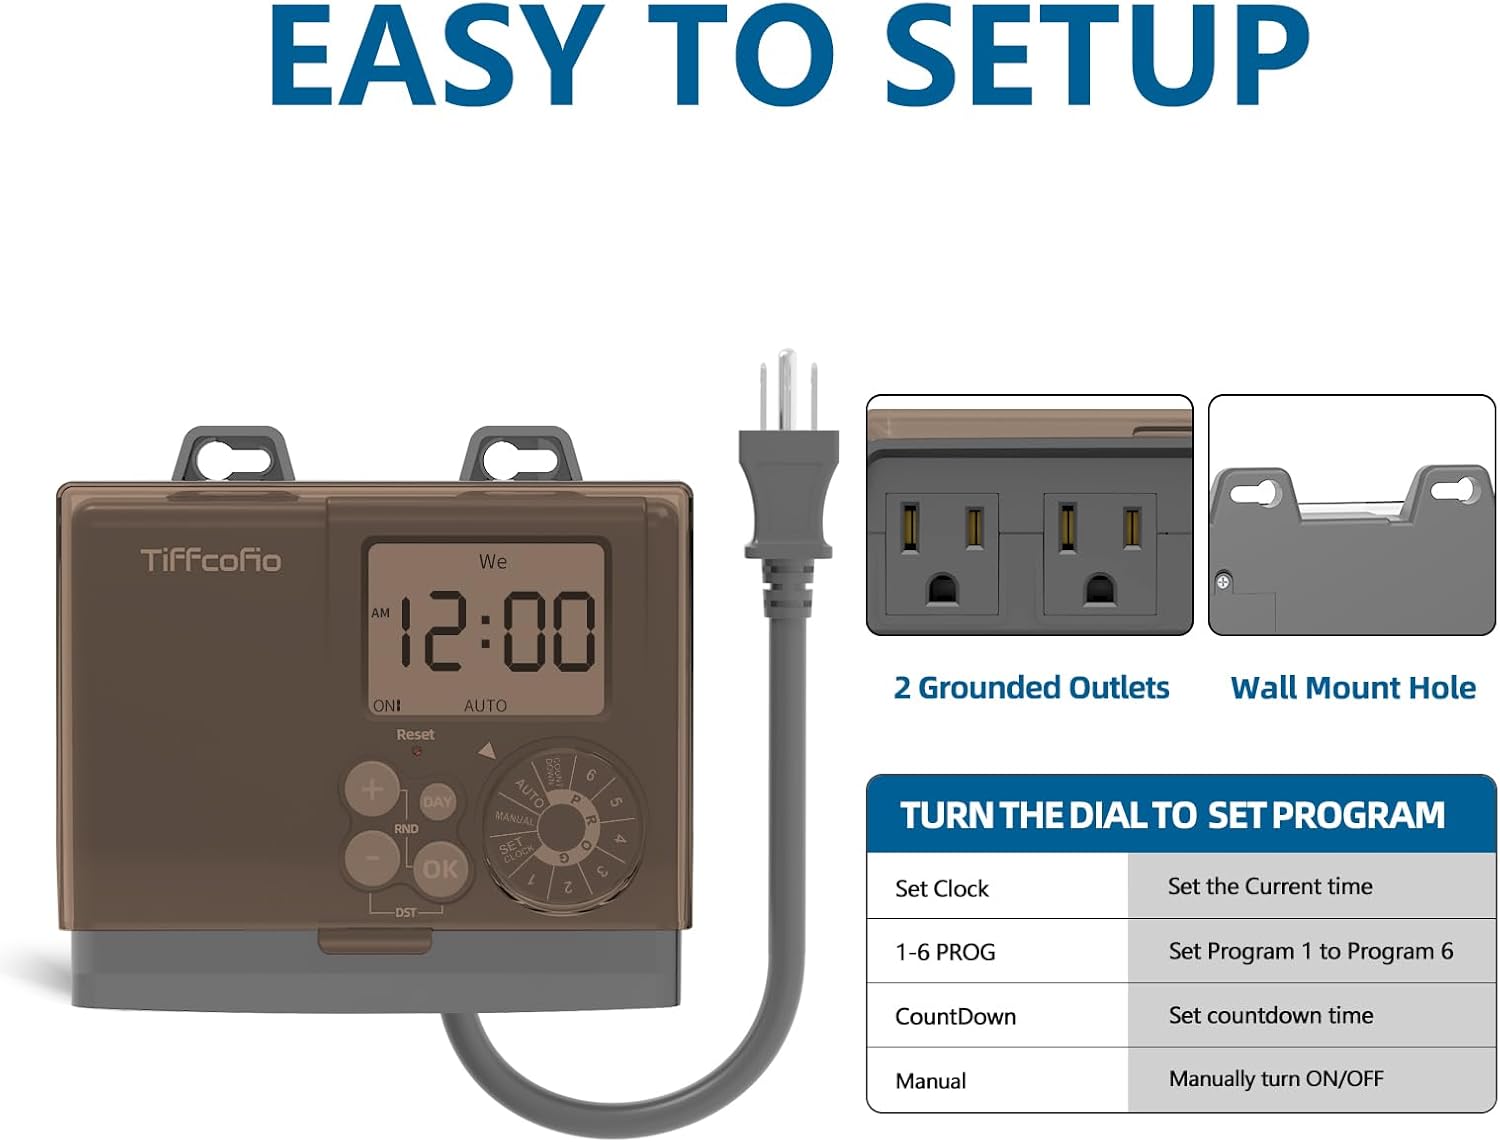
Figure 4.2: Rear view of the timer showing the two grounded outlets and the integrated wall mount hole for secure installation.
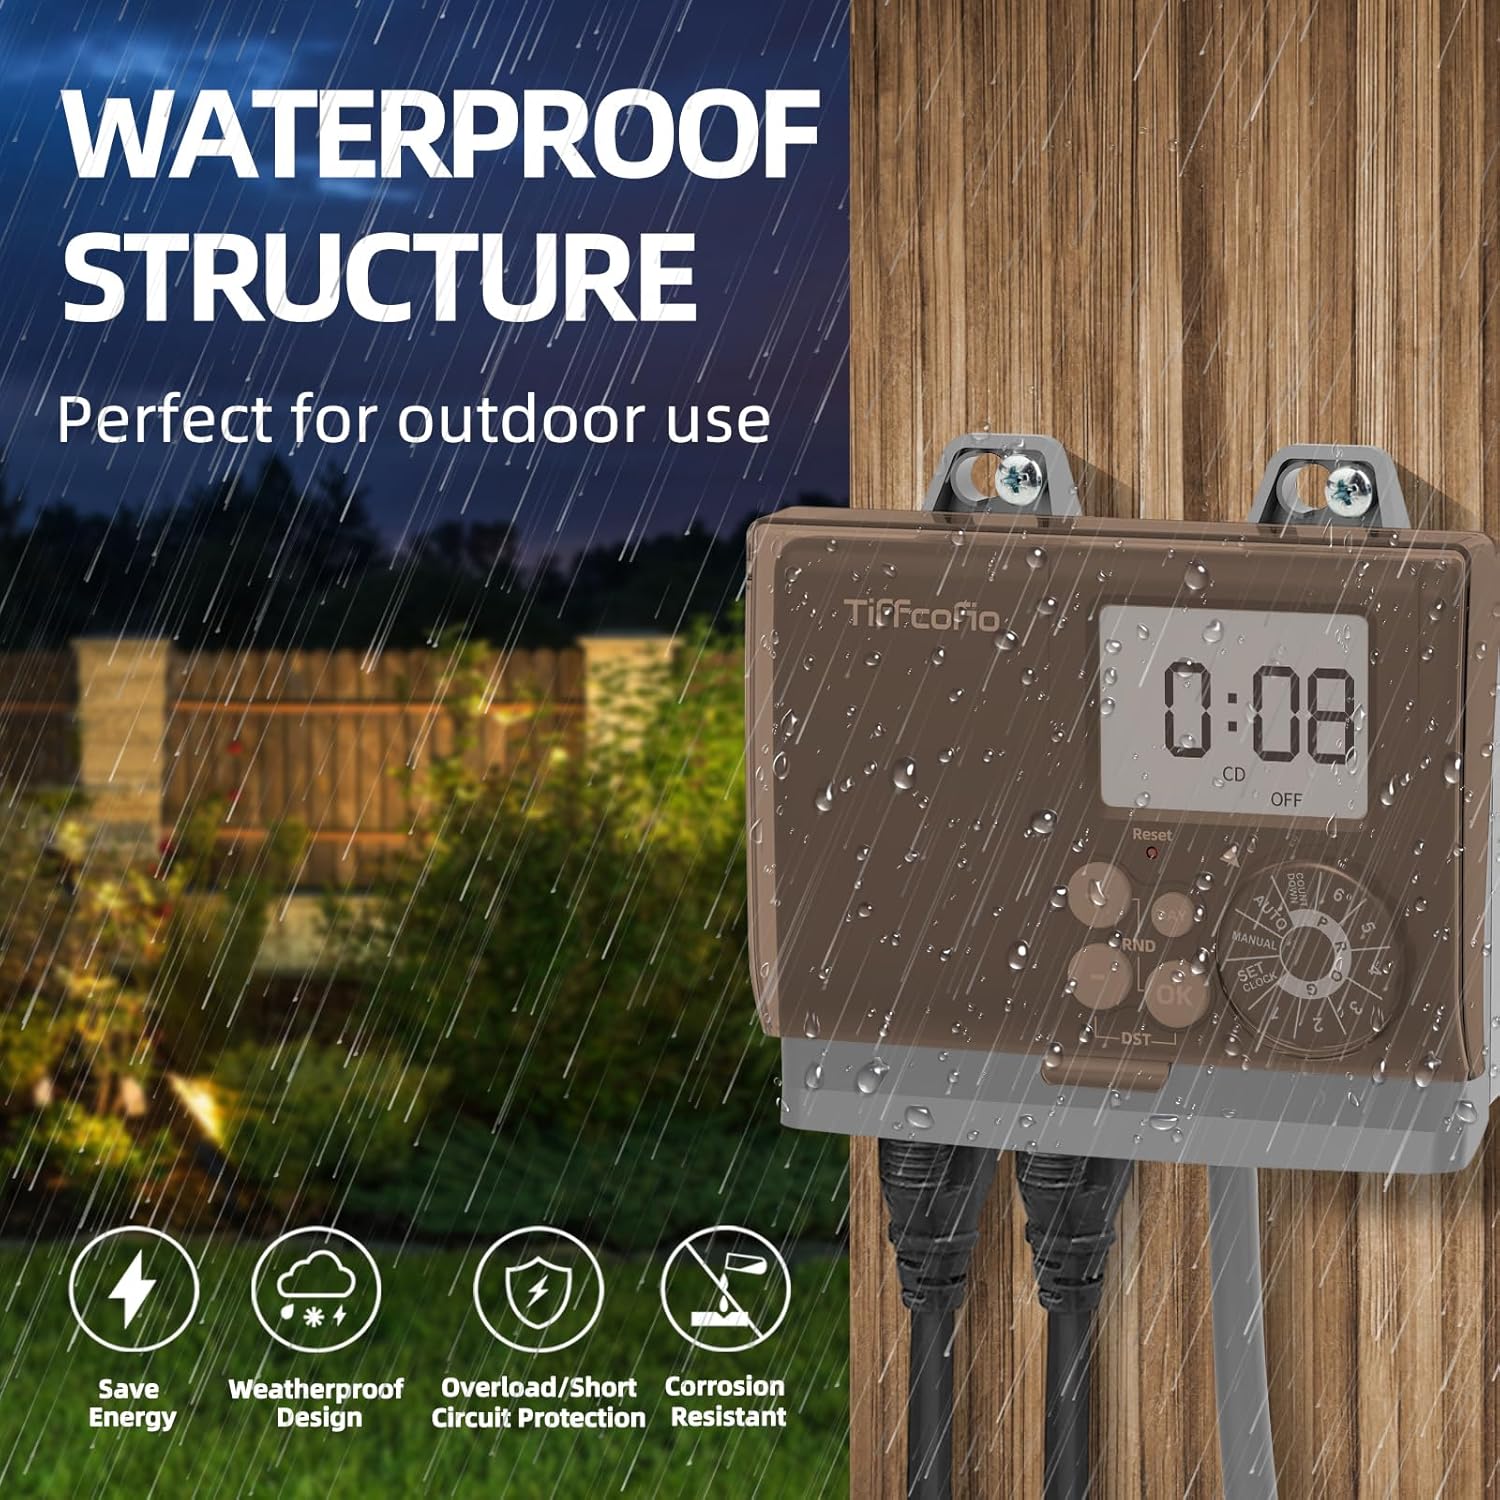
Figure 4.3: Illustration of the timer's weather-resistant structure, designed for outdoor use and protection against elements.
5. Setup
5.1 Mounting the Timer
The timer can be mounted to a wall or sturdy surface using the integrated wall mount hole on the back of the unit. Ensure the mounting location is secure and provides some shelter from direct, heavy precipitation to maximize the timer's lifespan.
5.2 Connecting to Power
- Plug the timer's 2-foot power cord into a grounded 3-prong outdoor electrical outlet.
- The display will illuminate, and the timer will be ready for programming.
5.3 Connecting Devices
Plug your outdoor electrical devices (e.g., pool pump, lights) into the two grounded outlets located on the bottom of the timer. Ensure the total load does not exceed the timer's maximum rating.
6. Operating Instructions
The timer's central dial is used to select different modes for setting the clock, programming ON/OFF cycles, setting a countdown, or operating manually.
6.1 Setting the Current Time (Set Clock)
- Rotate the central dial to the "SET CLOCK" position.
- Use the "+" and "-" buttons to adjust the current hour. Press "OK" to confirm.
- Use the "+" and "-" buttons to adjust the current minute. Press "OK" to confirm.
- Use the "DAY" button to select the current day of the week. Press "OK" to confirm.
- Rotate the dial back to "AUTO" to save the settings and return to normal operation.
6.2 Programming ON/OFF Cycles (1-6 PROG)
The timer allows you to set up to 6 distinct ON/OFF programs.
- Rotate the central dial to "1 PROG" to set the first program.
- The display will show "ON". Use the "+" and "-" buttons to set the desired ON hour, then press "OK".
- Set the ON minute using "+" and "-", then press "OK".
- Use the "DAY" button to select the days of the week for this ON event (e.g., Mon-Fri, Sat-Sun, or individual days). Press "OK" to confirm.
- The display will then show "OFF". Repeat steps 2-4 to set the desired OFF time and days for this program.
- To set additional programs (2-6), rotate the dial to the next program number (e.g., "2 PROG") and repeat steps 2-5.
- After setting all desired programs, rotate the dial back to "AUTO" for the timer to execute the programs.
6.3 Countdown Mode (CountDown)
This mode allows you to set a one-time countdown for your devices.
- Rotate the central dial to "CountDown".
- Use the "+" and "-" buttons to set the desired countdown duration in hours and minutes.
- Press "OK" to start the countdown. The connected devices will turn ON for the set duration and then turn OFF.
- To cancel the countdown, rotate the dial to another mode or press "OK" again.
6.4 Manual ON/OFF Control (Manual)
This mode allows you to manually turn the connected devices ON or OFF, overriding any set programs.
- Rotate the central dial to "MANUAL".
- Press the "OK" button to toggle the power to the outlets ON or OFF.
- Rotate the dial back to "AUTO" to resume programmed operation.
6.5 Reviewing Programs
To quickly review any set program, simply rotate the central dial to the corresponding program number (e.g., "1 PROG", "2 PROG", etc.). The display will show the ON and OFF times for that specific program without entering editing mode.

Figure 6.1: The timer displaying program settings when the dial is turned to a specific program number.
7. Maintenance
- Cleaning: Disconnect power before cleaning. Wipe the timer with a soft, damp cloth. Do not use abrasive cleaners or immerse the unit in water.
- Cord Inspection: Periodically check the power cord and connected device cords for any signs of wear, cuts, or damage. Replace if damaged.
- Protective Cover: Ensure the protective cover is always closed when the timer is not being programmed to maintain its weather resistance.
8. Troubleshooting Guide
| Problem | Possible Cause | Solution |
|---|---|---|
| Timer display is blank or not working. | No power to the timer. | Ensure the timer is securely plugged into a live, grounded outlet. Check the circuit breaker. |
| Connected device does not turn ON/OFF as programmed. | Incorrect program settings; Timer in Manual mode; Device not plugged in correctly. | Review program settings (Section 6.5). Ensure the dial is set to "AUTO". Check if the device is properly plugged into the timer. Test the device by plugging it directly into a wall outlet. |
| Timer is exposed to heavy rain and appears to be affected. | Timer is weather-resistant, not fully waterproof/submersible. | Relocate the timer to a more sheltered outdoor area. Ensure the protective cover is always securely closed. Disconnect power and allow to dry completely if moisture ingress is suspected. |
| Both outlets turn ON/OFF together; cannot control them independently. | This timer model operates both outlets simultaneously. | This is normal operation for this device. The timer is designed to control both outlets as a single unit. |
| Time or program settings are lost after a power outage. | Internal battery may be low or depleted. | The timer has an internal battery for memory backup. If settings are lost, ensure the timer is plugged in for several hours to recharge the internal battery. Re-program the time and settings as needed. |
9. Specifications
- Brand: Tiffcofio
- Model Number: MH1006
- Electrical Rating: 125V~, 60Hz, 20A Resistive, 20A General Purpose, 1.5HP, 2500W
- Outlets: 2 Grounded Outlets
- Cord Length: 2 feet
- Material: Plastic
- Product Dimensions (D x W x H): 2" x 4" x 3.5"
- Item Weight: 0.5 Pounds
- Certifications: ETL Listed
10. Warranty and Customer Support
The TiFFCOFiO 20A Outdoor Digital Pool Timer is ETL Listed, ensuring it meets recognized safety standards. For any questions, technical assistance, or support regarding your product, please contact Tiffcofio customer service. Our professional and reliable after-sales service team aims to respond to your inquiries within 6 hours.
Please retain your purchase receipt for warranty purposes.