
1. Introduction
Thank you for choosing the MOKiN Smart LCD Docking Station. This 18-in-1 USB-C docking station is designed to expand the connectivity of your laptop, providing multiple display outputs, high-speed data transfer, network access, and charging capabilities. This manual provides detailed instructions for setup, operation, and troubleshooting to ensure optimal performance.
2. Package Contents
Verify that all items are present in your package:
- MOKiN Smart LCD Docking Station (18-in-1, Triple Display)
- USB-C to USB-C Cable (for host connection)
- USB-A to USB-C Cable (for host connection, 2.62 ft)
- 150W DC Power Adapter
- Safety Sheet with User Manual
3. Product Features and Layout
The MOKiN Smart LCD Docking Station offers a comprehensive array of ports for various connectivity needs. Familiarize yourself with the port layout:

Image: Front and Rear Port Layout of the Docking Station
- Host Port: Connects to your laptop (USB-C).
- USB-C Ports (USB 3.1+USB 3.0): 10Gbps and 5Gbps data transfer.
- USB-A Ports (USB 3.1+USB 3.0): 10Gbps and 5Gbps data transfer.
- USB 2.0 Ports (480Mbps): Ideal for mouse/keyboard receivers.
- HDMI Ports (3x): Supports up to 4K@60Hz.
- DisplayPort (2x): Supports up to 4K@60Hz.
- DC 150W Input: Power input for the docking station.
- Ethernet Port: 2500Mbps Gigabit Ethernet.
- SD/TF Card Slots: For memory card access (312MB/s).
- Audio Jack (3.5mm): For headphones or speakers.
- Power Button: To power on/off the docking station.
- LCD Intelligent Display: Shows connection status, resolution, and charging information.
Note: Only 3 video ports (HDMI or DP) can output simultaneously for triple display configurations.
4. Setup Instructions
4.1 Power Connection
- Connect the provided 150W DC power adapter to the "DC 150W" input port on the docking station.
- Plug the power adapter into a wall outlet. The docking station will power on automatically or can be turned on using the power button.
4.2 Connecting to Your Laptop (Host)
- Use the provided USB-C to USB-C cable to connect the docking station's "Host Port" to a compatible USB-C, USB4, or Thunderbolt port on your laptop.
- If your laptop only has USB-A ports, use the provided USB-A to USB-C cable to connect the docking station's "Host Port" to a USB-A port on your laptop. Note that display functionality will require driver installation (see section 4.3).
4.3 Driver Installation for Display Output
For all HDMI or DisplayPort outputs to function, especially for extended display modes, driver installation is required.
- Windows 10/11: The necessary SM77x drivers can often be updated and installed directly through the system. If not, manual download may be required.
- macOS: Manual download and installation of the SM77x drivers are required. Visit the MOKiN official website or refer to the included safety sheet for driver download links.
- Important: Ensure your computer's USB-C port supports data function. Pure charging-only USB-C ports are not compatible for display output.

Image: Universal USB-C/A Compatibility Chart
5. Operating Instructions
5.1 Display Setup (Triple 4K Display)
The docking station supports triple 4K displays on both macOS and Windows, allowing for Mirror Mode, Extended Mode, and MST (Multi-Stream Transport) configurations.
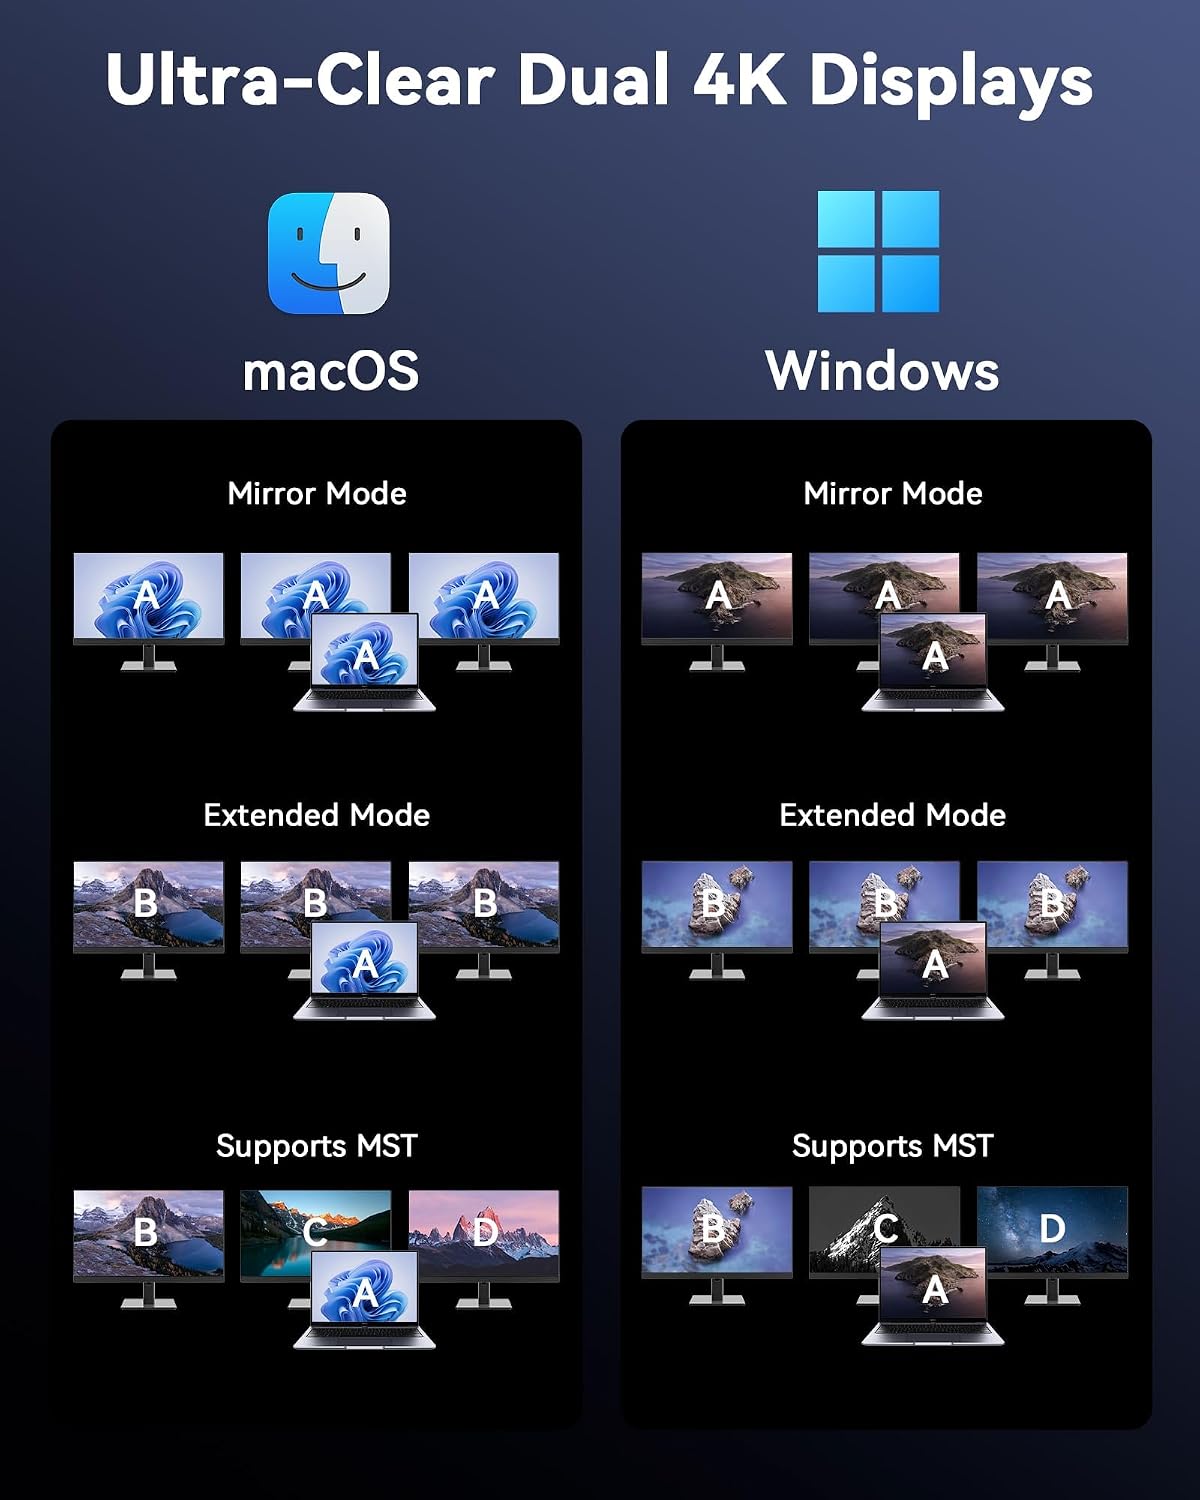
Image: Display Modes for macOS and Windows
- Connect your external monitors to the HDMI and/or DisplayPort outputs on the docking station.
- Ensure the necessary SM77x drivers are installed (refer to section 4.3).
- For Windows: Go to Display Settings (Right-click desktop > Display settings) to configure display modes (Extend, Duplicate, Show only on 1/2/3/4).
- For macOS: Go to System Settings > Displays to arrange and configure your monitors.

Image: Triple Display Setup with MOKiN Docking Station
5.2 Data Transfer
Utilize the high-speed USB ports for rapid data transfer:
- Connect USB storage devices, external hard drives, or other peripherals to the USB-C (10Gbps) or USB-A (10Gbps, 5Gbps) ports.
- The USB 3.1 Gen 2 ports (2 USB-C and 1 USB-A) support up to 10Gbps, allowing for quick transfer of large files.
- For mouse/keyboard receivers, it is recommended to use the 480Mbps USB-A ports to avoid interference with high-speed data transfers.

Image: High-Speed Data Transmission via Docking Station
5.3 Network Connection
Connect to a stable wired network using the Gigabit Ethernet port:
- Plug an Ethernet cable from your router or network switch into the 2500Mbps Ethernet port on the docking station.
- Your laptop will automatically detect the wired connection, providing a fast and stable internet connection.

Image: Fast and Stable Network Connection
5.4 Charging Capabilities
The docking station provides power delivery to your connected laptop and other devices.
- The docking station provides up to 100W Power Delivery (PD) to the host laptop via the USB-C host connection.
- Additional USB-C and USB-A ports can provide charging for smartphones, tablets, and other USB-powered devices.
- The front USB-C and USB-A ports can provide up to 30W when only one is used, or 15W each when both are used simultaneously.
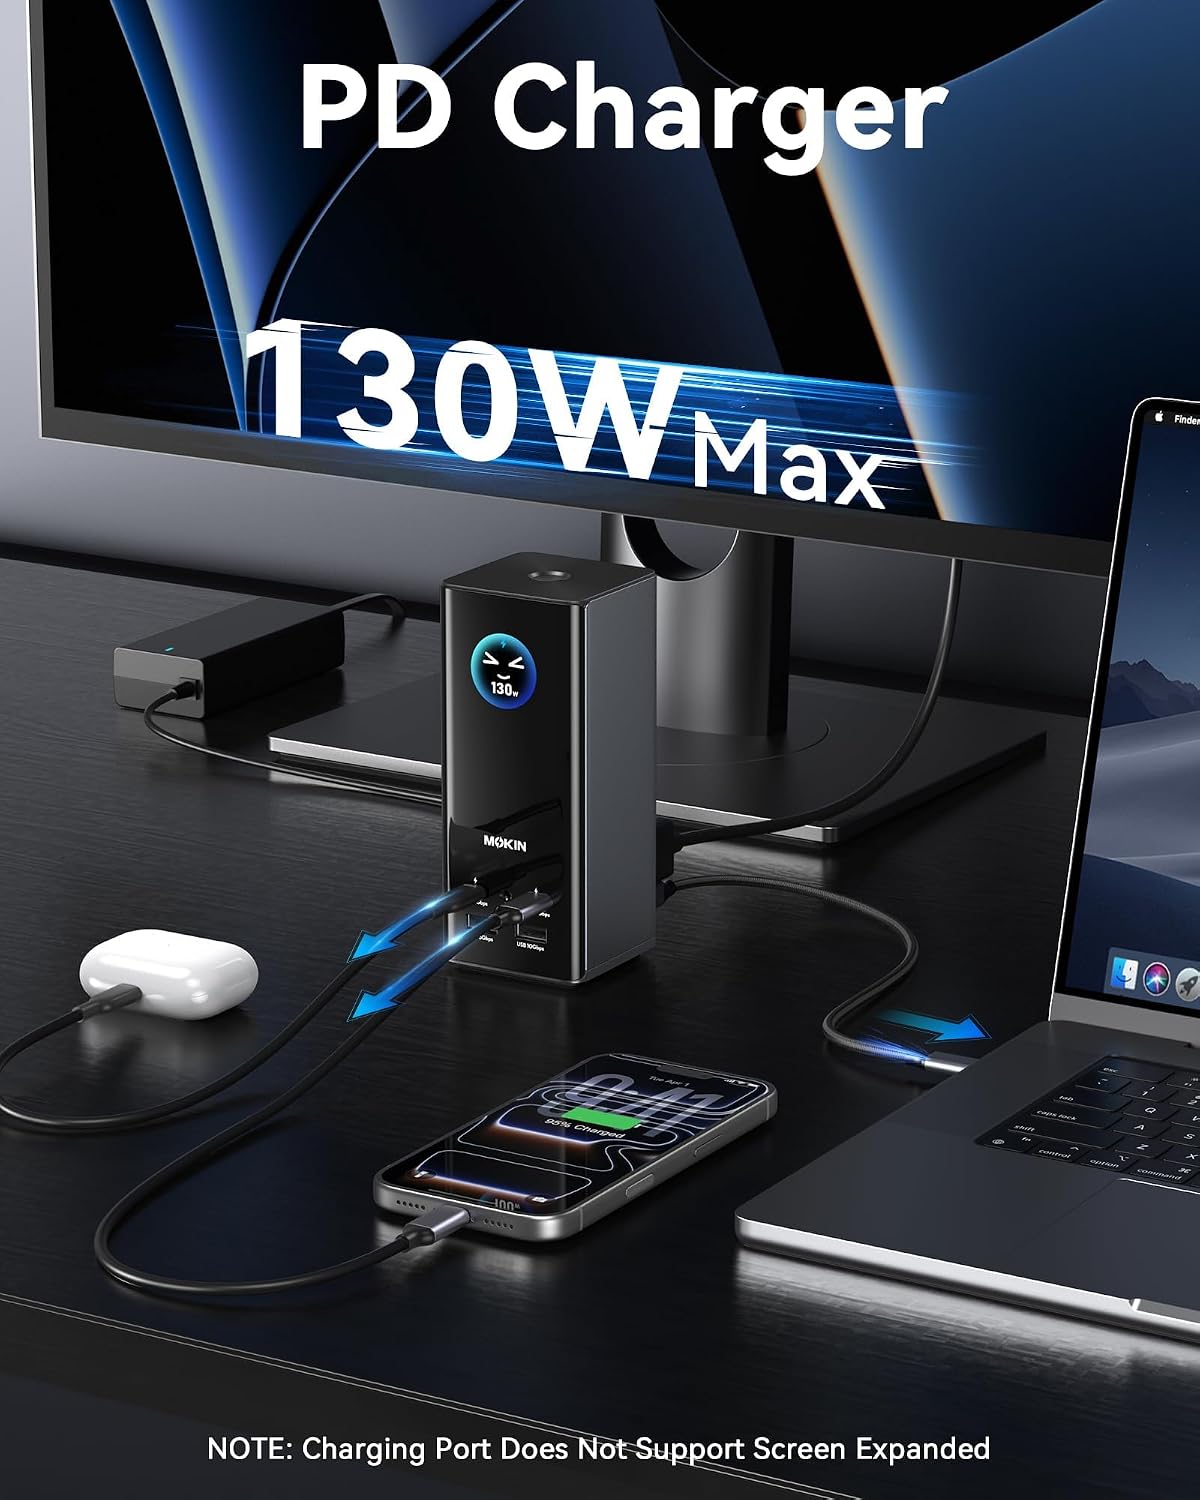
Image: Docking Station Charging Multiple Devices

Image: One-Port Charging Diagram (30W)

Image: Two-Port Charging Diagram (15W each)
5.5 LCD Intelligent Display Functions
The built-in LCD screen provides real-time information about the docking station's status:
- Real-Time Interactive Resolution Display: Shows the current resolution of connected monitors.
- Connection Status: Indicates which ports are active and connected.
- Charging Status: Displays power delivery information.
- Click: To turn on/switch UI screen.
- Double-click: To turn off the screen.
- Triple-click: To view the firmware version.
- Long press for 3 seconds: To turn on/off the docking station. Turning off the screen does not stop upstream charging.

Image: LCD Intelligent Display Features
5.6 Screen-Lock Button
The screen-lock button provides an instant privacy feature:
- Double-click the screen-lock button: This action will instantly turn off all connected external displays, securing sensitive information.
- Double-click again to restore the display.

Image: Protecting Privacy with Screen-Lock Button
6. Maintenance
- Keep the docking station in a dry, well-ventilated area.
- Avoid exposing the device to extreme temperatures or direct sunlight.
- Clean the device with a soft, dry cloth. Do not use liquid cleaners or aerosols.
- Do not attempt to disassemble or repair the device yourself. Contact customer support for assistance.
7. Troubleshooting
| Problem | Possible Cause | Solution |
|---|---|---|
| No display output |
|
|
| No power to laptop/devices |
|
|
| USB devices not recognized |
|
|
| Ethernet connection unstable/slow |
|
|
8. Specifications
| Feature | Specification |
|---|---|
| Model Number | MODK2402 |
| Ports | 18-in-1 (3x HDMI, 2x DP, 2x USB-C, 4x USB-A, 1x Ethernet, 1x SD, 1x TF, 1x Audio, 1x DC In, 1x Host) |
| Video Output | Triple 4K@60Hz (via 3x HDMI + 2x DP, max 3 simultaneous outputs) |
| USB Data Speed | USB 3.1 Gen 2 (10Gbps), USB 3.0 (5Gbps), USB 2.0 (480Mbps) |
| Ethernet Speed | 2500Mbps Gigabit Ethernet |
| Power Input | DC 150W |
| Power Delivery (Host) | Up to 100W |
| Card Reader | SD/TF (312MB/s) |
| Compatibility | macOS, Windows 10/11, USB-C/A, USB4, Thunderbolt |
| Item Weight | 2.35 pounds |
| Package Dimensions | 9.8 x 7.2 x 2.76 inches |
9. Warranty and Support
The MOKiN Smart LCD Docking Station comes with a 24-month warranty from the date of purchase. This warranty covers manufacturing defects and ensures reliable operation under normal use.
For technical support, warranty claims, or any questions regarding your product, please contact MOKiN customer service through the following channels:
- Refer to the contact information provided in the safety sheet included with your product.
- Visit the official MOKiN website for support resources and contact details.
- Contact the seller directly through your purchase platform.
Please have your model number (MODK2402) and proof of purchase ready when contacting support.