1. Introduction
The Reboot RB360 Series is a versatile 7-in-1 multi-function welding and plasma cutting machine designed for various applications, from DIY projects to professional workshop use. It supports multiple processes including MIG (Gas/Gasless), MMA (Stick), TIG Lift, Plasma Cutting, Spot Welding, and Aluminum Welding. This manual provides essential information for safe operation, setup, maintenance, and troubleshooting.
2. Safety Information
WARNING: Welding and plasma cutting can be dangerous. Always follow safety precautions to prevent injury or death.
- Always wear appropriate personal protective equipment (PPE), including welding helmet, gloves, and protective clothing.
- Ensure proper ventilation to avoid inhaling fumes.
- Never operate the machine in wet conditions or near flammable materials.
- Ensure the workpiece is properly grounded.
- Disconnect power before performing any maintenance or changing accessories.
- Keep children and unauthorized personnel away from the operating area.
3. Package Contents
Upon unpacking, verify that all items listed below are present and undamaged:
- Reboot RB360 Multi-functional Machine x 1
- Ground Clamp (6.5ft) x 1
- Electrode Holder (6.5ft) x 1
- Welding Rod x 10
- Gas Hose x 1
- User Manual x 1
- Air Adapter/Rubber Gasket x 1
- Non-HF Cutting Gun (13.1ft) x 1
- Insulation Ring x 1
- Electrodes x 2
- Nozzles x 2
- Wrench x 1

Image: All components included in the Reboot RB360 package.
4. Product Overview
The Reboot RB360 is a compact and powerful multi-process machine. It features a user-friendly control panel and supports dual voltage (120V/240V) operation.

Image: The Reboot RB360 machine highlighting its 7-in-1 capabilities.
Control Panel Introduction

Image: Labeled diagram of the RB360 control panel.
- Current Display: Shows the welding/cutting current.
- Voltage / Parameter Display: Shows voltage or other selected parameters.
- Mode Switching: Select between MIG, MMA, TIG Lift, and Plasma Cut modes.
- Welding Wire Diameter Selection: For MIG mode, select appropriate wire diameter.
- Gas Selector: Choose gas type for MIG/TIG.
- Function Selection: Additional function settings.
- Current Control: Adjust welding/cutting current.
- Voltage Control: Adjust welding voltage.
- Overheat Alert: Indicator for overheating.
- MMA Settings: Specific settings for MMA mode.
- Synergic / Manual MIG: Switch between synergic (automatic) and manual MIG settings.
5. Setup
General Connections
- Power Connection: Connect the machine to a suitable 120V or 240V power outlet. The machine automatically detects the voltage.
- Ground Clamp: Always connect the ground clamp securely to the workpiece.
- Air Compressor (for Plasma Cutting): Connect an air compressor to the machine's air inlet. Ensure the air pressure is set to approximately 60 PSI for optimal cutting performance.
- Gas Cylinder (for MIG/TIG): For MIG (Gas) and TIG welding, connect the appropriate gas cylinder (e.g., Argon for TIG, mixed gas for MIG) to the machine via the gas hose.

Image: Function Introduction - Connection points on the RB360.
6. Operating Instructions
The RB360 offers multiple welding and cutting processes. Select the desired mode using the control panel.
6.1. MMA (Stick) Welding
This mode is suitable for various metals and outdoor use due to its wind resistance. It features Hot Start for easy ignition, Arc Force for a stable arc, and Anti-Stick to prevent electrode sticking.
- Connect the ground clamp to the negative terminal and the electrode holder to the positive terminal.
- Select MMA mode on the control panel.
- Adjust the current (e.g., 100A for 2.5mm electrode, 130A for 3.2mm electrode).
- Maintain a consistent speed and pressure during welding.
Video: Demonstration of MMA (Stick) welding with the Reboot RB360.

Image: Stick welding in progress using the RB360.
6.2. TIG Lift Welding
For precise welding, especially on stainless steel. Requires pure Argon gas and a TIG torch (optional accessory).
- Connect the ground clamp to the positive terminal and the TIG torch to the negative terminal.
- Connect the pure Argon gas cylinder to the machine.
- Select TIG Lift mode and adjust the current (e.g., 120A for 5mm stainless steel).
- Use a stainless steel filler wire (e.g., 2.0mm).
Video: Demonstration of TIG Lift welding with the Reboot RB360.

Image: TIG Lift welding in progress using the RB360.
6.3. MIG Welding (Gas/Gasless)
The RB360 supports both gas MIG and flux-cored (gasless) MIG welding. It offers both synergic and manual modes for flexibility.
- Connect the ground clamp to the negative terminal and the MIG torch to the positive terminal.
- For gas MIG, connect a mixed gas or CO2 cylinder. For gasless MIG, no gas connection is needed.
- Install the appropriate welding wire (e.g., 1.0mm solid wire for gas MIG).
- Select MIG mode and choose between Synergic (SYN) or Manual (NON SYN) operation.
- Adjust current and voltage as needed (e.g., 100A, 17.6V for 3mm plate).
Video: Demonstration of MIG welding with the Reboot RB360.

Image: Synergic MIG and Manual MIG operation with the RB360.
6.4. Plasma Cutting
The low-frequency plasma torch provides clean and smooth cuts on various metals up to 16mm thickness.
- Connect the ground clamp to the positive terminal and the plasma cutting torch to the negative terminal.
- Ensure the air compressor is connected and providing 60 PSI pressure.
- Select Plasma Cut mode and adjust the current (e.g., 30A for 16mm carbon steel).
- Move the torch steadily across the material for a clean cut.
Video: Demonstration of Plasma Cutting with the Reboot RB360.

Image: Plasma cutting in action, demonstrating the RB360's cutting capacity.
6.5. Aluminum Welding
Achieve clean and quality aluminum welds with an optional spool gun (sold separately).
- Connect the spool gun to the machine.
- Select the appropriate mode and settings for aluminum welding.
- Use suitable aluminum welding wire.
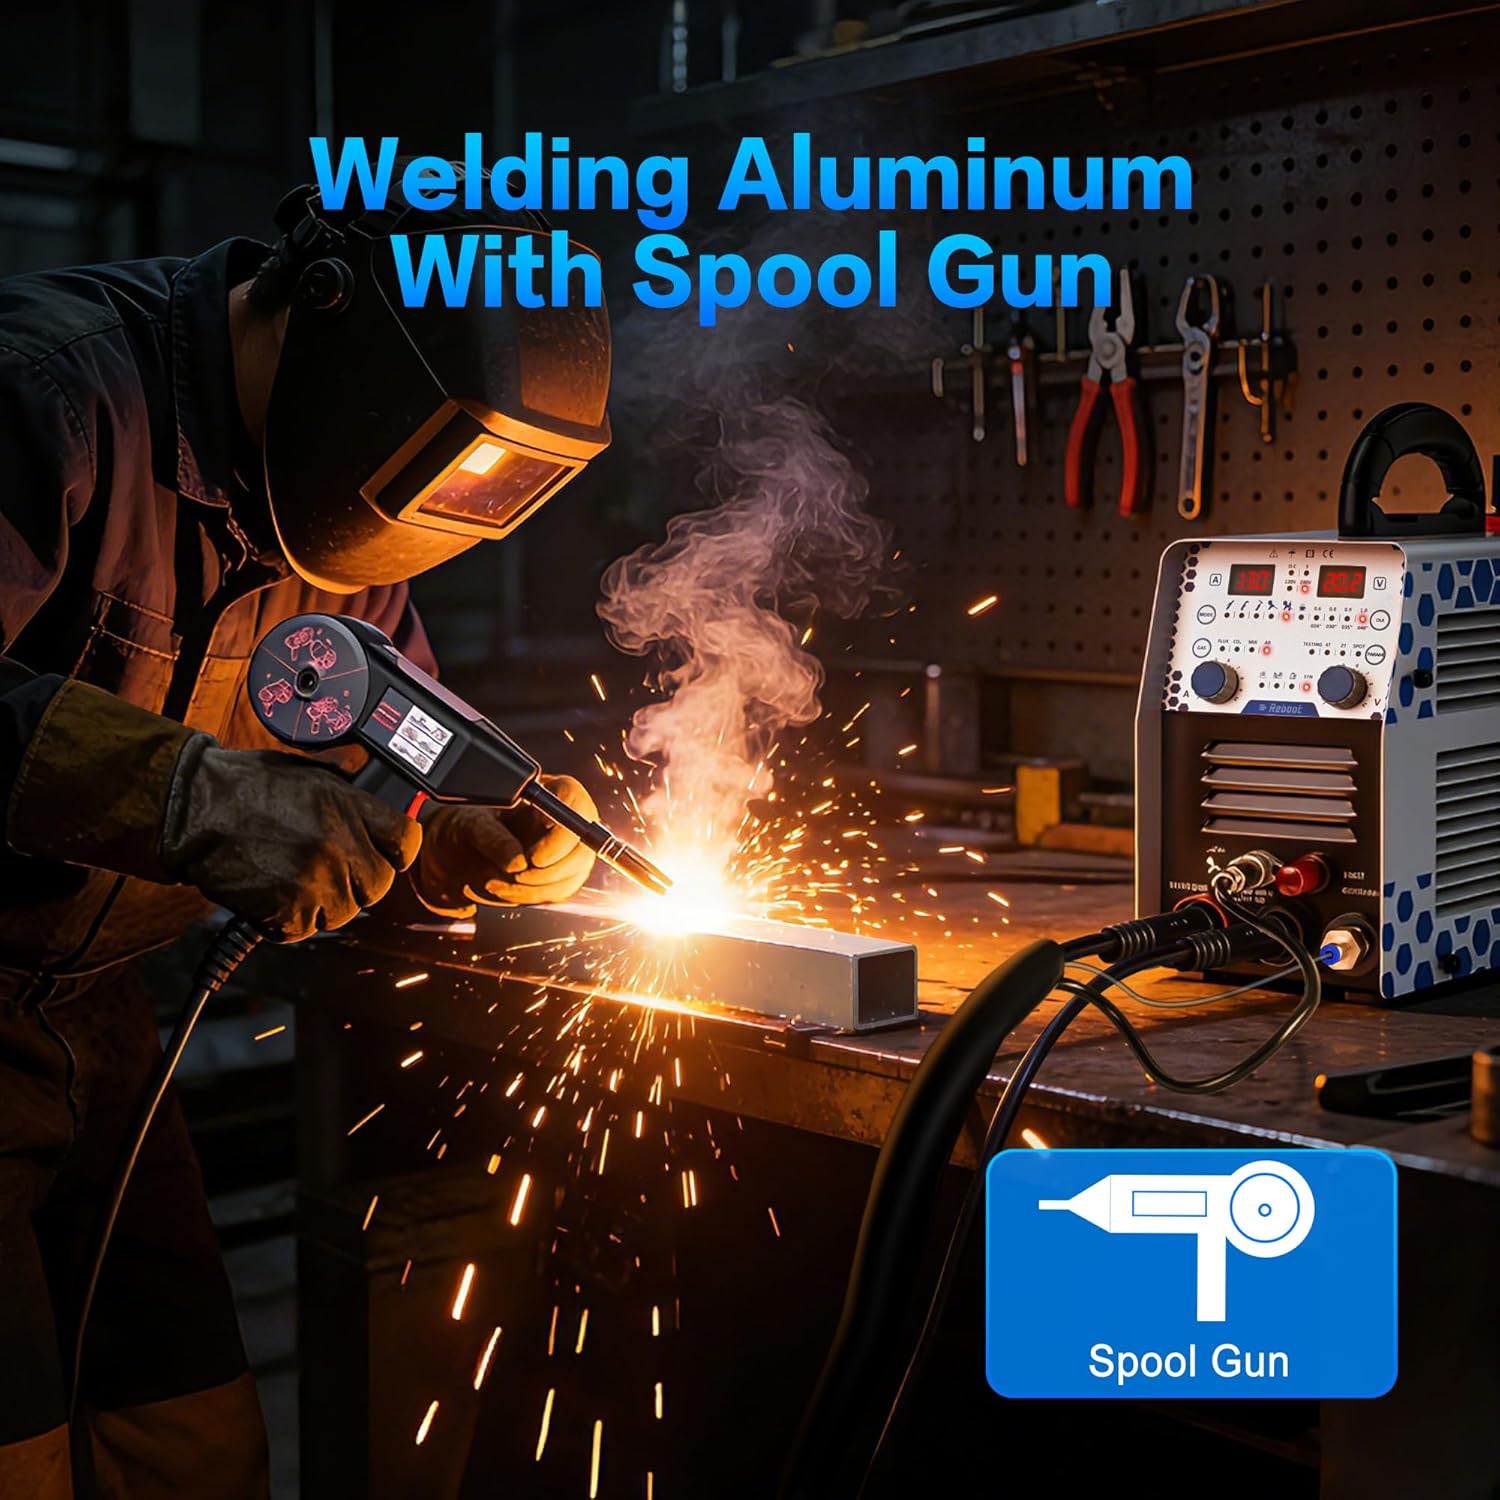
Image: Aluminum welding using the RB360 with an optional spool gun.
6.6. Spot Welding
The spot welding function helps prevent perforation on thin sheet metal, ideal for bodywork and assembly.
- Select the spot welding mode on the control panel.
- Adjust parameters for the specific material thickness.
7. Maintenance
Regular maintenance ensures the longevity and optimal performance of your RB360 machine.
- Cleaning: Regularly clean the machine's exterior and ventilation openings to prevent dust and debris buildup. Use a soft, dry cloth.
- Check Cables and Connections: Inspect all cables, torches, and connections for wear, damage, or loose fittings before each use. Replace any damaged components immediately.
- Consumables: Regularly check and replace plasma torch nozzles, electrodes, and contact tips as they wear out to maintain optimal performance.
- Air Filter (for Plasma): If applicable, clean or replace the air filter on the compressor or machine to ensure clean air supply for plasma cutting.
8. Troubleshooting
This section addresses common issues you might encounter with your RB360 machine.
| Problem | Possible Cause | Solution |
|---|---|---|
| No power | Loose power cable, tripped circuit breaker, faulty power outlet. | Check power connections, reset circuit breaker, try a different outlet. |
| No arc/poor arc stability | Improper grounding, incorrect settings, worn consumables, faulty torch. | Ensure proper ground connection, verify settings (current, voltage, gas), replace worn electrodes/nozzles, inspect torch. |
| Overheat alert (red light) | Prolonged use, insufficient ventilation, blocked air vents. | Allow machine to cool down, ensure adequate ventilation, clear any blocked air vents. The machine has an auto-break reminder after 40 minutes of continuous use. |
| Poor cut quality (Plasma) | Incorrect air pressure, worn plasma consumables, too fast/slow travel speed. | Adjust air pressure to 60 PSI, replace nozzle/electrode, adjust cutting speed. |

Image: Human-centered design with an auto-break reminder on the RB360.
9. Specifications
| Feature | Detail |
|---|---|
| Manufacturer | Reboot-EU |
| Package Dimensions | 50 x 36 x 30 cm; 9.1 kilograms |
| Model Number | PT-40 (RB360 Series) |
| Power Source Type | AC/DC |
| Voltage | 120V/240V (Dual Voltage) |
| Plasma Cutting Capacity | Up to 16 mm (30A) |
| MMA Welding Current | 130A |
| Batteries Required | No |
10. Warranty and Support
Reboot is committed to providing reliable support for its products. For any issues or spare parts, please contact customer service.
- Customer Support: Fast assistance is available for any problems or questions.
- Spare Parts: Over 50 common original accessories (such as nozzles and electrodes) are available to ensure the continuity of your projects.
For further assistance, please visit the Reboot Brand Store or contact your retailer.