
1. Safety Information
Please read all safety instructions carefully before using this product. Failure to follow these instructions may result in electric shock, fire, or other hazards.
- Eye Safety: Do not look directly into the projector lens when the lamp is on. The bright light can cause eye damage.
- Ventilation: Ensure adequate ventilation around the projector. Do not block ventilation openings. Overheating can damage the device.
- Power Source: Use only the provided power adapter. Ensure the power voltage matches the specifications.
- Battery Care: The projector contains a built-in rechargeable battery. Do not expose to extreme temperatures or attempt to disassemble.
- Water and Moisture: Keep the projector away from water, rain, and excessive humidity.
- Cleaning: Disconnect power before cleaning. Use a soft, dry cloth. Avoid liquid cleaners.
- Placement: Place the projector on a stable, level surface. Avoid placing it in direct sunlight or near heat sources.
2. Package Contents
Verify that all items are present in the package:
- HOTPEAK PR09 Mini Projector
- Remote Control
- Power Cord
- User Manual (this document)
3. Product Overview
The HOTPEAK PR09 is a portable mini projector designed for versatile entertainment. It features a built-in rechargeable battery, Wi-Fi and Bluetooth connectivity, and supports 4K decoding.

Figure 3.1: Front view of the HOTPEAK PR09 Mini Projector, showcasing its compact design and lens.
3.1 Components and Controls
Familiarize yourself with the various ports and controls on your projector:
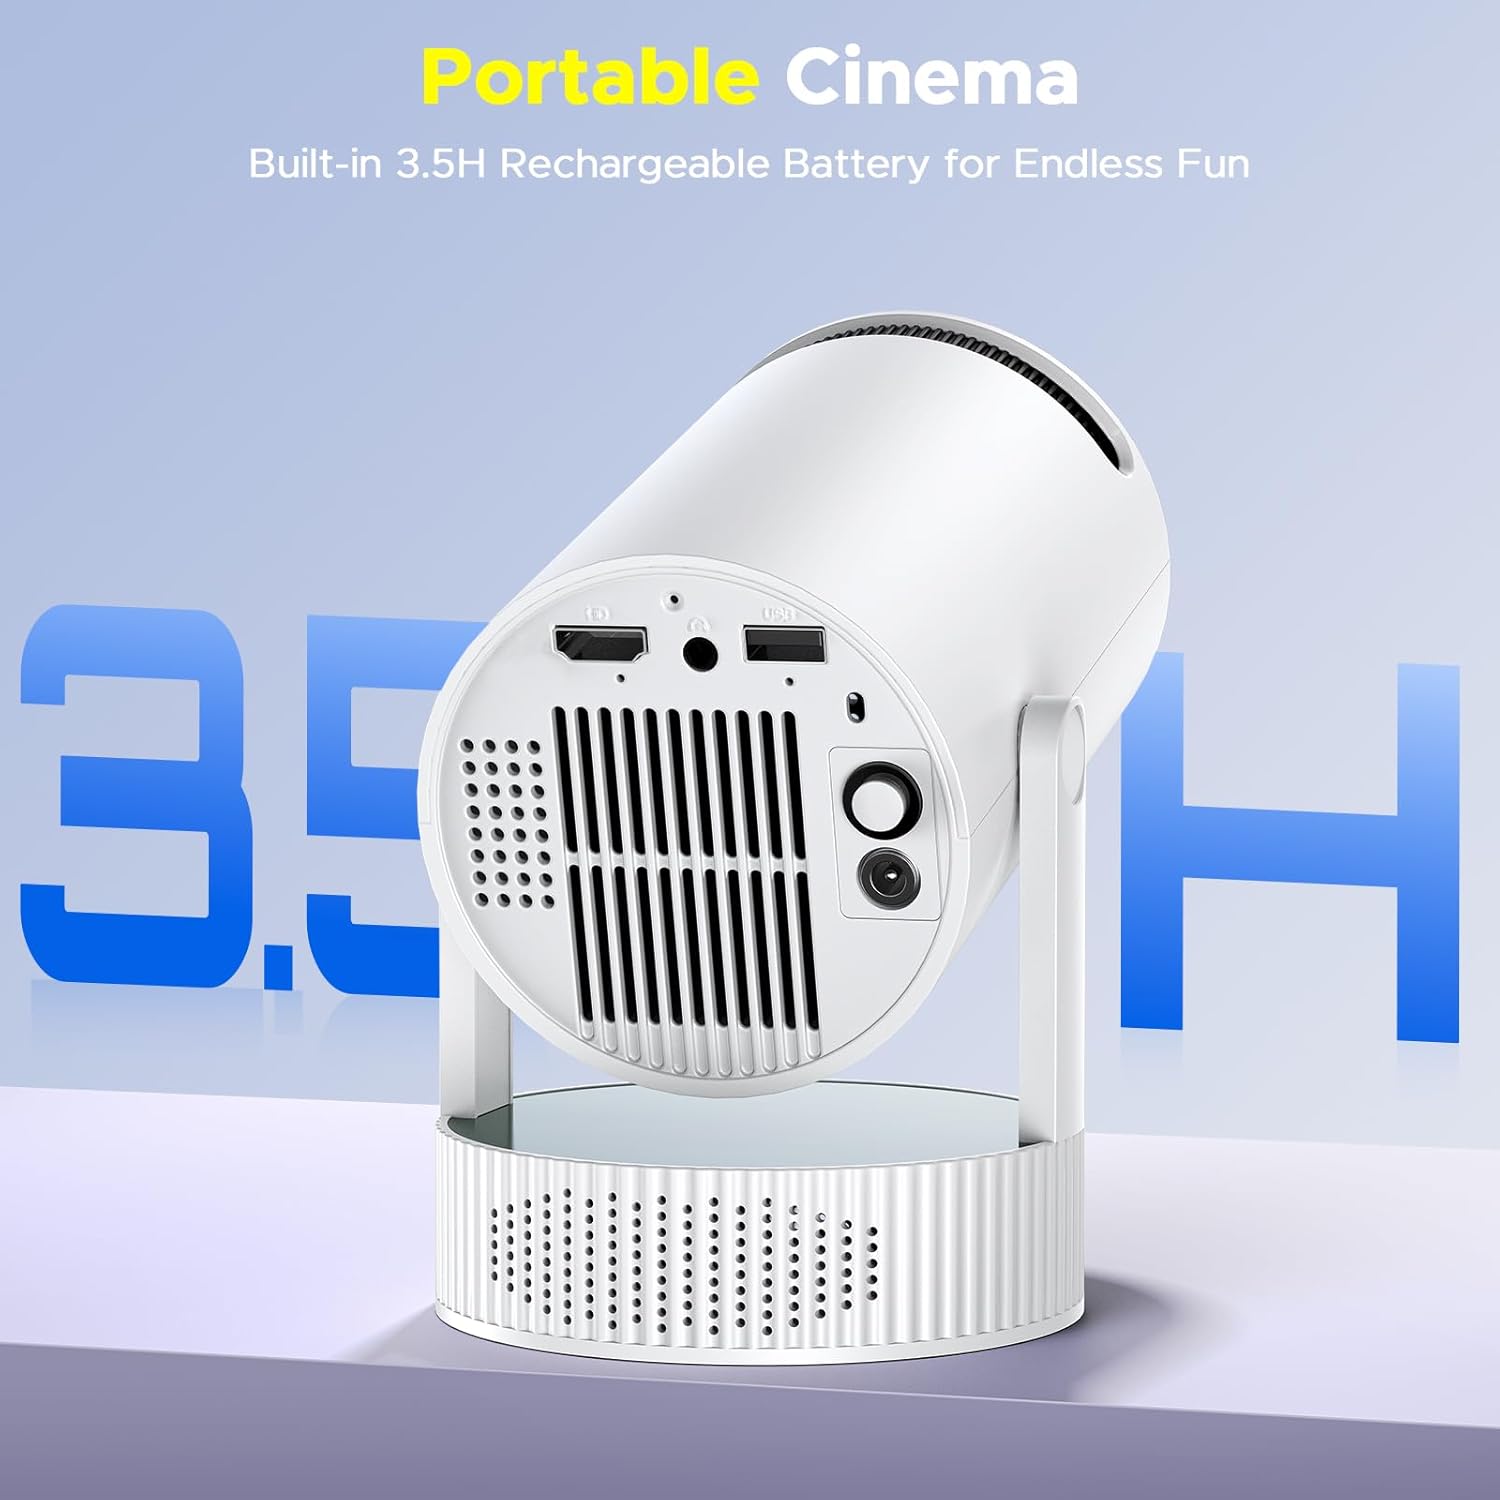
Figure 3.2: Rear view of the projector, highlighting the input/output ports and power button.
- Power Button: Located on the rear panel, used to turn the projector on/off.
- HDMI Port: Connects to external devices such as laptops, TV sticks, or gaming consoles.
- USB Port: For playing media directly from a USB drive.
- Audio Out (3.5mm Jack): Connects to external speakers or headphones.
- DC Power Input: Connects the power adapter for charging and continuous operation.
- Focus Ring: Manual adjustment ring around the lens for image clarity.
- 220° Rotatable Stand: Allows projection onto walls, ceilings, or floors at various angles.
4. Setup
4.1 Initial Setup
- Placement: Position the projector on a stable surface. The 220° rotatable stand allows flexible placement for projection on walls, ceilings, or floors.
- Power Connection: Connect the power cord to the DC power input on the projector and then to a power outlet. The projector can also operate on its built-in battery.
- Power On: Press the power button on the projector or the remote control to turn on the device.
4.2 Focus Adjustment
To achieve a clear image, adjust the focus:
- Rotate the focus ring around the projector lens manually until the projected image appears sharp and clear.
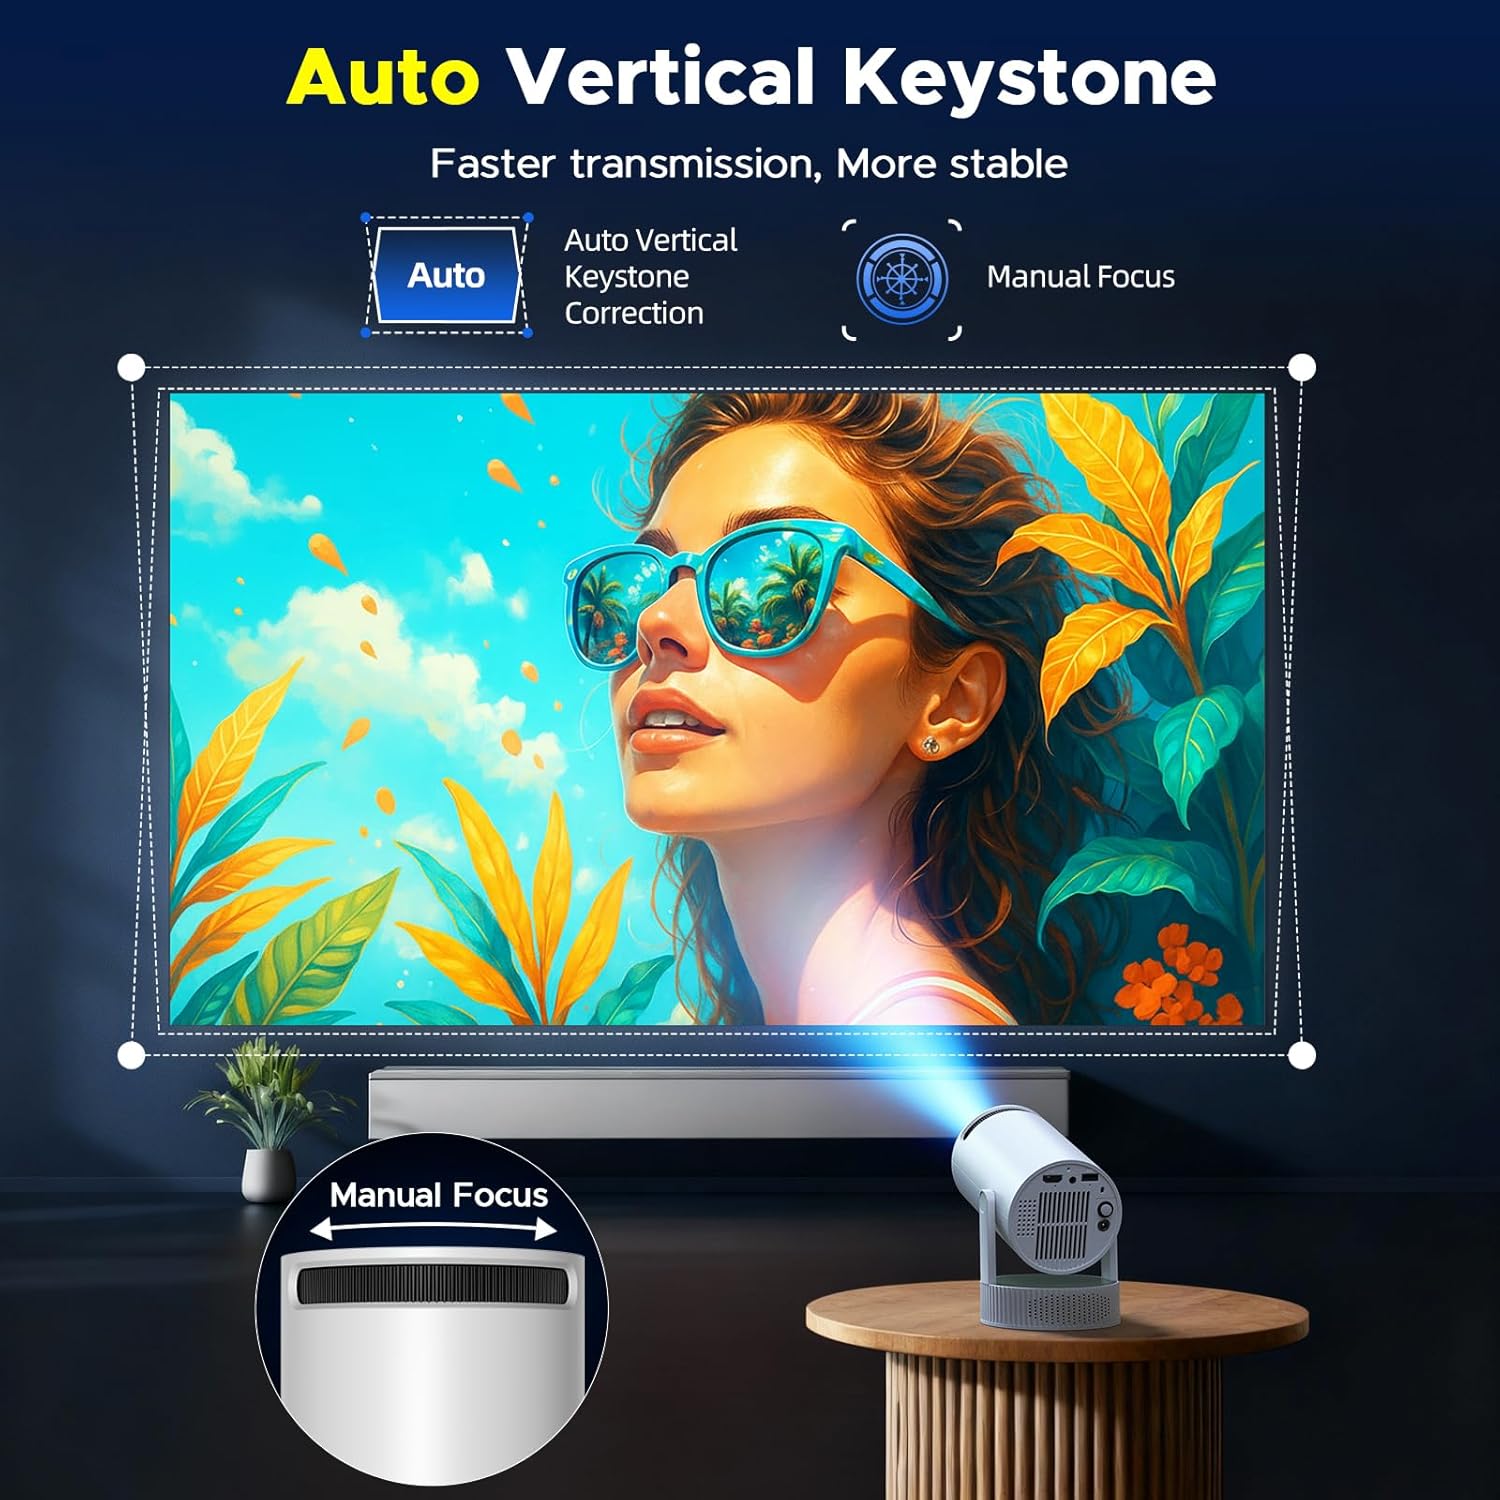
Figure 4.1: Detail showing the manual focus ring for image clarity adjustment.
4.3 Keystone Correction
The projector features automatic vertical keystone correction to adjust the image shape if the projector is not perfectly perpendicular to the screen.
- The projector will automatically correct vertical distortion.
- For further adjustments, navigate to the display settings in the projector's menu.
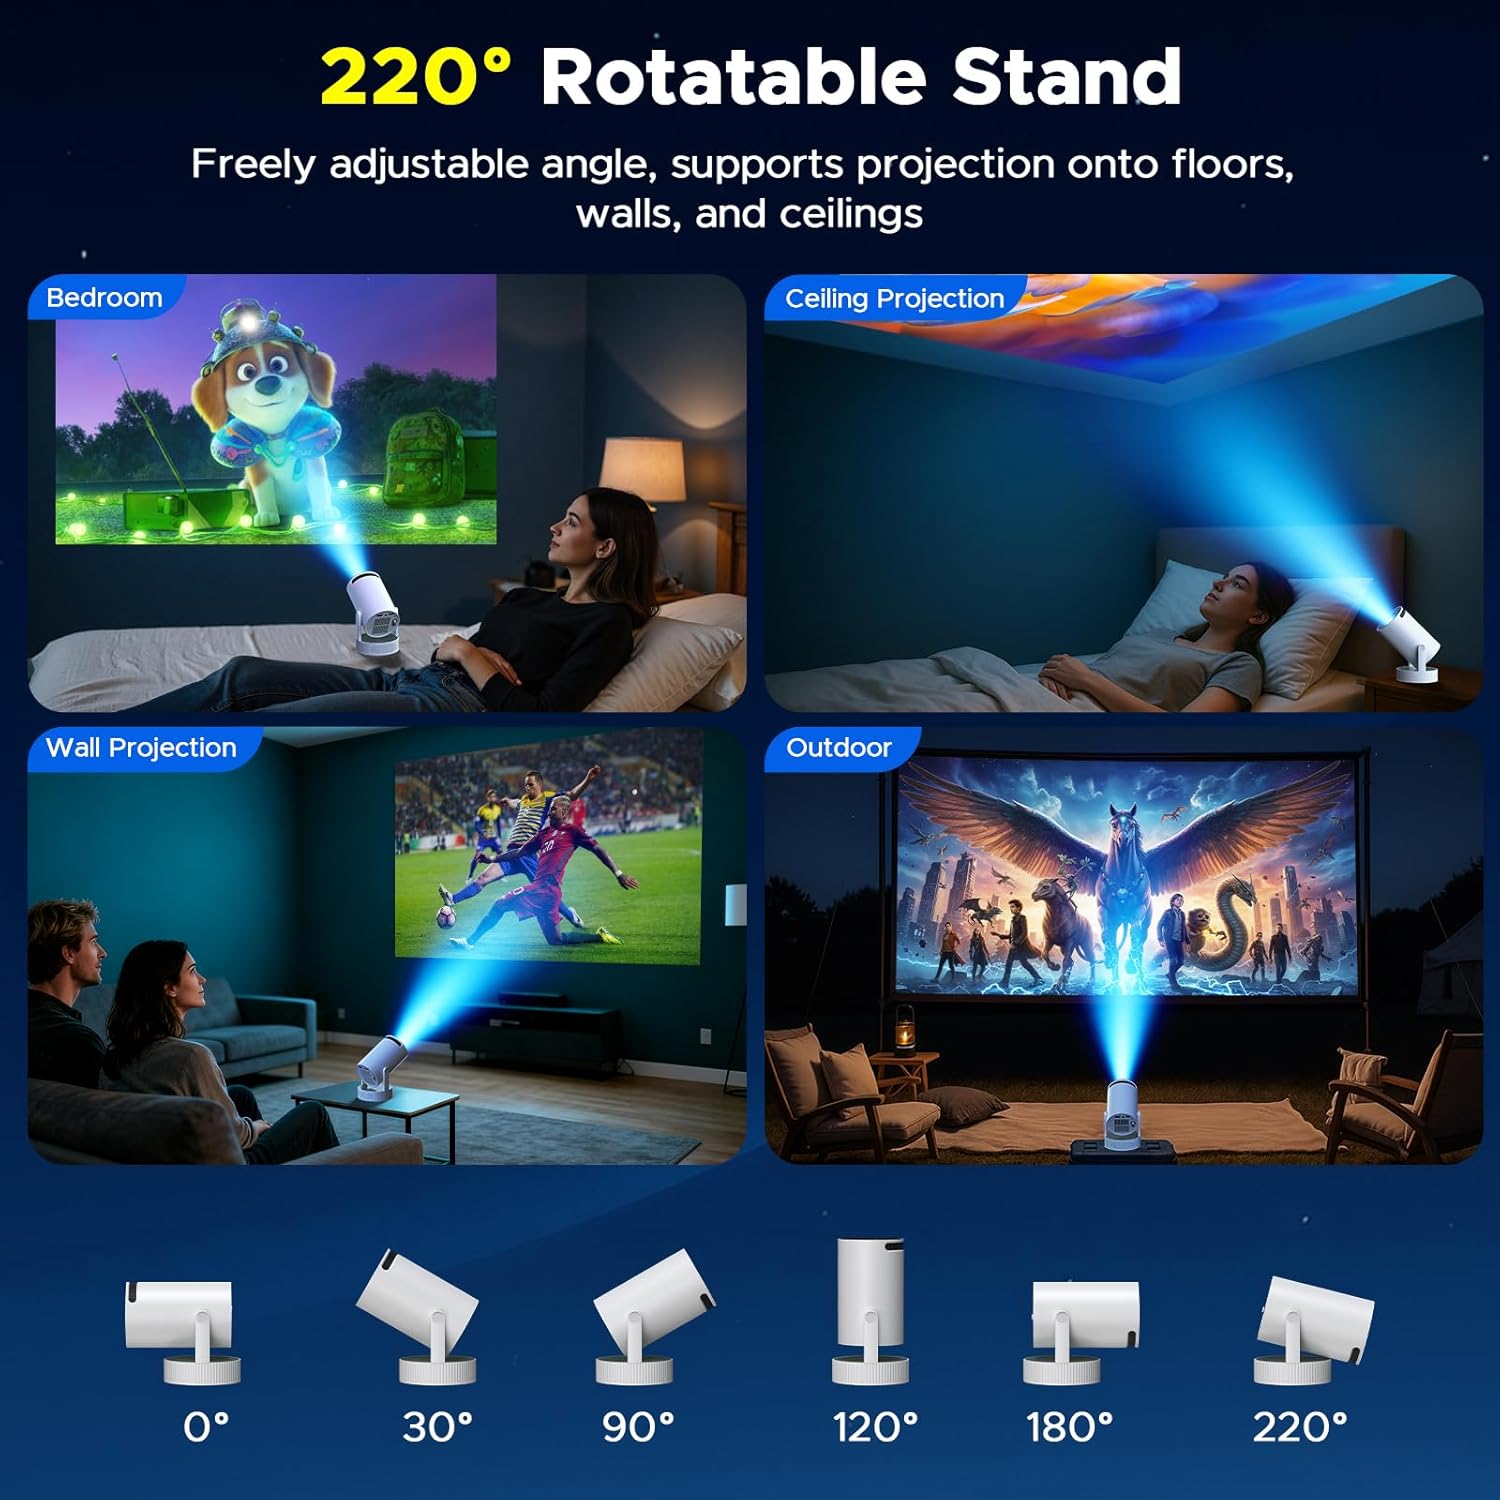
Figure 4.2: The projector's 220° rotatable stand allows projection onto ceilings, walls, and floors.
5. Operating Instructions
5.1 Connecting to Wi-Fi
To access online content and screen mirroring features, connect your projector to a Wi-Fi network:
- From the home screen, navigate to Settings.
- Select Network Settings or Wi-Fi.
- Turn Wi-Fi ON.
- Select your desired Wi-Fi network from the list.
- Enter the password using the on-screen keyboard and select Connect.
Video 5.1: Demonstrates the process of connecting the projector to a Wi-Fi network.
5.2 Bluetooth Connectivity
Connect external Bluetooth speakers or headphones for an enhanced audio experience.
- Ensure your Bluetooth audio device is in pairing mode.
- On the projector, navigate to Settings > Bluetooth.
- Select your device from the list of available devices to pair.

Figure 5.1: The projector supports Bluetooth 5.2 for connecting to external audio devices.
5.3 Screen Mirroring (iOS/Android)
Mirror your smartphone or tablet screen wirelessly to the projector.
- Ensure both your phone and the projector are connected to the same Wi-Fi network.
- On the projector's home screen, select the appropriate screen mirroring application (e.g., AirPin(PRO) for iOS, Miracast for Android).
- On your iOS device, open Control Center and tap Screen Mirroring, then select the projector's name (e.g., ATV_5).
- On your Android device, enable Wireless Projection or Smart View from your quick settings and select the projector's name.
Video 5.2: Illustrates the steps for screen mirroring from both iOS and Android devices to the projector.
5.4 HDMI Connection
Connect devices like laptops, gaming consoles, or TV sticks using an HDMI cable.
- Connect one end of the HDMI cable to the HDMI port on the projector and the other end to your external device.
- On the projector's home screen, select the HDMI input source.
5.5 USB Playback
Play media files directly from a USB flash drive.
- Insert your USB flash drive into the USB port on the projector.
- Navigate to File Manager on the home screen and select your USB drive to browse files.
5.6 Android TV 11 Features
The projector runs on Android TV 11, providing access to various streaming applications.
- Access pre-installed apps like YouTube, Prime Video, and others directly from the home screen.
- Download additional applications from the Play Store.

Figure 5.3: The Android TV 11 interface provides access to a wide range of entertainment applications.
6. Maintenance
6.1 Cleaning
- Lens: Use a soft, lint-free cloth specifically designed for optical lenses. Do not use abrasive cleaners.
- Casing: Wipe the projector's exterior with a soft, dry cloth. Avoid using harsh chemicals or solvents.
- Ventilation Openings: Periodically clean dust from the ventilation openings using a soft brush or compressed air to ensure proper airflow.
6.2 Storage
- When not in use for extended periods, store the projector in a cool, dry place.
- Protect the lens from dust and scratches by using a lens cap or storing it in its original packaging.
7. Troubleshooting
If you encounter issues with your projector, refer to the following common problems and solutions:
| Problem | Possible Solution |
|---|---|
| No power | Ensure the power cord is securely connected and the power outlet is functional. Check battery charge if operating wirelessly. |
| Blurry image | Adjust the manual focus ring on the lens. Ensure the projection distance is within the recommended range. |
| No sound | Check the volume settings on the projector and any connected external audio devices. Ensure Bluetooth speakers are properly paired. |
| Cannot connect to Wi-Fi | Verify the Wi-Fi password. Ensure the projector is within range of the Wi-Fi router. Restart the projector and router. |
| Screen mirroring issues | Ensure both devices are on the same Wi-Fi network. Check for software updates on both devices. Restart the screen mirroring application. |
| Image distorted (trapezoid shape) | The projector has auto vertical keystone correction. If issues persist, check projector placement or manual keystone settings if available. |
8. Specifications
Detailed technical specifications for the HOTPEAK PR09 Mini Projector:
| Feature | Specification |
|---|---|
| Brand | HOTPEAK |
| Model Name | PR09-SZUS |
| Native Resolution | 1280 x 720 Pixels |
| Display Resolution Maximum | 3840 x 2160 Pixels (4K Support) |
| Connectivity Technology | Bluetooth, HDMI, Wi-Fi (Dual-band WiFi 6) |
| Special Features | Built-In Speaker, Built-in Rechargeable Battery, Lightweight, Auto Vertical Keystone, 220° Rotation |
| Display Type | LED |
| Form Factor | Portable |
| Compatible Devices | Gaming Console, Laptop, Smartphone, Television |
| Contrast Ratio | 1500:1 (High) |
| Brightness | 300 ANSI Lumens |
| Projection Size | 30" to 200" |
| Throw Distance | 3.2 Feet (Min) - 13.6 Feet (Max) |
| Operating System | Android TV 11 |
| Item Dimensions L x W x H | 6.3"L x 4.72"W x 8.46"H |
| UPC | 758675330266 |
| ASIN | B0GD64QNSN |
Video 8.1: An overview of the HOTPEAK PR09 Projector's features, including its built-in rechargeable battery.
9. Warranty and Support
Your HOTPEAK PR09 Mini Projector comes with a 1 Year Warranty from the date of purchase.
For any questions, technical assistance, or warranty claims, please contact our 24/7 support team. Refer to the contact information provided on the product packaging or the official HOTPEAK website.