
1. Introduction
Thank you for choosing the RAPSUAR Commercial Nugget Ice Maker Machine. This manual provides essential information for the safe and efficient operation, installation, and maintenance of your ice maker. Please read this manual thoroughly before use and retain it for future reference.
2. Safety Instructions
- Ensure the ice maker is connected to a grounded power outlet with the correct voltage (110 Volts).
- Do not operate the machine with a damaged power cord or plug.
- Keep the appliance away from heat sources and direct sunlight.
- Ensure adequate ventilation around the unit. Maintain at least 6 inches of clearance on all sides for proper airflow.
- Do not immerse the appliance, power cord, or plug in water or other liquids.
- Always unplug the ice maker before cleaning or performing any maintenance.
- This appliance is not intended for use by persons with reduced physical, sensory, or mental capabilities, or lack of experience and knowledge, unless they have been given supervision or instruction.
- Use only potable water for ice production.
3. What's in the Box
Upon unpacking, please verify that all components are present and undamaged:
- RAPSUAR Nugget Ice Maker Machine
- Ice Scoop
- Water Filter
- Drainage Hose
- Water Inlet Hose
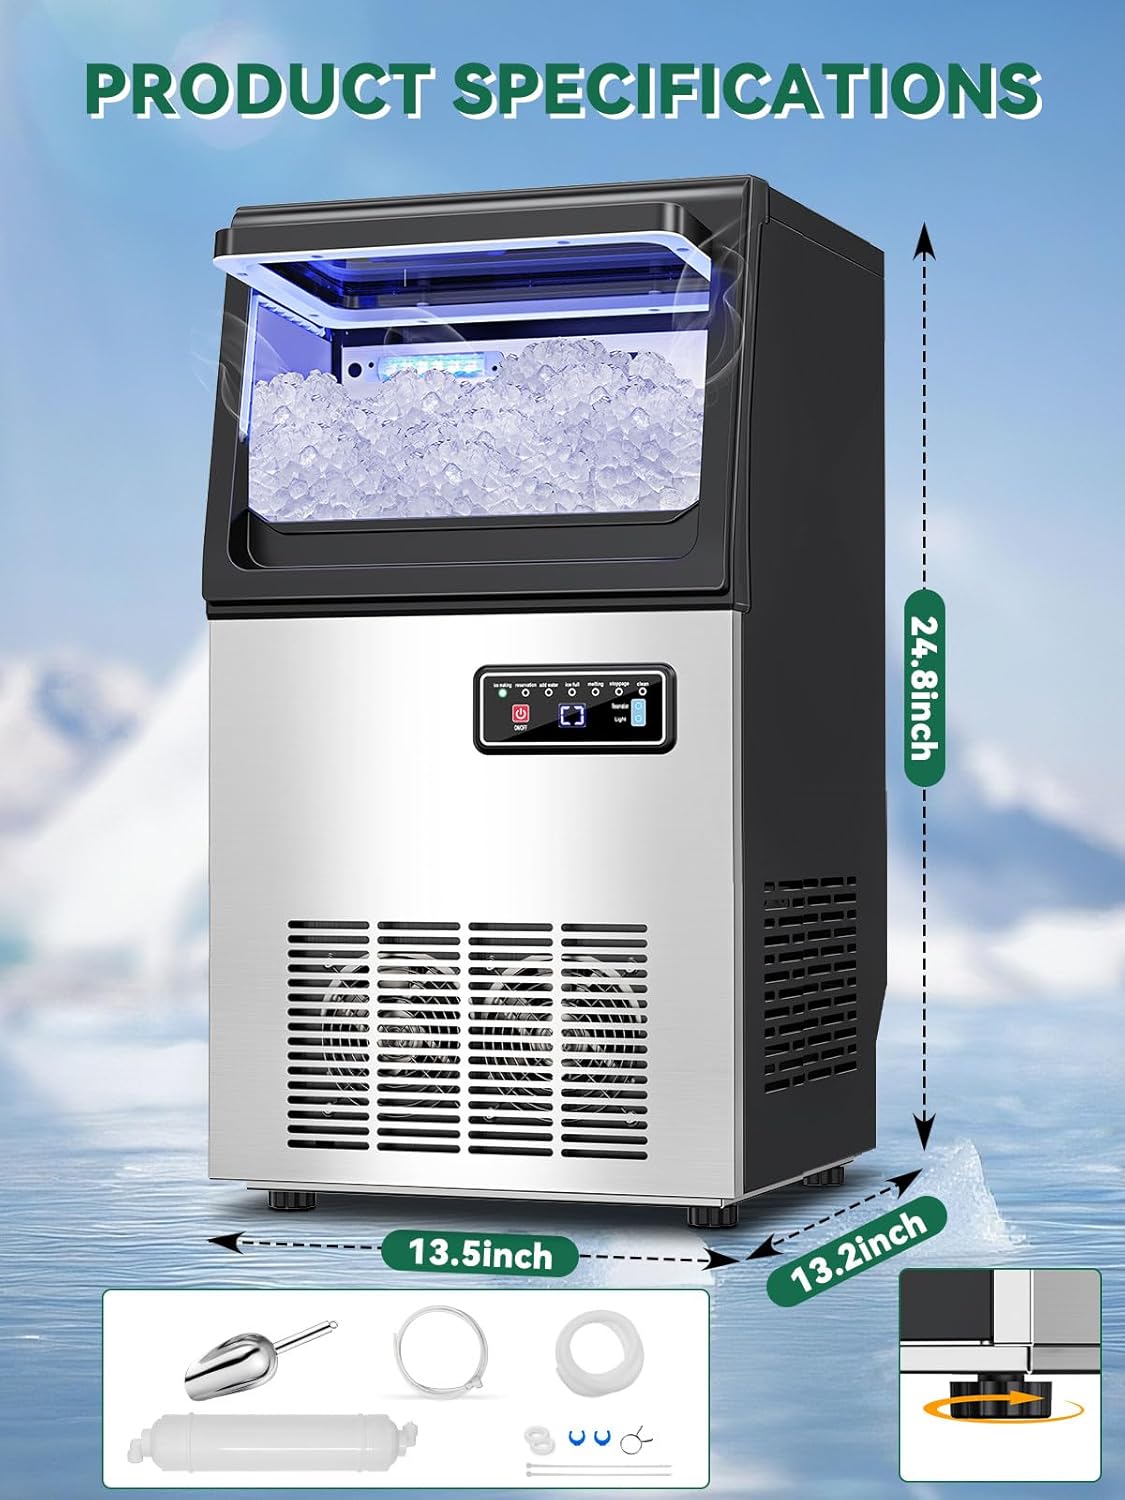
Image: The ice maker with its accessories, including an ice scoop, water filter, and connection hoses.
4. Product Specifications
| Specification | Detail |
|---|---|
| Brand | RAPSUAR |
| Model Name | Ice Maker |
| Product Dimensions (D x W x H) | 13.2" x 13.5" x 24.8" |
| Ice Storage Capacity | 12 Pounds |
| Ice Production per Day | 70 Pounds |
| Wattage | 260 watts |
| Voltage | 110 Volts |
| Refrigerant | R290a |
| Material | Stainless Steel |
| Item Weight | 44.4 pounds |
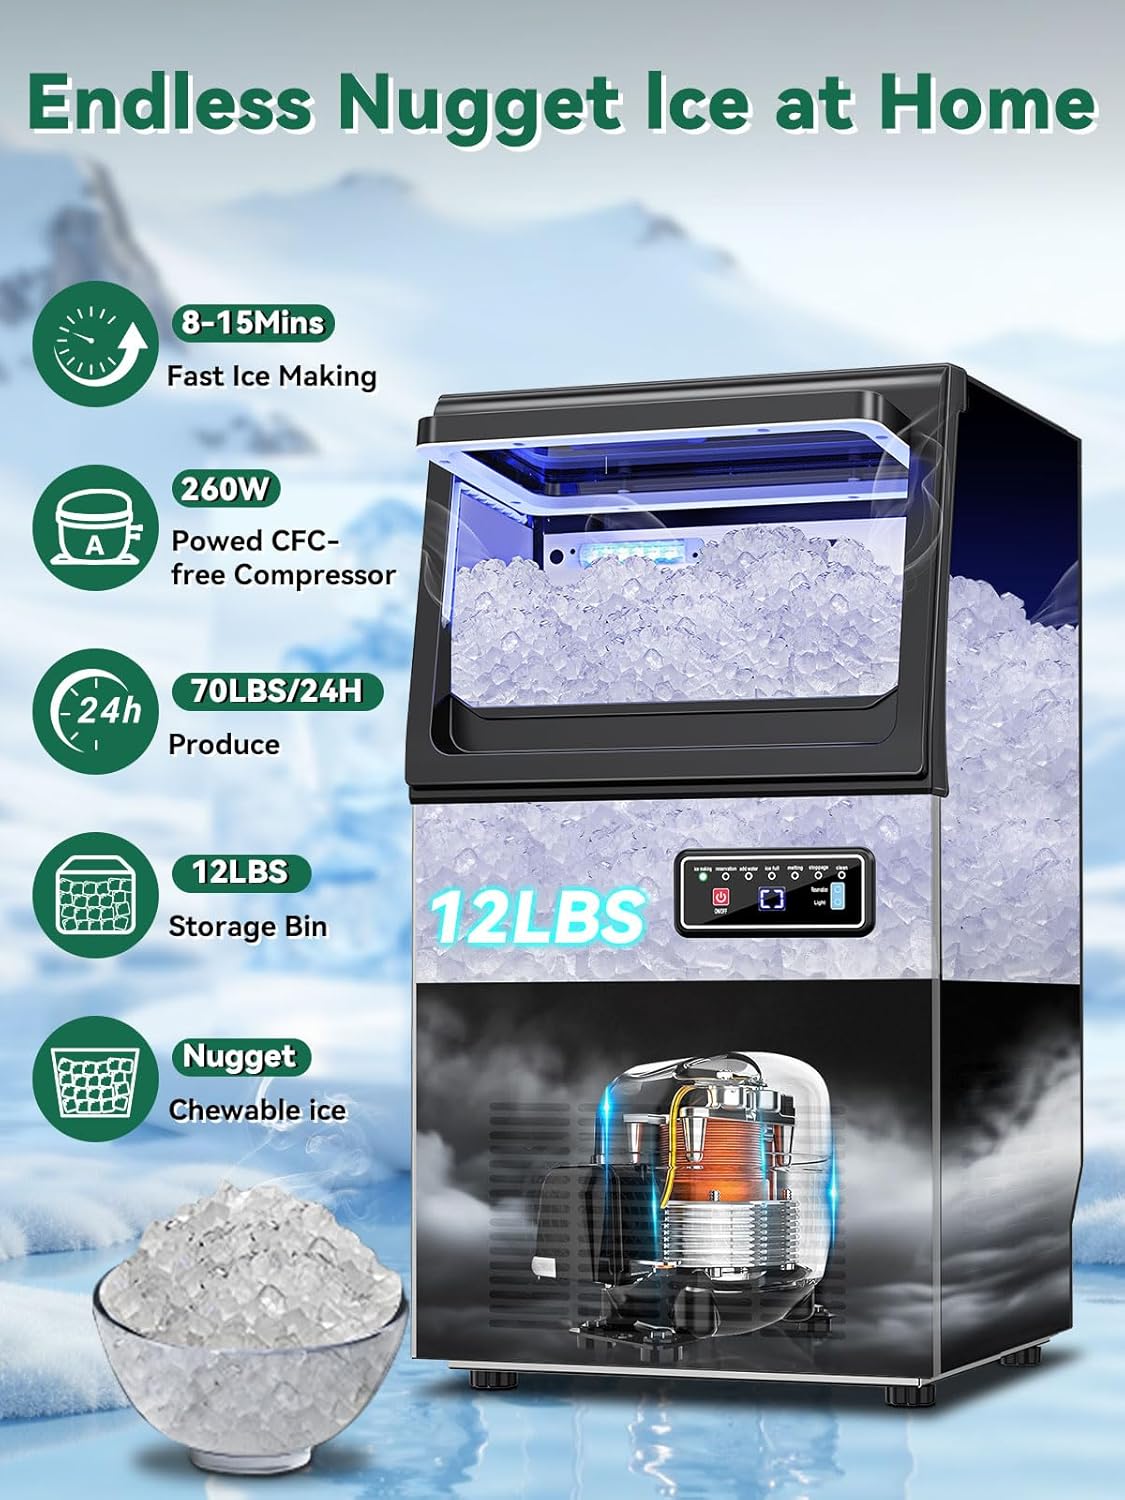
Image: Visual representation of the ice maker's daily production capacity (70 lbs), storage bin size (12 lbs), and 260W CFC-free compressor.

Image: Illustration of the ice maker's multi-layer insulation, including heavy-duty stainless steel, thickened cyclopentane foam, and food-grade PP interior liner, designed to slow ice melting.
5. Setup and Installation
5.1 Placement
- Place the ice maker on a firm, level surface capable of supporting its weight when full of ice and water.
- Ensure the unit is in a well-ventilated area, away from direct sunlight or heat sources. Maintain at least 6 inches (15 cm) of clearance on the back and sides for proper air circulation.
- Adjust the leveling feet at the bottom of the unit to ensure stability.
5.2 Water Connection
The ice maker requires a continuous water supply. Connect the provided water inlet hose to a potable water source and to the designated inlet on the back of the machine. It is recommended to use the included water filter for optimal ice quality.

Image: Illustration demonstrating the simple water connection process for the ice maker, including the water filter.
5.3 Drainage
Connect the drainage hose to the outlet at the bottom rear of the machine and direct it to a suitable drain or collection container. Ensure the drainage hose is not kinked or obstructed to allow for proper water flow.

Image: The back of the ice maker, highlighting the power cord, water inlet connection with filter, and drainage outlet.
5.4 Initial Cleaning
Before first use, it is recommended to perform a self-cleaning cycle to ensure the internal components are clean. Refer to the 'Cleaning and Maintenance' section for detailed instructions.
5.5 Setup Video Guide
For a visual guide on setting up your ice maker, please watch the following video:
Video: This official product video demonstrates the setup process, including connecting water lines and initial operation of the RAPSUAR Commercial Nugget Ice Maker Machine.
6. Operation
6.1 Control Panel Overview
The ice maker features an intuitive LCD control panel for easy operation.

Image: The LCD control panel showing indicators for ice making, reservation, add water, ice full, melting, stoppage, and clean, along with ON/OFF, Reservation, and Light buttons.

Image: A closer look at the LCD control panel, emphasizing the ON/OFF button, digital display, Reservation button, and Light button, along with various status indicators.
- ON/OFF Button: Press to turn the ice maker on or off.
- Reservation Button: Used to set a timed start or stop for ice production.
- Light Button: Controls the internal LED lighting.
- Indicators: Lights for 'ice making', 'reservation', 'add water', 'ice full', 'melting', 'stoppage', and 'clean' provide real-time status updates.
6.2 Starting Ice Production
- Ensure the water supply is connected and turned on.
- Plug the ice maker into a grounded power outlet.
- Press the ON/OFF button to start the ice making process. The 'ice making' indicator will illuminate.
- The machine will automatically begin producing nugget ice. The first batch typically takes 10-15 minutes.
6.3 Reservation Function
The reservation function allows you to program the ice maker to start or stop at a specific time.
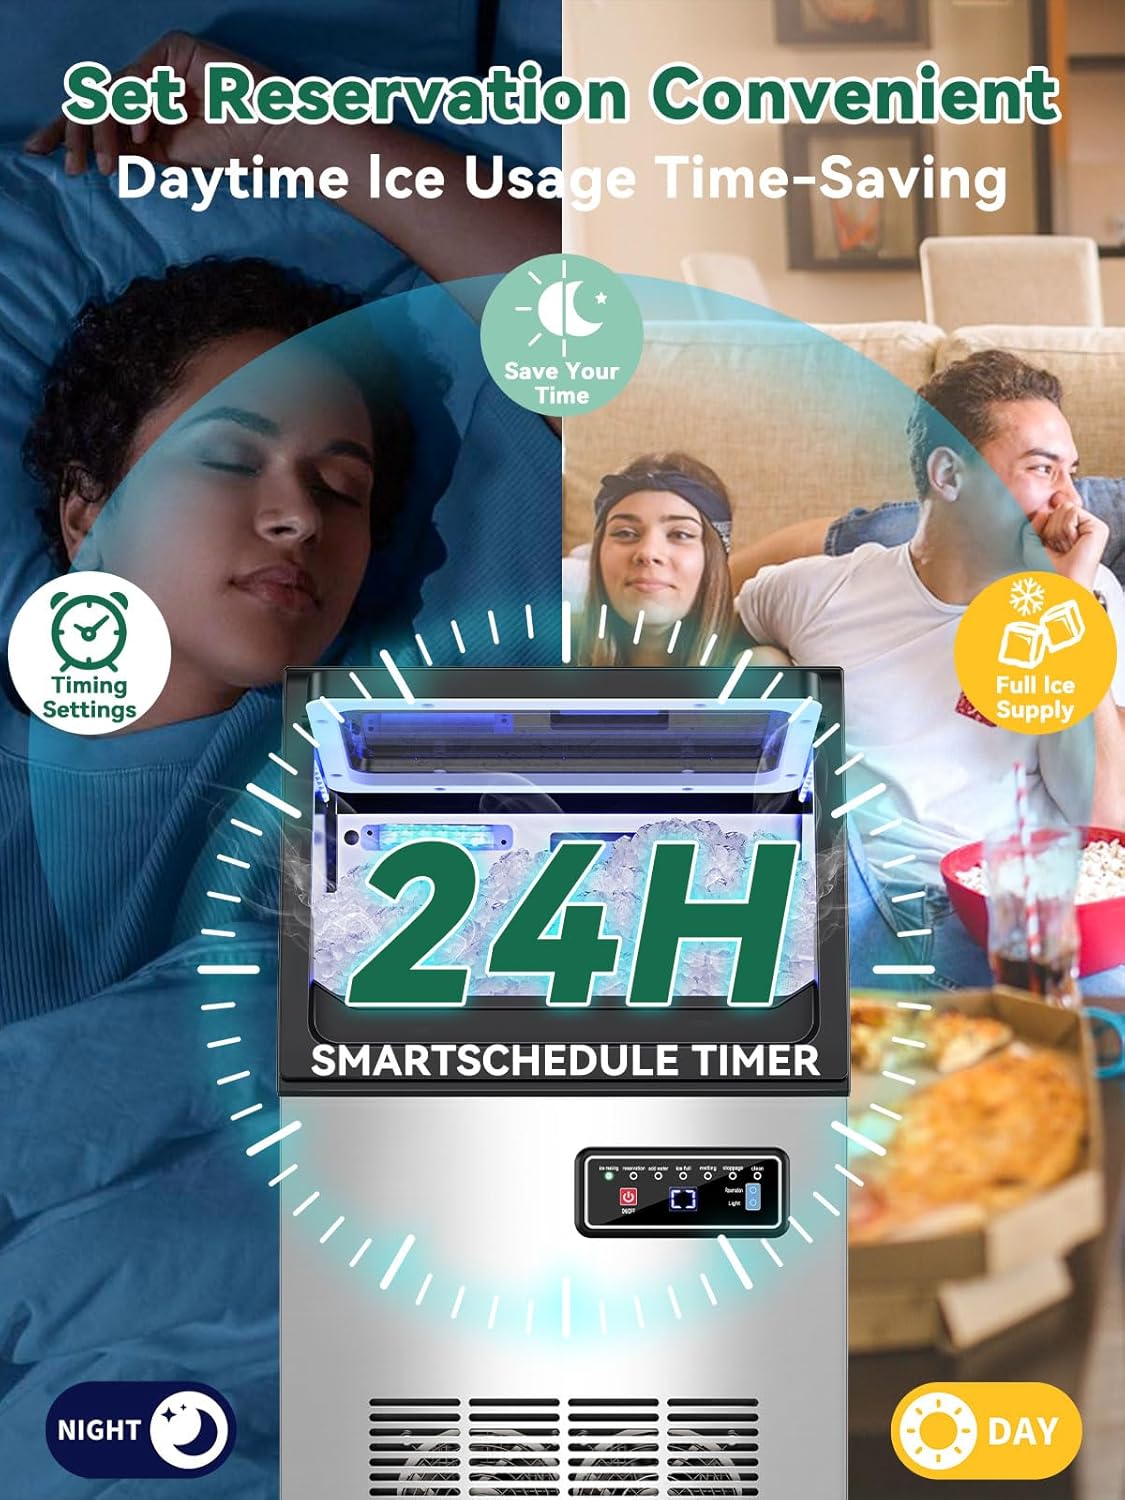
Image: A visual representation of the 24-hour smart schedule timer, illustrating how it can be used for daytime or nighttime ice production.

Image: An illustration depicting the ice scheduling feature, allowing users to set a timer for the ice maker to prepare ice in advance.
- To set power-on time (in standby mode): Press the Reservation button. Use the digital display to adjust the desired power-on time.
- To set shutdown time (during ice making): Press the Reservation button. Use the digital display to adjust the desired shutdown time.
7. Cleaning and Maintenance
7.1 Automatic Self-Cleaning
The ice maker is equipped with a self-cleaning function to maintain hygiene and prevent mineral buildup.

Image: A visual of the ice maker's internal self-cleaning cycle, with water circulating to clean the components.

Image: A graphic detailing the automatic self-cleaning process, activated by a single click and completing in approximately 5 minutes.
To activate self-cleaning:
- Ensure the ice maker is in standby mode (not actively making ice).
- Long press the ON/OFF button for approximately 3 seconds. The 'clean' indicator will illuminate, and the machine will begin its cleaning cycle.
- Once the cycle is complete, the machine will return to standby mode.
7.2 Regular Cleaning
- Exterior: Wipe the exterior with a soft, damp cloth. Do not use abrasive cleaners or solvents.
- Interior: Periodically clean the ice storage bin and water reservoir with a mild detergent and warm water. Rinse thoroughly to remove any soap residue.
- Air Filter: Regularly check and clean the air filter located on the side or back of the unit to ensure efficient operation.
7.3 Water Filter Replacement
The included water filter helps maintain ice quality. Replace the filter every 3-6 months, or as needed, depending on water quality and usage. Refer to the filter's instructions for specific replacement procedures.
8. Troubleshooting
If you encounter issues with your ice maker, refer to the following common problems and solutions:
| Problem | Possible Cause | Solution |
|---|---|---|
| No Ice Production | No power; water supply off; 'add water' indicator on; ambient temperature too high. | Check power connection; ensure water supply is on; refill water reservoir or check water line; move unit to a cooler area. |
| 'Add Water' Indicator On | Water reservoir is empty or water supply is interrupted. | Ensure water supply is connected and turned on; check for kinks in the water inlet hose. |
| 'Ice Full' Indicator On | Ice storage bin is full. | Remove ice from the storage bin. The machine will resume ice production automatically. |
| Ice Melts Quickly | High ambient temperature; poor ventilation; ice bin not insulated. | Ensure proper ventilation; move unit to a cooler location. Note that the ice storage bin is not a freezer and some melting is normal. |
| Unusual Noise | Loose parts; unit not level; compressor issue. | Check for loose components; ensure unit is level; if noise persists, contact customer support. |
| Water Leakage | Loose hose connections; clogged drain hose. | Check and tighten all hose connections; clear any obstructions in the drain hose. |
If the problem persists after attempting these solutions, please contact RAPSUAR customer support for assistance.
9. Warranty and Support
Your RAPSUAR Nugget Ice Maker Machine is covered by a manufacturer's warranty. Please refer to the warranty card included with your product for specific terms and conditions. For technical support, troubleshooting assistance, or to inquire about replacement parts, please contact RAPSUAR customer service through the retailer where the product was purchased or visit the official RAPSUAR website.