
HD-130
Generic HD-130 Macro LED Ring Flash Light User Manual
Model: HD-130
1. Introduction
Thank you for purchasing the Generic HD-130 Macro LED Ring Flash Light. This device is designed to provide consistent, shadow-free illumination for macro photography, scientific research, medical fields, and personal photography. Please read this manual carefully before using the product to ensure proper operation and to achieve optimal results.
2. Package Contents
Please check the package contents to ensure all items are present:
- 1 x Macro Ring Flash Unit
- 1 x Power Control Unit with LCD Display
- 8 x Adapter Rings (40.5mm, 52mm, 55mm, 58mm, 62mm, 67mm, 72mm, 77mm)
- 3 x Translucent Diffusers (White, Orange, Blue)
- 1 x User Manual (English & Chinese)
Note: Camera and AA batteries are not included.
3. Product Overview
The HD-130 Macro LED Ring Flash Light consists of a circular LED light unit, a control unit, and various accessories for versatile use.
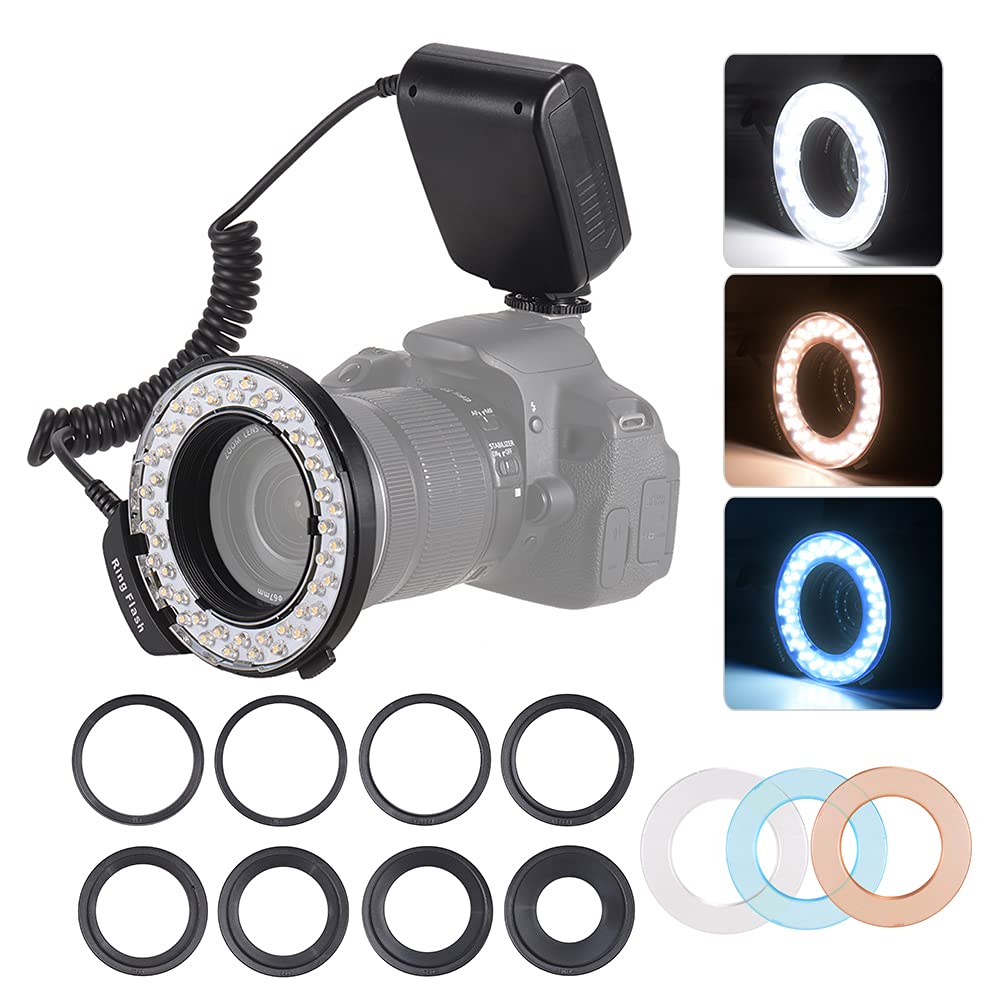
Figure 1: Complete HD-130 Macro LED Ring Flash Light Kit. This image displays the circular LED ring light, the power control unit with an LCD screen and coiled cable, eight black adapter rings of various sizes, and three translucent diffusers (white, orange, and blue).
Control Unit Features:
- LCD Display: Shows current settings such as flash mode, power level, and left/right flash status.
- PILOT Button: Activates a test flash.
- MODE Button: Toggles between different flash modes (e.g., full flash, left-only, right-only).
- LIGHT Button: Adjusts the brightness or power output.
- ON/OFF Button: Powers the unit on or off.
- SET Button: Confirms selections or enters settings.
- Directional Buttons (Up/Down/Left/Right): Navigate menus and adjust values.
4. Setup
4.1 Battery Installation
- Locate the battery compartment on the back of the power control unit.
- Open the battery compartment cover.
- Insert 4 AA batteries (not included) according to the polarity indicators (+/-) inside the compartment.
- Close the battery compartment cover securely.
4.2 Mounting the Ring Flash
- Select the appropriate adapter ring that matches the filter thread size of your camera lens.
- Screw the chosen adapter ring onto the front of your camera lens until it is secure.
- Align the Macro Ring Flash unit with the adapter ring and gently push it into place until it clicks or is firmly attached.
4.3 Connecting to Camera
- Slide the hot shoe foot of the power control unit into your camera's hot shoe mount.
- Tighten the locking wheel (if present) on the control unit to secure it to the camera.
- Ensure the coiled cable from the control unit is securely connected to the Macro Ring Flash unit.
5. Operation
5.1 Power On/Off
Press the ON/OFF button on the control unit to power the device on or off. The LCD display will illuminate when powered on.
5.2 Mode Selection
Press the MODE button to cycle through different flash modes:
- Full Flash: Both left and right sides of the ring flash illuminate.
- Left Flash: Only the left side of the ring flash illuminates, creating directional lighting.
- Right Flash: Only the right side of the ring flash illuminates, creating directional lighting.
- Light Mode: The LEDs provide continuous light for video or constant illumination.
5.3 Adjusting Brightness/Power
In any mode, use the LIGHT button or the directional buttons (up/down) to adjust the brightness or power output of the flash. The LCD display will show the current power level.
5.4 Using Diffusers
The included translucent diffusers (white, orange, blue) can be attached to the front of the ring flash to modify the light quality. The white diffuser softens the light, the orange diffuser adds warmth, and the blue diffuser adds a cool tone. Simply snap the desired diffuser onto the front of the LED ring.
5.5 Test Flash
Press the PILOT button to fire a test flash and check the lighting effect before taking a picture.
6. Maintenance
6.1 Cleaning
To clean the unit, use a soft, dry cloth. Do not use abrasive cleaners, solvents, or harsh chemicals, as these may damage the surface or internal components.
6.2 Storage
When not in use for extended periods, remove the AA batteries from the control unit to prevent leakage. Store the device in a cool, dry place away from direct sunlight and extreme temperatures.
7. Troubleshooting
- Flash not firing:
- Check if the unit is powered on.
- Ensure batteries are correctly inserted and have sufficient charge.
- Verify the control unit is securely mounted on the camera's hot shoe.
- Check the connection cable between the control unit and the ring flash.
- Uneven lighting:
- Ensure diffusers are properly attached and clean.
- Adjust the flash mode (e.g., full flash vs. left/right only).
- LCD display not working:
- Check battery charge and installation.
- Ensure the unit is powered on.
8. Specifications
| Feature | Specification |
|---|---|
| Model | HD-130 |
| LED Quantity | 46 |
| Color Temperature | 3000K-15000K |
| Exposure Time | 1/100s |
| Compatible Battery | 4 x AA (not included) |
| Flash Range | 5cm - 2m |
| Item Weight | Approx. 200g / 7.1oz |
| Adapter Rings Included | 40.5mm, 52mm, 55mm, 58mm, 62mm, 67mm, 72mm, 77mm |
| Diffusers Included | White (Translucent), Orange, Blue (Translucent) |
9. Warranty and Support
9.1 Warranty Information
This product comes with a standard manufacturer's warranty. Please refer to the warranty card included in your package or contact your retailer for specific terms and conditions.
9.2 Customer Support
If you encounter any issues or have questions regarding the use of your HD-130 Macro LED Ring Flash Light, please contact the retailer from whom you purchased the product or the manufacturer's customer support for assistance.
Related documentsHD-130


Ask a question about this manual
Ask about setup, troubleshooting, compatibility, parts, safety, or missing instructions. Manuals+ will review the question and use this page’s manual context to help answer it.