
Introduction
Thank you for choosing the KENES LJ-9068-2 Matte Black Bathroom Faucet. This manual provides detailed instructions for the proper installation, operation, and maintenance of your new faucet. Please read this manual thoroughly before installation and keep it for future reference.
The KENES LJ-9068-2 is a modern 2-handle, 3-hole deck-mounted bathroom faucet featuring a pull-down sprayer, dual spray modes, and a durable matte black finish. It is designed to provide reliable performance and enhance your bathroom's aesthetic.
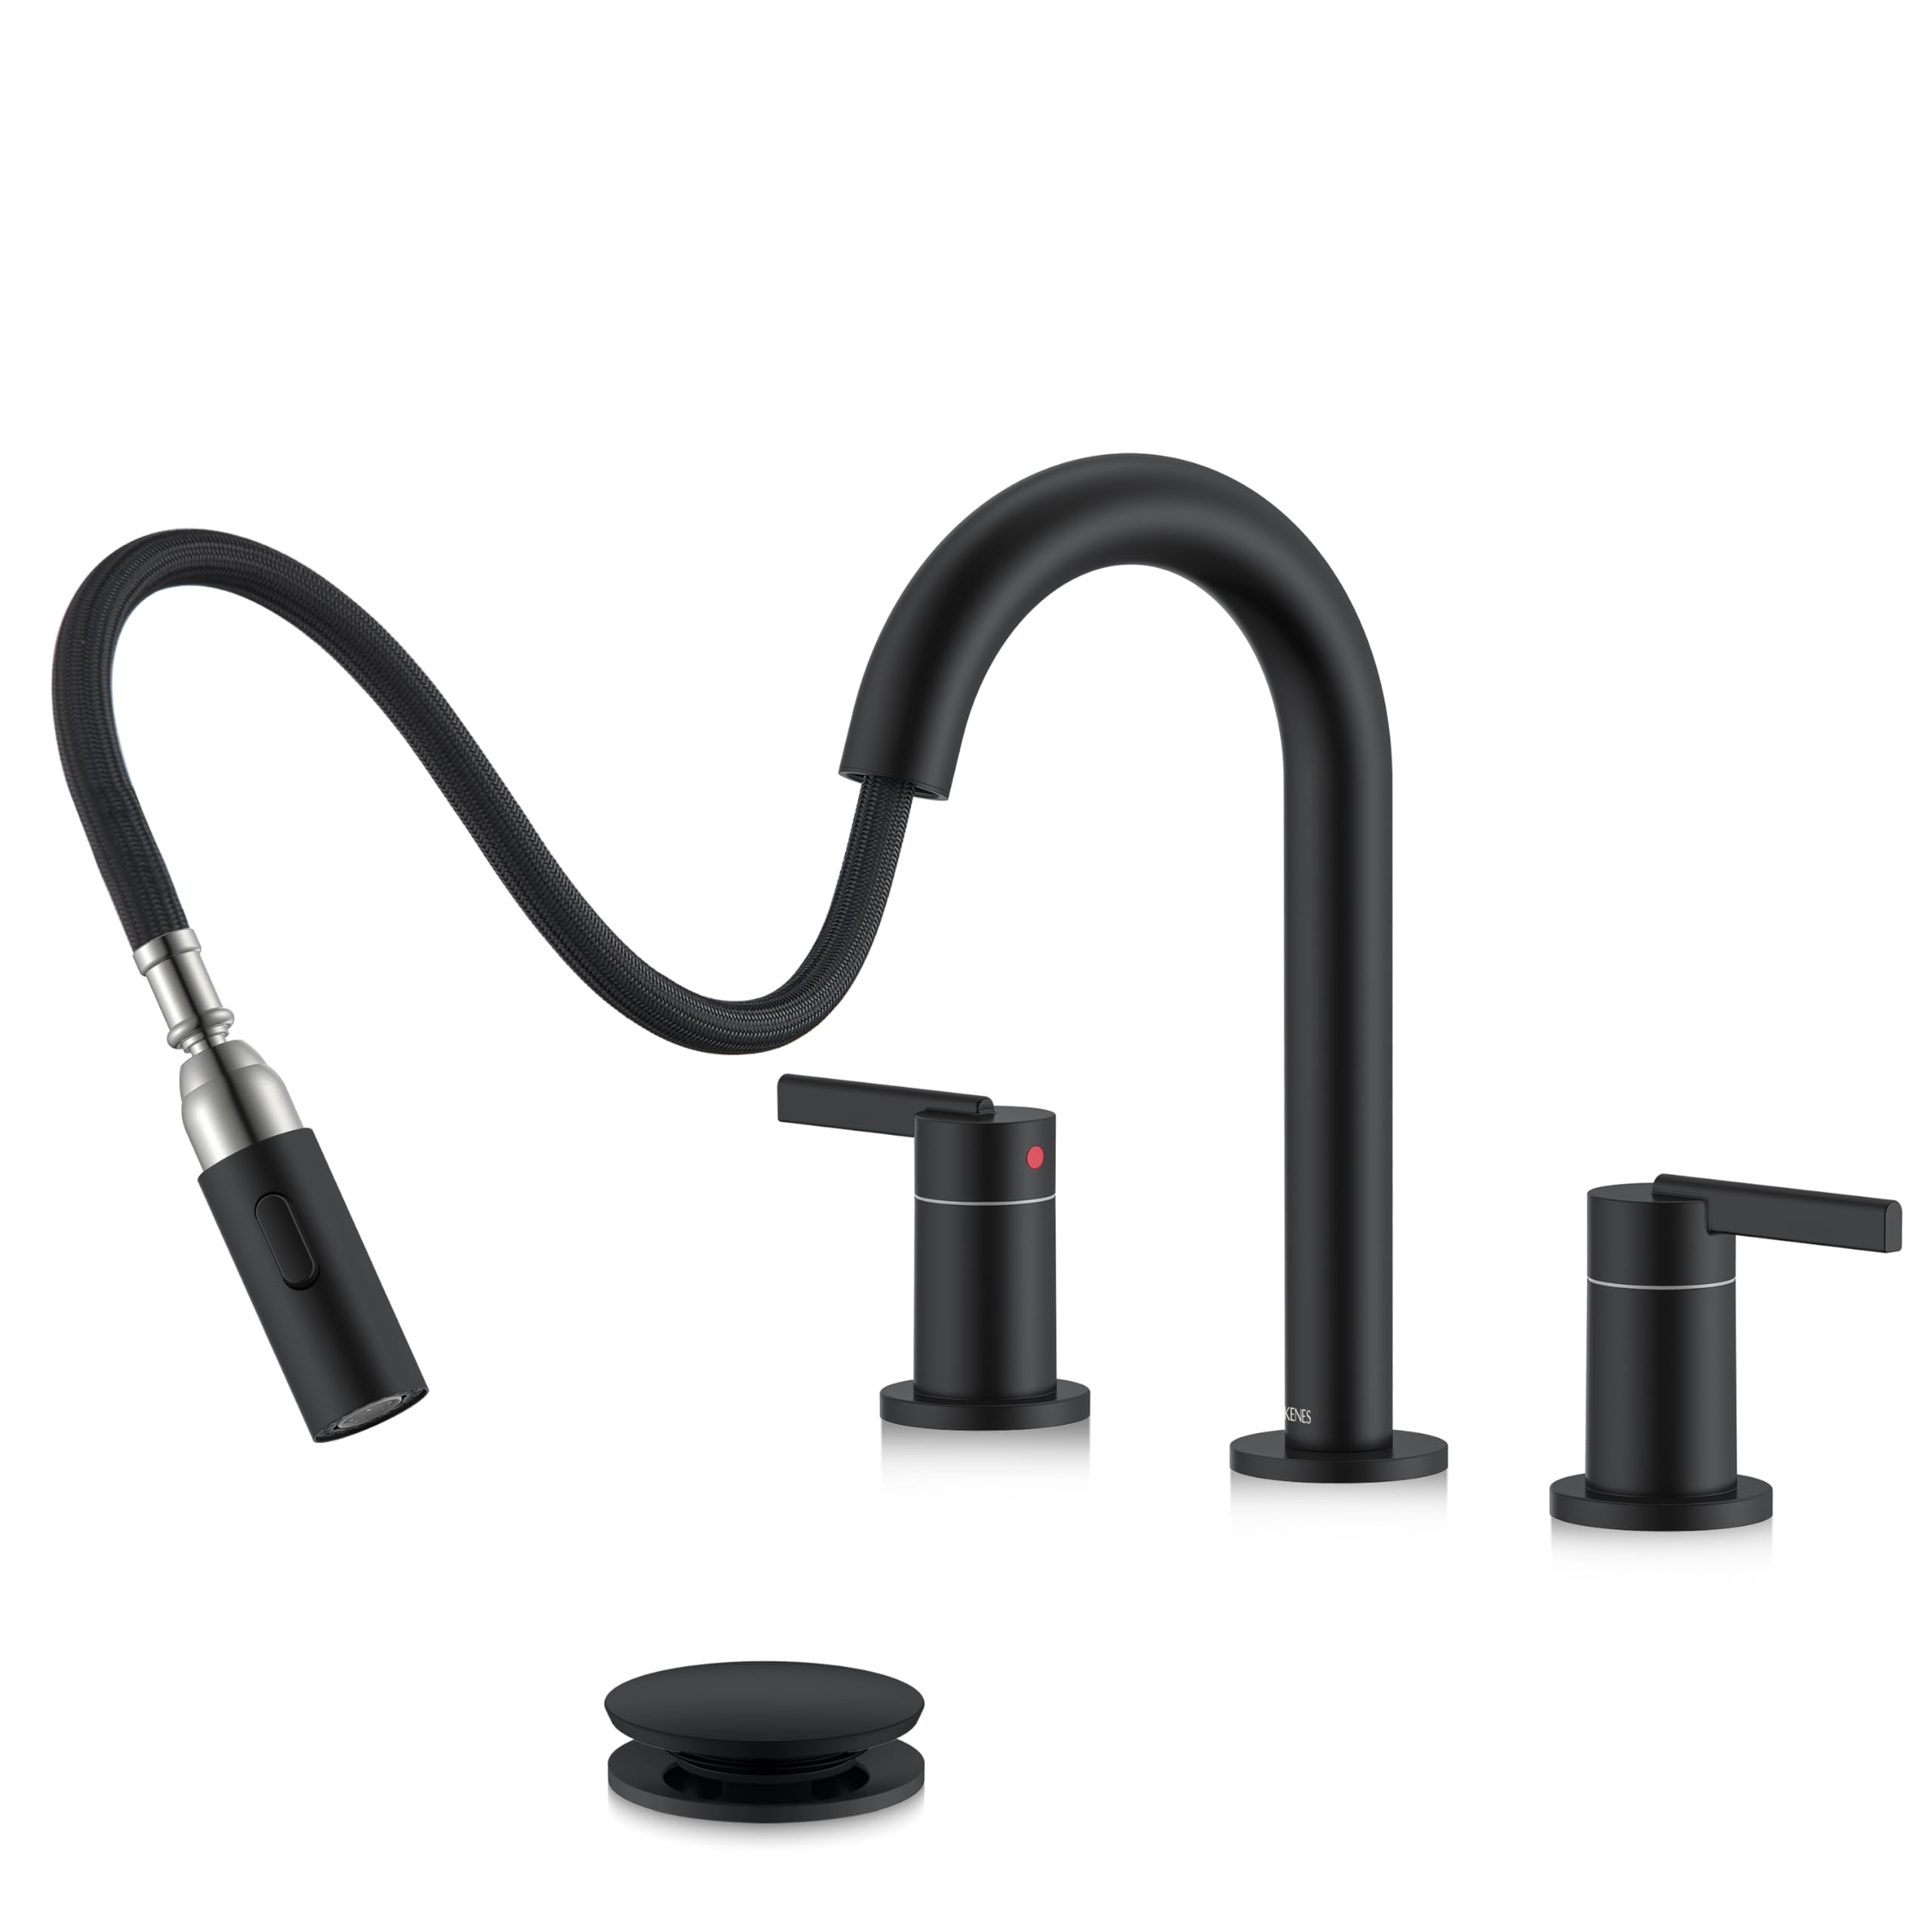
Figure 1: KENES LJ-9068-2 Matte Black Bathroom Faucet. This image shows the complete faucet assembly, highlighting its modern design and matte black finish.
Safety Information
- Always turn off the main water supply before beginning any installation or maintenance.
- Wear appropriate personal protective equipment, such as safety glasses and gloves, during installation.
- Ensure all connections are secure to prevent leaks. Do not overtighten.
- This faucet is lead-free certified, ensuring safe daily use for you and your family.
- If you are unsure about any installation steps, consult a qualified plumber.
Package Contents
Verify that all components are present before beginning installation:
- Faucet Body with Pull-Down Sprayer
- Two Handles (Hot and Cold)
- Pop-Up Drain Assembly
- Hot and Cold Water Supply Lines
- Mounting Hardware and Gaskets
- Instruction Manual
Specifications
| Feature | Specification |
|---|---|
| Brand | KENES |
| Model Number | LJ-9068-2 |
| Material | Stainless Steel |
| Finish | Matte Black |
| Mounting Type | Deck Mount |
| Number of Handles | 2 |
| Number of Holes Required | 3 |
| Spout Swivel | 360 Degrees |
| Flow Rate | 1.2 Gallons per Minute (GPM) |
| Spout Height | 4.2 Inches |
| Spout Reach | 5.6 Inches |
| Maximum Deck Thickness | 2.25 Inches |
| Minimum Clearance to Backsplash | 2.5 Inches |
| Hole Size Requirement | 1-1.5 Inches |
| Certifications | North American Lead-Free Standards Compliant |
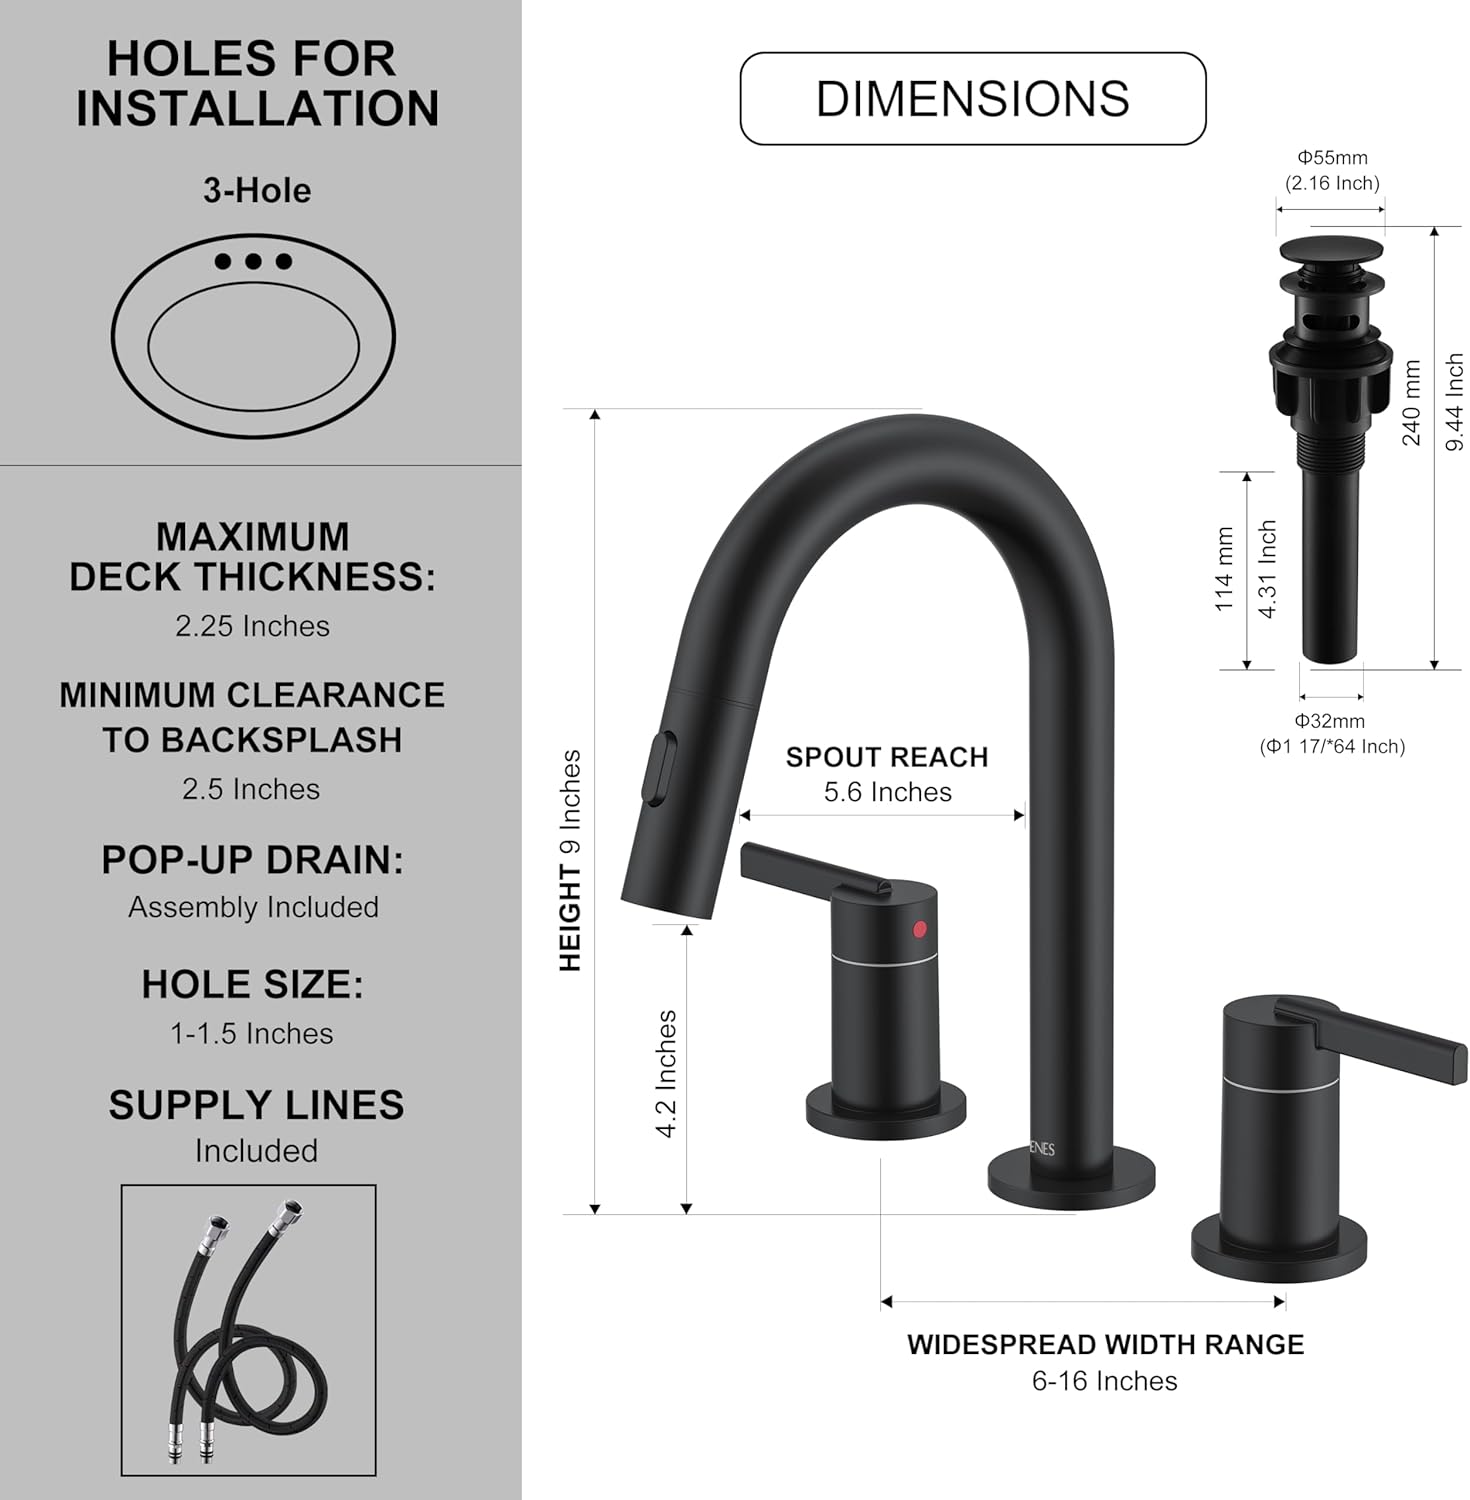
Figure 2: Detailed dimensions and installation hole requirements for the KENES LJ-9068-2 faucet, including spout height, reach, and deck thickness.
Setup and Installation
Before you begin: Ensure you have all necessary tools (adjustable wrench, plumber's putty or silicone sealant, screwdriver) and that the water supply is turned off.
1. Prepare the Sink
- Clean the sink surface where the faucet will be installed.
- Ensure the three mounting holes (6-16 inches widespread) are clear and meet the required 1-1.5 inch diameter.
2. Install the Faucet Body
- Insert the faucet body into the center hole of the sink.
- From underneath the sink, secure the faucet body with the provided washer and mounting nut. Hand-tighten, then use a wrench for a final snug fit.
3. Install the Handles
- Insert the hot and cold handles into their respective side holes.
- Secure each handle from underneath the sink using the provided washers and mounting nuts.

Figure 3: Illustration of the quick-connect system for easy installation and the pop-up drain assembly. The quick connect audibly clicks when lines are properly connected.
4. Connect Water Supply Lines
- Connect the hot and cold supply lines from the faucet handles to your home's water supply valves. Use the quick-connect system for the pull-down hose. Ensure an audible click for secure connection.
- Tighten all connections with a wrench, but do not overtighten.
5. Install the Pop-Up Drain
- Apply plumber's putty or silicone sealant around the flange of the pop-up drain.
- Insert the drain into the sink drain hole.
- From underneath, secure the drain body with the provided washer and locking nut. Ensure the drain is properly aligned.
6. Test for Leaks
- Slowly turn on the main water supply.
- Check all connections for leaks. If leaks occur, tighten the connections slightly until they stop.
- Remove the aerator from the faucet spout and flush the lines for a few minutes to clear any debris. Reinstall the aerator.
Operating Instructions
Water Flow and Temperature Control

Figure 4: The two-handle design allows for precise control of water flow and temperature. The left handle controls hot water, and the right handle controls cold water.
- Hot Water: Turn the left handle counter-clockwise to increase hot water flow.
- Cold Water: Turn the right handle counter-clockwise to increase cold water flow.
- Temperature Mixing: Adjust both handles to achieve your desired water temperature.
Pull-Down Sprayer Functionality

Figure 5: The pull-down sprayer features two distinct spray modes: aerated stream and powerful spray, easily switchable with a button.
- Extend the Sprayer: Gently pull down the sprayer head from the faucet spout. The flexible hose allows for extended reach (up to 20 inches).
- Switch Spray Modes: Press the button on the sprayer head to toggle between the aerated stream for daily tasks and the powerful spray for rinsing.
- Retract the Sprayer: When finished, guide the sprayer head back into the spout. The self-retracting technology ensures it docks smoothly.
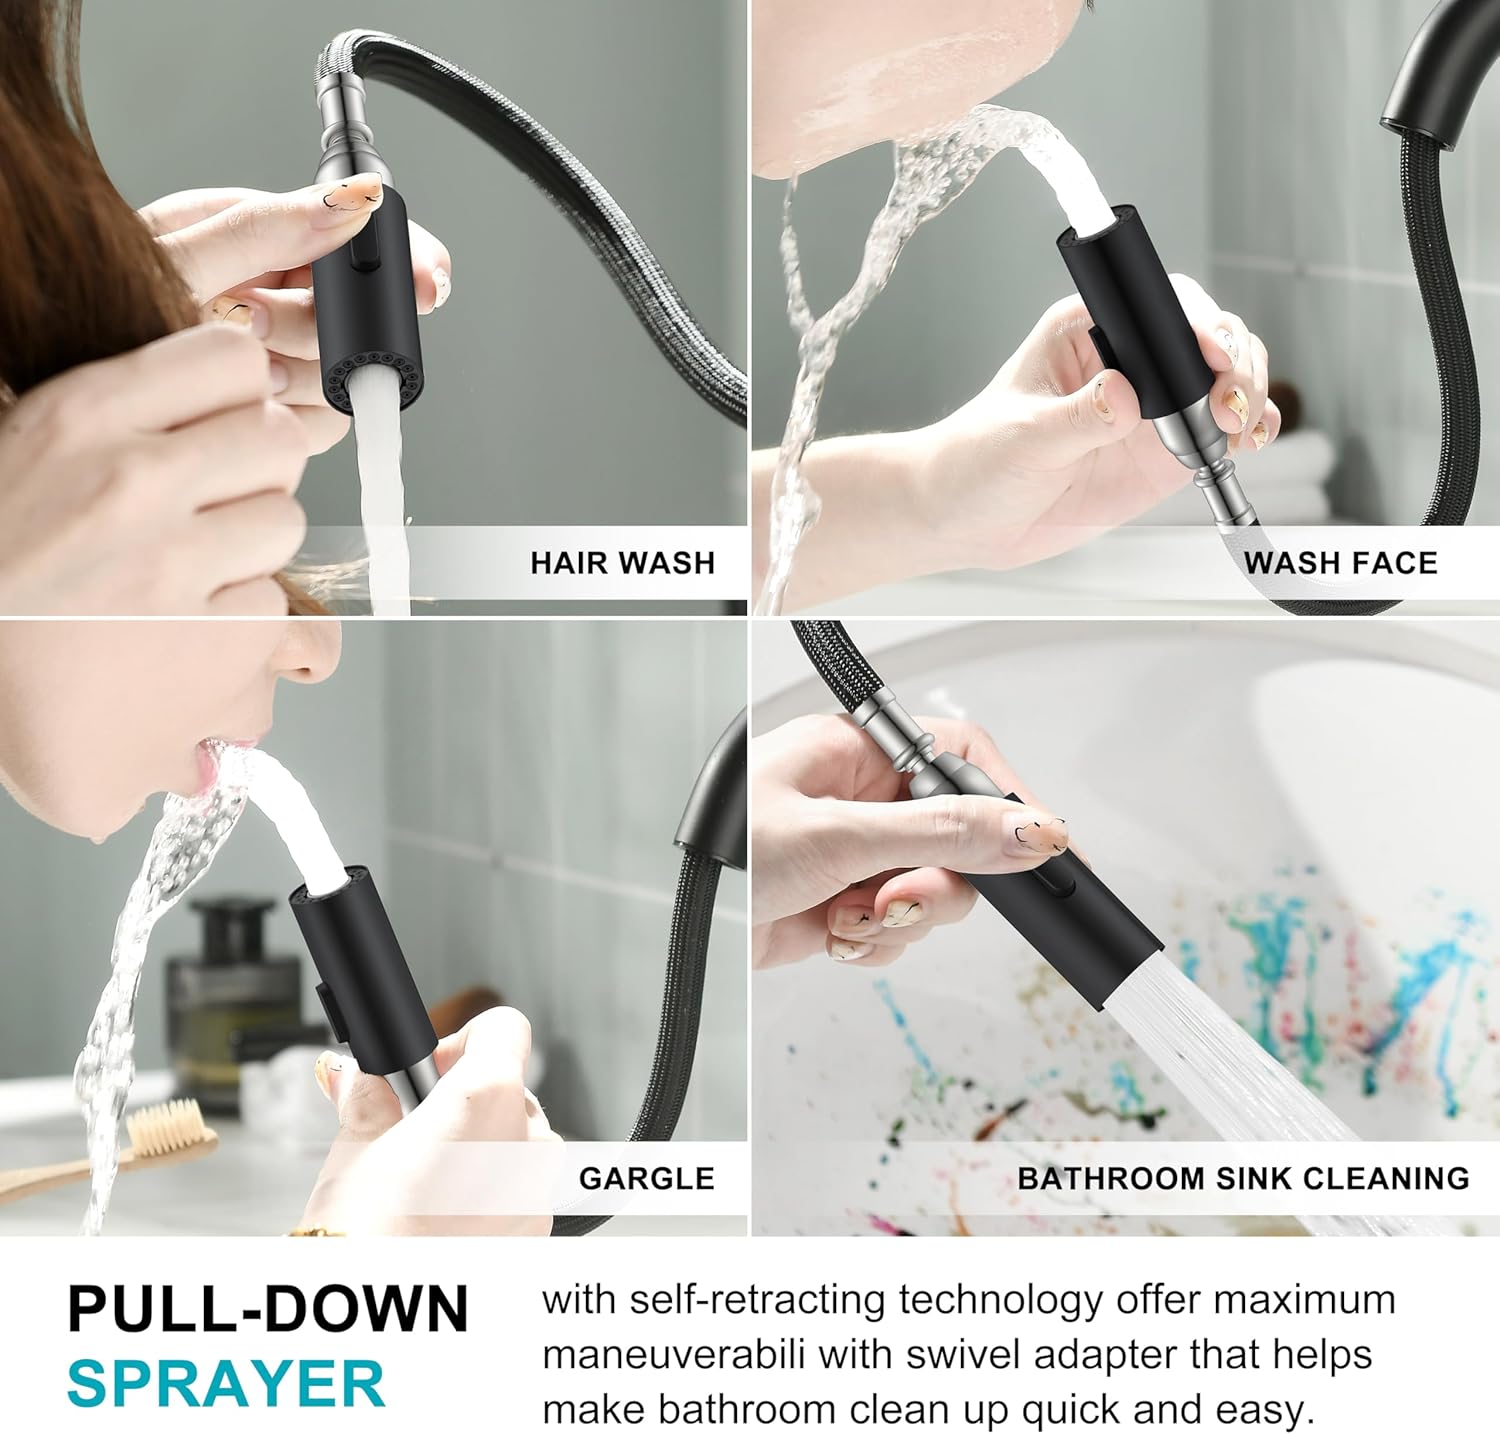
Figure 6: The pull-down sprayer is versatile for tasks such as hair washing, face washing, gargling, and general bathroom sink cleaning.
360-Degree Swivel Spout
- The faucet spout can swivel 360 degrees, providing maximum maneuverability and clearance for various sink tasks.
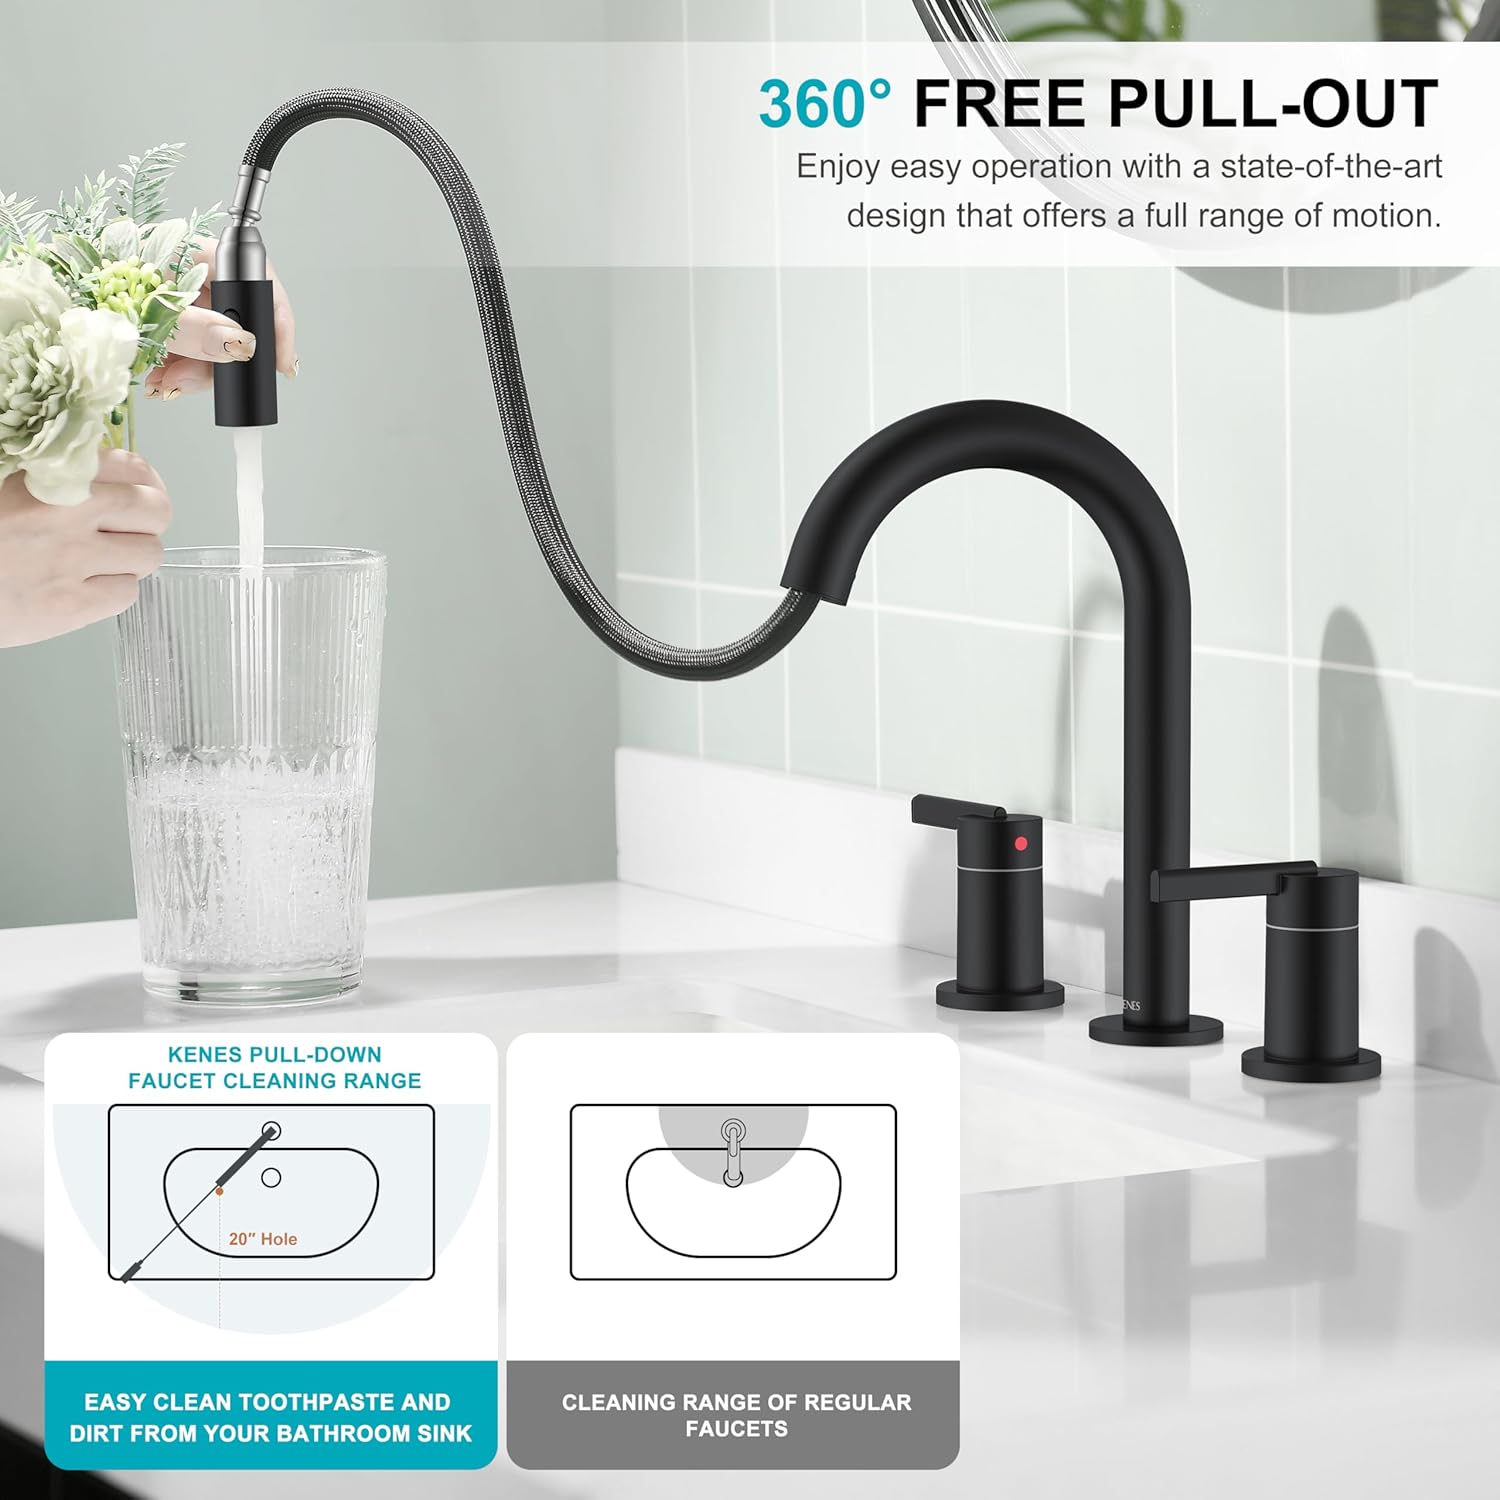
Figure 7: The 360-degree free pull-out design offers a full range of motion, making it easy to clean all areas of the sink.
Maintenance
Cleaning the Faucet
- Clean the faucet regularly with a soft cloth and mild soap.
- Avoid abrasive cleaners, harsh chemicals, or scouring pads, as these can damage the matte black finish.
- Wipe the faucet dry after each use to prevent water spots and mineral buildup.
Cleaning the Aerator

Figure 8: The eco-friendly aerator provides a steady and splash-free stream. Regular cleaning ensures optimal water flow.
- If water flow decreases or becomes irregular, the aerator may be clogged.
- Unscrew the aerator from the tip of the pull-down sprayer.
- Rinse any debris from the aerator screen under running water. For stubborn deposits, soak in a 50/50 solution of white vinegar and water.
- Reattach the aerator, ensuring it is securely tightened.
Troubleshooting
| Problem | Possible Cause | Solution |
|---|---|---|
| Low Water Flow | Clogged aerator; partially closed supply valves; kinked supply lines. | Clean the aerator (see Maintenance); ensure supply valves are fully open; check supply lines for kinks. |
| Leaks from Faucet Base | Loose mounting nuts; improper sealing. | Tighten mounting nuts underneath the sink; apply plumber's putty or silicone sealant if necessary. |
| Leaks from Supply Lines | Loose connections; damaged O-rings. | Tighten supply line connections; replace O-rings if damaged. |
| Sprayer Does Not Retract Fully | Obstruction under the sink; hose weight dislodged. | Check for obstructions preventing the hose from retracting; ensure the hose weight is properly positioned on the hose. |
| Water Temperature Not Consistent | Improper adjustment of hot/cold handles; issues with water heater. | Adjust hot and cold handles for desired mix; check your water heater settings. |
Warranty and Support
KENES products are manufactured to high-quality standards and are backed by our commitment to customer satisfaction.
Warranty Information
This product comes with a manufacturer's warranty covering defects in materials and workmanship under normal use. Please refer to your purchase documentation for specific warranty terms and duration.
Customer Support
If you have any questions, require assistance with installation, or encounter any issues with your KENES LJ-9068-2 faucet, please do not hesitate to contact our customer support team. You can reach us by visiting the KENES official flagship store online and sending us an email. We are available to assist you.