
1. Introduction
This manual provides detailed instructions for the installation, operation, and maintenance of your zozoye Carburetor Kit. This kit is designed as a replacement for specific Honda Fourtrax 300 models. Please read this manual thoroughly before beginning any installation or maintenance procedures to ensure proper function and safety.
2. Package Contents
Verify that all components listed below are present and undamaged before proceeding with installation.
- Carburetor Assembly x1
- Intake Manifold Boot x1
- Throttle Cable x1
- Air Filter x1
- Oil Filter x1
- Fuel Filter x1
- Spark Plug x1
- Clean Brushes x1 (for maintenance)

Figure 2.1: All components included in the zozoye Carburetor Kit.
3. Compatibility
This carburetor kit is compatible with the following Honda Fourtrax 300 models and years:
- Honda Fourtrax 300 4x4 TRX300FW (1988-2000)
- Honda Fourtrax 300 TRX300 (1988-2000)
Reference OE/OEM Part Numbers:
- 16100-HC4-013
- 16100-HC4-033
- 16100-HC4-750
- 16100-HC4-840
- 16211-HC4-003
- 17910-HC5-970
- 17254-HC5-900

Figure 3.1: Applicable vehicle models for this carburetor kit.

Figure 3.2: Manufacturer Part Numbers for cross-referencing.
4. Safety Information
Always prioritize safety when working on your vehicle. Failure to follow safety precautions can result in injury or damage to the vehicle.
- Ensure the vehicle is turned off, cooled down, and the battery is disconnected before starting any work.
- Work in a well-ventilated area to avoid inhaling fuel fumes.
- Wear appropriate personal protective equipment (PPE), including safety glasses and gloves.
- Keep a fire extinguisher nearby when working with fuel.
- Dispose of old fuel and parts according to local regulations.
- If you are unsure about any step, consult a qualified mechanic.
5. Setup and Installation
This section outlines the general steps for installing the carburetor kit. Specific procedures may vary slightly depending on your exact vehicle model. Refer to your vehicle's service manual for detailed instructions.
5.1 Preparation
- Park the ATV on a level surface and engage the parking brake.
- Turn off the engine and allow it to cool completely.
- Turn the fuel petcock to the "OFF" position.
- Disconnect the negative terminal of the battery.
- Gather all necessary tools, including screwdrivers, wrenches, pliers, and a drain pan for fuel.
5.2 Removing the Old Carburetor
- Locate the carburetor on your ATV. It is typically situated between the air filter box and the engine intake manifold.
- Carefully disconnect the fuel line from the carburetor. Be prepared for some fuel spillage and catch it in a drain pan.
- Disconnect the throttle cable and choke cable (if applicable) from the carburetor. Note their routing for reinstallation.
- Loosen the clamps securing the carburetor to the air intake boot and the engine intake manifold.
- Gently remove the old carburetor. Inspect the intake manifold boot for cracks or damage; replace if necessary.
5.3 Installing the New Carburetor Kit
- Install New Intake Manifold Boot: If replacing, install the new intake manifold boot onto the engine intake port, ensuring a secure fit. Tighten the clamp.
- Install New Air Filter: Replace the old air filter with the new one provided. Ensure it is properly seated in the airbox.
- Install New Fuel Filter: Cut the fuel line and install the new fuel filter in the correct flow direction (indicated by an arrow on the filter). Secure with clamps.
- Install New Spark Plug: Carefully remove the old spark plug and install the new spark plug, ensuring it is torqued to the manufacturer's specifications.
- Mount Carburetor: Position the new carburetor assembly between the air filter boot and the intake manifold boot. Ensure it slides fully into both boots.
- Secure Clamps: Tighten the clamps on both the air filter boot and the intake manifold boot to secure the carburetor. Do not overtighten.
- Connect Throttle Cable: Connect the new throttle cable to the carburetor and route it correctly. Adjust for proper slack as per your vehicle's service manual.
- Connect Fuel Line: Connect the fuel line to the carburetor's fuel inlet.
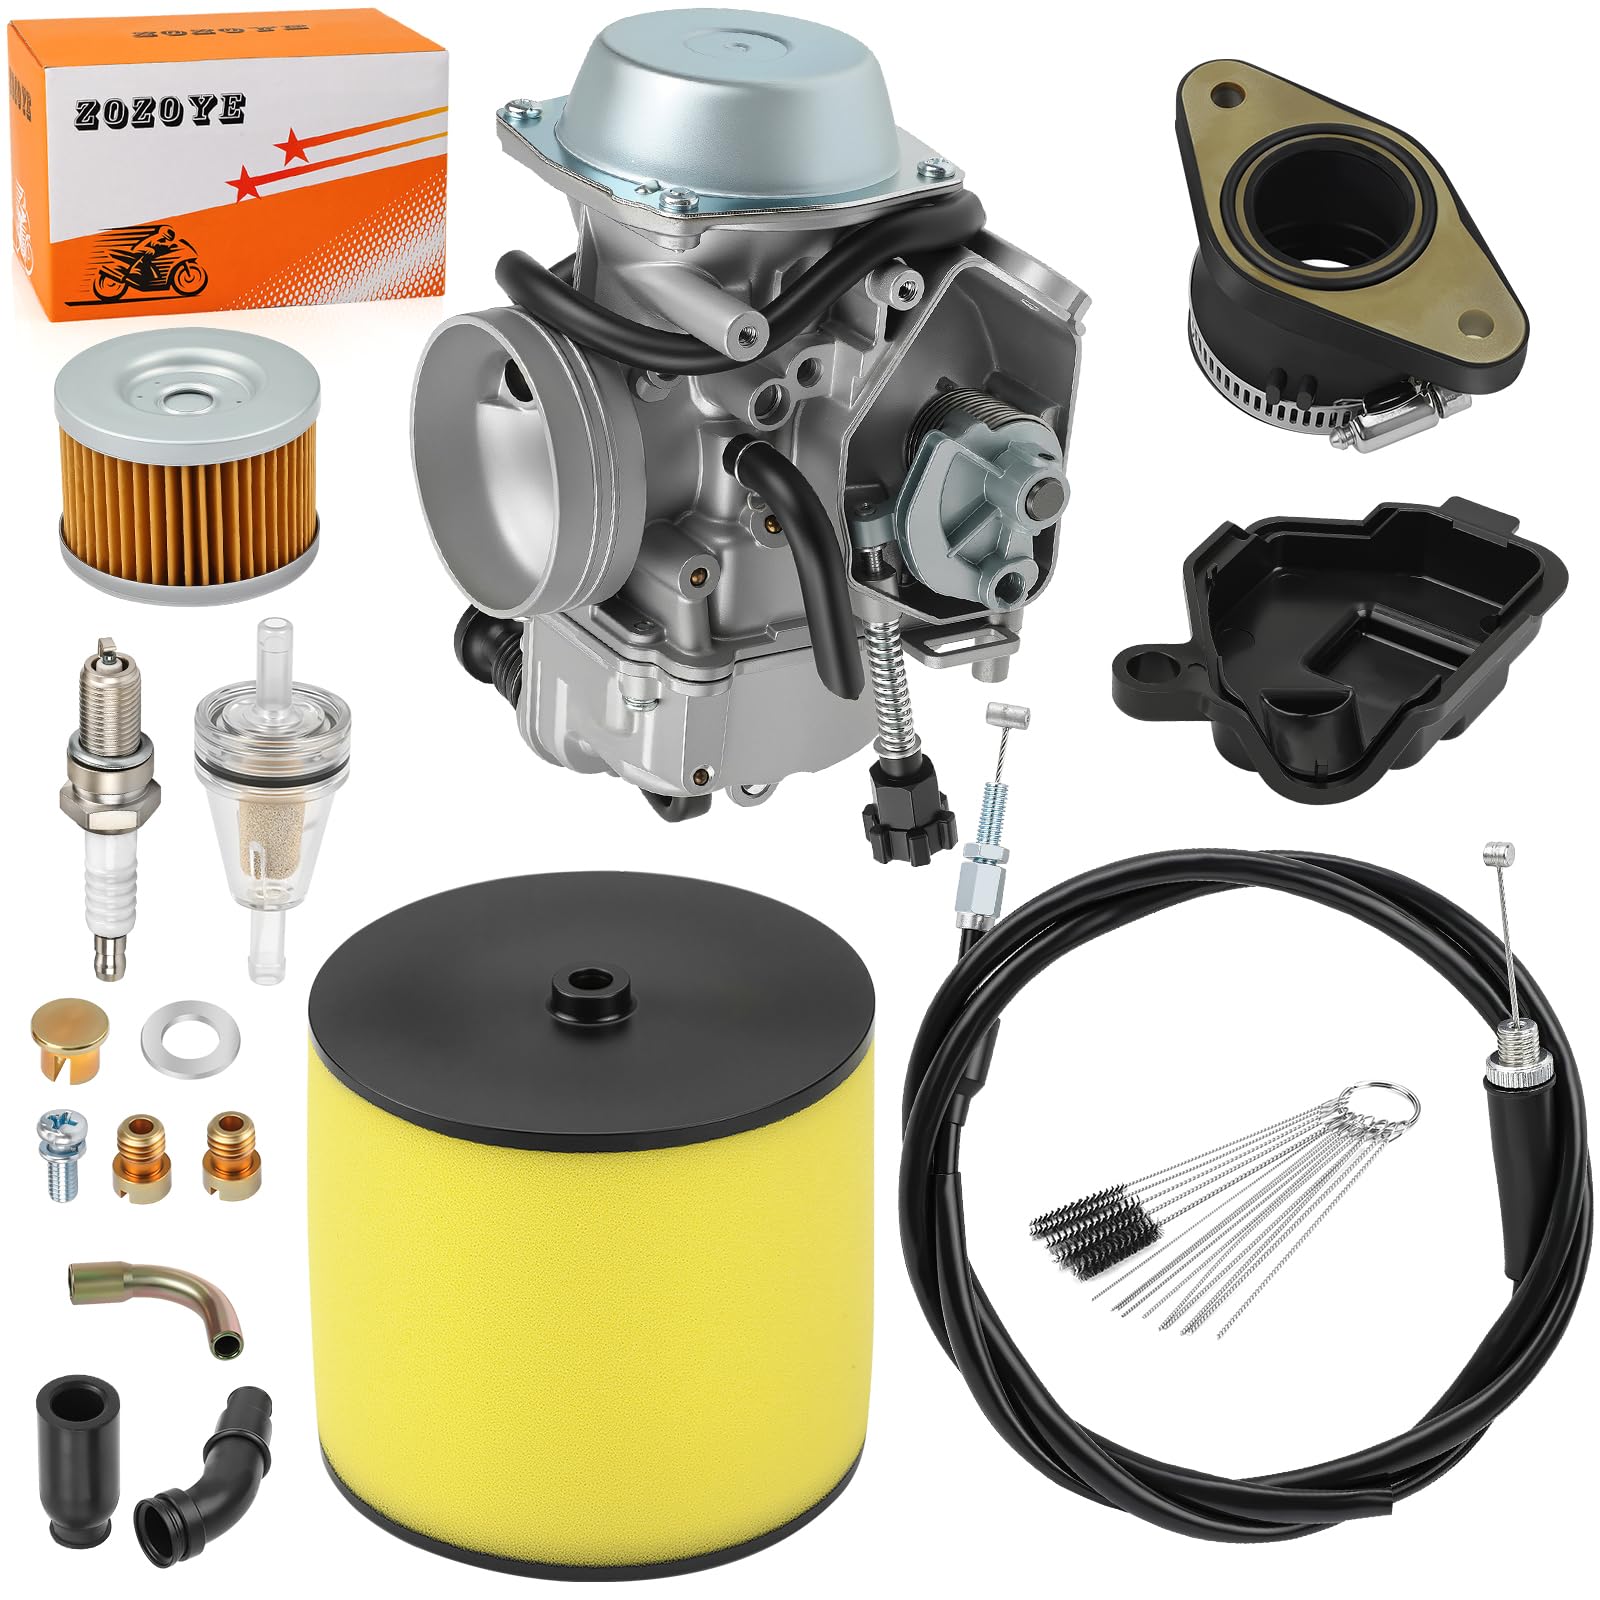
Figure 5.1: Overview of the carburetor kit components before installation.
6. Operating Instructions
6.1 Initial Start-up
- Reconnect the negative battery terminal.
- Turn the fuel petcock to the "ON" or "RES" position. Allow a few moments for the carburetor float bowl to fill with fuel.
- Start the engine according to your ATV's manufacturer instructions. You may need to use the choke for a cold start.
- Allow the engine to warm up.
6.2 Basic Carburetor Adjustment
The carburetor is pre-tuned for general use. Fine-tuning may be required for optimal performance based on altitude, temperature, and specific engine conditions. Refer to your vehicle's service manual for precise adjustment procedures.
- Idle Speed Adjustment: Adjust the idle screw (typically a large, knurled screw) to achieve the recommended idle RPM for your ATV.
- Air/Fuel Mixture Adjustment: The air/fuel mixture screw (often a smaller, recessed screw) controls the richness or leaness of the mixture at idle. Adjust in small increments (1/8 to 1/4 turn) to find the smoothest idle and best throttle response. Turning clockwise leans the mixture, counter-clockwise enriches it.
Note: Improper carburetor adjustment can lead to poor engine performance, reduced fuel efficiency, and potential engine damage.

Figure 6.1: Detailed views of the carburetor assembly.
7. Maintenance
Regular maintenance of your carburetor kit components ensures longevity and optimal engine performance.
- Air Filter: Inspect and clean the air filter regularly, especially after riding in dusty conditions. Replace if damaged.
- Fuel Filter: Replace the fuel filter annually or if you notice reduced fuel flow or contamination.
- Spark Plug: Inspect the spark plug periodically for wear and proper gap. Replace as needed.
- Carburetor Cleaning: If the engine experiences rough idling, poor acceleration, or starting issues, the carburetor may require cleaning. Use the provided clean brushes and a suitable carburetor cleaner. Disassemble carefully, clean all jets and passages, and reassemble.
- Throttle Cable: Lubricate the throttle cable periodically to ensure smooth operation and prevent sticking. Check for fraying or damage.
- Oil Filter: Replace the oil filter during every oil change, as recommended by your ATV's manufacturer.

Figure 7.1: Key components requiring regular inspection and maintenance.
8. Troubleshooting
This section provides solutions to common issues you might encounter. For complex problems, consult a professional mechanic.
| Problem | Possible Cause | Solution |
|---|---|---|
| Engine won't start | No fuel, clogged fuel filter, faulty spark plug, incorrect choke setting. | Check fuel level and petcock position. Replace fuel filter. Inspect/replace spark plug. Adjust choke. |
| Rough idle or stalling | Dirty carburetor jets, improper air/fuel mixture, vacuum leak. | Clean carburetor. Adjust air/fuel mixture screw. Check intake manifold boot for leaks. |
| Poor acceleration/lack of power | Clogged air filter, restricted fuel flow, incorrect jetting. | Clean/replace air filter. Check fuel filter and lines. Consult service manual for jetting. |
| Fuel leaks | Loose fuel line connections, damaged float bowl gasket, stuck float. | Tighten fuel line clamps. Inspect/replace gaskets. Clean float needle and seat. |
9. Specifications
Key specifications for the zozoye Carburetor Kit components:
- Brand: zozoye
- Model Numbers: 16100-HC4-033, 16100-HC4-750
- Manufacturer Part Number: 16100-HC4-033
- Included Components: Carburetor Assembly, Intake Manifold Boot, Throttle Cable, Air Filter, Oil Filter, Fuel Filter, Spark Plug, Clean Brushes
- Exterior Finish: Chrome (on certain components)

Figure 9.1: Dimension drawing of key components.
10. Warranty and Support
This zozoye product comes with a manufacturer's warranty.
- Warranty Period: 365 Days from the date of purchase.
- Coverage: The warranty covers defects in materials and workmanship under normal use.
- Contact Support: For warranty claims, technical assistance, or any questions regarding this product, please contact the zozoye customer service through your purchase platform.