
Introduction
This manual provides essential instructions for the proper installation, usage, and maintenance of your ARCCAPTAIN Replacement Lenses for the RL-600LA Welding Helmet. Adhering to these guidelines ensures optimal performance and extends the lifespan of your protective lenses. Please read this manual thoroughly before attempting any replacement procedures.
What's Included
Your ARCCAPTAIN Replacement Lens kit for the RL-600LA Welding Helmet includes the following components:
- 5x Outer Replacement Lenses
- 3x Replacement Side Window Lenses
- 2x Inner Replacement Lenses
Setup: Lens Replacement
Always ensure your welding helmet is clean and free from debris before replacing any lenses. Handle lenses by their edges to avoid fingerprints or scratches on the viewing area. Wear clean gloves if possible.
1. Outer Protective Lens Replacement
The outer protective lens shields the auto-darkening filter from sparks, spatter, and scratches. Replace it when it becomes scratched, pitted, or dirty to maintain clear vision.

Figure 1: Outer Protective Lens Replacement. Gently pry the old outer lens from its retaining clips or frame. Align the new outer lens with the helmet's viewing area and press it firmly into place until it snaps securely into the retaining mechanism.
2. Side Window Protective Lens Replacement
The side window lenses provide peripheral vision. Replace them if they become damaged or obstruct your view.
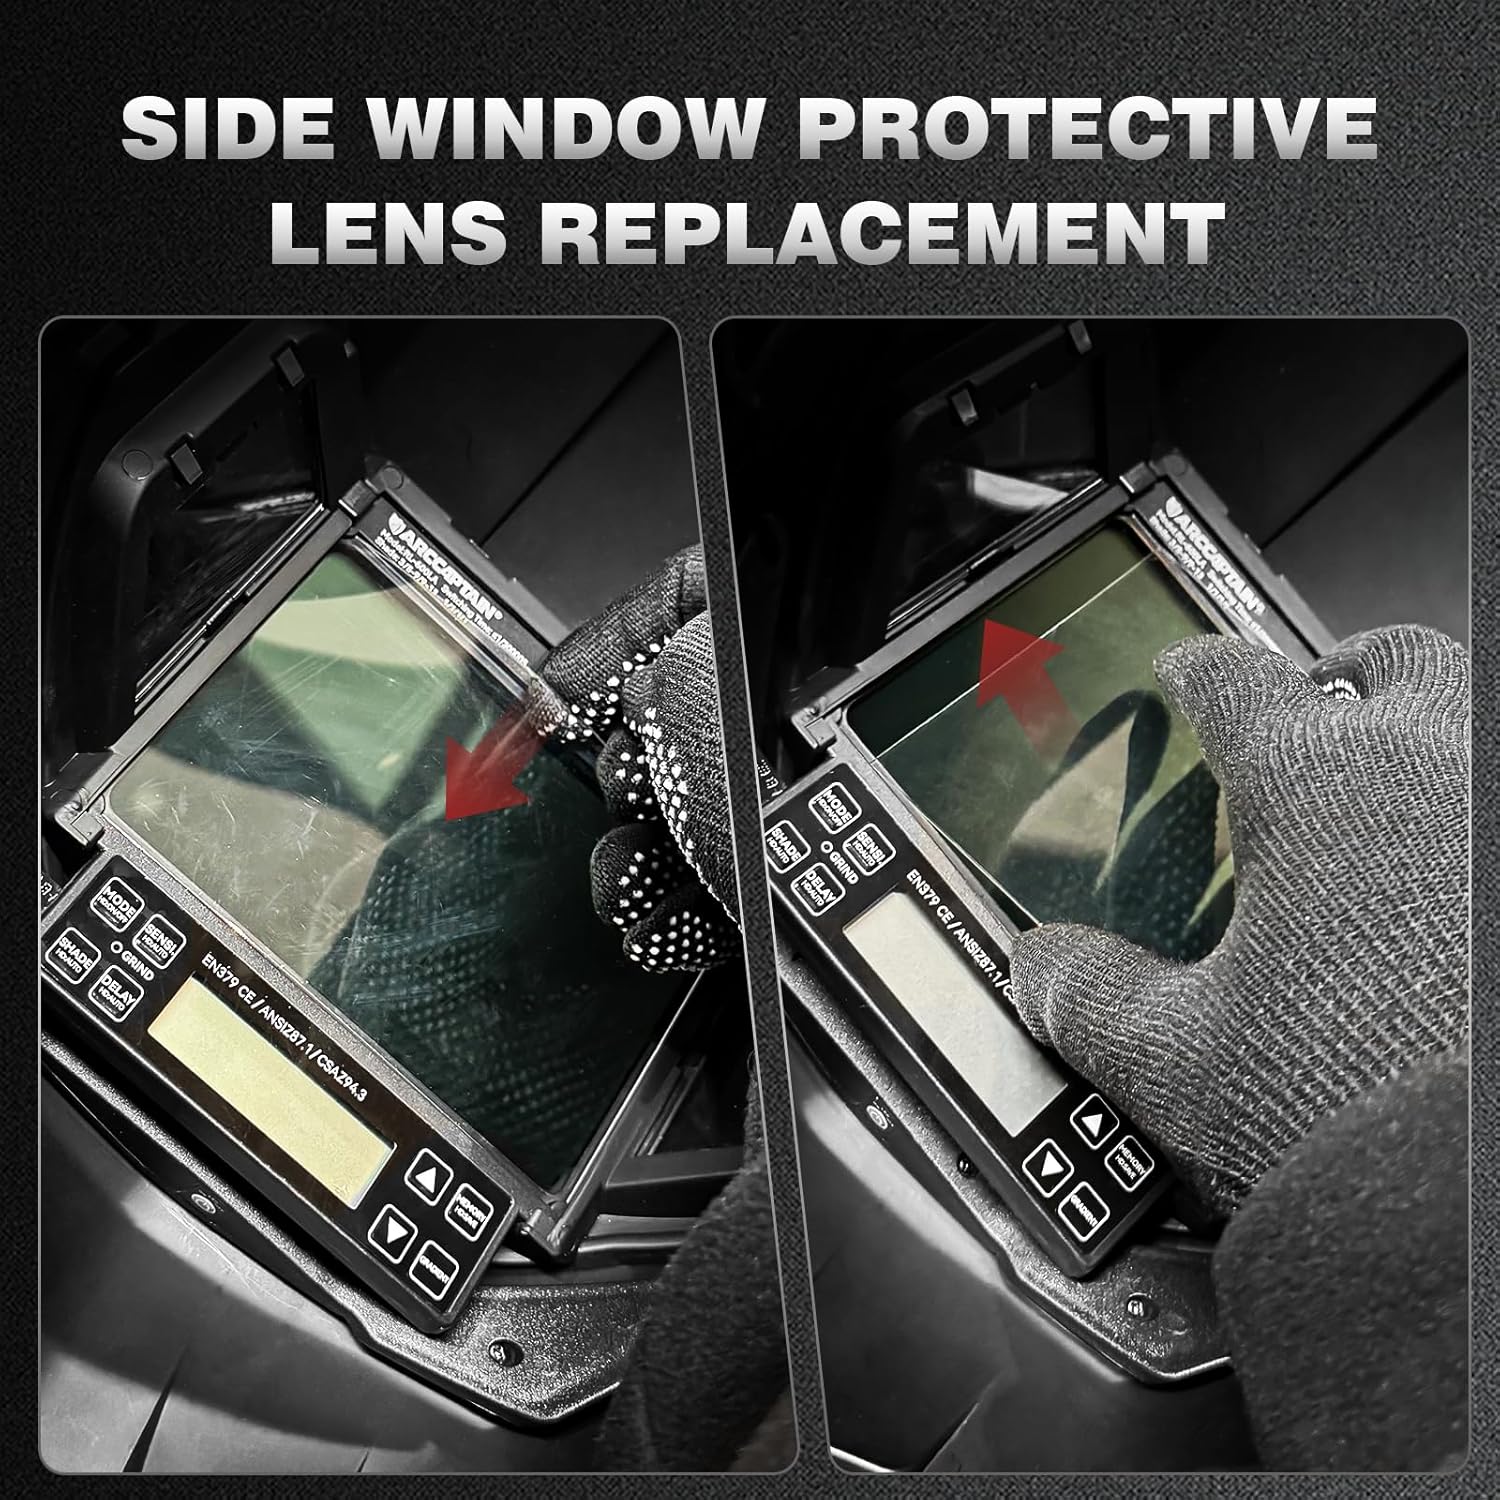
Figure 2: Side Window Protective Lens Replacement. Locate the side window lens on your helmet. Carefully remove the old side window lens by disengaging its clips or frame. Insert the new side window lens, ensuring it sits flush and is securely fastened.
3. Inner Protective Lens Replacement
The inner protective lens protects the auto-darkening filter from the inside. Replace it when it becomes dirty or scratched.
- Open the helmet to access the inside of the auto-darkening filter (ADF) cartridge.
- Carefully unclip or slide out the old inner protective lens.
- Insert the new inner protective lens, ensuring it is correctly oriented and securely seated within its frame.
Usage Guidelines and Post-Installation Check
After replacing any lens, perform the following checks:
- Secure Fit: Ensure all replacement lenses are securely seated and do not wobble or fall out.
- Clear Vision: Verify that your vision through the helmet is clear and unobstructed. Check for any smudges, scratches, or distortions on the new lenses.
- Functionality: If replacing the outer or inner lens of an auto-darkening helmet, ensure the ADF unit functions correctly (e.g., darkens appropriately when exposed to light).
- Blue Light Protection: The replacement lenses are designed with blue light protection. Ensure they are installed correctly to benefit from this feature.
Never use a damaged or improperly installed lens, as this can compromise your eye protection during welding operations.
Maintenance
Proper maintenance ensures the longevity and effectiveness of your replacement lenses.
Cleaning
- Clean lenses regularly with a soft, lint-free cloth.
- For stubborn dirt or smudges, use a mild soap solution or a specialized lens cleaning spray. Avoid abrasive cleaners or solvents.
- Do not use paper towels or rough materials, as they can scratch the lens surface.
- Ensure lenses are completely dry before re-installing them into the helmet.
Storage
- Store unused replacement lenses in their original packaging or a clean, dry, and dust-free environment.
- Avoid exposing lenses to extreme temperatures or direct sunlight for prolonged periods.
Troubleshooting
If you encounter issues after replacing your lenses, consider the following:
- Lens Does Not Fit: Double-check that you have the correct replacement lenses for the ARCCAPTAIN RL-600LA welding helmet. Ensure the lens is oriented correctly.
- Blurred Vision: Inspect the lens for fingerprints, smudges, or scratches. Clean the lens thoroughly. Ensure the lens is seated flush and not warped.
- Lens Falls Out: Re-install the lens, ensuring it is properly engaged with all retaining clips or the frame. If clips are damaged, the helmet frame may need inspection or replacement.
If problems persist, contact ARCCAPTAIN customer support for further assistance.
Specifications
| Brand | ARCCAPTAIN |
| Model Number | RL-600LA |
| Material | Polypropylene (PP) |
| Included Components | 5x Outer Replacement Lenses, 3x Replacement Side Window Lenses, 2x Inner Replacement Lenses |
| EU Spare Part Availability Duration | 10 Years |
Warranty Information
ARCCAPTAIN provides a commitment to product quality. The EU Spare Part Availability Duration for this product is 10 years. For specific warranty terms and conditions, including coverage and claims procedures, please refer to the official ARCCAPTAIN website or contact their customer support directly. Keep your purchase receipt as proof of purchase.
Customer Support
For any questions, technical assistance, or support regarding your ARCCAPTAIN RL-600LA Replacement Lenses, please contact ARCCAPTAIN customer service through their official website or the retailer where the product was purchased.
ARCCAPTAIN Official Website: Visit ARCCAPTAIN Store on Amazon


