
1. Product Overview
This carburetor is engineered as a direct replacement component, meticulously designed to meet the original factory specifications for Generac WheelHouse 5500, 5550, and 8550 generators, model 01646. It ensures reliable performance and is supplied as a complete assembly, ready for immediate installation without requiring additional parts.
Key Features
- Direct replacement for Generac WheelHouse 5500, 5550, 8550 Generator Model# 01646.
- Meets original carburetor dimensions and performance standards.
- Complete carburetor assembly as pictured.
- Manufactured to specification for perfect installation and long-lasting reliable performance.
- Ready to install; no additional parts needed for quick performance restoration.
2. Specifications
| Property | Value |
|---|---|
| Brand | Generic |
| Compatible Model Number | 01646 (Generac WheelHouse 5500, 5550, 8550) |
| Unit Count | 1.0 Count |
| Exterior Finish | Aluminum |
| Included Components | 1x Carburetor Kit |
3. Installation Instructions
Proper installation is critical for the carburetor's performance and the safe operation of your generator. Always ensure the generator is turned off, cooled down, and disconnected from any power source before beginning the installation process.
Required Tools (Typical)
- Wrench set (metric and/or standard)
- Screwdriver set (flathead and Phillips)
- Pliers
- Gasket scraper or razor blade
- Fuel line clamps or pinch-off tool
- Container for draining fuel
Step-by-Step Installation
- Safety First: Disconnect the spark plug wire to prevent accidental engine starting.
- Fuel Shut-off: Turn off the fuel supply valve on the generator.
- Access Carburetor: Remove the air filter housing and air filter to gain access to the carburetor.
- Disconnect Fuel Line: Carefully disconnect the fuel line from the old carburetor. Be prepared for residual fuel spillage and have a suitable container ready.
- Disconnect Linkages: Disconnect any throttle linkages, choke linkages, or wires attached to the old carburetor. Note their positions for reassembly.
- Remove Old Carburetor: Unbolt and carefully remove the old carburetor from the engine. Thoroughly clean any old gasket material from the mounting surfaces on both the engine and the air filter housing.
- Install New Gaskets: Place new gaskets (if provided) onto the mounting studs. Ensure they are correctly oriented and seated.
- Mount New Carburetor: Position the new carburetor onto the mounting studs, ensuring it aligns properly with the gaskets and engine intake.
- Reattach Linkages: Reconnect all throttle and choke linkages, and any wires, ensuring they move freely and are correctly positioned.
- Reconnect Fuel Line: Reconnect the fuel line to the new carburetor. Secure all connections with clamps to prevent leaks.
- Reassemble Air Filter: Reinstall the air filter and air filter housing.
- Reconnect Spark Plug: Reconnect the spark plug wire.
- Leak Check: Turn on the fuel supply valve and carefully check for any fuel leaks around the carburetor and fuel lines. Address any leaks immediately.
- Test Operation: Start the generator according to its manufacturer's instructions and check for proper operation, including smooth idling and responsiveness.
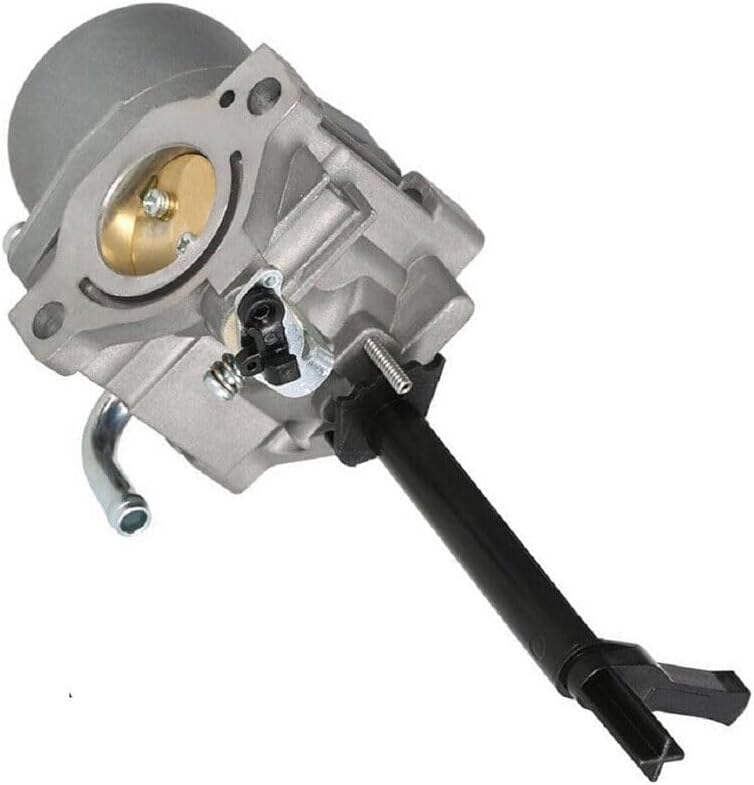
Figure 1: Side view of the carburetor, highlighting the fuel inlet pipe and the mounting bolt holes. Ensure these align correctly during installation.
4. Operation Guidelines
Once correctly installed, the carburetor's primary function is to regulate the precise air-fuel mixture required for the generator engine's combustion. Adhering to proper operating procedures ensures efficient and reliable performance.
Initial Start-up
- Fuel and Oil Check: Before starting, confirm that the generator has adequate fresh fuel and the engine oil level is correct.
- Generator Specific Procedure: Follow your specific generator's starting procedure, which typically involves setting the choke, opening the fuel valve, and engaging the starter (pull cord or electric start).
- Warm-up Period: Allow the engine to run for a few minutes to warm up before applying any electrical load. This helps stabilize engine performance.
Normal Operation
During normal operation, the carburetor automatically adjusts the air-fuel ratio in response to the engine's demand and load. It is important to monitor the generator's performance for any unusual noises, vibrations, or changes in engine speed, which could indicate an issue.
5. Maintenance
Regular maintenance is essential to extend the lifespan of your carburetor and ensure the optimal performance and reliability of your generator. Neglecting maintenance can lead to starting difficulties and reduced efficiency.
Cleaning
- External Inspection: Periodically inspect the carburetor for any accumulation of dirt, debris, or fuel residue on its exterior surfaces.
- External Cleaning: Use a dedicated carburetor cleaner spray to clean external surfaces. Avoid spraying directly into air intakes unless specifically instructed by the generator's manual.
- Internal Cleaning: If the generator exhibits performance issues such as rough running or difficulty starting, a more thorough internal cleaning of the carburetor may be necessary. This often involves partial disassembly. If you are not experienced with carburetor maintenance, it is recommended to consult a professional service technician.
Fuel System Care
- Fresh Fuel: Always use fresh, clean, and appropriate fuel for your generator. Stale or contaminated fuel is a common cause of carburetor issues, leading to deposits and clogged passages.
- Fuel Stabilizer: If the generator will be stored for an extended period (e.g., more than 30 days), consider adding a high-quality fuel stabilizer to the fuel tank to prevent fuel degradation.
- Fuel Filter: If your generator is equipped with a fuel filter, regularly check its condition and replace it according to the generator manufacturer's recommendations.

Figure 2: Angled view of the carburetor, showing the float bowl at the bottom and the throttle linkage mechanism. Regular inspection of these components is recommended.
6. Troubleshooting Common Issues
This section outlines common problems that may arise with carburetor operation and provides potential causes and solutions. Always ensure safety precautions are followed before attempting any troubleshooting or repairs.
| Problem | Possible Cause | Solution |
|---|---|---|
| Engine won't start | No fuel, clogged fuel filter, clogged carburetor jet, faulty spark plug | Check fuel level, replace fuel filter, clean carburetor, replace spark plug |
| Engine runs rough/surges | Dirty carburetor, incorrect air-fuel mixture, old/stale fuel | Clean carburetor, adjust mixture screw (if applicable), use fresh fuel |
| Fuel leaks | Loose fuel line connection, damaged gasket, faulty float needle | Tighten connections, replace gaskets, inspect float assembly for damage |
| Engine lacks power | Partially clogged carburetor, restricted air filter, incorrect engine timing | Clean carburetor, replace air filter, consult generator manual for timing adjustment |

Figure 3: Carburetor with key dimensions, including an overall length of 7.75 inches and an intake diameter of 1.02 inches. These measurements are important for verifying compatibility.
7. Support
For further assistance, technical support, or inquiries regarding this carburetor, please refer to the contact information provided with your Generac WheelHouse generator. Alternatively, it is recommended to consult a qualified small engine service technician for professional diagnosis and repair.


