
1. Important Safety Information
Read all instructions carefully before assembly and use of the trampoline. Failure to follow these instructions may result in serious injury.
- This trampoline is designed for outdoor use only.
- Ensure the trampoline is placed on a level surface, free from obstructions.
- The safety net must be properly installed and secured at all times to prevent falls.
- The edges and poles are padded with EPE foam (14 mm thick) for additional protection.
- Maximum user weight capacity: 50 kg. Designed for use by one child at a time.
- Always supervise children when they are using the trampoline.
- Do not attempt somersaults or other dangerous maneuvers.
- Remove shoes and sharp objects before using the trampoline.
2. Product Overview and Components
The Devoko Outdoor Trampoline provides a safe and enjoyable jumping experience. Key components include:
- Galvanized Steel Frame: Robust 28 mm steel tubes with a U-shaped design for stability and T-shaped connectors for reinforcement. Features 1.1 mm thick galvanized material with zinc and anti-corrosion coating.
- Jumping Mat: 270 g/m² PE material, UV-resistant, stitched in eight rows for maximum safety and tear resistance.
- Safety Net: 90 g/m² polyethylene net, 150 cm high, with additional zippers and safety clips.
- Springs: 36 high-strength galvanized steel springs, 12 cm long, securely attached to the jumping mat.
- Edge Cover: Padded with 14 mm thick EPE foam.
- Ladder: Easy-access ladder for children with stable steps and anti-slip feet.
- Shoe Net: Side net for storing small items or shoes before jumping.
- Spring Hook Tool: Included for easier spring installation.
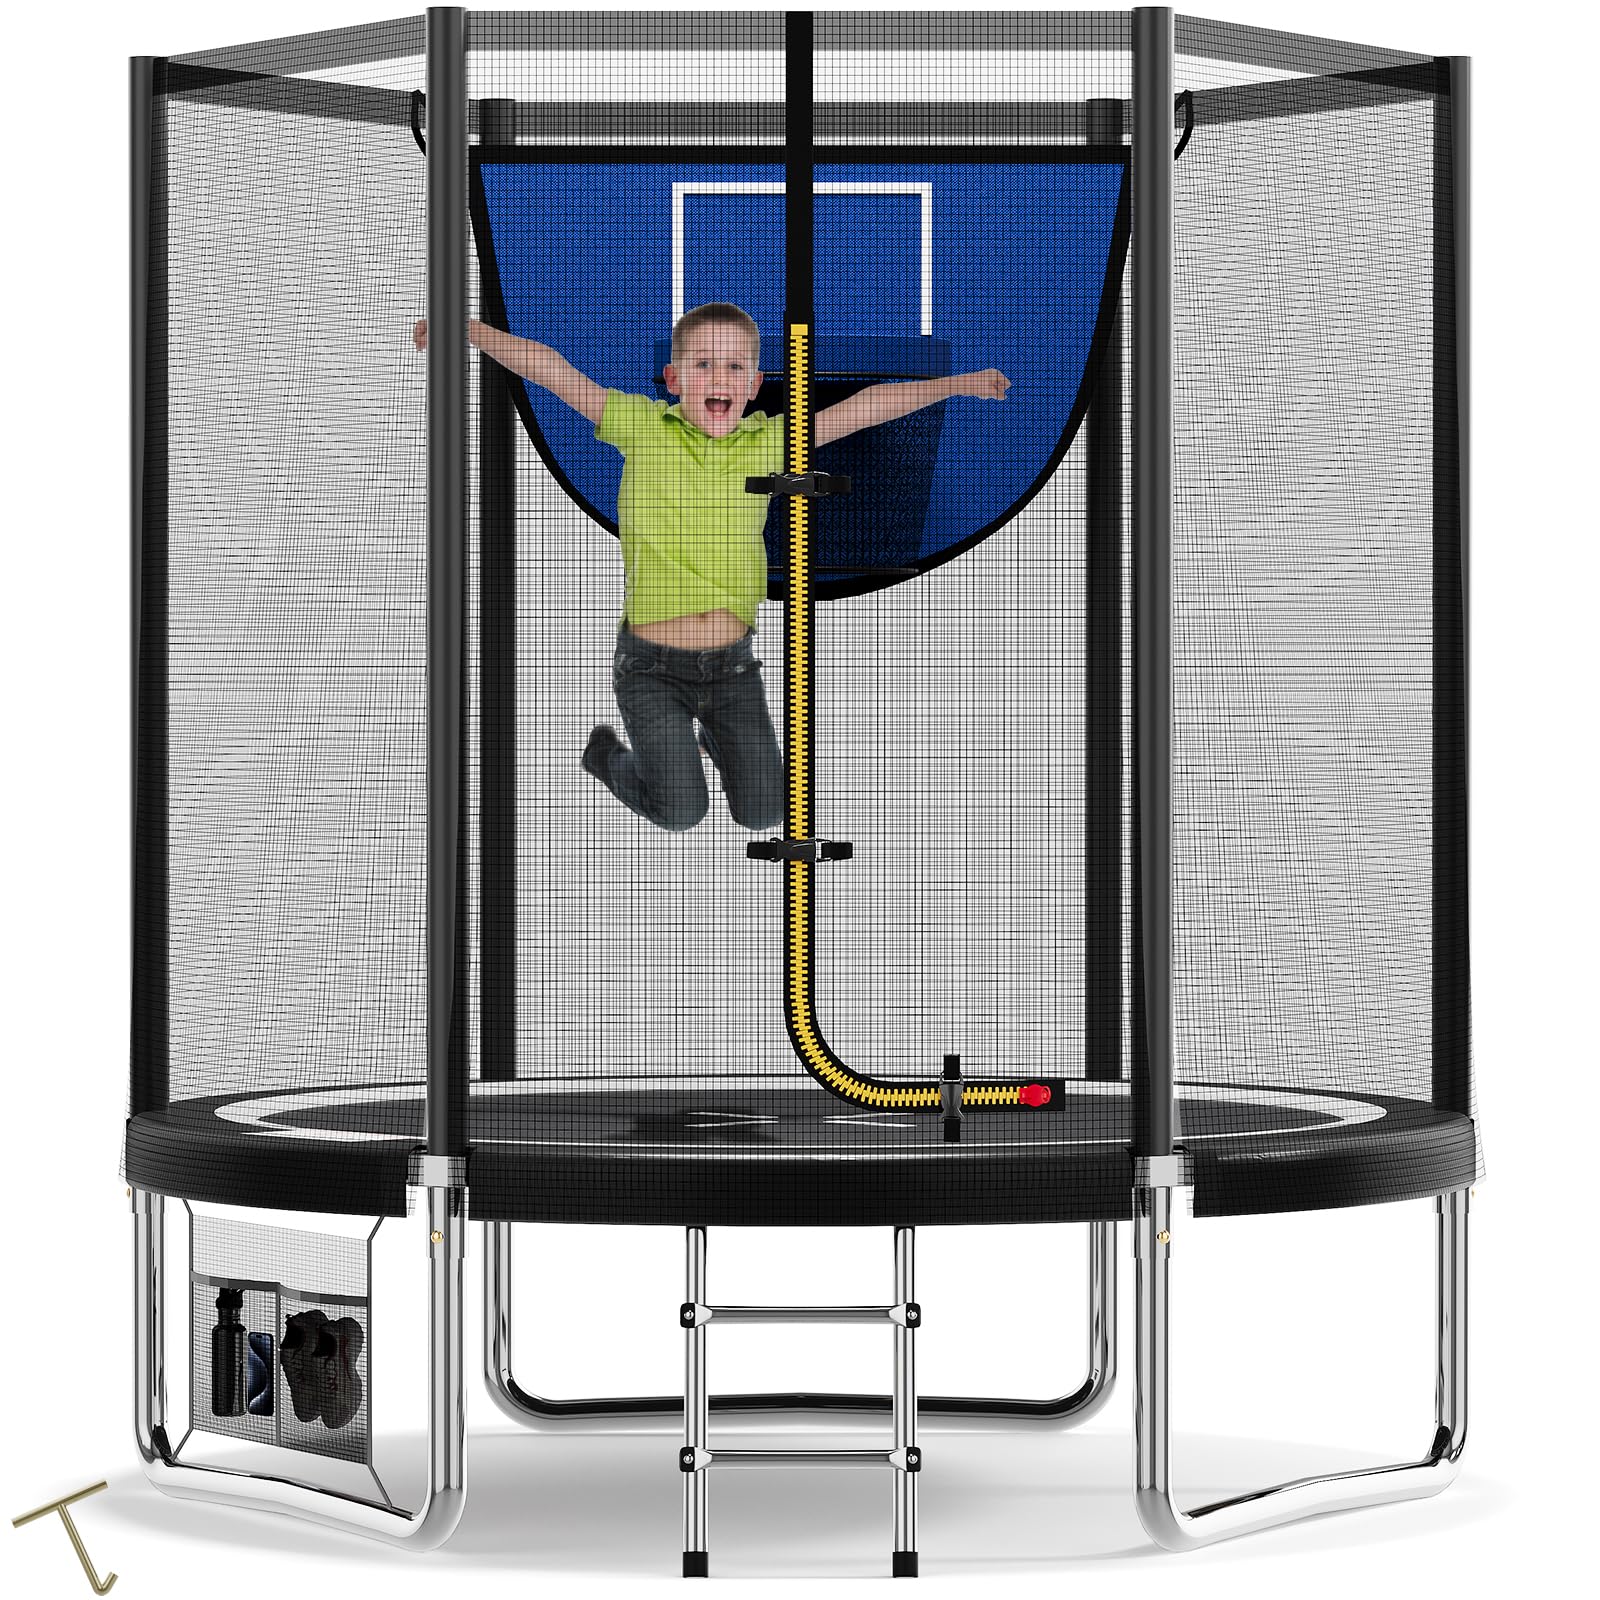
Image: Devoko 183 cm Outdoor Trampoline with Safety Net and optional Basketball Hoop.

Image: Detailed view of the trampoline's robust W-shaped leg structure and galvanized steel tubing, highlighting zinc and anti-corrosion coatings.

Image: Close-up of the 36 high-strength, 12 cm long galvanized steel springs used in the trampoline for enhanced rebound.

Image: Various high-quality components including spring hooks, a shoe net, a double zipper with safety clip for the enclosure, and a waterproof spring cover.
3. Setup and Assembly Instructions
Assembly typically requires two adults and can be completed in less than 2 hours. A detailed instruction manual in 5 languages and a pair of assembly gloves are included with the product. Follow these general steps:
- Unpack Components: Carefully remove all parts from the packaging and verify against the parts list in the included manual.
- Assemble Frame: Connect the galvanized steel tubes to form the base frame. Ensure all connections are secure.
- Attach Legs: Securely attach the W-shaped legs to the main frame.
- Install Jumping Mat and Springs: Lay the jumping mat onto the frame. Use the provided spring hook tool to attach the 36 springs evenly around the frame to the jumping mat. This step requires tension and may be easier with two people.
- Install Edge Cover: Place the padded edge cover over the springs and frame to prevent contact with springs.
- Assemble Safety Net Poles: Attach the padded poles for the safety net to the frame.
- Install Safety Net: Secure the safety net to the poles and the jumping mat frame. Ensure the zipper and safety clips are functional.
- Attach Ladder: Hook the ladder securely to the trampoline frame.
- Optional Basketball Hoop Assembly: If included, follow the specific instructions for assembling and attaching the basketball hoop.

Image: Visual guide for installing the optional basketball hoop, showing component parts and assembly sequence.

Image: The easy-access ladder for children, featuring stable, anti-slip steps for safe entry and exit.
4. Operating Instructions
To ensure a safe and enjoyable experience, follow these operating guidelines:
- Only one user should be on the trampoline at a time.
- Always enter and exit the trampoline using the provided ladder.
- Ensure the safety net zipper is fully closed and secured with clips before jumping.
- Jump in the center of the mat for optimal balance and safety.
- Avoid jumping too high or attempting stunts that could lead to loss of control.
- Do not use the trampoline in wet or windy conditions.
- Keep the area around the trampoline clear of obstacles.
- Use the side shoe net to store footwear and other small items.
5. Maintenance
Regular maintenance will extend the life of your trampoline and ensure continued safety:
- Inspect Regularly: Before each use, check all components for wear, damage, or loose parts. Pay close attention to the frame, springs, jumping mat, safety net, and padding.
- Clean Components: Clean the jumping mat and safety net with mild soap and water. Avoid harsh chemicals.
- Check Frame: Ensure all frame connections are tight. The galvanized steel frame is designed for durability and corrosion resistance, but regular inspection is recommended.
- Springs: Verify that all 36 springs are securely attached and not stretched or damaged.
- Padding: Ensure the EPE foam padding on the edges and poles is intact and securely fastened. Replace if damaged.
- UV Protection: The jumping mat is UV-resistant, but prolonged exposure to extreme sunlight can still cause degradation over many years. Consider a weather cover if storing for extended periods.
- Winter Storage: In regions with harsh winters, it is recommended to disassemble and store the trampoline indoors to prevent damage from snow and ice.
6. Troubleshooting
This section addresses common issues you might encounter:
| Problem | Possible Cause | Solution |
|---|---|---|
| Trampoline feels unstable. | Uneven ground; loose frame connections. | Relocate to a level surface. Check and tighten all frame bolts and connectors. |
| Jumping mat has reduced bounce. | Damaged or stretched springs; worn jumping mat. | Inspect all springs for damage and replace any faulty ones. Check the jumping mat for tears or excessive stretching. |
| Safety net is loose or torn. | Improper installation; material wear. | Ensure the net is correctly attached to all poles and the frame. Replace the safety net if torn or significantly damaged. |
| Difficulty assembling springs. | High tension required. | Use the provided spring hook tool. Assembly is easier with two adults, alternating spring installation around the mat. |
7. Specifications
| Feature | Detail |
|---|---|
| Model | Devoko Outdoor Trampoline |
| Diameter | 183 cm (Frame Size) |
| Overall Dimensions (L x W x H) | 183 x 183 x 195 cm |
| Jumping Mat Diameter | 144 cm (approximate, based on image) |
| Safety Net Height | 150 cm |
| Frame Material | Galvanized Steel (28 mm tubes, 1.1 mm thickness) |
| Jumping Mat Material | 270 g/m² UV-resistant Polypropylene (PP) |
| Number of Springs | 36 |
| Spring Length | 12 cm |
| Padding Material | 14 mm EPE Foam |
| Safety Net Material | 90 g/m² Polyethylene (PE) |
| Maximum Load Capacity | 50 kg (for 1 child) |
| Country of Origin | China |

Image: Dimensional diagram of the 183 cm trampoline, indicating overall height, safety net height, mat height, and maximum weight capacity.
8. Warranty and Support
Devoko is committed to providing quality products. While specific warranty details are not provided here, please refer to your purchase documentation for warranty information.
For any questions regarding assembly, operation, maintenance, or to obtain replacement parts, please contact Devoko customer support. The product includes original spare parts availability for components such as the safety net, jumping mat, springs, or frame parts.
Contact information can typically be found on the product packaging or through your retailer's customer service portal.
