
1. Important Safety Information
Before operating the JOROTO MD85 Adjustable Weight Bench, please read and understand all instructions and warnings. Failure to follow these instructions may result in serious injury or equipment damage.
- Consult a physician before starting any exercise program.
- Keep children and pets away from the equipment during use.
- Place the bench on a flat, stable surface. Ensure adequate space around the equipment.
- Inspect the bench for loose parts, damage, or wear before each use. Do not use if damaged.
- Ensure all adjustment pins and locking mechanisms are securely engaged before beginning an exercise.
- Do not exceed the maximum weight capacity of 990 lbs (450 kg).
- Use proper form and controlled movements during exercises.
- Stop exercising immediately if you feel pain, dizziness, or discomfort.
2. Package Contents
Verify that all components are present before beginning assembly. If any parts are missing or damaged, contact JOROTO customer support.
- Main Bench Frame with Storage
- Adjustable Backrest Pad
- Seat Pad
- Cable Pulley Arms (2)
- Foot Hook Assembly
- Resistance Bands/Cables (if included)
- Assembly Hardware (bolts, washers, nuts)
- Assembly Tools (wrenches, Allen keys)
- User Manual
3. Assembly Instructions
Assembly of the JOROTO MD85 bench is designed to be straightforward and typically takes less than 15 minutes. Follow these general steps:
- Unpack Components: Carefully remove all parts from the packaging and lay them out on a clean, flat surface.
- Attach Backrest and Seat: Secure the backrest and seat pads to the main frame using the provided hardware. Ensure they are firmly attached.
- Install Cable Pulley Arms: Attach the cable pulley arms to the designated points on the bench frame. Ensure the swivel mechanism is free to move.
- Mount Foot Hook Assembly: Install the foot hook assembly to the front of the bench.
- Final Inspection: Double-check all bolts and connections to ensure they are tight and secure. Test all adjustable mechanisms for proper function.

4. Operating Instructions
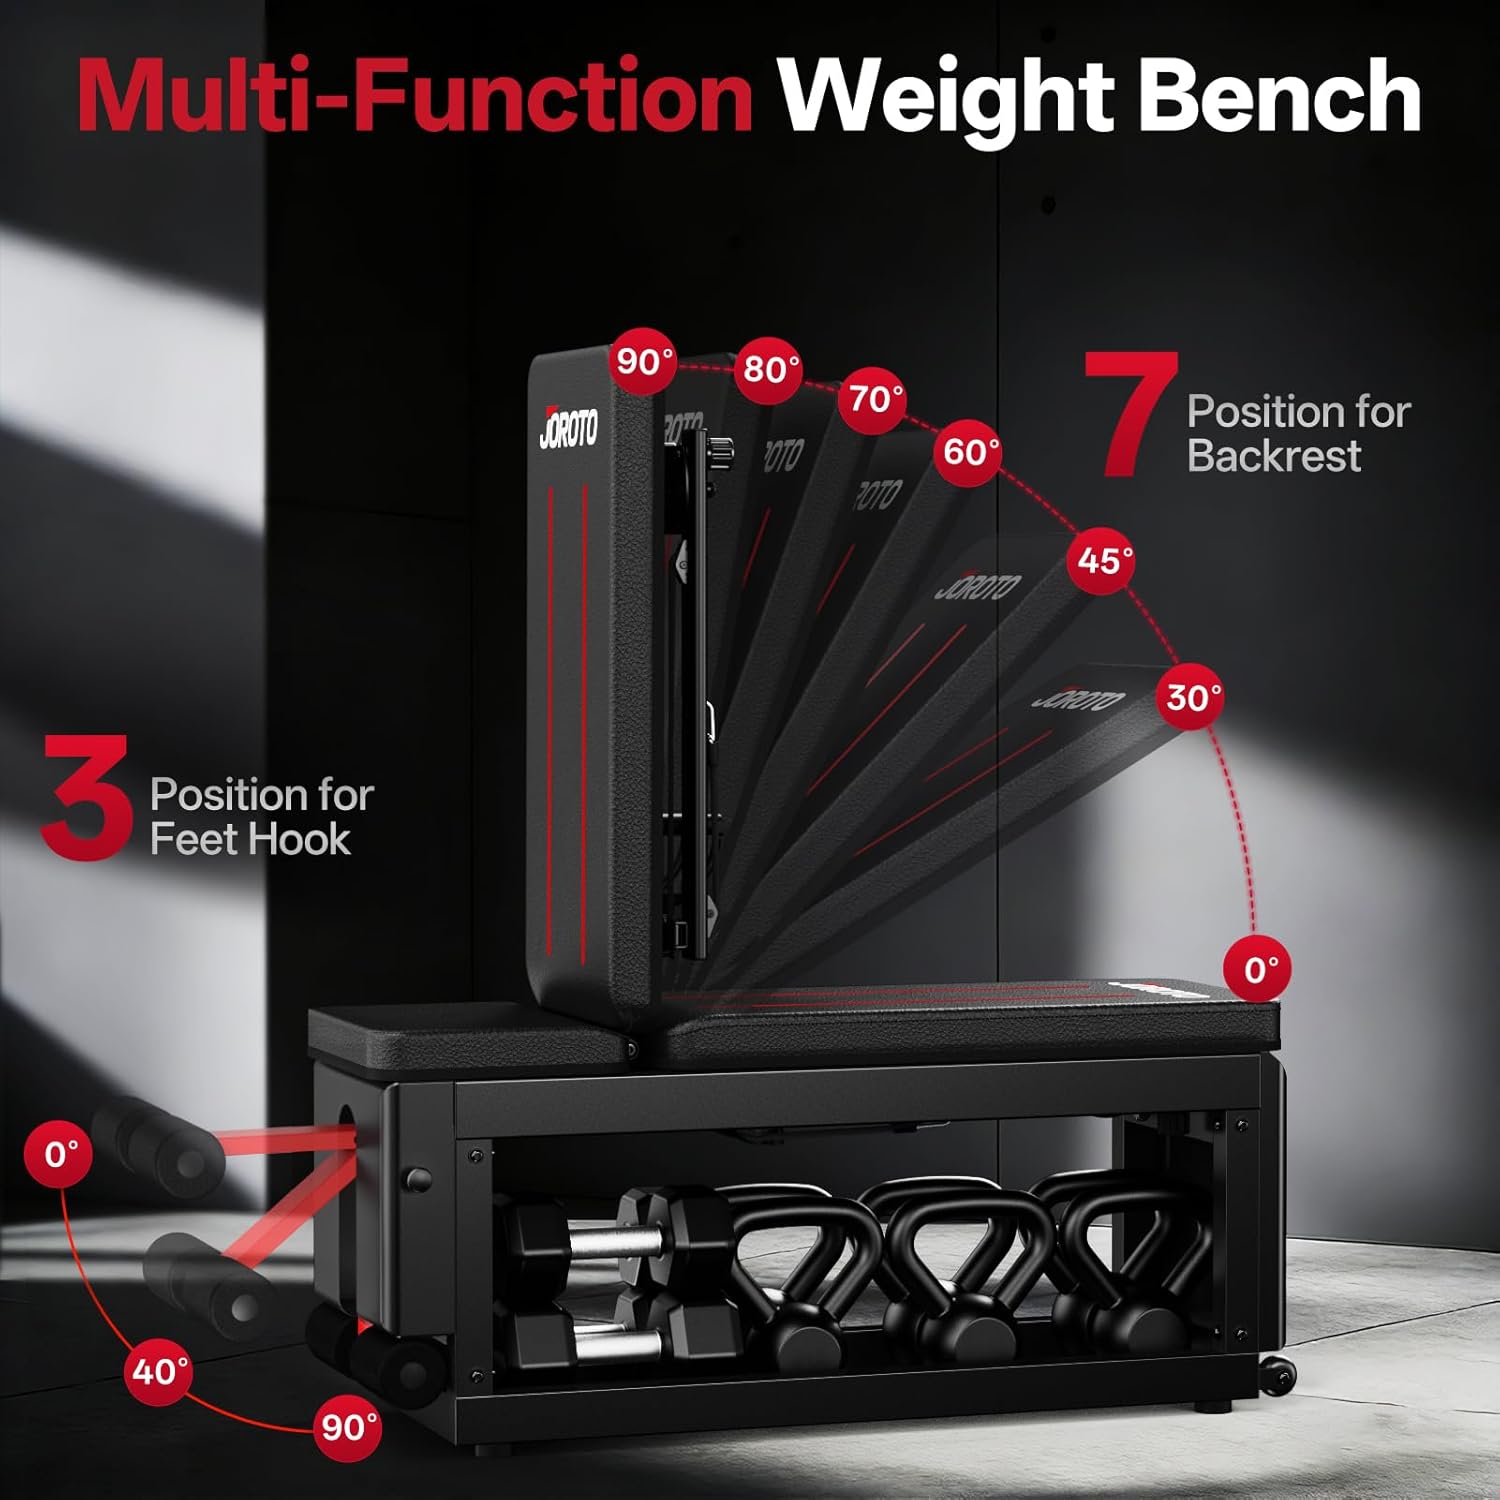
4.1 Adjusting the Backrest
The backrest offers 6 adjustable angles to accommodate various exercises, from flat to incline positions. To adjust:
- Lift the backrest slightly to disengage the locking pin.
- Move the backrest to the desired angle.
- Ensure the locking pin securely re-engages into one of the 6 available slots.
4.2 Adjusting the Foot Hook
The foot hook assembly has 3 positions for leg support during exercises like sit-ups or decline presses.
- Locate the adjustment pin on the foot hook assembly.
- Pull the pin out and slide the foot hook to the desired position.
- Release the pin, ensuring it locks into place.
4.3 Using the Cable Crossover System
The integrated cable crossover system features 9-position swivel pulley arms and a 4-level hook for resistance adjustment.
- Arm Position: Adjust the angle of the pulley arms by pulling the adjustment pin and rotating them to one of the 9 available positions (e.g., 0°, 22.5°, 45°, 67.5°, 90°, 112.5°, 135°, 157.5°, 180°). Ensure the pin locks securely.
- Resistance Adjustment: The 4-level hook allows for varying cable tension. Attach the resistance band or cable to the desired hook level (1-4) to increase or decrease resistance.
- Attachment: Connect your preferred handles or accessories to the carabiners on the cable ends.

4.4 Integrated Storage
The bench includes a spacious under-bench storage compartment (4.7 cu ft capacity) for dumbbells, kettlebells, and other workout accessories. This helps maintain an organized workout area.

4.5 Mobility
Equipped with smooth-rolling wheels and side handles, the bench can be easily moved by one person, even when loaded with weights in the storage compartment.

4.6 Exercise Examples
The JOROTO MD85 supports a wide range of exercises for full-body strength training. Examples include:
- Dumbbell Flyes (upper and lower chest)
- Bench Press (chest)
- Dumbbell Rows (back)
- Shoulder Presses (shoulders)
- Bicep Curls (arms)
- Tricep Extensions (arms)
- Sit-ups (core)
- Cable Crossover exercises (chest, shoulders, back)

5. Maintenance
Regular maintenance ensures the longevity and safe operation of your JOROTO MD85 bench.
- Cleaning: Wipe down the bench pads and frame with a damp cloth after each use to remove sweat and dirt. Use mild soap if necessary, then wipe dry. Avoid abrasive cleaners.
- Inspection: Periodically check all bolts, nuts, and moving parts for tightness. Tighten any loose fasteners. Inspect cables and pulleys for signs of wear or fraying.
- Storage: Store the bench in a dry, cool place away from direct sunlight and extreme temperatures.
6. Troubleshooting
| Problem | Possible Cause | Solution |
|---|---|---|
| Bench feels unstable or wobbly. | Loose fasteners; uneven floor. | Tighten all assembly bolts. Ensure the bench is on a level surface. Adjust leveling feet if present. |
| Backrest or foot hook not locking securely. | Pin not fully engaged; obstruction. | Ensure the adjustment pin is fully extended into the desired slot. Check for any debris obstructing the mechanism. |
| Cable crossover resistance feels too weak or too strong. | Incorrect resistance hook level; worn cables. | Adjust the cable to a different hook level (1-4) for desired tension. Inspect cables for wear and replace if necessary. |
| Difficulty moving the bench. | Wheels obstructed; excessive weight in storage. | Clear any obstructions around the wheels. Reduce weight in the storage compartment if it's excessively heavy. |
7. Specifications
- Brand: JOROTO
- Model: MD85
- Item Weight: 59 Pounds
- Material: Alloy Steel, Leather
- Product Dimensions (D x W x H): 43.3" x 11.8" x 18.5"
- Frame Material: Alloy Steel
- Weight Limit: 990 Pounds (450 kg)
- Backrest Angles: 6 adjustable positions
- Foot Hook Positions: 3 adjustable positions
- Cable Pulley Arms: 9-position swivel adjustment
- Cable Resistance: 4-level hook adjustment
- Storage Capacity: 4.7 cu ft (under-bench compartment)

8. Warranty and Support
JOROTO provides a 1-year warranty for replacement parts on the MD85 Adjustable Weight Bench. For any questions, concerns, or assistance, please contact JOROTO customer support. Our team is available 24/7 to provide reliable after-sales service.
Contact Information: Refer to the contact details provided on the JOROTO official website or your purchase documentation.