
Introduction
Thank you for choosing the HOMCOM Narrow 3-Door Shoe Cabinet with Mirror. This manual provides important information for the safe assembly, operation, and maintenance of your new furniture. Please read it thoroughly before use and keep it for future reference.
Safety Instructions
- Anti-Tip System: It is crucial to fix the furniture to the wall using the provided anti-tip system to prevent accidents and ensure stability.
- Weight Limits: Do not exceed the maximum weight capacity of 5 kg per compartment, 20 kg on the top surface, and 30 kg total.
- Assembly: Assemble the unit on a soft, clean surface to prevent scratches. Ensure all screws and fasteners are securely tightened before use.
- Children Safety: Keep small parts and packaging materials away from children. Do not allow children to climb on or play with the cabinet.
- Placement: Place the cabinet on a flat, stable surface. Avoid placing it in areas with high humidity or direct sunlight.

The anti-tip system is essential for safety. Always secure the cabinet to a wall to prevent it from falling over, especially in households with children or pets.
Package Contents
Before beginning assembly, please check that all parts listed in the instruction manual are present and undamaged. If any parts are missing or damaged, please contact customer service.
- Wooden panels (various sizes for frame, back, and drawers)
- Mirror panels for drawer fronts
- Tilt-out shoe mechanisms (3 sets)
- Assembly hardware (screws, dowels, cam locks, anti-tip kit)
- Instruction manual
Assembly Instructions
Follow these steps carefully for proper assembly. It is recommended to have two people for assembly.
- Prepare the Base: Attach the feet or protective pads to the bottom panel.
- Assemble the Frame: Connect the side panels to the top and bottom panels using the provided hardware (dowels, cam locks, and screws). Ensure all connections are tight.
- Install Back Panels: Slide or nail the back panels into the grooves on the frame.
- Assemble Drawers: For each of the three tilt-out compartments, attach the tilt-out mechanism to the drawer front and the side panels of the cabinet.
- Attach Mirror Panels: Securely attach the mirror panels to the front of each tilt-out drawer.
- Final Checks: Ensure all parts are securely fastened and the cabinet is stable. Install the anti-tip device to the wall.

Assembly Video Guide
Video: A detailed assembly guide for a similar 3-door shoe cabinet. This video demonstrates the step-by-step process of putting together the cabinet, including attaching panels, installing hardware, and fitting the tilt-out mechanisms. While the specific model may vary slightly, the general assembly principles apply.
Operating Instructions
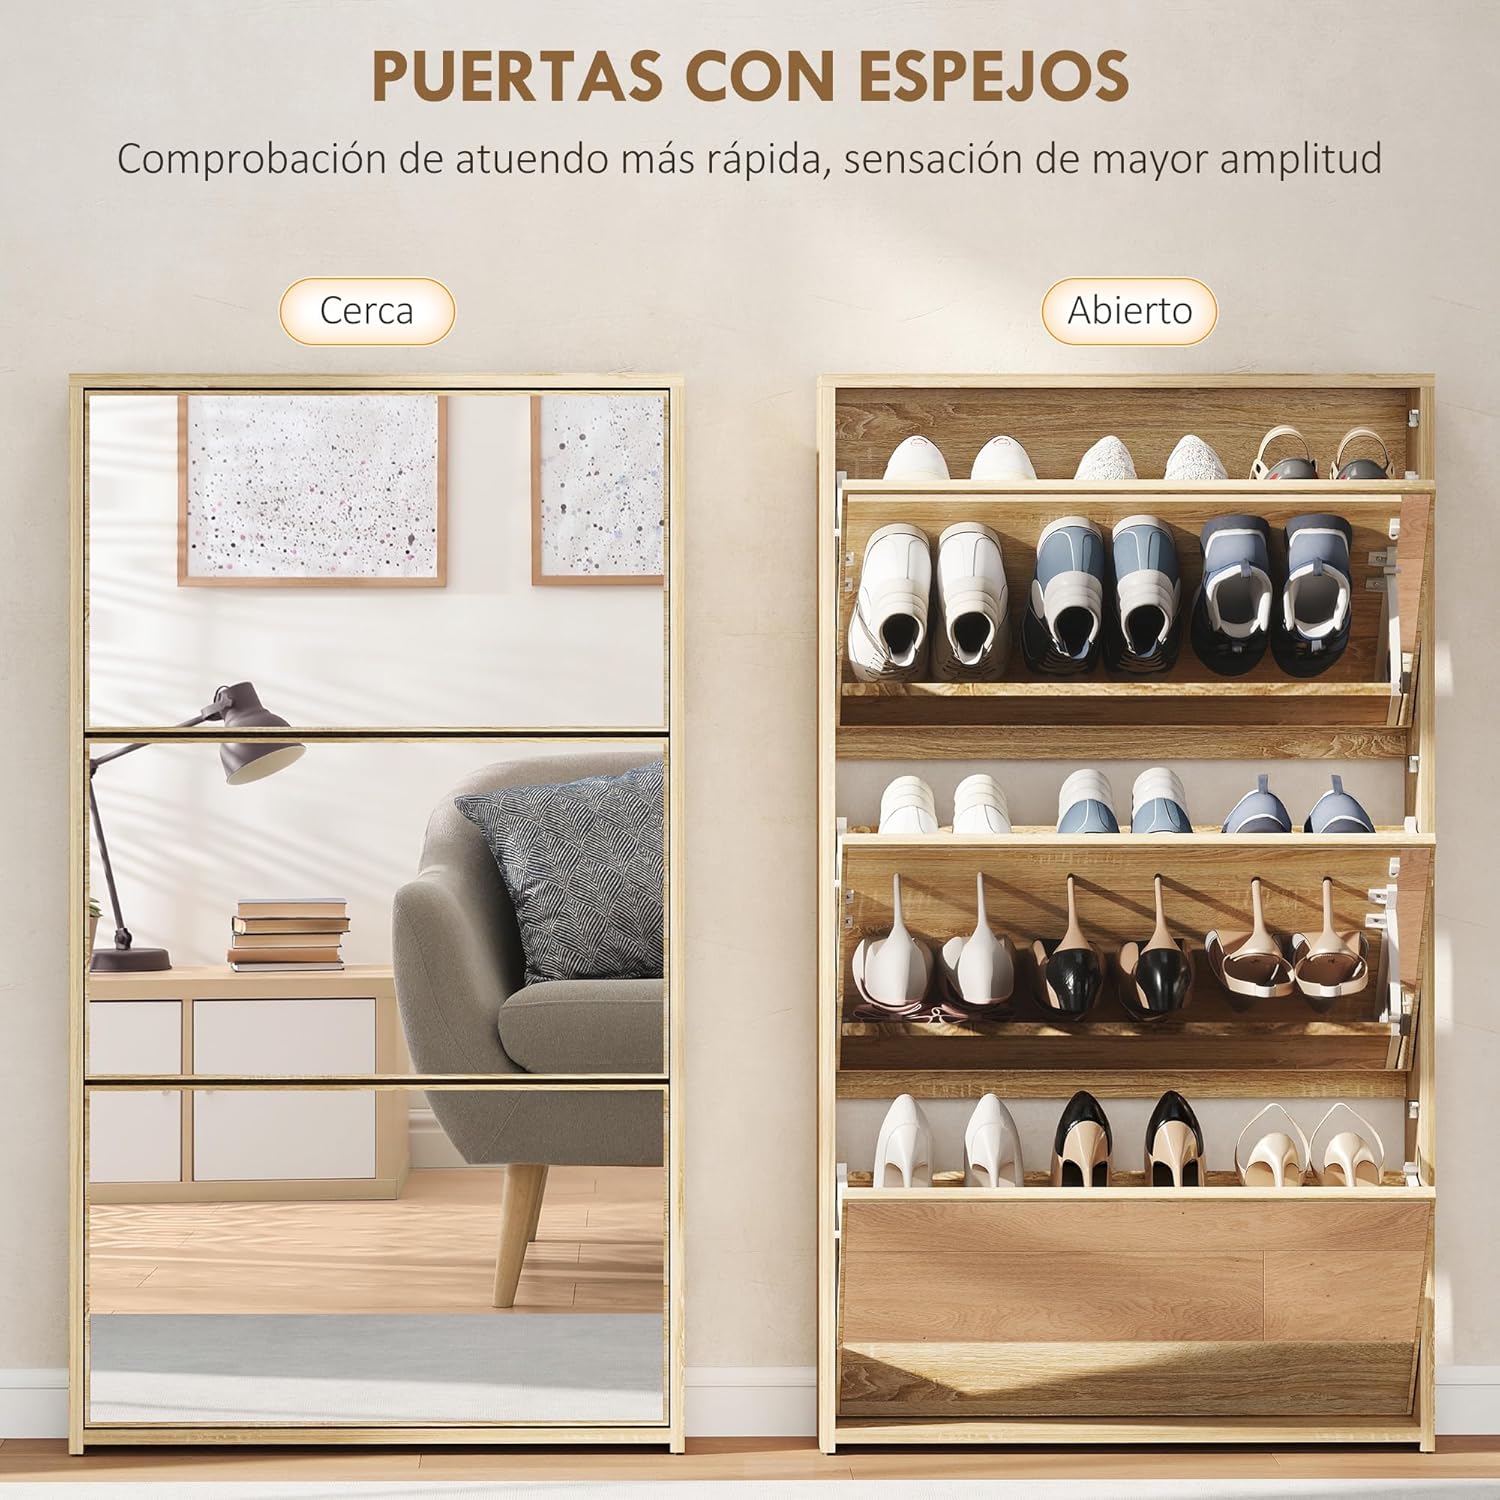
This shoe cabinet features three tilt-out compartments designed for easy access and space-saving storage.
- Opening Compartments: Gently pull the top edge of each drawer front outwards to tilt open the compartment.
- Storing Shoes: Place shoes into the designated slots within each compartment. The cabinet can hold up to 9 pairs of shoes (maximum EU size 45).
- Closing Compartments: Push the drawer front back into the cabinet until it is flush with the main frame.
- Top Surface: The top surface can be used for decorative items, keys, or small accessories, with a maximum weight capacity of 20 kg.

Maintenance and Care
- Cleaning: Wipe the cabinet surfaces with a soft, damp cloth. Avoid using harsh chemicals or abrasive cleaners, especially on the mirror surfaces.
- Mirror Care: Clean mirrors with a glass cleaner and a lint-free cloth to prevent streaks.
- Regular Checks: Periodically check all screws and connections to ensure they remain tight. Re-tighten if necessary.
- Avoid Moisture: Protect the cabinet from excessive moisture and direct water contact to prevent damage to the melamine finish.
- Stain Resistance: The cabinet is designed to be stain-resistant. For spills, wipe immediately with a damp cloth.
Troubleshooting
- Wobbly Cabinet: Ensure the cabinet is placed on a level surface. Check all assembly screws and re-tighten if loose. Verify the anti-tip system is correctly installed.
- Drawers Not Closing Properly: Check for any obstructions inside the compartments. Ensure the tilt-out mechanisms are correctly aligned and not damaged.
- Scratches on Floor: The cabinet includes protective pads to prevent floor scratches. Ensure they are properly attached to the bottom of the unit.
Specifications
| Model Number | ES837-648V00ND0731 |
| Brand | HOMCOM |
| Dimensions (L x W x H) | 65 x 17 x 114.5 cm |
| Mirror Dimensions (L x H) | 58 x 34 cm |
| Drawer Height | 15 cm |
| Shoe Capacity | Up to 9 pairs (max EU 45) |
| Weight Capacity (per compartment) | 5 kg |
| Weight Capacity (top surface) | 20 kg |
| Total Weight Capacity | 30 kg |
| Material | Melamine |
| Special Features | Anti-tip, Mirror doors, Stain resistant |

Warranty and Support
For warranty information, please refer to the documentation included with your purchase or contact HOMCOM customer service directly. Keep your proof of purchase for any warranty claims.