
1. Introduction
Thank you for choosing the Blütezeit MJ-300 Sliding Gate Opener. This system is designed to provide reliable and convenient automation for residential and light commercial sliding gates weighing up to 900 lbs. This manual provides essential information for the safe installation, operation, and maintenance of your gate opener system, including the MJ-300 motor, 13.12ft steel gear racks, and the 40ft reflective infrared safety sensor.
Please read this manual thoroughly before installation and operation to ensure proper function and safety.
2. Safety Information
WARNING: Failure to follow these safety instructions may result in serious injury or death, and may void your warranty.
- Ensure all installation and wiring are performed by qualified personnel in accordance with local electrical codes.
- Keep the gate area clear of obstructions, children, and pets at all times.
- Do not allow children to operate the gate opener or play near the gate.
- Regularly inspect the gate and opener for signs of wear, damage, or misalignment.
- The safety sensor must be installed and properly aligned to prevent the gate from closing on people or objects.
- Disconnect power to the gate opener before performing any maintenance or repairs.
- Do not attempt to repair the motor or control board yourself. Contact qualified service personnel.
- Ensure the gate is properly balanced and moves freely before installing the opener.
3. Package Contents
Verify that all components are present and undamaged before beginning installation.
- Blütezeit MJ-300 Sliding Gate Opener Motor (1 unit)
- Steel Gear Racks (4 pieces, 3.28 ft each, total 13.12 ft)
- 40ft Reflective Infrared Safety Sensor (1 unit)
- Remote Controls (Quantity may vary, typically 2)
- Mounting Hardware for Motor, Gear Racks, and IR Sensor
- Installation Manual (This document)
4. Product Overview and Features
4.1 MJ-300 Gate Opener Motor
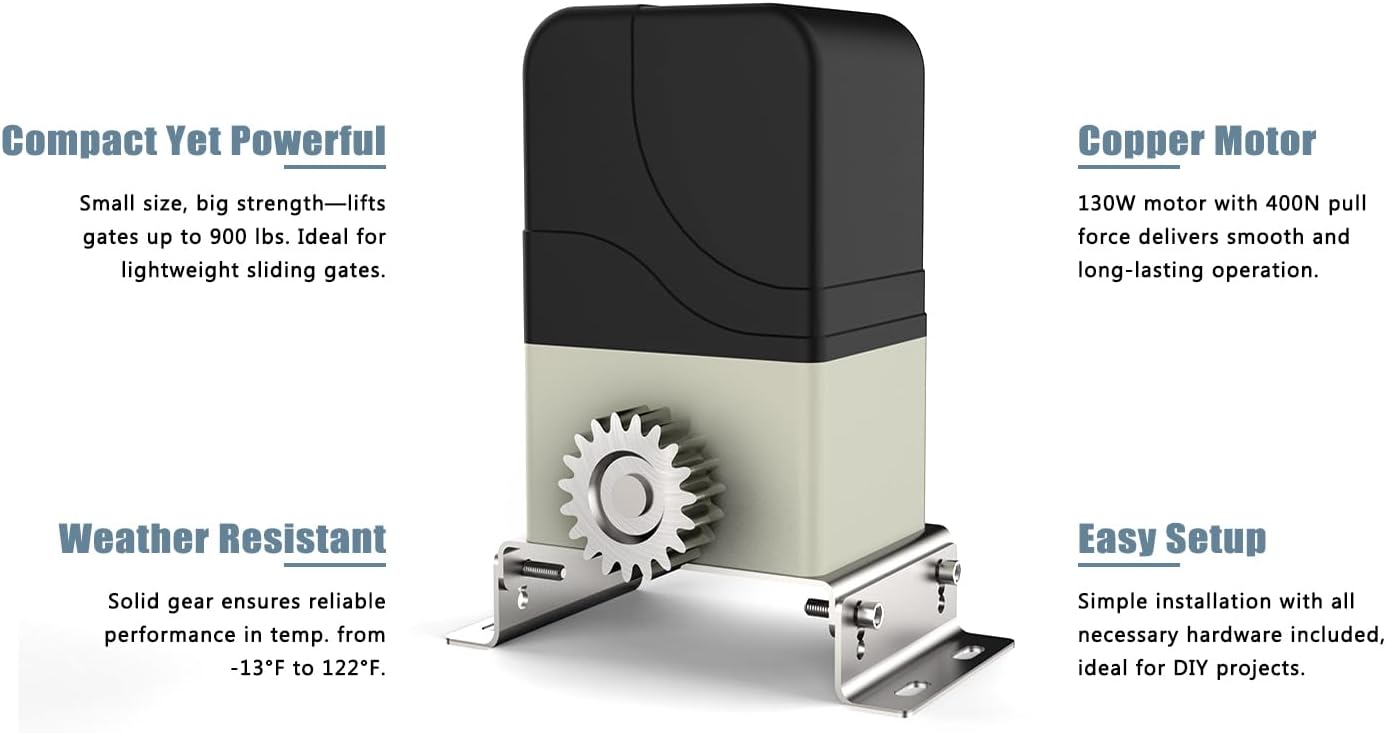
This image displays the Blütezeit MJ-300 sliding gate opener motor unit. It highlights its compact design, powerful 130W copper motor capable of lifting gates up to 900 lbs, weather-resistant solid gear for reliable performance in temperatures from -13°F to 122°F, and its easy setup for DIY projects.
- Compact Yet Capable: Designed for gates up to 900 lbs, ideal for residential and light commercial use.
- Copper Motor: Features a 130W AC110V pure copper motor for smooth and long-lasting operation.
- Weather Resistant: Engineered with solid gears to ensure reliable performance across a wide temperature range (-13°F to 122°F).
- Easy Setup: Includes all necessary hardware for straightforward installation.
4.2 Control Features and Accessories

This image illustrates the safety remote control and the red and blue magnet switches. The remote uses rolling code for secure operation and supports single or three-button modes. The system also features an auto-close function adjustable from 5 to 120 seconds. The red magnet switch controls the gate's closing position, and the blue magnet switch controls the opening position, ensuring precise control.
- Safety Remote: Utilizes rolling code technology for secure gate operation, configurable for single or three-button modes.
- Auto-Close Function: Adjustable timer from 5 to 120 seconds for automatic gate closure.
- Magnet Switches: Red magnet for precise gate close position, blue magnet for precise gate open position.
- Enhanced Safety & Customizable Operation: Supports PED (partial open) mode, resistance rebound, and compatibility with external accessories like keypads and exit wands.
4.3 Steel Gear Racks

This image shows four sections of the galvanized steel gear racks, each measuring 1 meter (3.28 ft) in length and 8mm thick. These racks are designed for maximum strength and durability, providing stable and smooth motion for the sliding gate.
- Heavy-Duty Construction: Includes 4 pieces of 3.28 ft galvanized steel racks (8mm thick) for a total of 13.12 ft.
- Durability: Engineered for maximum strength, weather resistance, and long-term performance.
- Smooth Operation: Ensures stable and smooth movement of the gate.
4.4 Reflective Infrared Safety Sensor

This image displays the reflective infrared safety sensor unit with its wiring. It features a dual-color LED status indicator and visible laser aiming for easy alignment. The sensor uses single-side wiring for simplified installation and has a detection range of up to 33 feet (10 meters).
- Long-Range Detection: 40ft effective detection distance with a fast 2ms response time.
- Visible Laser Aiming: Red beam assists in quick and accurate alignment of the sensor.
- Dual-Color LED Indicator: Provides visual feedback on sensor status.
- Single-Side Wiring: Simplifies installation by requiring wiring on only one side.
- All-Weather Performance: IP65-rated housing ensures dependable operation in various weather conditions.

This close-up image shows the dual-color LED indicator on the IR sensor. A green light indicates power, and a red light turns off after correct setup. If the beam is blocked, the red light turns on, indicating proper function.

This image demonstrates the visible red laser guide line emitted by the IR sensor, making it easy to align the reflector by eye for quick and accurate installation without needing extra tools.

This image visually represents the IP65 waterproof protection of the IR sensor, showing water splashing over the unit. This rating confirms its ability to withstand everyday weather conditions like rain and dust, ensuring reliable outdoor performance.
4.5 Reflector and Mounting

This image shows the durable metal mounting bracket and the large anti-vibration reflector for the IR safety sensor. The bracket allows for an adjustable mounting angle, enabling precise sensor positioning and alignment. The reflector's high reflectivity surface ensures stable signal return for accurate detection, and its larger size helps resist vibration misalignment.
- Durable Metal Construction: Mounting bracket resists bending, rust, and harsh environments.
- Adjustable Mounting Angle: Allows for easy tilt and rotation for precise sensor positioning.
- High Reflectivity Surface: Ensures stable signal return for accurate and reliable detection.
- Large Anti-Vibration Reflector: Bigger size for easier installation and resistance to vibration misalignment.
5. Setup and Installation
The Blütezeit MJ-300 gate opener is designed for DIY-friendly installation. However, it is recommended that electrical wiring be performed by a qualified electrician.
5.1 Pre-Installation Checklist
- Ensure the gate moves freely and smoothly by hand.
- Verify the gate is structurally sound and properly aligned.
- Confirm availability of a suitable power source (AC110V).
- Gather all necessary tools (drills, wrenches, measuring tape, level, etc.).
5.2 Mounting the Motor Unit
- Choose a stable, level mounting surface adjacent to the gate.
- Securely fasten the motor base using the provided mounting hardware. Ensure the motor's gear aligns correctly with the future position of the gear rack.
5.3 Installing the Steel Gear Racks
- Attach the steel gear racks along the bottom edge of the gate, ensuring they are level and parallel to the ground.
- Maintain a small gap (approximately 1-2mm) between the motor's gear and the rack to allow for smooth operation and thermal expansion.
- Use all provided mounting hardware to secure the racks firmly.
5.4 Wiring the System
- Connect the AC110V power supply to the motor control board as per the detailed wiring diagram in the separate wiring instructions.
- Connect the safety sensor wires to the designated terminals on the control board. The system is compatible with 12–24V DC sensor inputs.
- Ensure all connections are secure and properly insulated.
5.5 Installing and Aligning the IR Safety Sensor
- Mount the IR sensor and its reflector on opposite sides of the gate opening, ensuring they are at an appropriate height (typically 6-12 inches from the ground) and within the 40ft detection range.
- Use the visible red laser beam and the dual-color LED indicator to precisely align the sensor with the reflector. Adjust the mounting angle as needed.
- Test the sensor by interrupting the beam to ensure the gate stops or reverses.
5.6 Setting Limit Switches (Magnet Switches)
- Attach the red magnet to the gate to define the fully closed position.
- Attach the blue magnet to the gate to define the fully open position.
- Adjust the magnet positions to achieve the desired open and close limits.
6. Operating Instructions
6.1 Remote Control Operation
- Press the designated button on the remote control to open or close the gate.
- A second press during operation will stop the gate. A third press will reverse its direction.
- Refer to the remote control programming guide for pairing additional remotes or changing operating modes (single/three-button).
6.2 Auto-Close Function
- The auto-close timer can be set from 5 to 120 seconds. Consult the control board manual for specific programming steps.
- Once enabled, the gate will automatically close after the set delay if no obstruction is detected.
6.3 PED (Partial Open) Mode
- This mode allows the gate to open partially for pedestrian access.
- Refer to the control board manual for instructions on how to activate and set the partial open distance.
6.4 Resistance Rebound
- The system is equipped with a resistance rebound feature. If the gate encounters an obstruction during closing, it will reverse direction to prevent damage or injury.
- Ensure this feature is properly calibrated during installation.
7. Maintenance
Regular maintenance ensures the longevity and safe operation of your gate opener system.
- Monthly:
- Inspect the gate for smooth movement, ensuring no binding or dragging.
- Check all mounting hardware for tightness.
- Clean the gear racks and motor gear of any debris.
- Test the safety sensor by interrupting the beam during gate operation.
- Quarterly:
- Lubricate any moving parts of the gate (hinges, rollers) as recommended by the gate manufacturer.
- Inspect electrical wiring for any signs of wear or damage.
- Annually:
- Have a qualified technician inspect the entire system for optimal performance and safety.
8. Troubleshooting
Before contacting support, review these common issues and solutions.
| Problem | Possible Cause | Solution |
|---|---|---|
| Gate does not move. | No power; Safety sensor obstructed; Remote battery low; Limit switch issue. | Check power supply; Clear sensor path; Replace remote battery; Verify limit switch positions. |
| Gate opens but does not close. | Safety sensor obstructed or misaligned; Auto-close disabled; Close limit switch issue. | Check/align safety sensor; Enable auto-close; Verify close limit switch. |
| Gate reverses unexpectedly. | Obstruction detected; Resistance sensitivity too high; Safety sensor issue. | Remove obstruction; Adjust resistance sensitivity (refer to control board manual); Check safety sensor. |
| Remote control not working. | Low battery; Not programmed; Out of range. | Replace battery; Reprogram remote; Move closer to the gate opener. |
9. Specifications
| Feature | Specification |
|---|---|
| Model | MJ-300 |
| Max Gate Weight | 900 lbs (400 kg) |
| Motor Power | 130W |
| Power Supply | AC110V |
| Gear Rack Length | 13.12 ft (4 x 3.28 ft sections) |
| Gear Rack Material | Galvanized Steel (8mm thick) |
| IR Sensor Detection Range | Up to 40 ft (12 meters) |
| IR Sensor Response Time | 2ms |
| IR Sensor IP Rating | IP65 |
| Operating Temperature | -13°F to 122°F (-25°C to 50°C) |
| Sensor Input Compatibility | 12–24V DC |
10. Warranty and Support
Blütezeit products are designed for durability and performance. For specific warranty details, please refer to the warranty card included with your product or visit the official Blütezeit website.
If you encounter any issues or require technical assistance, please contact Blütezeit customer support through the retailer where you purchased the product or via the contact information provided on the official Blütezeit website.
Please have your model number (MJ-300) and purchase date available when contacting support.