
1. Introduction
Thank you for choosing the Raylix 16A Level 1 & 2 EV Charger. This portable electric vehicle charger is designed to provide efficient and reliable charging for all SAE J1772 compatible electric vehicles and plug-in hybrids. Featuring an adjustable current, delayed charging function, and a user-friendly display, this charger offers flexibility and convenience for home or on-the-go use. Please read this manual thoroughly before operation to ensure safe and optimal performance.
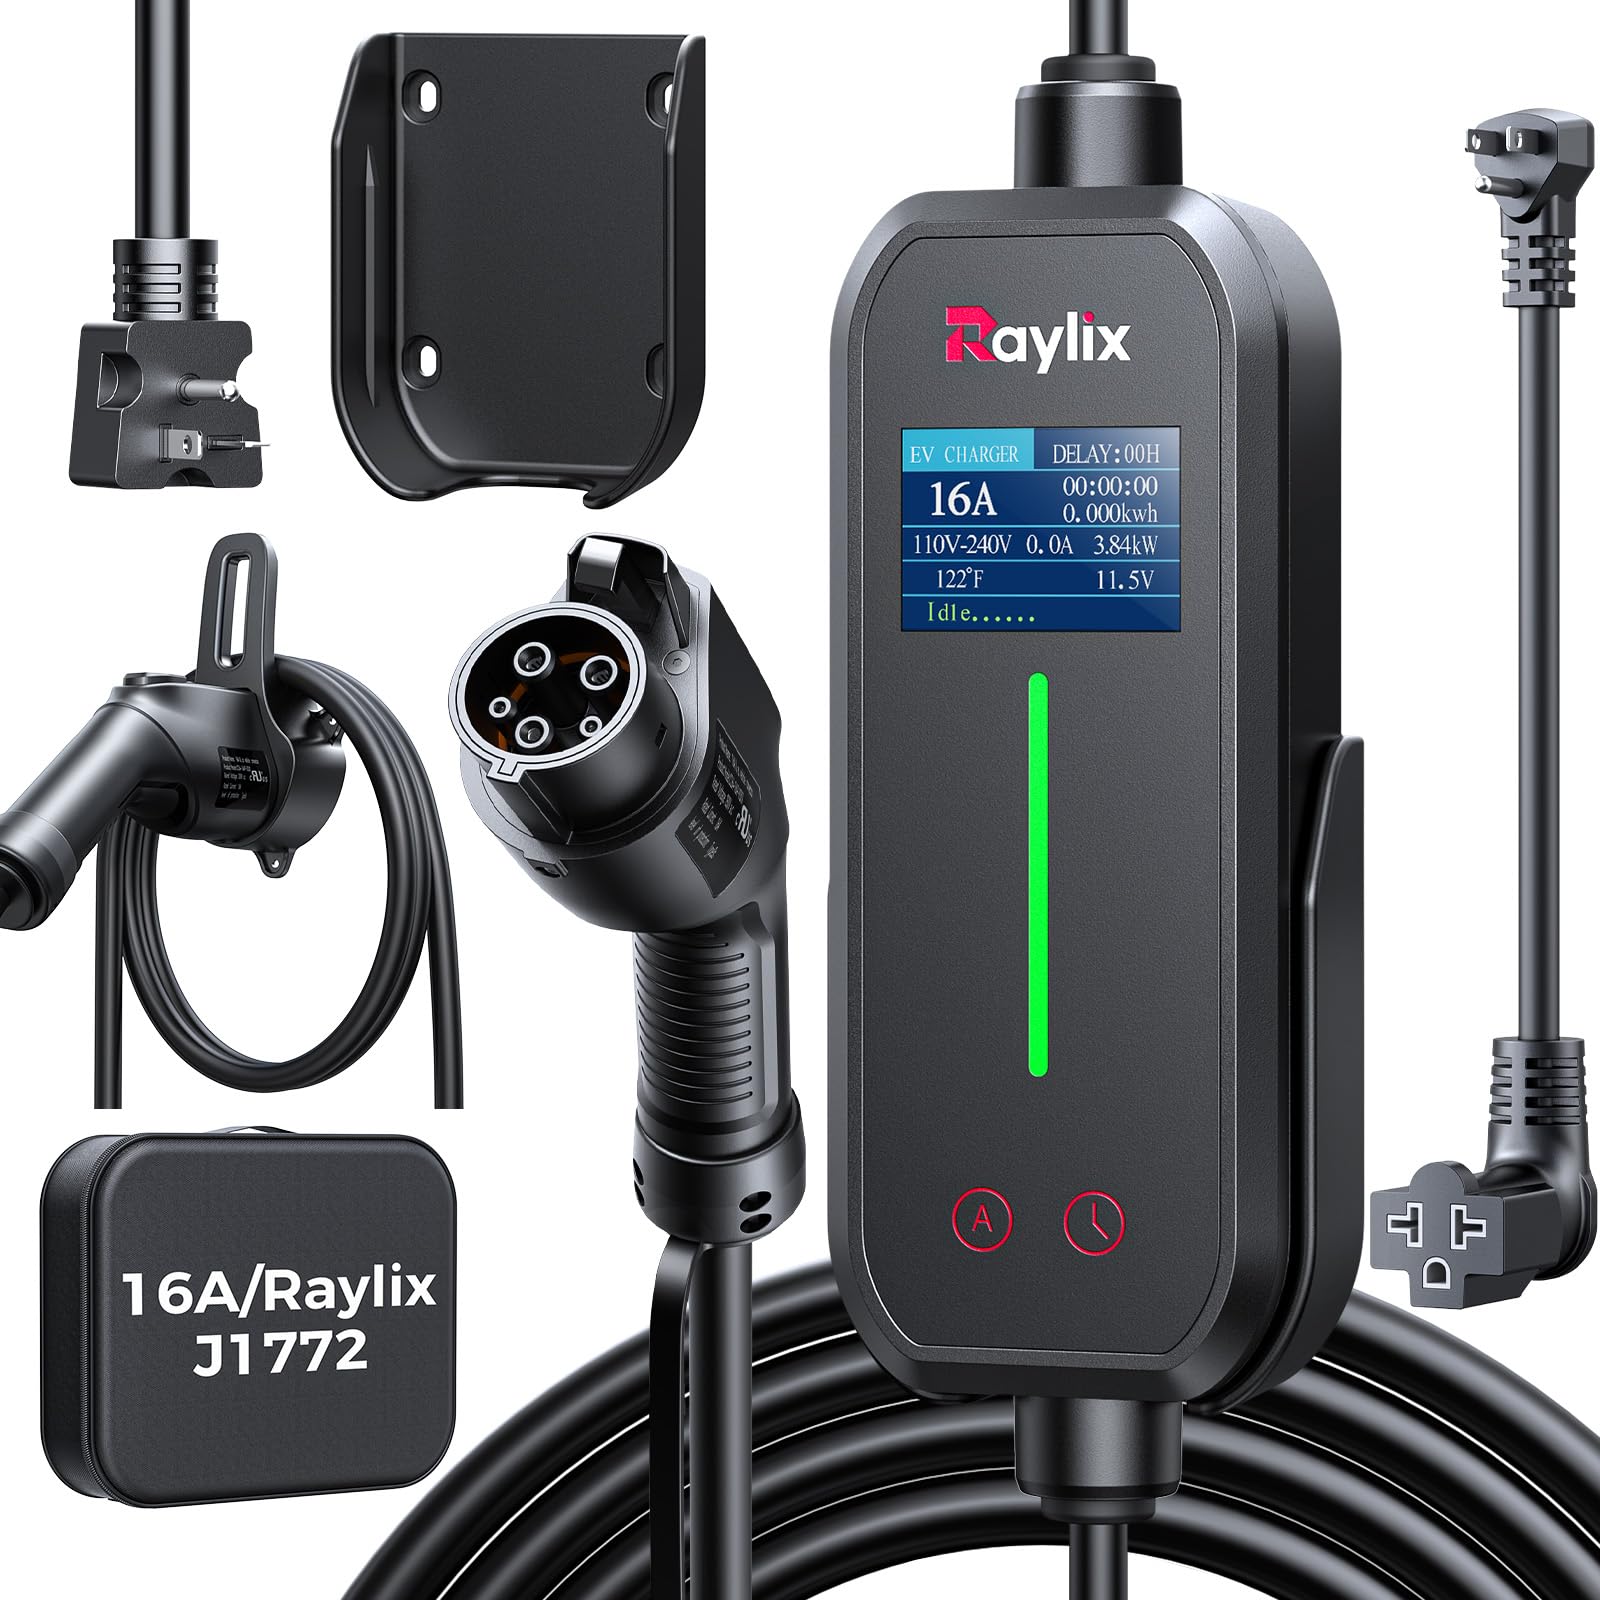
Image 1.1: Raylix 16A Level 1 & 2 EV Charger in its carrying case.
2. Safety Information
Your safety is paramount. This charger incorporates multiple safety features, but proper handling and adherence to guidelines are essential.
- Electrical Safety: Always ensure the power outlet is properly grounded and meets local electrical codes. Do not use extension cords or adapters unless specifically rated for EV charging.
- Protection Features: The charger is equipped with overvoltage, overcurrent, and overheating protection to prevent damage to the charger and your vehicle.
- Environmental Protection: Rated IP66 for water and dust resistance, allowing for safe outdoor use in various weather conditions. It also has a UL94V-0 fire rating for enhanced safety.
- Cable Handling: Avoid bending or kinking the charging cable excessively. Do not drive over the cable. Ensure the cable is not a tripping hazard.
- Damage Inspection: Before each use, inspect the charger, cable, and connector for any signs of damage. Do not use if any damage is observed.

Image 2.1: The charger is designed for safe use in various weather conditions.
3. Product Overview
The Raylix EV Charger consists of a control box with an integrated display, a charging cable, and a J1772 connector. The control box allows for monitoring charging status, adjusting current, and setting delayed charging times.
Control Box Display and Buttons:
- LED Display: Shows real-time charging status, current, voltage, temperature, and energy consumption.
- 'A' Button (Current Setting): Press to cycle through available current settings (8A, 10A, 12A, 16A). Press and hold for 3 seconds to confirm.
- 'Clock' Button (Time-Delayed Setup): Press to initiate delayed charging setup. Click to adjust the delay time.

Image 3.1: User-friendly display and control buttons on the charger.
4. Setup and Installation
The Raylix EV Charger is designed for easy plug-and-play installation. No complex wiring is required.
- Choose an Outlet: Identify a suitable 110V-240V outlet. The charger supports NEMA 5-15 (120V, Level 1) and NEMA 6-20 (240V, Level 2) outlets.
- Plug in the Charger: Insert the charger's power plug into the chosen electrical outlet.
- Mount the Holder: Use the provided holder to keep the control box and cable organized and off the ground. This prevents damage and maintains a tidy charging area.
- Cable Management: Uncoil the 21ft charging cable, ensuring it is free from kinks or obstructions.

Image 4.1: Charger compatibility with NEMA 5-15/5-20 (Level 1) and NEMA 6-20 (Level 2) outlets.

Image 4.2: Proper use of the wall mount holder for organization.
5. Operating Instructions
5.1 Standard Charging
- Ensure the charger is plugged into a suitable power outlet.
- Connect the J1772 connector to your electric vehicle's charging port.
- The charger will automatically begin charging at the default or previously set current. Monitor the display for charging status.
5.2 Adjusting Current
The charger allows you to adjust the charging current to suit your needs or electrical circuit capacity.
- Before connecting to the vehicle or during an active charge, press the 'A' button on the control box.
- Each press will cycle through the available current options: 8A, 10A, 12A, 16A.
- Once your desired current is displayed, press and hold the 'A' button for 3 seconds to confirm the setting.
- Note: When using a 110V outlet (NEMA 5-15 plug), the current is automatically limited to 12A for safety.
5.3 Delayed Charging
Utilize the delayed charging feature to take advantage of off-peak electricity rates.
- Connect the charger to your vehicle.
- Press the 'Clock' button on the control box to activate the delayed charging setup.
- Click the 'Clock' button repeatedly to adjust the delay time (up to 12 hours).
- Once the desired delay is set, the charger will wait for the specified time before beginning the charging session.

Image 5.1: Delayed charging allows for cost savings during off-peak hours.
5.4 Video Guide: Control Box Operation
Video 5.2: This video demonstrates how to operate the control box, including setting the current and using the time-delayed charging feature.
6. Compatibility
The Raylix 16A EV Charger is universally compatible with all electric vehicles and plug-in hybrids that use the SAE J1772 connector.
- Compatible Brands: Includes GM, Nissan, Audi, Kia, Honda, BMW, Hyundai, Volkswagen, Ford, Rivian, Volvo, Mercedes-Benz, Porsche, and many more.
- Tesla Vehicles: For Tesla vehicles, a J1772 to Tesla adapter (sold separately) is required.

Image 6.1: Universal compatibility with SAE J1772 vehicles.
7. Maintenance
Regular maintenance ensures the longevity and safe operation of your charger.
- Cleaning: Wipe the control box and cable with a soft, dry cloth. Do not use harsh chemicals or abrasive cleaners. Ensure the charger is unplugged before cleaning.
- Cable Care: After each use, coil the cable neatly and store it on the provided holder or in a safe place to prevent damage. Avoid tangling or leaving the cable on the ground where it could be stepped on or driven over.
- Connector Care: Keep the J1772 connector clean and free from debris. Use the protective cap when not in use.
- Storage: Store the charger in a dry, cool place when not in use for extended periods.
8. Troubleshooting
If you encounter issues with your Raylix EV Charger, refer to the following common troubleshooting steps:
- Charger Not Activating: Ensure the charger is securely plugged into a live electrical outlet. Check the vehicle's charging port connection. Verify the vehicle is ready to accept a charge.
- No Power to Display: Check the power outlet and ensure it is functioning correctly. Try plugging another device into the outlet to confirm power.
- Charging Interrupted: Check for any error messages on the charger's display or your vehicle's dashboard. Ensure the cable is not damaged or disconnected. Overheating can cause interruptions; allow the charger to cool down if it feels hot.
- Current Adjustment Not Working: Ensure you are pressing and holding the 'A' button for 3 seconds to confirm the new current setting. Remember the 12A limit for 110V outlets.
- Delayed Charging Not Starting: Verify the delay time is correctly set using the 'Clock' button. Ensure the vehicle is connected and ready to charge after the delay period.
If problems persist, please contact Raylix customer support for assistance.
9. Specifications
| Feature | Detail |
|---|---|
| Brand | Raylix |
| Model Number | C64-16AP-VSXX |
| Amperage | 16 Amps (Adjustable: 8A, 10A, 12A, 16A) |
| Input Voltage | 110V-240V |
| Cable Length | 21 feet |
| Connector Type | SAE J1772 |
| Product Dimensions | 16.18 x 13.22 x 3.78 inches |
| Item Weight | 6.85 pounds |
| Color | Black |
| Certifications | FCC, CE, UL94V-0 Fire Rating |
| Water/Dust Resistance | IP66 |
10. Warranty and Support
For specific warranty details and customer support, please refer to the documentation included with your purchase or contact Raylix directly through their official website or the retailer where the product was purchased. Keep your purchase receipt for warranty claims.