
Introduction
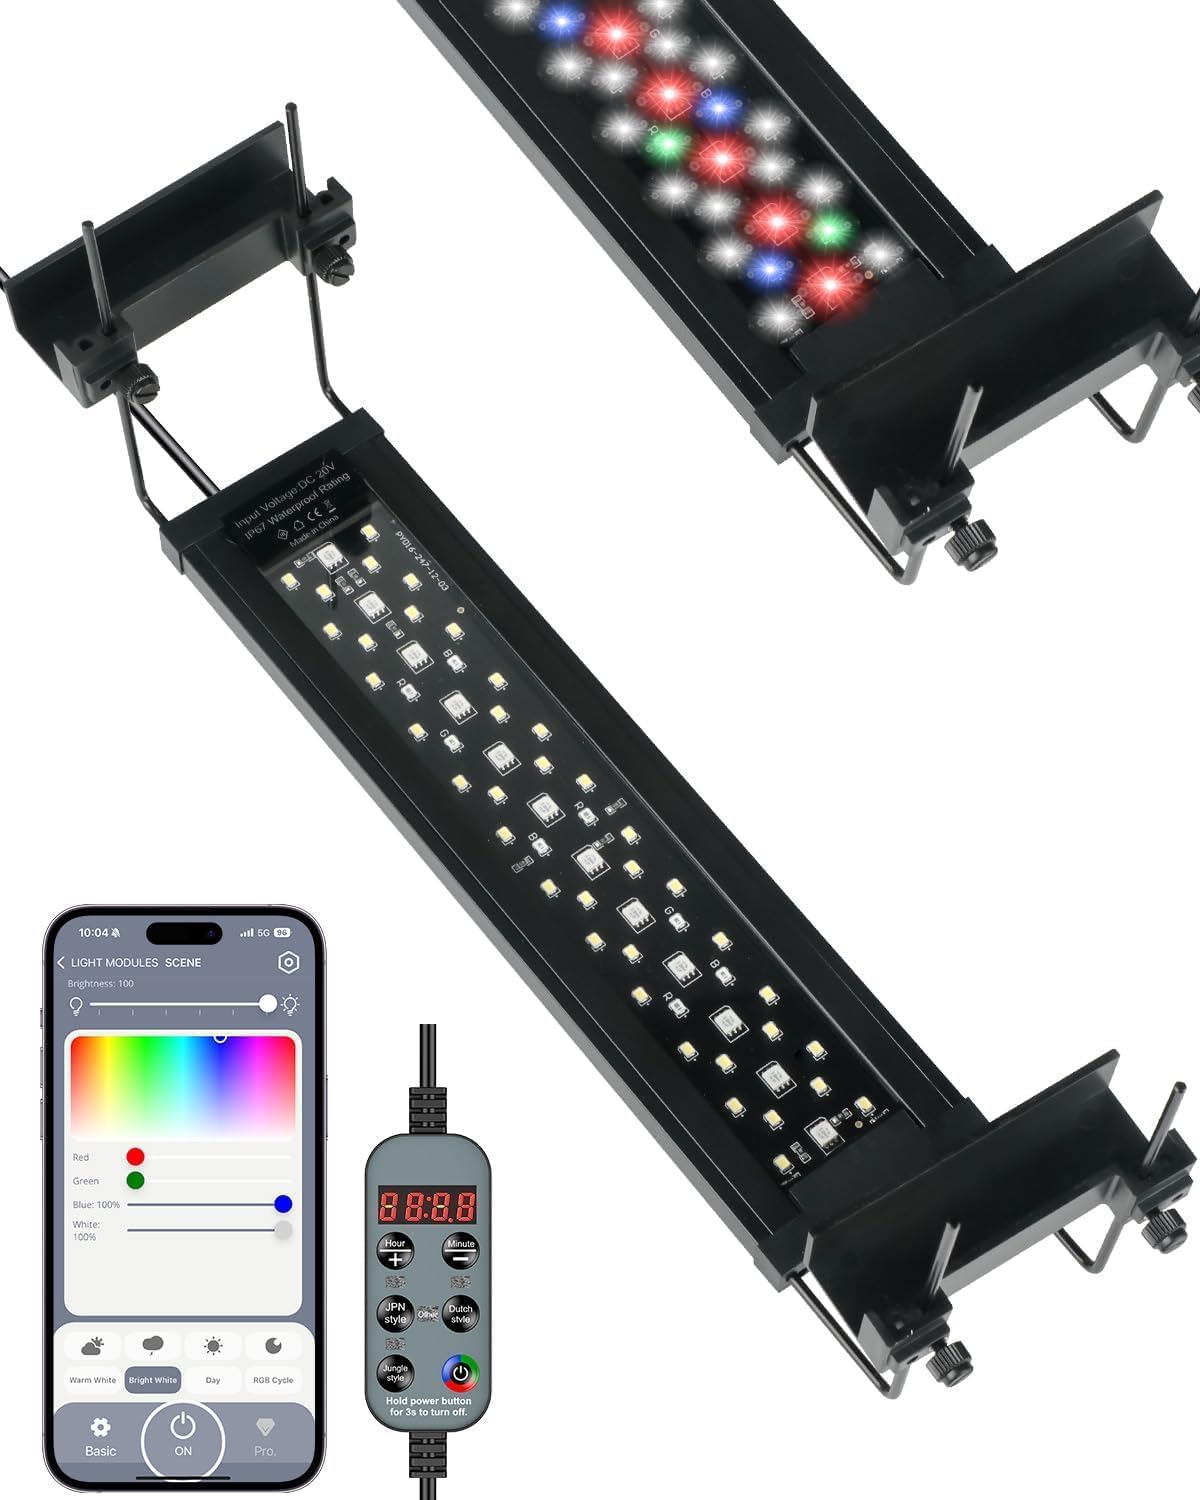
Figure 1: Pawfly CW4311 Bluetooth Full Spectrum Aquarium Light.
This manual provides instructions for the Pawfly CW4311 Bluetooth Full Spectrum Aquarium Light. This light is designed to enhance aquatic plant growth and bring vibrant colors to your freshwater, saltwater, planted, or coral reef tank. It features full spectrum lighting, smart Bluetooth control, and customizable 24/7 day-night timer modes.
Key features include:
- Full spectrum lighting (8000 K white, 660 nm red, 525 nm green, 445 nm blue) with PAR (70), LUX (3500), and CRI (> 94) for optimal plant growth and natural color rendering.
- Smart Bluetooth control via an intuitive app for brightness, color, and effect customization.
- Over 100,000 color choices to create dynamic underwater scenes.
- Three automatic day-night timer modes (Dutch, Jungle, Japanese) to simulate natural 24/7 cycles.
- Adjustable brightness and independent WRGB color adjustment.
- IP67 waterproof rating and enhanced aluminum shell for durability and heat dissipation.
- Extendable brackets for tanks from 12 to 18 inches.

Figure 2: Bright and natural full spectrum lighting for plant growth.
What's in the Box
Verify that all components are present:
- 1 x Pawfly CW4311 Aquarium Light
- 1 x Power Adapter with Inline Controller
- 2 x Extendable Mounting Brackets
Setup Instructions
Attach Mounting Brackets:
Slide the extendable mounting brackets onto each end of the light fixture. Ensure they are securely fastened.

Figure 3: Extendable side brackets for tank installation.
Position the Light:
Place the light fixture on top of your aquarium, adjusting the extendable brackets to fit the tank's width (12-18 inches). Ensure the light is centered and stable.
Connect Power:
Plug the power adapter into the light fixture, then plug the adapter into a standard electrical outlet. The inline controller will illuminate.
Initial Power On:
The light will turn on automatically. If not, press the power button on the inline controller. Set the start time on the controller after the first use or after any power loss.

Figure 4: Inline light controller for manual operation.
Operating Instructions
A. Bluetooth App Control
The Pawfly Aquarium Light can be controlled via a dedicated Bluetooth app. Download the "P-light controller" app from the App Store (iOS) or Google Play Store (Android).

Figure 5: Smartphone app interface for Bluetooth control.
Video 1: Official Pawfly Aquarium Light overview and feature demonstration.
Pairing:
Ensure Bluetooth is enabled on your smartphone. Open the "P-light controller" app. The app should automatically detect and connect to your Pawfly light. If prompted, the default PIN is 12345678.
Brightness Adjustment:
Use the app's interface to adjust the light intensity from 1% to 100%.

Figure 6: App interface for brightness and individual color channel adjustment.
Color Selection:
The app provides access to over 100,000 color choices. Select from preset colors or customize individual WRGB (White, Red, Green, Blue) channels to create desired lighting effects.

Figure 7: App interface for precision brightness and extensive color options.
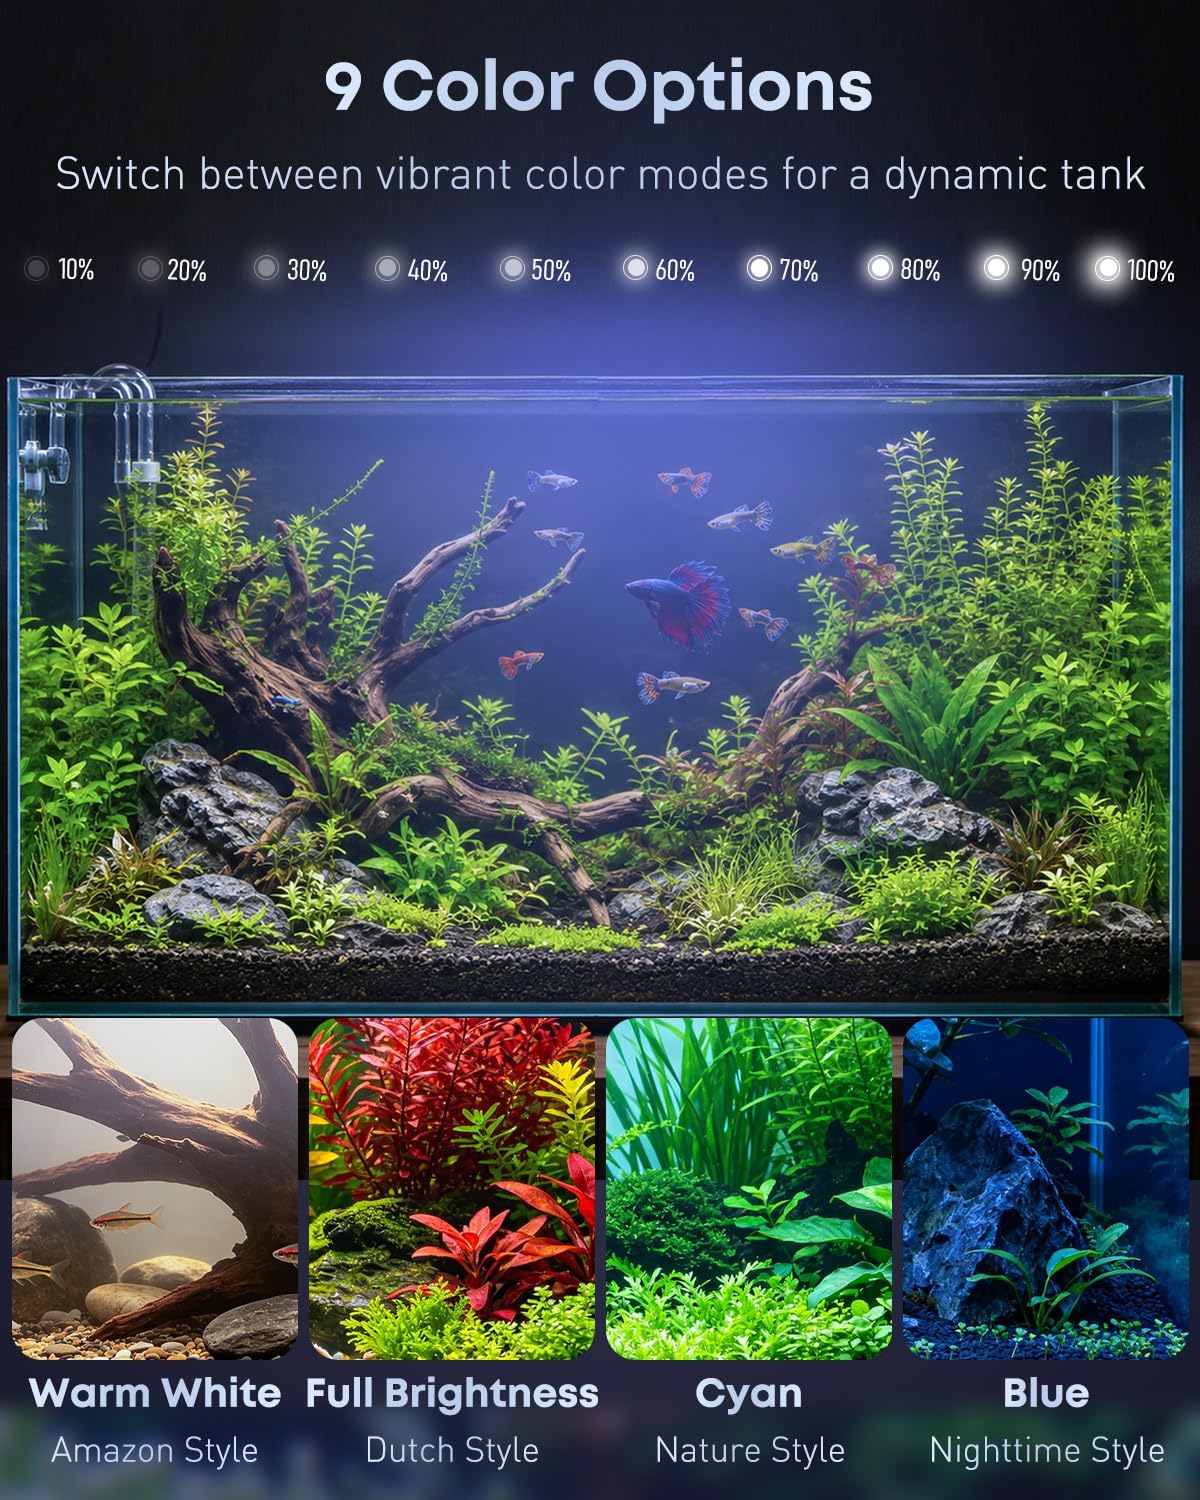
Figure 8: Examples of various color options in an aquarium setting.
Timer Modes (24/7 Cycle):
The app allows you to set and customize three automatic day-night timer modes: Dutch, Jungle, and Japanese style. These modes simulate natural light cycles from sunrise to night.

Figure 9: Visual representation of the three pre-programmed lighting cycles.

Figure 10: App interface for selecting and viewing 24/7 natural day-night light cycles.

Figure 11: App interface for customizing 24/7 day-night cycles.
Dynamic Color Modes:
Switch between various vibrant color effects such as Warm White, Bright White, Day, and RGB Cycle to create a dynamic underwater scene.

Figure 12: App interface for selecting dynamic color modes.
B. Manual Controller Operation
The inline controller provides basic control over the light's functions.
Figure 13: Inline controller button functions.
Power On/Off:
Press the power button (red/green icon) to turn the light on or off. Hold for 3 seconds to completely power off.
Brightness Adjustment:
Use the "+" and "-" buttons to increase or decrease the light brightness.
Set Start Time:
After initial power-on or power loss, the display will show "00:00". Use the "Hour" and "Minute" buttons to set the current time. This time serves as the reference for the 24/7 timer modes.
Timer Mode Selection:
Press the "JPN Style", "Jungle Style", or "Dutch Style" buttons to activate the corresponding 24/7 day-night cycle. The light will automatically follow the pre-programmed intensity changes throughout the day.
Dynamic Color Mode:
Press the button with the color wheel icon to cycle through dynamic color modes.
Maintenance
Regular maintenance ensures optimal performance and longevity of your Pawfly Aquarium Light.
Cleaning:
Periodically wipe the light fixture with a soft, damp cloth to remove dust, water spots, and algae. Ensure the light is unplugged before cleaning. Do not use abrasive cleaners or solvents.
Waterproofing:
The light is IP67 waterproof, meaning it can withstand splashes and short shallow immersion. However, avoid prolonged submersion or direct water jets to prevent damage.

Figure 14: IP67 waterproof design and aluminum shell for durability.
Cable Inspection:
Regularly check the power cord and adapter for any signs of damage, fraying, or kinks. Replace if necessary.
Troubleshooting
- Light does not turn on.
Solution: Check if the power adapter is securely plugged into both the light fixture and the electrical outlet. Ensure the outlet is functional. Press the power button on the inline controller. If using the app, ensure the light is connected and not set to 0% brightness.
- Bluetooth app cannot connect to the light.
Solution: Ensure Bluetooth is enabled on your smartphone. Restart the app and try reconnecting. Make sure the light is powered on and within Bluetooth range. If prompted for a PIN, use 12345678. Try restarting your phone or the light fixture by unplugging and replugging it.
- Timer modes are not working correctly.
Solution: Verify that the correct start time is set on the inline controller. If using the app, ensure the desired 24/7 timer mode is activated and configured correctly. After a power outage, the time may need to be reset.
- Light intensity or color is inconsistent.
Solution: Check the app settings for brightness and individual color channel adjustments. Ensure no custom settings are overriding the desired mode. Clean the light fixture to remove any obstructions or debris that might affect light output.
Specifications
| Feature | Detail |
|---|---|
| Model Number | CW4311 |
| Wattage | 14 Watts |
| Light Source Type | Light Emitting Diode (LED) |
| Color Temperature | 8000 K (White) |
| Spectrum | Full Spectrum (8000 K white, 660 nm red, 525 nm green, 445 nm blue) |
| PAR | 70 |
| LUX | 3500 |
| CRI | > 94 |
| Control Method | Bluetooth App, Inline Controller |
| Timer Modes | Dutch, Jungle, Japanese (24/7 cycles) |
| Waterproof Rating | IP67 |
| Material | Plastic, Aluminum (Enhanced Aluminum Shell) |
| Dimensions (L x W x H) | 11.61"L x 3.74"W x 2.76"H (Light fixture only, excluding brackets) |
| Compatible Tank Size | 12" - 18" (with extendable brackets) |
| Power Source | Corded Electric |
Warranty and Support
The Pawfly CW4311 Aquarium Light comes with a 1-year manufacturer's warranty. This warranty covers defects in materials and workmanship under normal use.
For technical support, warranty claims, or any questions regarding your product, please contact Pawfly customer service. Refer to the contact information provided with your purchase or visit the official Pawfly website.
Manufacturer: Pawfly
Seller: Pawfly (fulfilled by Amazon)
