Safety Information
Please read and understand all safety warnings and instructions before assembling and using this equipment. Failure to do so may result in serious injury.
- Maximum Weight Capacity: This equipment is designed to support a maximum user weight of 330 lbs (150 kg). Do not exceed this limit.
- Assembly: Ensure all bolts, nuts, and connections are securely tightened before each use. Improper assembly can lead to serious injury.
- Placement: Place the power tower on a flat, stable, and non-slip surface. Ensure adequate clear space around the equipment for safe movement.
- Inspection: Regularly inspect the equipment for signs of wear, damage, or loose components. Discontinue use immediately if any issues are found and contact customer support.
- Warm-up: Always perform a proper warm-up before exercising and cool down afterwards.
- Children and Pets: Keep children and pets away from the equipment during use.
- Medical Advice: Consult with a healthcare professional before starting any new exercise program.
What's in the Box
Please verify that all components are present before beginning assembly:
- Pull Up Bar
- Dip Station Frame
- Assistance Platform
- Arm Pads (2)
- Non-slip Suction Cups (4)
- Accessory Kit (bolts, nuts, wrenches, etc.)
Assembly Instructions
Follow these steps carefully to assemble your VEVOR Power Tower Dip Station. Refer to the included accessory kit for all necessary hardware.
Official VEVOR Pull Up Bar Assembly Video. This video demonstrates the step-by-step process for setting up your power tower, ensuring correct installation of all components.
Step 1: Install Floor Mats
Attach the protective floor mats to the ends of the main base bars. These mats help stabilize the unit and protect your flooring.
Step 2: Install the Bottom Base
Connect the two main base sections using the provided bolts and nuts. Ensure they are securely fastened to form the H-shaped stable base.
Step 3: Install the Crossbar of the Bottom Base
Attach the crossbar to the bottom base frame. This piece adds structural integrity and stability to the entire unit.
Step 4: Install the Drum (Pulley System)
Assemble the pulley system (drum) onto the vertical support posts. This system is crucial for the assistance platform mechanism. Ensure all wheels and bolts are correctly aligned and tightened.
Step 5: Install the Cylinder (Gas Spring)
Attach the gas spring cylinder to the designated points on the base and the movable assistance platform frame. This component provides the adjustable assistance for exercises.
Step 6: Install the Elbow Pads
Secure the elbow pads onto the dip station arms using the provided hardware. These pads offer comfort and support during dips and leg raises.
Step 7: Install the Knee Pad Assembly
Assemble the knee pad onto its support frame. This will form the assistance platform.
Step 8: Install the Knee Pad Assembly onto the Crossbar of the Base
Attach the assembled knee pad platform to the main frame, connecting it to the pulley system and gas spring. Secure it with the adjustment knob.
Step 9: Install the Handles on Both Sides
Insert the side handles into their respective slots on the dip station arms. These handles provide additional grip options and support.
Step 10: Insert the Upper Frame into the Base
Carefully lift and insert the upper frame assembly (with elbow pads and knee pad) into the main vertical posts of the base. Align the holes for height adjustment.
Step 11: Install the Upper Crossbar (Pull-Up Bar)
Attach the multi-grip pull-up bar to the top of the upper frame. Secure it firmly with the provided bolts and nuts.
Operating Instructions
1. Adjusting Height (9 Levels)
The VEVOR Power Tower features 9 adjustable height levels to accommodate various user heights and exercise preferences. To adjust the height:
- Locate the adjustment knob on the vertical support posts.
- Unscrew and pull out the knob to disengage the locking pin.
- Carefully raise or lower the upper frame to your desired height.
- Align the holes and re-insert the locking pin.
- Tighten the adjustment knob securely to prevent movement during exercise.

Image: Detail of the 9-level height adjustment mechanism and simple setting knob.
2. Using the Auxiliary Support Plate (Assistance Platform)
The adjustable auxiliary support plate is designed to assist beginners or those needing help with pull-ups and other bodyweight exercises. It can be laid flat and fixed to provide support.
- To engage the assistance platform, ensure it is in the lowered position.
- Kneel on the platform to reduce your effective body weight during exercises like pull-ups.
- Adjust the tension or position as needed for your comfort and assistance level.

Image: Demonstration of using the adjustable assistance platform for easier pull-ups.
3. Ergonomic Design Features
The power tower is equipped with several ergonomic features for comfort and safety:
- Thick Back Pad: Provides support for your back during leg raises and other core exercises.
- Soft Elbow Pads: Cushioned pads on the dip station arms reduce pressure on your elbows and forearms. These pads can be adjusted forward and backward for optimal fit.
- Non-Slip Grips: All handles feature non-slip material to ensure a secure and comfortable grip during workouts.
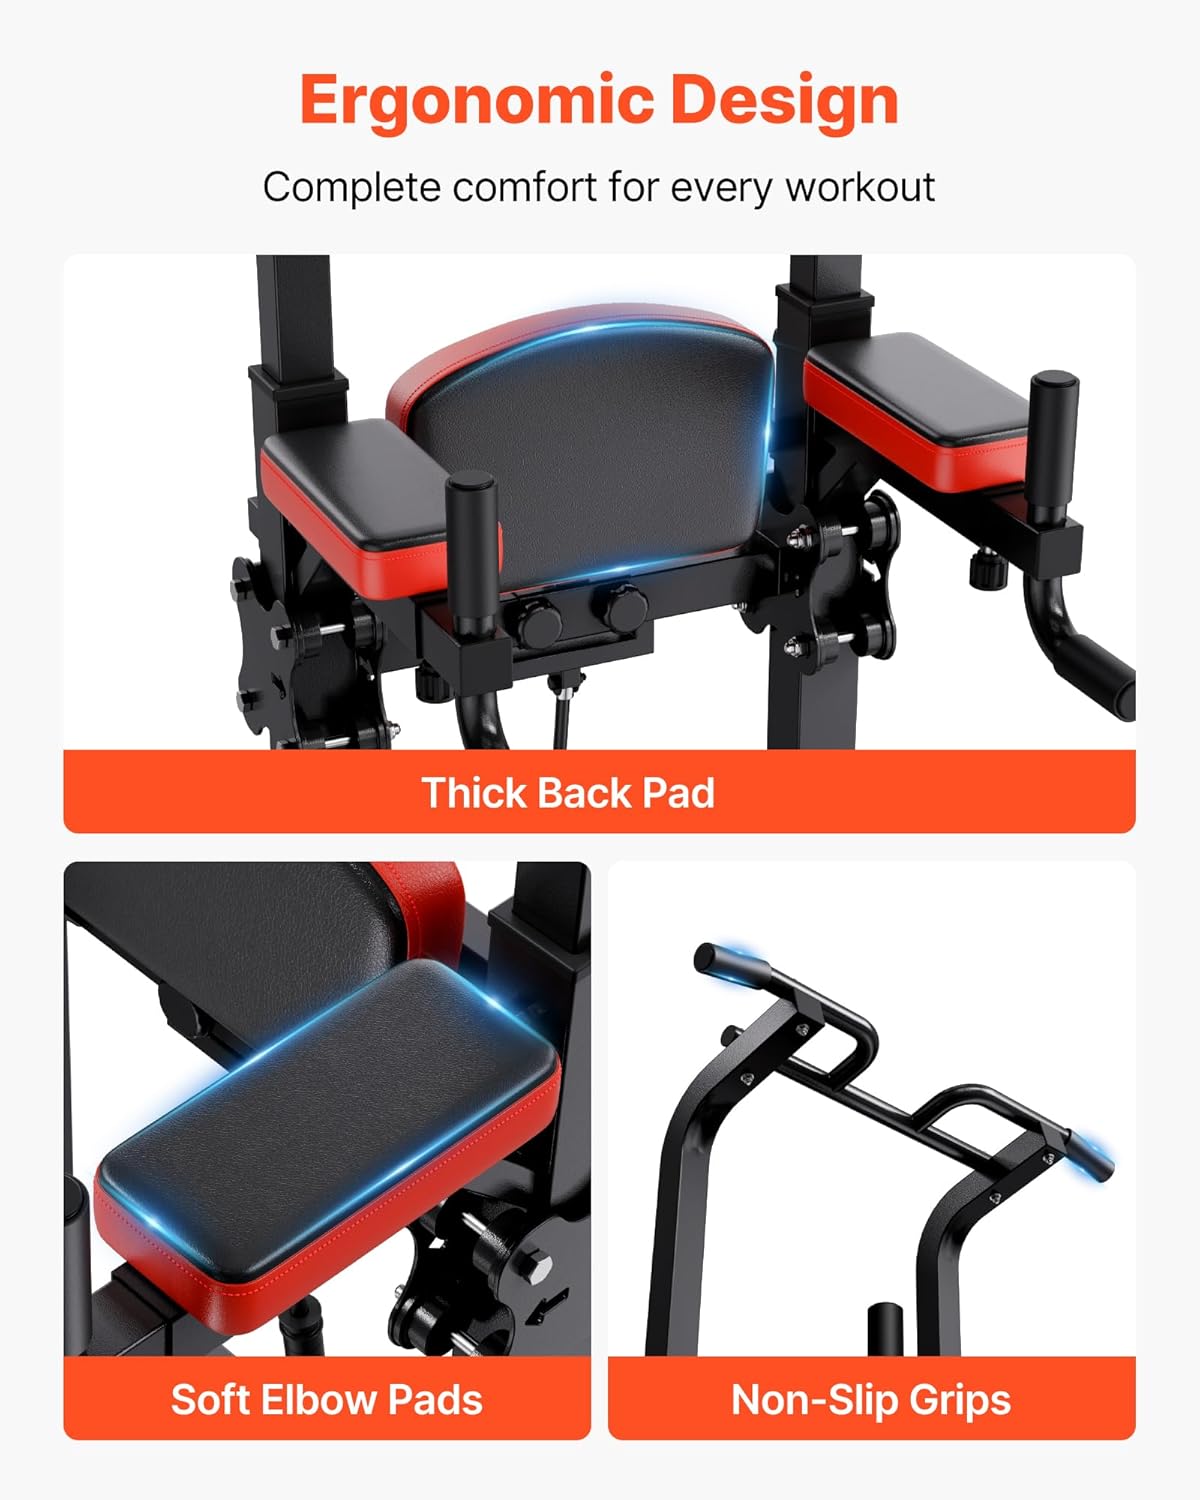
Image: Close-up of the ergonomic features including the back pad, elbow pads, and non-slip grips.
4. Versatile Exercise Options
This power tower supports a variety of exercises to target different muscle groups:
- Pull-ups: Use the upper bar for various grip pull-ups to work your back and biceps.
- Leg Raises: Utilize the dip station with back and elbow pads for effective abdominal and core training.
- Dips: Perform dips using the parallel bars to target your chest, triceps, and shoulders.
- Push-ups: The lower handles can be used for elevated push-ups, increasing range of motion and intensity.
- Inverted Rows: Use the lower bars for inverted rows to strengthen your back and biceps.

Image: A user performing leg lifts on the power tower, illustrating one of its versatile exercise options.
Maintenance
Regular maintenance ensures the longevity and safe operation of your VEVOR Power Tower.
- Cleaning: Wipe down the equipment with a damp cloth after each use to remove sweat and dust. Avoid abrasive cleaners.
- Lubrication: Periodically check the moving parts, especially the pulley system and gas spring, for smooth operation. Apply a silicone-based lubricant if necessary.
- Tightness Check: Every few weeks, or after intense use, re-check all bolts, nuts, and connections to ensure they remain tight. Tighten any loose fasteners.
- Storage: Store the power tower in a dry, cool place away from direct sunlight and extreme temperatures to prevent material degradation.
Troubleshooting
Here are solutions to common issues you might encounter:
1. Equipment Feels Unstable
- Check Assembly: Ensure all bolts and nuts are fully tightened. Refer to the assembly instructions.
- Level Surface: Verify that the power tower is placed on a completely flat and level surface. Adjust the non-slip suction cups if necessary.
- Weight Distribution: Ensure your body weight is centered during exercises.
2. Difficulty Adjusting Height or Assistance Platform
- Lubrication: Apply a small amount of silicone lubricant to the sliding mechanisms and the gas spring cylinder if movement is stiff.
- Obstructions: Check for any obstructions or debris in the adjustment holes or sliding tracks.
- Knob/Pin Engagement: Ensure the adjustment knob's pin is fully disengaged before attempting to move the frame, and fully engaged and tightened after adjustment.
3. Squeaking Noises During Use
- Tighten Bolts: Squeaking often indicates loose connections. Re-tighten all bolts and nuts.
- Lubricate Moving Parts: Lubricate any pivot points or areas where metal components rub together.
Specifications
| Feature | Detail |
|---|---|
| Brand | VEVOR |
| Model Number | Pull Up Bar 9 Level Height |
| Material | Carbon Steel |
| Color | Black |
| Maximum Weight Recommendation | 330 Pounds (150 kg) |
| Item Weight | 64.4 Pounds (29.2 kg) |
| Handle Type | Non-slip |
| Height Adjustment | 9 Levels (72.8-86.6 inches / 1850-2200 mm) |
| Base Dimensions (L x W) | Approx. 43.7 in (1110 mm) x 38.6 in (980 mm) |

Image: Product dimensions and weight capacity details.
Warranty and Support
This VEVOR Power Tower Dip Station is provided with No Warranty as per product specifications. For any questions, technical assistance, or support regarding your product, please contact VEVOR customer service directly through their official channels or the retailer where the product was purchased.
For more information about VEVOR products, visit the VEVOR Store on Amazon.


