
1. Important Safety Information
Please read and understand all instructions before assembling and using this workbench. Failure to follow these instructions may result in serious injury or property damage. Keep this manual for future reference.
- Weight Capacity: Do not exceed the maximum load capacity of 5000 lbs (2268 kg) for the tabletop. Distribute weight evenly across the surface.
- Assembly: Ensure all fasteners are securely tightened before use. Periodically check and retighten as necessary.
- Stability: Always use the adjustable feet to level the workbench on uneven surfaces to prevent wobbling or tipping.
- Electrical Safety: The integrated power strip is ETL-certified. Do not overload the outlets. Use only with grounded tools and appliances. Disconnect power when not in use or during maintenance. Keep liquids away from electrical components.
- Work Area: Maintain a clear and well-lit work area. Keep children and bystanders away during assembly and operation.
- Personal Protective Equipment: Wear appropriate safety gear, such as safety glasses and gloves, when performing tasks on the workbench.
2. Package Contents
Before beginning assembly, verify that all components listed below are present and undamaged. If any parts are missing or damaged, do not proceed with assembly. Contact customer support for assistance.
- Rubberwood Tabletop
- H-shaped Steel Frame Components (Legs, Crossbars)
- Adjustable Metal Feet
- Side Pegboards
- Pegboard Hooks (10 x 1.9", 10 x 3.7")
- ETL-Certified Power Strip with Cord Organizer
- Assembly Hardware (Bolts, Nuts, Washers, Wrench)
- Instruction Manual
3. Setup and Assembly
Assembly of the ENJOYWOOD workbench is designed to be straightforward with pre-drilled holes. A helper is recommended due to the weight of some components, particularly the tabletop.
3.1 Unpacking and Preparation
- Carefully unpack all components from the packaging.
- Lay out all parts on a clean, flat, and soft surface to prevent scratches.
- Verify all parts against the package contents list.
3.2 Frame Assembly
- Attach the adjustable metal feet to the bottom of each leg component. Ensure they are threaded securely.
- Connect the H-shaped steel legs using the crossbars. Secure with the provided bolts, nuts, and washers. Do not fully tighten all fasteners until the entire frame is assembled.
- Repeat for all leg and crossbar sections to form the complete frame structure.

Image 1: Detail of the stable H-shaped legs, 1.2mm thick steel, and adjustable metal feet for enhanced stability.
3.3 Tabletop and Accessory Installation
- Carefully place the rubberwood tabletop onto the assembled frame. Align the pre-drilled holes in the tabletop with the holes in the frame.
- Secure the tabletop to the frame using the appropriate fasteners. Once the tabletop is in place, fully tighten all frame and tabletop fasteners.
- Attach the side pegboards to the designated locations on the workbench frame. Secure them with the provided hardware.
- Install the ETL-certified power strip to the side of the workbench, ensuring the cord organizer is positioned for easy cable management.
- Insert the various pegboard hooks into the pegboard holes as desired for tool organization.

Image 2: The 96-inch wide surface and illustration of the 6 adjustable height levels, ranging from 28.5 to 38.5 inches.
3.4 Height Adjustment and Leveling
- The workbench height can be adjusted from 28.5 inches to 38.5 inches in 6 distinct levels. To adjust, loosen the locking mechanisms on each leg, raise or lower the tabletop to the desired height, and then securely fasten the locking mechanisms. Ensure all legs are set to the same height.
- Use the adjustable metal feet at the base of each leg to fine-tune the workbench's level on uneven floors. Rotate the feet clockwise to lower and counter-clockwise to raise until the workbench is stable and does not wobble.
4. Operating Instructions
The ENJOYWOOD workbench is designed for versatile use in garages, workshops, homes, and offices.
4.1 Using the Work Surface
- The 1.2-inch solid rubberwood tabletop provides a durable surface for various tasks. It is finished with a protective varnish.
- Always place heavy items carefully on the tabletop. Avoid dropping heavy tools or materials to prevent damage to the surface.
- For tasks involving liquids, paints, or adhesives, consider using a protective mat or covering to preserve the tabletop's finish.
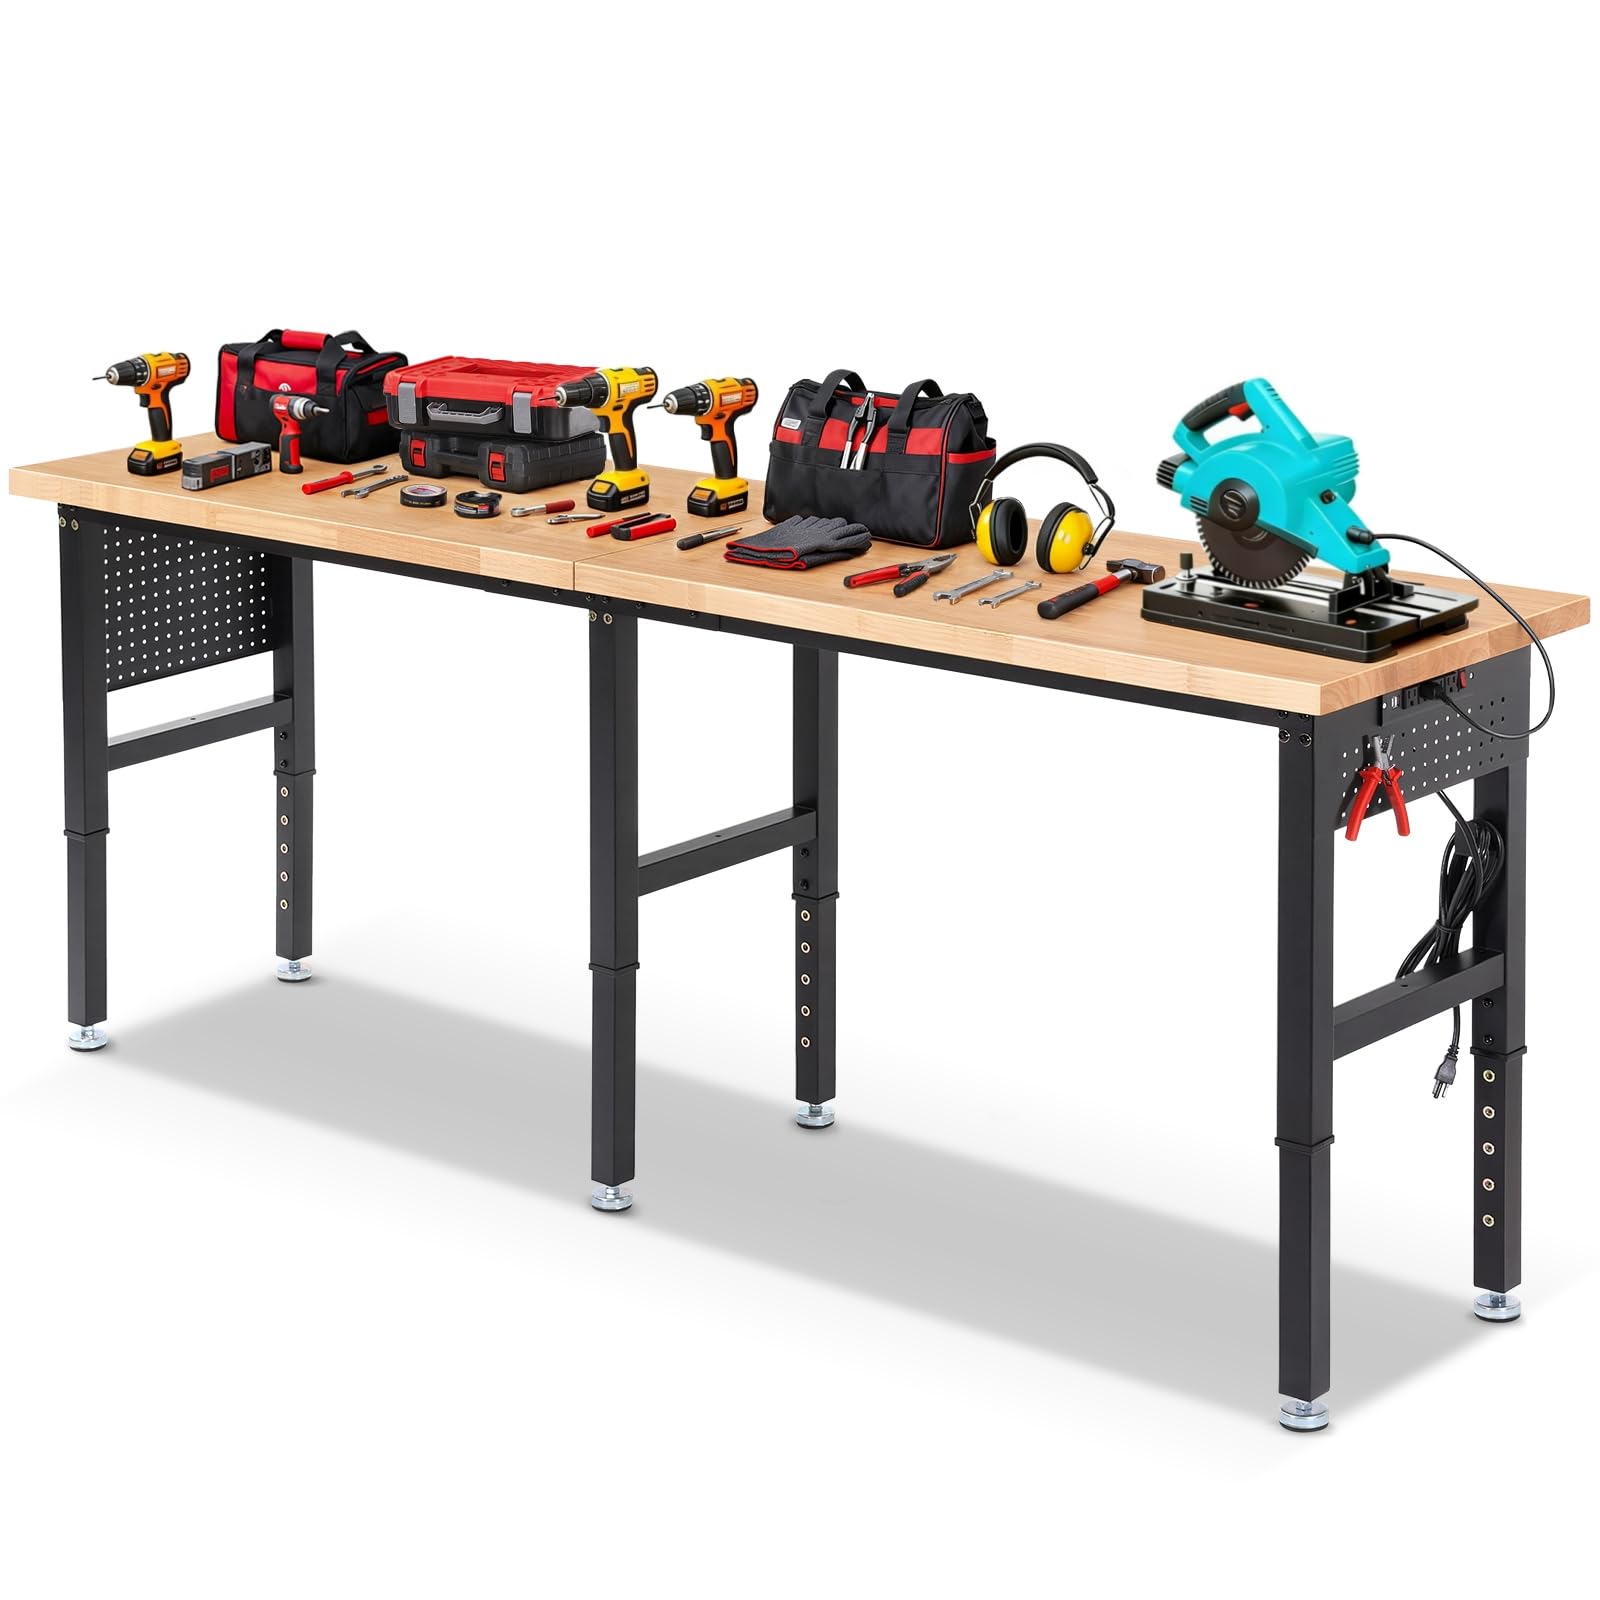
Image 3: The workbench demonstrating its rugged construction and superior load-bearing capability, supporting up to 5000 lbs.
4.2 Utilizing the Power Outlets
- The integrated power strip features 4 AC outlets and 2 USB ports. Connect power tools, chargers, and other electrical devices as needed.
- Use the independent on/off switch to control power to the outlets. Turn off the switch when not in use to conserve energy and for safety.
- The cord organizer helps keep cables tidy and prevents clutter on the work surface.

Image 4: Close-up of the ETL-certified power strip, showing 4 AC outlets, 2 USB ports, and the independent switch, with a power tool connected.
4.3 Organizing with the Pegboard
- The side pegboards provide vertical storage space for tools and accessories.
- Utilize the included 1.9-inch and 3.7-inch hooks to hang frequently used tools, keeping them organized, visible, and within easy reach.

Image 5: The 19.3" x 13.8" side pegboard, demonstrating organized tool storage with various hooks.
5. Maintenance
Regular maintenance ensures the longevity and safe operation of your workbench.
- Cleaning: Wipe down the rubberwood tabletop with a damp cloth. For stubborn grime, use a mild wood cleaner. Avoid abrasive cleaners or harsh chemicals that could damage the varnish. Clean the steel frame with a damp cloth as needed.
- Fastener Check: Periodically inspect all bolts, nuts, and screws. Retighten any loose fasteners to maintain structural integrity and prevent wobbling.
- Electrical Components: Keep the power strip and its cord clean and free from dust and debris. Inspect the power cord for any signs of damage (fraying, cuts). If damaged, discontinue use and replace immediately.
- Protective Mat: If using a protective mat, clean it regularly according to its material instructions.

Image 6: Detail of the 1.2-inch durable rubberwood tabletop, highlighting its high-density, safety paint, and easy-to-clean surface.
6. Troubleshooting
Refer to this section for common issues and their solutions.
- Workbench is wobbly:
- Ensure all assembly fasteners are securely tightened.
- Adjust the metal feet at the base of each leg to level the workbench on uneven surfaces.
- Verify that all legs are set to the same height adjustment level.
- Power outlets are not working:
- Check if the independent on/off switch on the power strip is in the 'ON' position.
- Ensure the power strip's main plug is securely connected to a functioning wall outlet.
- Verify that the connected device is working correctly by testing it in another outlet.
- Do not overload the power strip. Disconnect some devices if too many are plugged in.
- Missing or damaged parts:
- Do not attempt to assemble the product with missing or damaged parts.
- Contact ENJOYWOOD customer support for replacement parts.
7. Specifications
| Feature | Specification |
|---|---|
| Model Number | EN3003 |
| Overall Dimensions (L x W) | 96 inches x 24 inches |
| Adjustable Height Range | 28.5 inches - 38.5 inches (6 levels) |
| Load Capacity | 5000 lbs (2268 kg) |
| Tabletop Material | 1.2 inch Solid Rubberwood |
| Frame Material | 2 inch x 2 inch (1.2mm thick) Alloy Steel |
| Power Strip | ETL Certified, 4 AC Outlets, 2 USB Ports, Independent Switch |
| Pegboard Dimensions | 19.3 inches x 13.8 inches (Side Pegboards) |
| Pegboard Hooks Included | 10 x 1.9 inches, 10 x 3.7 inches |
| UPC | 763932983482 |
8. Warranty and Support
ENJOYWOOD is committed to providing quality products and customer satisfaction. For any warranty inquiries, technical support, or assistance with parts, please contact ENJOYWOOD customer service.
Please have your model number (EN3003) and purchase information ready when contacting support to expedite assistance.