
1. Introduction
Thank you for choosing the Devoko 10x12 FT Resin Outdoor Storage Shed. This manual provides essential information for the safe assembly, operation, and maintenance of your new storage shed. Please read these instructions carefully before beginning assembly and retain them for future reference.
This durable resin shed is designed to provide ample storage space for your garden tools, lawn equipment, and other outdoor items, offering protection from the elements. Its weather-resistant construction and lockable door ensure your belongings remain secure and protected.

Figure 1: Exterior view of the Devoko 10x12 FT Resin Outdoor Storage Shed, highlighting its UV resistance.
2. Safety Information
- Site Preparation: Ensure the chosen location for the shed is level and clear of debris. A solid, level foundation is crucial for stability.
- Local Regulations: Before assembly, please check your local Homeowners Association (HOA) policies and building codes to ensure compliance.
- Assembly Team: Assembly requires a minimum of 2-3 people for safety and efficiency due to the size and weight of components.
- Protective Gear: Always wear appropriate personal protective equipment, such as work gloves and safety glasses, during assembly.
- Tool Safety: Use tools correctly and safely. Keep children and pets away from the assembly area.
- Component Handling: Be cautious when handling large panels to avoid injury from sharp edges or falling parts.
- Ventilation: Ensure proper ventilation inside the shed, especially if storing items that may emit fumes.
- Weight Distribution: Do not overload the shed. Distribute weight evenly to maintain structural integrity.
3. Package Contents
Your Devoko 10x12 FT Resin Outdoor Storage Shed is delivered in multiple boxes. Please verify that all components listed in the packing list (usually found inside one of the boxes) are present and undamaged before beginning assembly.
Typical components include:
- Wall panels (resin plastic)
- Roof panels (resin plastic)
- Floor panels (resin plastic)
- Door panels and hardware (hinges, handles, lock mechanism)
- Window panels
- Support beams and frame components
- Fasteners and connectors (reduced quantity due to "Kick-it" design)
- Assembly instructions manual

Figure 2: Overview of assembly requirements, including the number of boxes, personnel, and tools needed.
4. Specifications
| Feature | Detail |
|---|---|
| Brand | Devoko |
| Model Number | PS24-0781-1012BG |
| Color | Beige |
| Material | Resin, Plastic |
| Product Dimensions (D x W x H) | 144.3" x 118.5" x 100.8" |
| Base Material | Resin |
| Top Material Type | Resin, Plastic |
| Water Resistance Level | Water Resistant |
| Frame Material | Resin Plastic |
| Door Style | Single Hinged Door (Lockable) |
| Assembly Required | Yes |
| Item Weight | 93.9 pounds |
Figure 3: Detailed dimensions of the storage shed.
5. Setup and Assembly
The Devoko storage shed features a unique "Kick-it" installation method designed to simplify assembly and reduce the number of screws required. Follow the detailed instructions provided in your product's assembly manual for step-by-step guidance.
5.1 Site Preparation
- Choose a flat, level area for your shed. A concrete slab or a well-compacted gravel base is recommended.
- Ensure adequate clearance around the shed for assembly and future access.
5.2 Assembly Steps Overview
- Unpack and Identify Parts: Carefully unpack all boxes and lay out components. Refer to the parts list in your manual to identify each piece.
- Base Assembly: Assemble the floor panels according to the instructions, ensuring they interlock securely to form a stable base. The thickened floor design helps prevent moisture intrusion.
- Wall Panel Installation: Utilize the "Kick-it" interlocking system to connect the wall panels. This method significantly reduces the need for traditional screws, streamlining the process.
- Window and Vent Installation: Integrate the window panels and air vents into the designated wall sections. The multi-window design and air vents promote natural light and circulation.
- Roof Assembly: Construct the roof frame and attach the roof panels. The double sloping roof is designed to prevent water and snow accumulation.
- Door Installation: Install the door panels, hinges, and the lockable handle mechanism. Ensure the doors open and close smoothly and the lock functions correctly.
- Final Checks: Review all connections to ensure they are secure and the shed is stable.
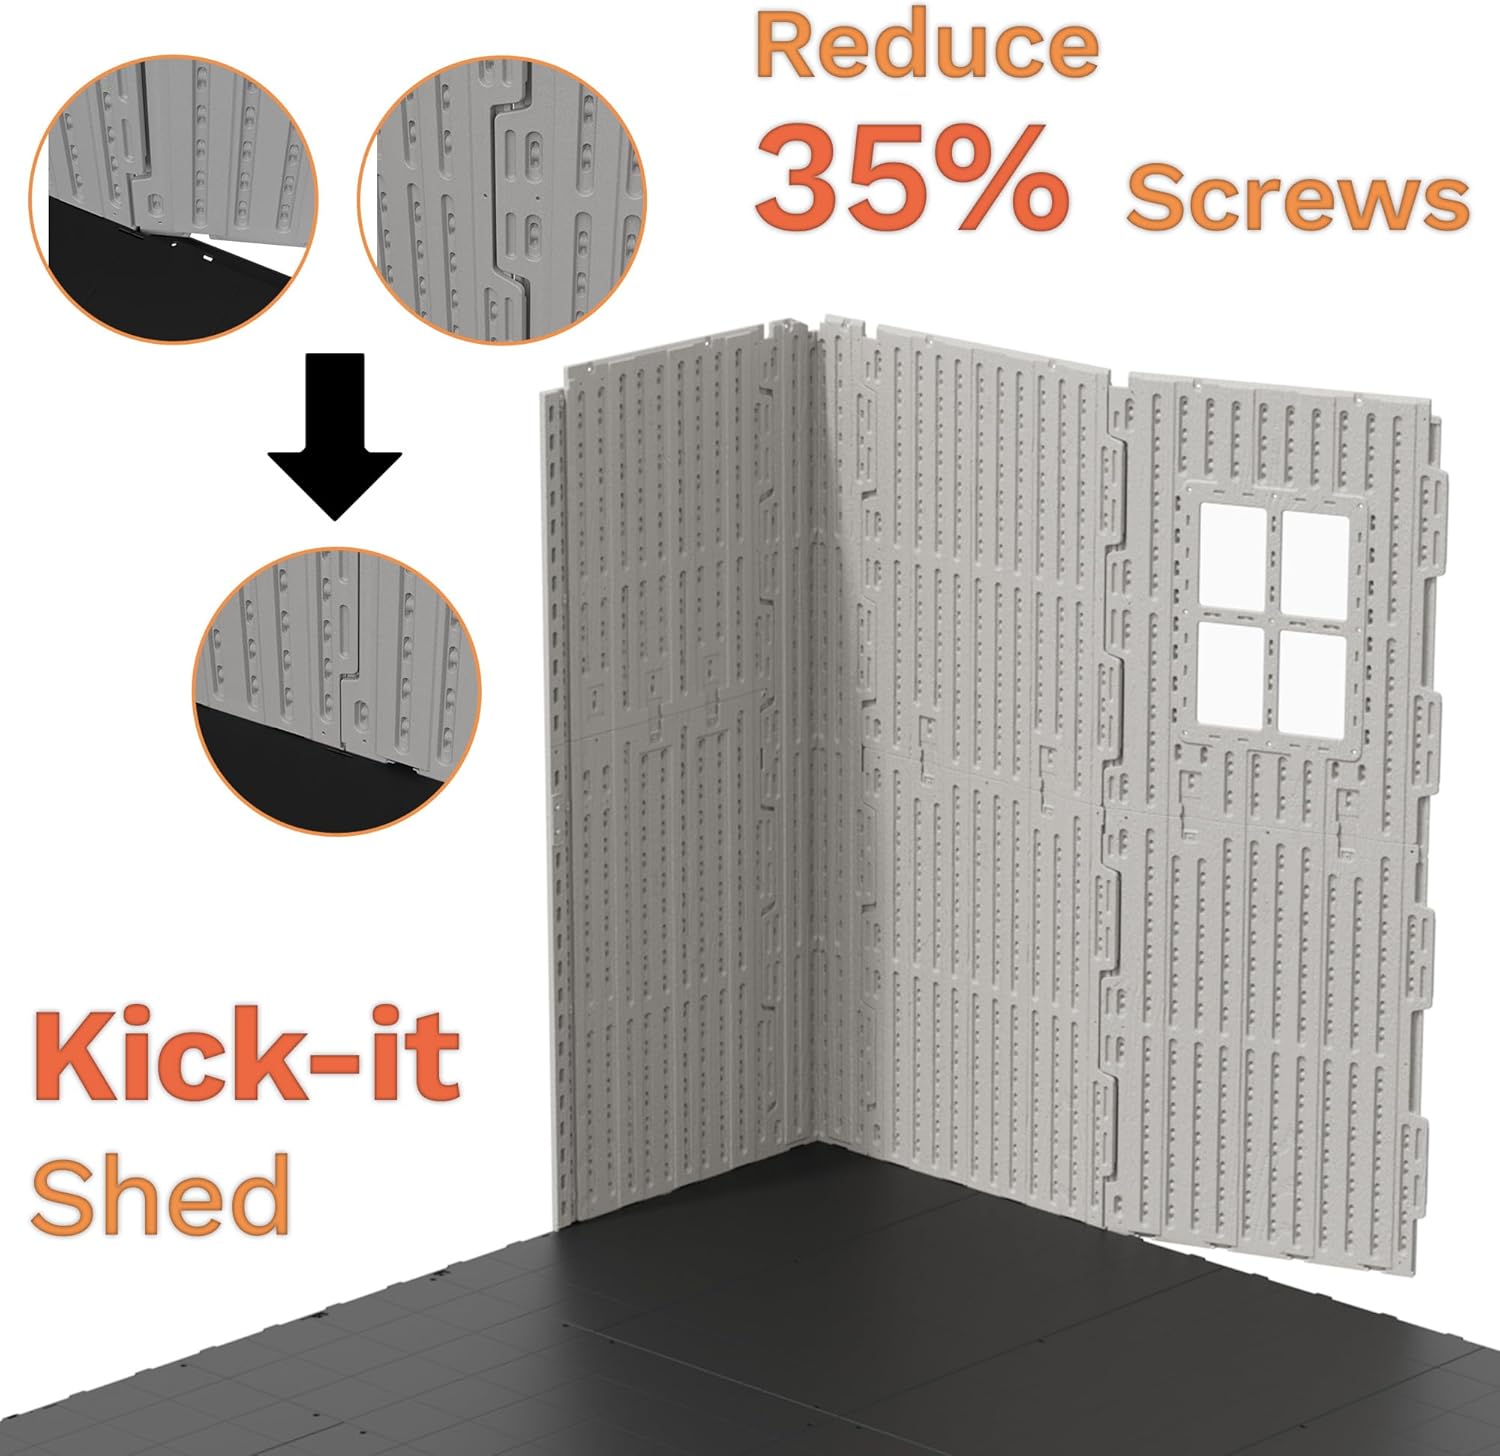
Figure 4: The "Kick-it" installation method, designed for easier assembly.
6. Operating Instructions
6.1 Accessing the Shed
- The shed features a single hinged door. To open, disengage the lock (if applied) and pull the handle.
- To close, push the door firmly until it latches. Engage the lock for security.
6.2 Utilizing Storage Space
- The 10x12 FT interior provides ample space for various items such as lawnmowers, bicycles, garden tools, and outdoor furniture.
- Organize items efficiently to maximize space and ensure easy access. Consider adding shelving units (not included) for smaller items.
6.3 Natural Lighting and Ventilation
- The integrated windows and skylights allow natural light to illuminate the interior, reducing the need for artificial lighting during the day.
- Air vents promote air circulation, helping to prevent moisture buildup and maintain a fresh environment inside the shed.

Figure 5: Key features including the waterproof roof, heavy-duty construction, and secure locking door.
7. Maintenance
Regular maintenance will extend the life and appearance of your Devoko storage shed.
- Cleaning: Clean the exterior of the shed periodically with mild soap and water. Avoid abrasive cleaners or harsh chemicals that could damage the resin material.
- Roof Inspection: Regularly check the roof for any accumulation of leaves, snow, or debris. Clear it to ensure proper water runoff and prevent excessive weight.
- Door and Hinges: Inspect door hinges and the locking mechanism for smooth operation. Lubricate hinges with a silicone-based spray if they become stiff.
- Ventilation: Ensure the air vents are clear and unobstructed to maintain proper airflow.
- Structural Integrity: Periodically check all connections and fasteners to ensure they remain tight and secure.
8. Troubleshooting
If you encounter issues with your storage shed, refer to the following common problems and solutions:
- Water Leakage:
- Ensure the shed is assembled on a perfectly level surface. Uneven ground can cause gaps.
- Check all roof panels and wall connections for proper seating and sealing. Re-tighten any loose fasteners.
- Inspect the roof for any cracks or damage.
- Verify that the double sloping roof design is clear of debris, allowing water to run off effectively.
- Door Not Closing/Latching Properly:
- Check if the shed base is level. An uneven base can cause the door frame to warp.
- Inspect hinges for damage or misalignment. Adjust if necessary.
- Ensure no obstructions are preventing the door from closing fully.
- Difficulty During Assembly:
- Double-check that you are using the correct parts for each step as indicated in the assembly manual.
- Ensure all components are oriented correctly before attempting to connect them.
- Confirm that you have the required number of people (2-3) for assistance, especially with larger panels.
9. Warranty and Support
For specific warranty information regarding your Devoko 10x12 FT Resin Outdoor Storage Shed, please refer to the warranty card included with your product or contact Devoko customer support directly.
If you require further assistance or have questions not covered in this manual, please visit the official Devoko store or contact their customer service department.


