
Introduction
Thank you for choosing the Merax Bathroom Vanity with Ceramic Sink. This 24-inch vanity, model X13Q10, is designed to provide functional storage and a stylish aesthetic to your bathroom. It features a durable MDF frame with solid wood legs, a ceramic sink, one soft-closing door, and three drawers. This manual provides essential information for safe assembly, proper operation, and effective maintenance of your new vanity.
Safety Information
- Always follow all assembly instructions carefully.
- Ensure all hardware is securely tightened before use. Periodically check and re-tighten as necessary.
- Do not overload drawers or shelves. Distribute weight evenly.
- Keep small parts away from children during assembly to prevent choking hazards.
- Avoid exposing the vanity to excessive moisture or direct water spray to prevent damage to the wood and finish.
- If wall mounting is an option or recommended, ensure proper wall anchors are used for your wall type to prevent tipping.
Package Contents
Your Merax Bathroom Vanity package includes:
- Vanity cabinet components (MDF panels, solid wood legs)
- Ceramic sink top
- Hardware kit (screws, cam locks, hinges, drawer slides, handles)
- Assembly instruction manual

Image: Exploded view of vanity components, including cabinet panels, drawers, and hardware.

Image: Close-up of various hardware pieces and drawer slides included for assembly.
Specifications
| Feature | Detail |
|---|---|
| Brand | Merax |
| Model Number | X13Q10 |
| Overall Dimensions (D x W x H) | 46.5D x 61W x 86.4H centimetres (18.3D x 24W x 34H inches) |
| Color | Blue Gray |
| Material | MDF Frame, Solid Wood Legs, Ceramic Sink |
| Number of Doors | 1 (Soft-Closing) |
| Number of Drawers | 3 |
| Sink Type | Integrated Ceramic Sink with 3 pre-drilled faucet holes and overflow |
| Special Features | Scratch Resistant Ceramic Sink, Open-Back for Plumbing Ease |
| Item Weight | 33.8 kg |

Image: Technical drawing showing all key dimensions of the vanity in inches.
Setup and Assembly
This bathroom vanity requires self-assembly. Please refer to the detailed step-by-step assembly instruction manual included in your package for specific instructions. Ensure you have all parts and tools before beginning. It is recommended to assemble the vanity in the room where it will be installed.
Key Assembly Considerations:
- Tools Required: Typically includes a screwdriver (Phillips head), hammer, and possibly a wrench.
- Component Identification: Lay out all components and hardware. Match them with the parts list in the included manual.
- Frame Assembly: Follow the sequence for assembling the main cabinet frame. Ensure all connections are secure.
- Drawer Installation: Install drawer slides onto the cabinet and drawers according to the manual. Test for smooth operation.
- Door Installation: Attach the soft-close hinges to the door and cabinet. Adjust hinges for proper door alignment and soft-closing function.
- Sink Placement: Carefully place the ceramic sink top onto the assembled cabinet. Ensure it is properly aligned and secured if the manual specifies.
- Plumbing Access: The vanity features an open-back structure for easy access to plumbing connections. Plan your plumbing rough-in accordingly.

Image: Illustrates the soft-closing door mechanism and the open-back design for convenient plumbing installation and maintenance.
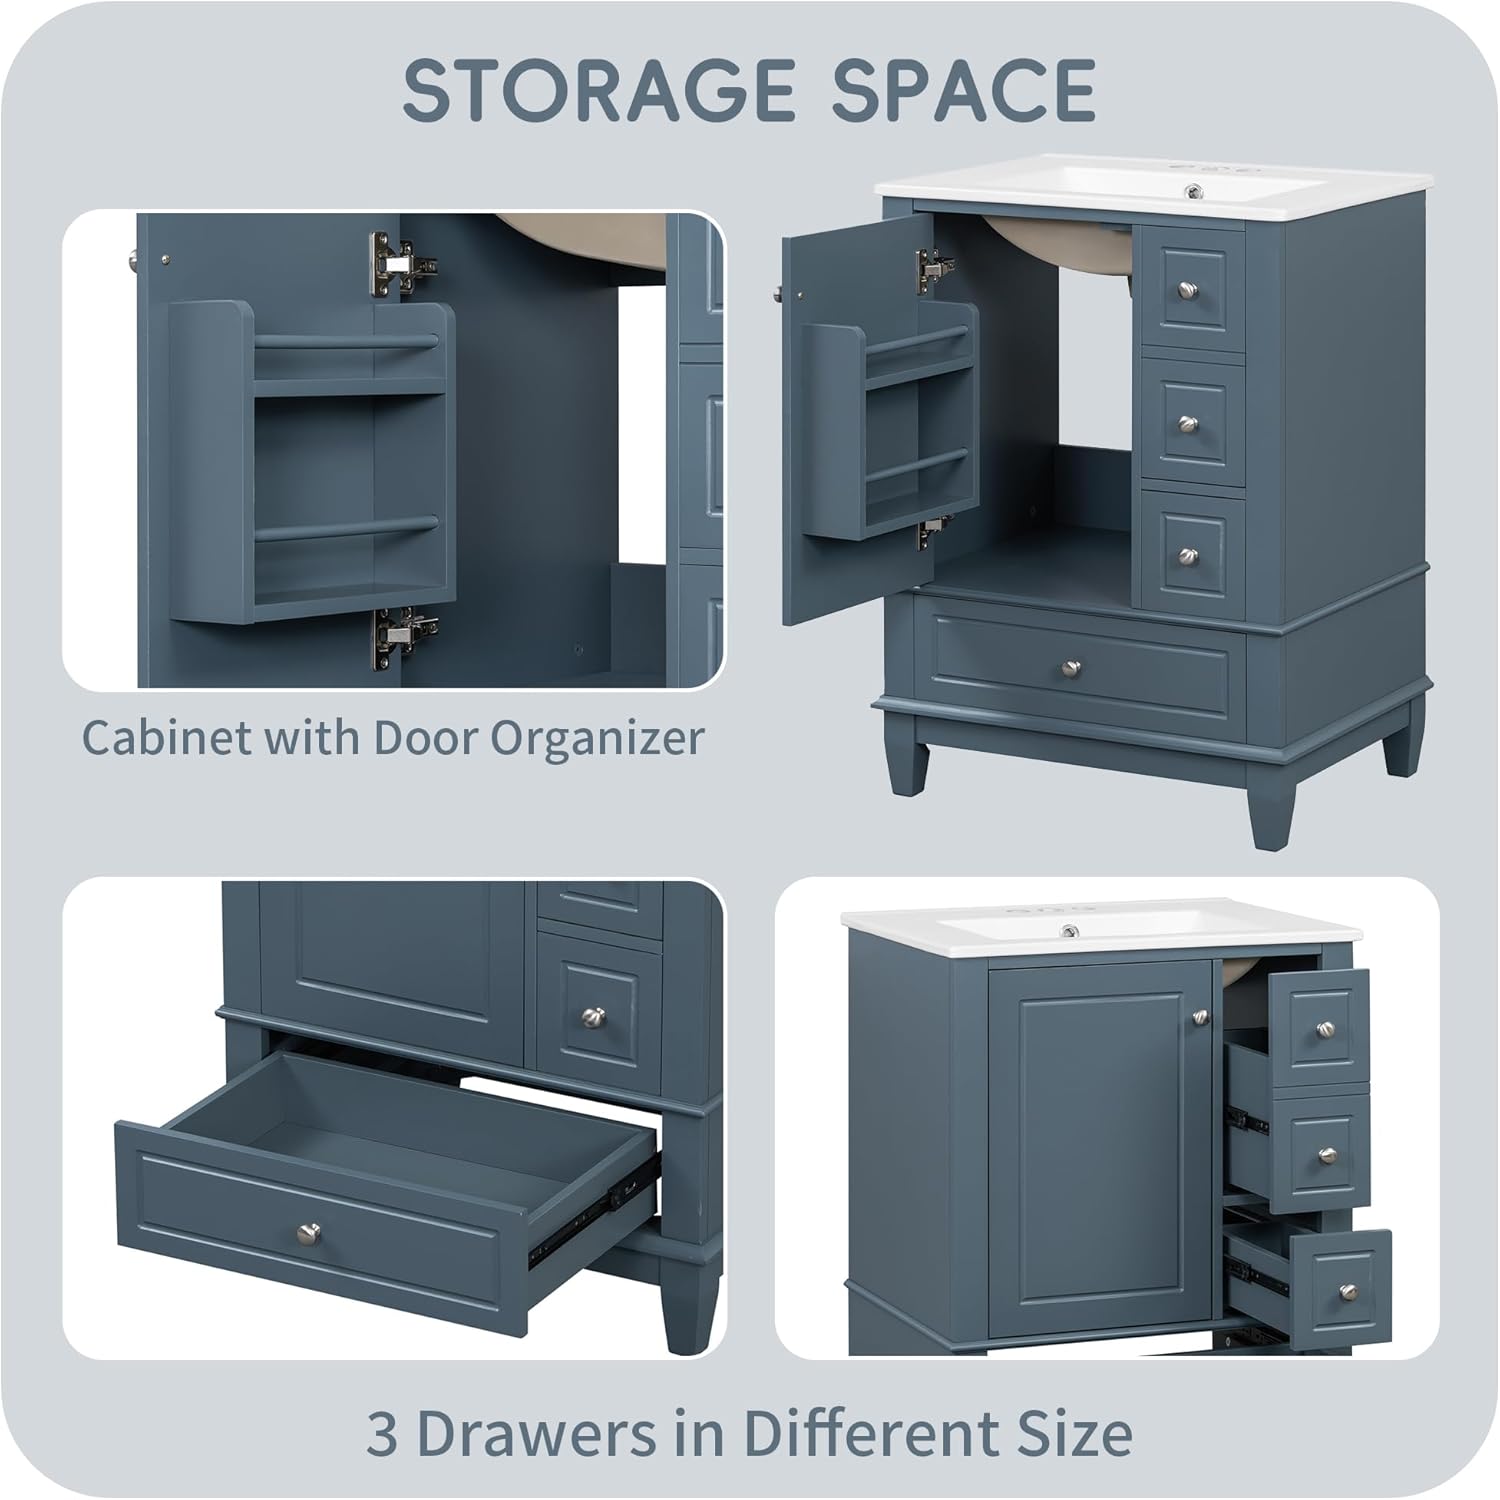
Image: Back view of the vanity, highlighting the open section for plumbing connections.
Operation
The Merax Bathroom Vanity is designed for ease of use and efficient storage.
Storage Features:
- Cabinet with Door Organizer: The main cabinet door is fitted with soft-close hinges to prevent slamming. Inside, a double-layer door shelf provides additional storage for smaller items.
- Three Drawers: The vanity includes three drawers of varying sizes, equipped with smooth slide rails for easy access. These are ideal for organizing toiletries, towels, and other bathroom essentials.

Image: The vanity with its cabinet door open, revealing the integrated door organizer, and the three drawers pulled out to show storage capacity.
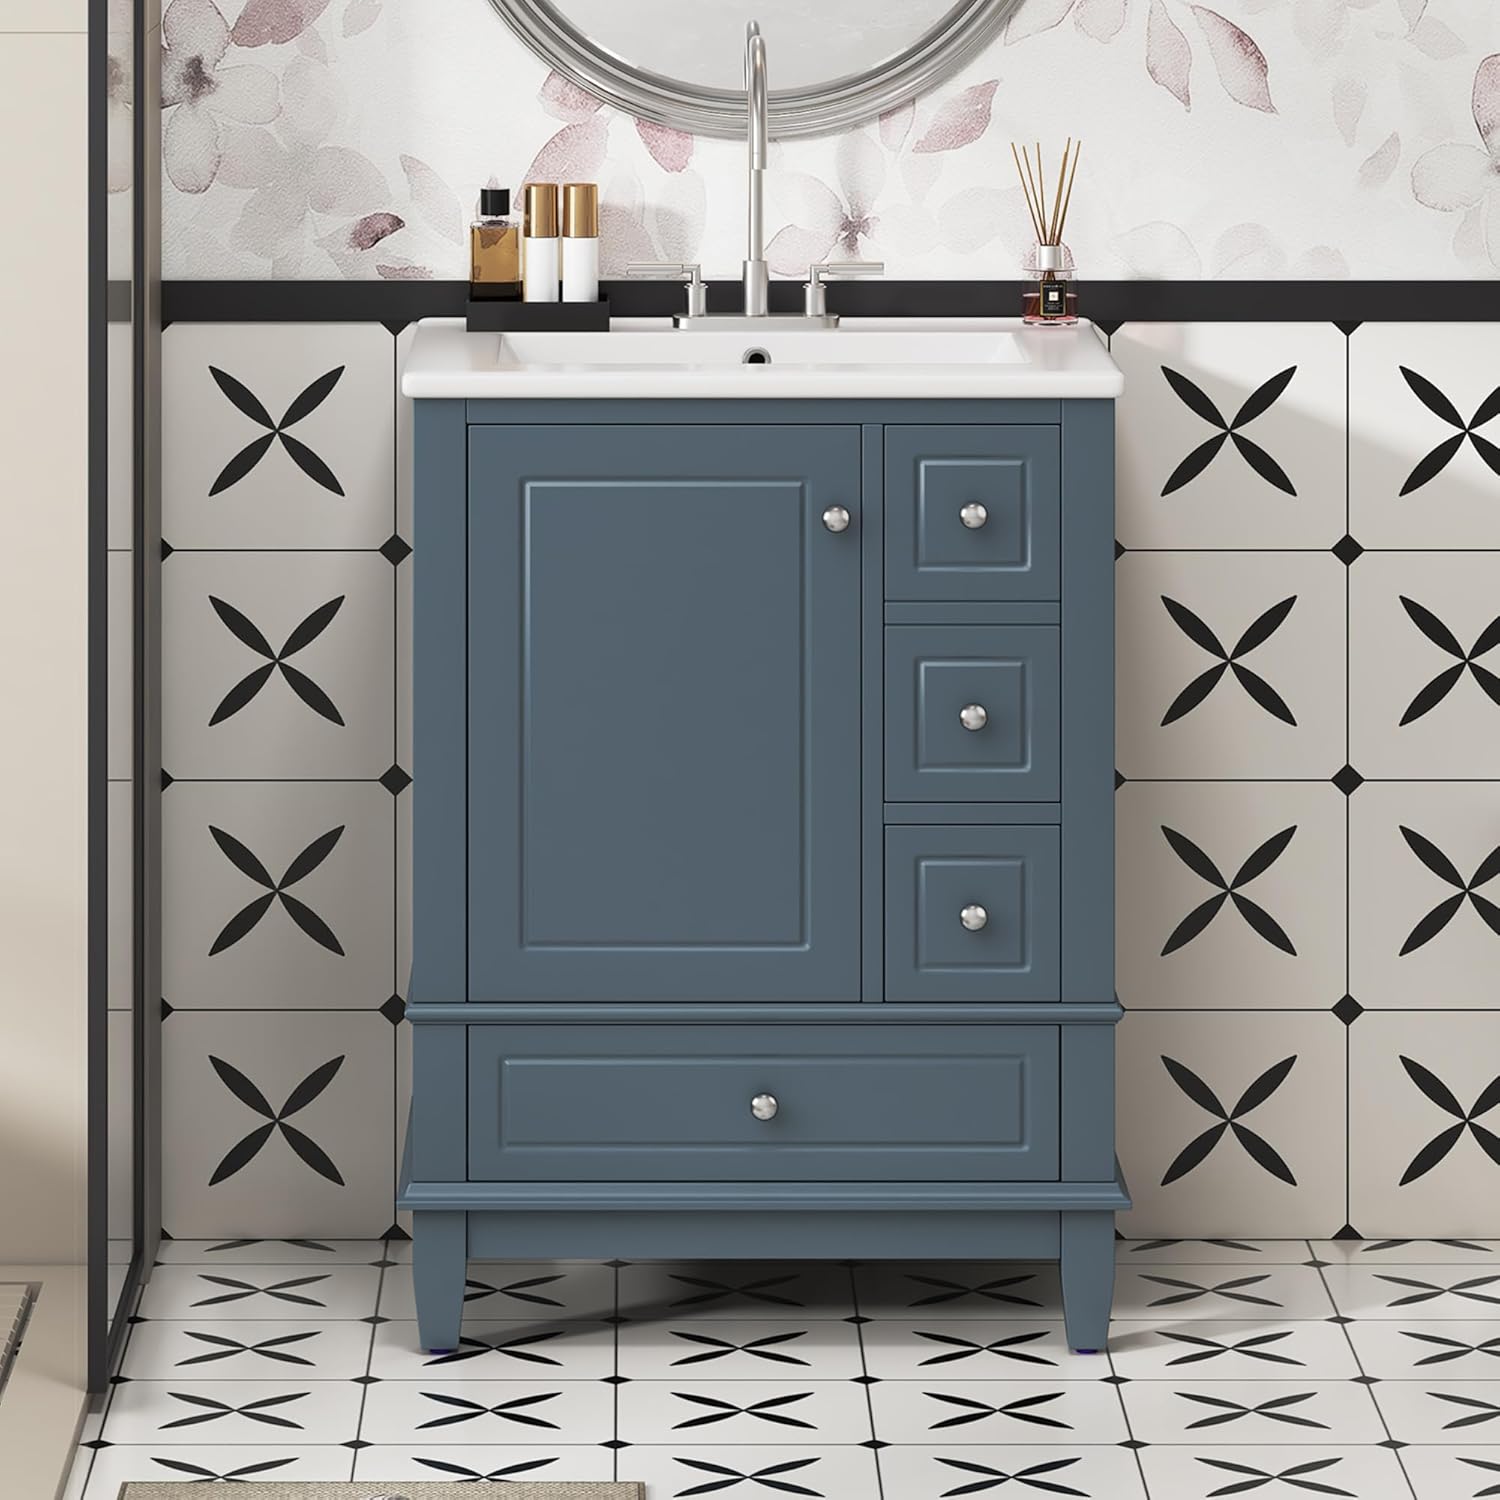
Image: Front view of the fully assembled Merax bathroom vanity with its ceramic sink.
Care and Maintenance
Proper care will ensure the longevity and appearance of your Merax Bathroom Vanity.
Cleaning Instructions:
- Cabinet Finish: The painted finish can be easily wiped clean with a damp cloth. Avoid abrasive cleaners or harsh chemicals that may damage the surface.
- Ceramic Sink: The integrated ceramic sink has an ultra-smooth, scratch-proof surface. Clean with mild soap and water. Stains or water spots can be removed with a non-abrasive bathroom cleaner. Rinse thoroughly after cleaning.
- General Care: Promptly wipe up any water spills on the vanity surface to prevent moisture damage. Avoid placing extremely hot items directly on the surface.
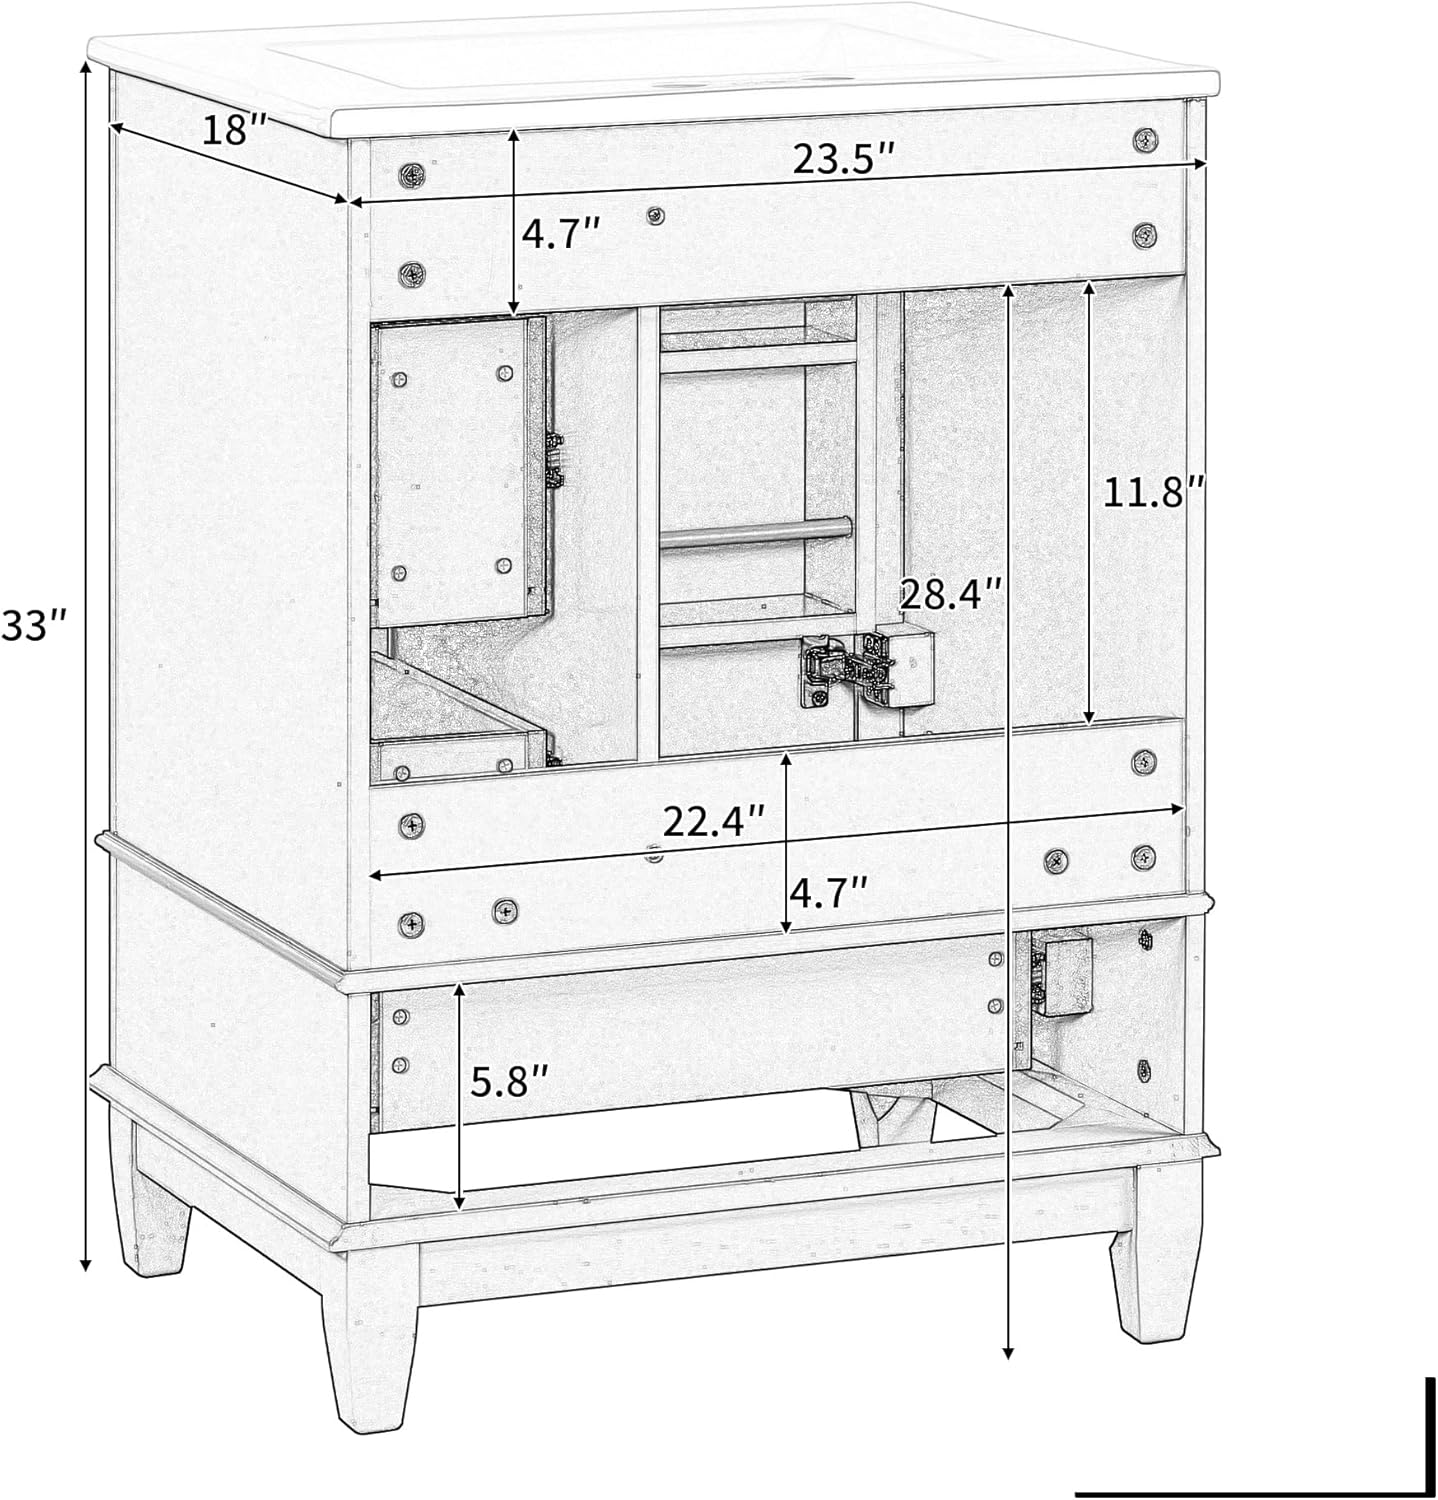
Image: Detailed view of the ceramic sink, highlighting its smooth surface, chrome-finish overflow, and pre-drilled faucet holes.
Troubleshooting
If you encounter any issues with your vanity, refer to the following common problems and solutions:
| Problem | Possible Cause | Solution |
|---|---|---|
| Drawers do not slide smoothly | Improperly installed drawer slides or debris in tracks. | Check that drawer slides are correctly aligned and securely fastened. Clean tracks of any dust or obstructions. |
| Cabinet door does not close properly or is misaligned | Hinges are loose or require adjustment. | Tighten hinge screws. Adjust the hinge screws to align the door. Refer to the assembly manual for hinge adjustment details. |
| Vanity feels unstable | Loose connections or uneven floor. | Ensure all assembly hardware is fully tightened. If the floor is uneven, use shims under the legs to stabilize the vanity. |
| Water leakage around sink | Improper faucet or drain installation. | Ensure all plumbing connections (faucet, drain) are properly sealed and tightened. Consult a professional plumber if necessary. |
Warranty and Customer Support
For any questions, missing parts, or issues not covered in this manual, please contact Merax customer support. Keep your purchase receipt and model number (X13Q10) handy for faster service.
Contact information for customer support can typically be found on the retailer's website or on the original packaging.


